 Skip to Navigation


In this tutorial, I’ll show you how to send emails in Django by using any of the following:
- Built-in email backend + SMTP [jump ahead]
- Email API [jump ahead]
- Anymail [jump ahead]
- Custom email backend [jump ahead]
Before we start, make sure you have the latest version of Python and Django installed on your system.
Disclaimer: Every line of code in this article has been written and checked by our developers.
Send emails in Django using SMTP
Let’s start by setting up django.core.email, which is a default Django SMTP solution. The package includes a send_mail method, providing simple email sending in any Django application. Python already has a default package for SMTP email sending, smtplib, whereas django.core.mail is more of a wrapper over this package to work natively in Django.
1. Setting up the project
Make a new working directory, which we’ll use to bootstrap a new Django project:
$ mkdir django-email
$ django-admin startproject emails django-email
The code will create a Django project called emails in the django-email directory, and we’ll get a structure looking like this:
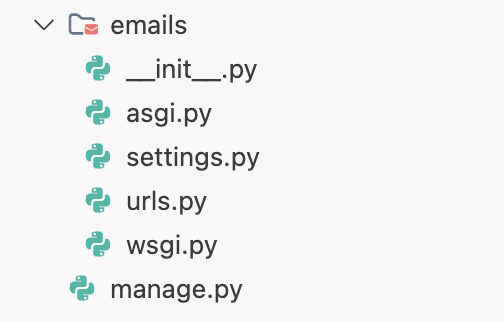
Next, we need to modify the settings.py file, which is a Python module in Django that defines and stores all the settings to tweak how our Django application works and runs.
So, go to the settings.py file, and add the following code at the end of the file:
EMAIL_BACKEND = 'django.core.mail.backends.smtp.EmailBackend'
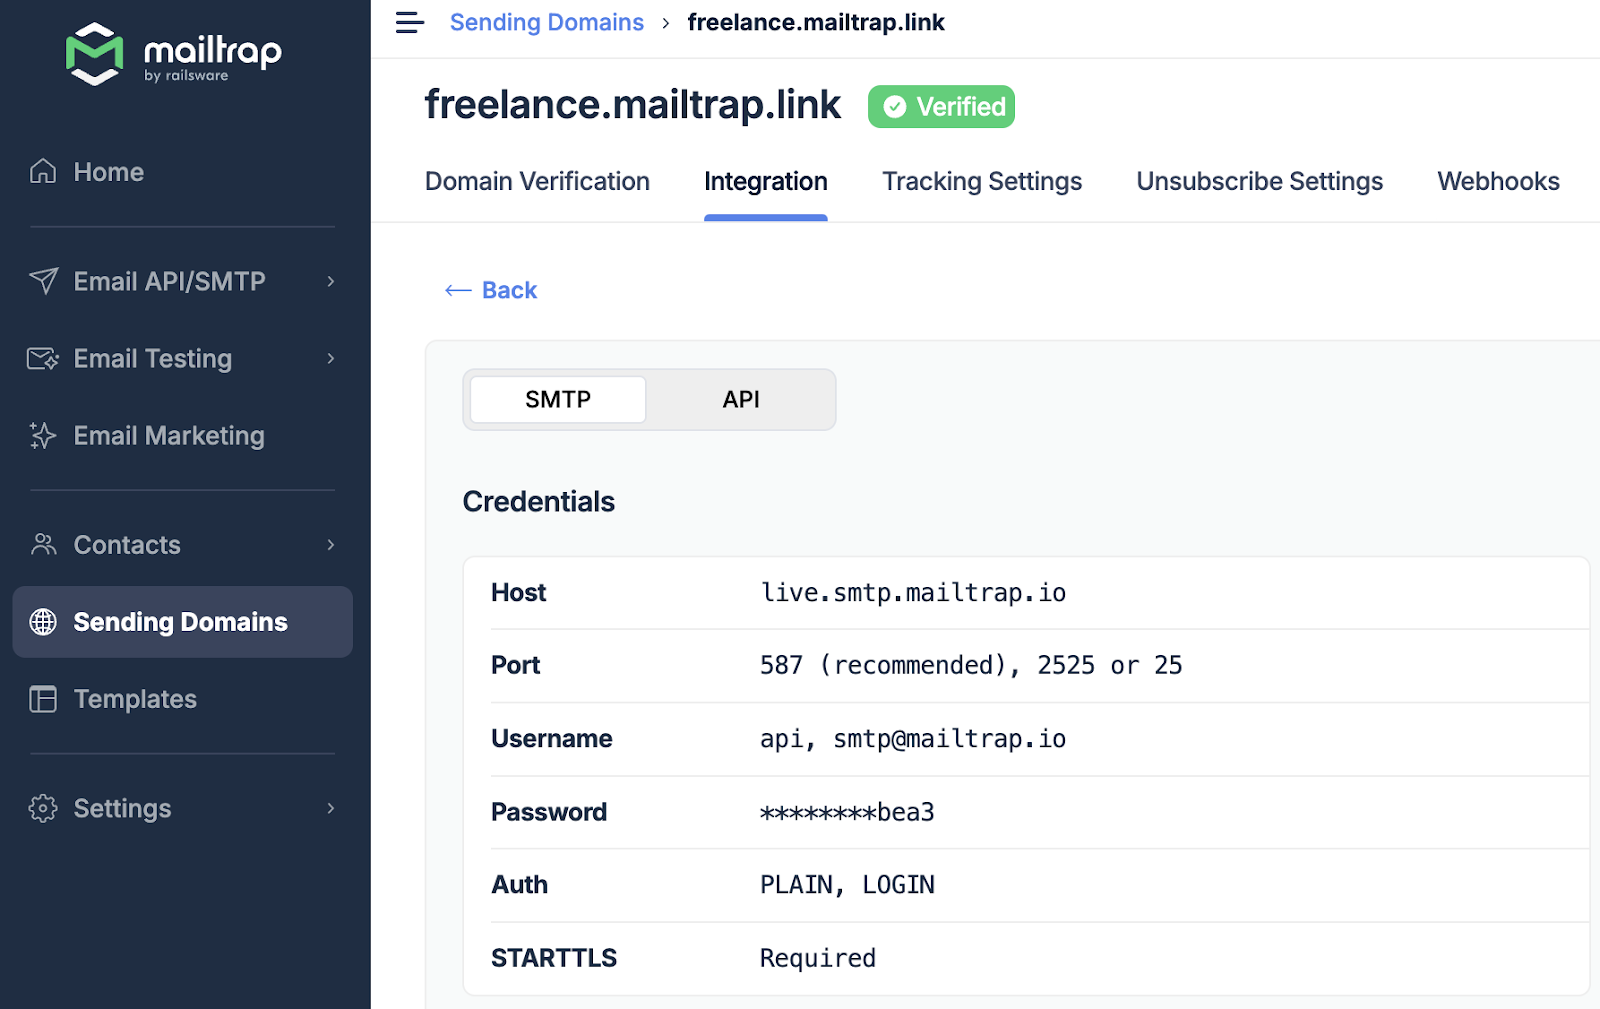
EMAIL_HOST = 'live.smtp.mailtrap.io'
EMAIL_PORT = 587
EMAIL_HOST_USER = '<your-mailtrap-username>'
EMAIL_HOST_PASSWORD = '<your-mailtrap-password>'
EMAIL_USE_TLS = TrueImportant: These variable names shouldn’t be tweaked since they’re used internally by Django. This configuration works for Mailtrap as an SMTP provider, so if you’re using Mailtrap, just provide your credentials from your dashboard.
As you see above, we also have the EMAIL_BACKEND variable provided, and this is exactly the email backend that we previously mentioned, which is responsible for sending emails in Django.
You can think of the email backend as a core instance that manages all the technical details of sending emails, from opening and closing email-sending connections to actual email sending implementation, etc.
The default email backend in Django is backends.smtp.EmailBackend, which is literally what we provided for the EMAIL_BACKEND variable, so basically we’re using a default SMTP email backend in Django to handle emails.
3. Creating an email-sending function
views.py is a Django file that defines the content returned when a user navigates to a specific page. We can also perform miscellaneous actions in it, like sending emails.
So, create and open a views.py file in the emails folder, then copy/paste the following code in order to create a sending function which will also return the results:
from django.core.mail import send_mail
from django.http import HttpResponse

def send_example_email(request):
    try:
        send_mail(
            subject='Email from Django',
            message='This is an email sent from Django application.',
            from_email='example@your_mailtrap_domain',
            recipient_list=['test@example.com'],
            fail_silently=False,
        )

        return HttpResponse('Email sent successfully!')
    except Exception as e:
        return HttpResponse(f'Failed to send email: {str(e)}')
4. Creating a URL path for email sending
urls.py file is a Django file that allows us to associate the created views with corresponding URLs in the browser.
If we import the implemented view and add it to URL patterns, Django will associate our view with the URL, and we’ll be able to test the email sending function by opening that URL.
from django.contrib import admin
from django.urls import path
from . import views

urlpatterns = [
    path('admin/', admin.site.urls),
    path('send-email/', views.send_example_email, name='send_example_email'),
]
5. Running the application and sending the email
Finally, run the Django application to test the implemented function.
python manage.py runserverIf you have followed everything so far, you should see the following in the console.

As you open the development server in your browser, change the URL path to /send-email instead of the root URL. You should see a text “Email sent successfully!”, meaning the implemented send_example_email function was executed, and we just sent the email.
Send HTML email
To send HTML emails in Django, simply modify the previously created views.py file:
from django.core.mail import send_mail
from django.http import HttpResponse

def send_example_email(request):
    try:
        send_mail(
            subject='Test HTML Email from Django',
            message='This is a test email sent from Django application.',
            from_email='reply@your_mailtrap_domain',
            recipient_list=['example@example.com'],
            fail_silently=False,
            html_message='<p>This is a <strong>HTML test email</strong> sent from Django application.</p>',
        )

        return HttpResponse('HTML Email sent successfully!')
    except Exception as e:
        return HttpResponse(f'Failed to send HTML email: {str(e)}')
As you see, the email sending logic is basically the same as in the previous example, except we added html_message property to include the HTML content of the email we’re sending.
Run the application and open /send-email page in the browser.
python manage.py runserverSend email to multiple recipients
To send an email to multiple recipients, let’s use the recipients_list parameter, extend it, and add another recipient we would like to send an email to:
from django.core.mail import send_mail
from django.http import HttpResponse

def send_example_email(request):
    try:
        send_mail(
            subject='Test HTML Email from Django',
            message='This is a test email sent from Django application.',
            from_email='reply@your_mailtrap_domain',
            recipient_list=['example@example.com', 'example2@example.com'],
            fail_silently=False,
            html_message='<p>This is a <strong>HTML test email</strong> sent from Django application.</p>',
        )

        return HttpResponse('Email sent successfully!')
    except Exception as e:
        return HttpResponse(f'Failed to send email: {str(e)}')
Run the server with:
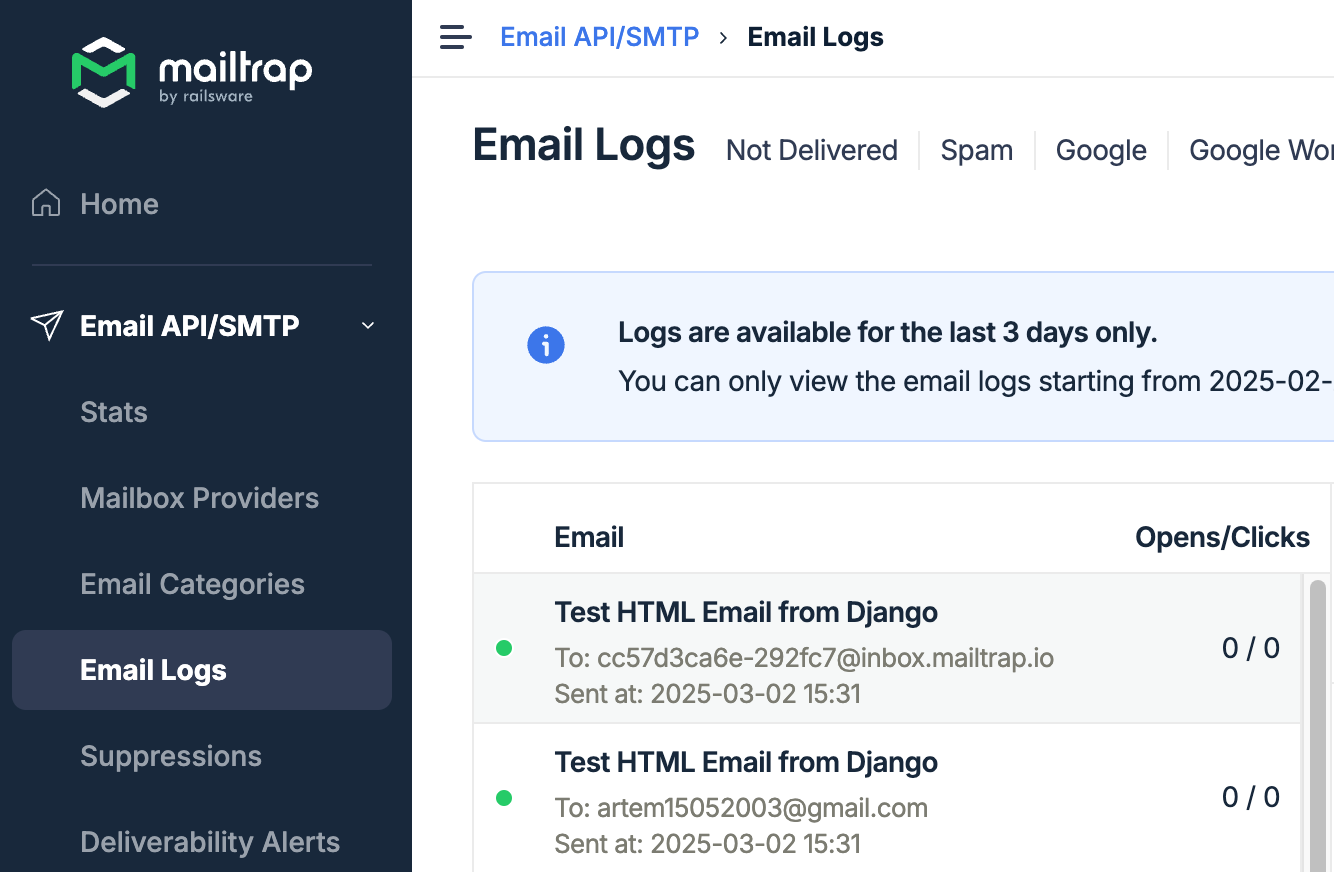
python manage.py runserverAs you run your Django application and open the /send-email page, your email should be sent successfully. In your Mailtrap Dashboard, you should now see 2 new emails being sent in the Email Logs tab.
Note: For older versions of Django you may need EmailMultiAlternatives.
Send email with attachments
For attachments, we’ll have to use the EmailMessage class, since not all features from the EmailMessage class are available in send_mail.
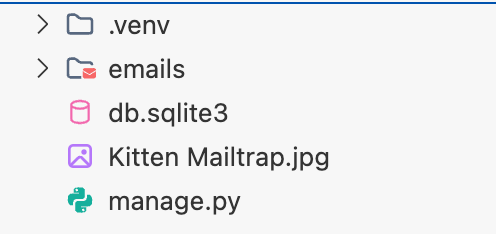
If you have to use features such as file attachments, you’ll have to make EmailMessage instances directly. For file attachment logic, we’re going to use the attach_file method. Make sure you have the right file in your working directory. For this example, we’re going to use the Kitten Mailtrap.jpg file.
Here’s a code snippet you can copy/paste in your views.py file:
from django.core.mail import EmailMessage
from django.http import HttpResponse
from django.conf import settings
import os

def send_example_email(request):
    try:
        email = EmailMessage(
            subject='Test Email with Attachment from Django',
            body='<p>This is a <strong>HTML test email</strong> with an attachment sent from Django application.</p>',
            from_email='reply@your_mailtrap_domain',
            to=['recipient@example.com'],
        )
        email.content_subtype = "html"

        file_path = os.path.join(settings.BASE_DIR, 'Kitten Mailtrap.jpg')
        email.attach_file(file_path)

        email.send(fail_silently=False)

        return HttpResponse('Email with attachment sent successfully!')
    except Exception as e:
        return HttpResponse(f'Failed to send email with attachment: {str(e)}')
Send email with embedded image
To send an email with an embedded image, we’ll use the EmailMessage class. For image attachment, we’re going to use the attach method.
In this demo, I’ll use the Kitten Mailtrap.jpg file again, which I’ll refer to by using cid: syntax (Content ID). To do this, I’ll add a Content ID header, so that it can be associated with the img tag in the html and get embedded.
from django.core.mail import EmailMessage
from email.mime.image import MIMEImage
from django.http import HttpResponse
from django.conf import settings
import os
def send_example_email(request):
try:
email = EmailMessage(
subject='Test Email with Embedded Image from Django',
body='''
<p>This is a <strong>HTML test email</strong> with an embedded image sent from Django application.</p>
<img src="cid:kitten_image">
''',
from_email='reply@your_mailtrap_domain',
to=['recipient@example.com']
)
email.content_subtype = "html"
image_path = os.path.join(settings.BASE_DIR, 'Kitten Mailtrap.jpg')
with open(image_path, 'rb') as img:
image = MIMEImage(img.read())
image.add_header("Content-ID", "<kitten_image>")
email.attach(image)
email.send(fail_silently=False)
return HttpResponse('Email with embedded image sent successfully!')
except Exception as e:
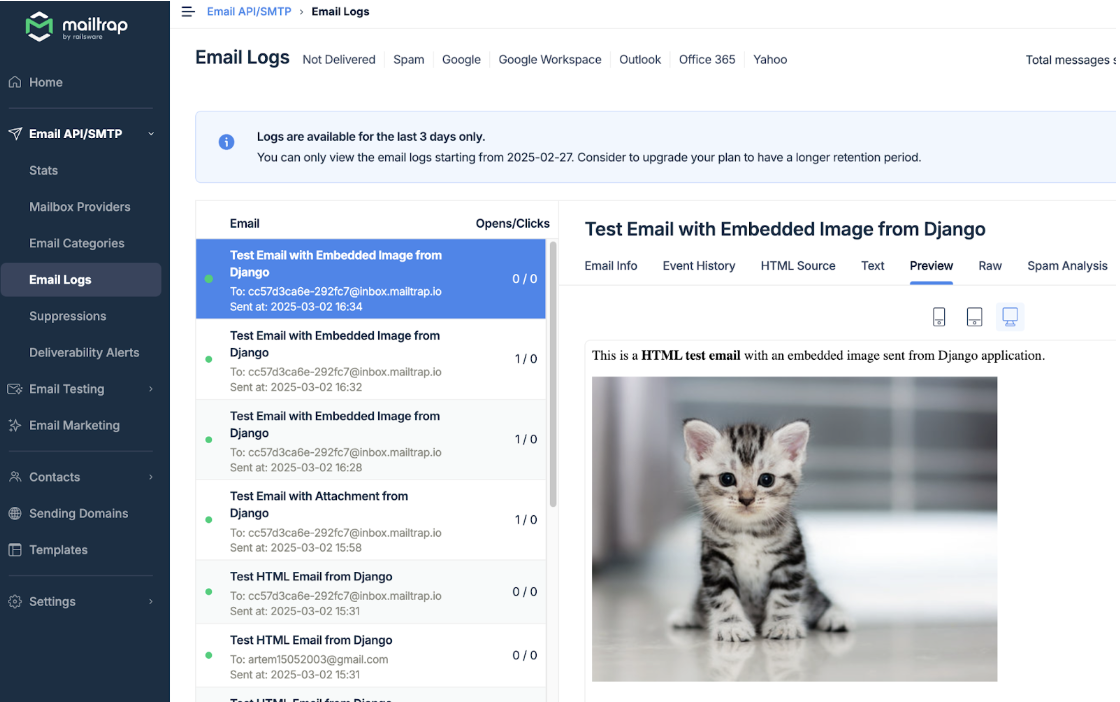
return HttpResponse(f'Failed to send email with embedded image: {str(e)}')After running the server and opening the /send-email page, your email should be sent successfully, and you’ll be able to see our kitten in the Email Logs.
Asynchronous email sending
The primary problem with synchronous email sending is performance. On a large scale, when a lot of users trigger email sending logic, it may slow down the overall process of email sending in the application. This is crucial in high-load applications, and using an asynchronous approach is one of the most efficient ways to optimize it.
As for asynchronous email sending, there’re a few approaches to achieve it. In complex Django applications, the most typical solution would be using Celery and Redis. We’re not going to cover them for this topic, since using Celery and Redis is a large topic of its own worthy of a separate article. Instead, we’ll focus on setting everything up so that we can perform asynchronous email sending simply using the Post Office Library.
Post Office is a powerful solution, providing us all the tools we need to handle emails asynchronously. Compared to Celery, we don’t need a message broker, since Post Office uses Django’s Backend to queue tasks, which means we can literally use Post Office from the box without much fuss in setting things up.
Unlike Django’s default send_mail method, which blocks execution until the email is sent, Post Office queues emails in the database and sends them via background jobs. This improves performance and prevents request timeouts in applications that send multiple emails.
Additionally, starting from version 3.0, Django Post Office uses multiple threads to significantly speed up email delivery. By default, it runs 5 threads per process, but this can be adjusted. It’s also fully compatible with task queues like Celery and RQ.
First, let’s install the django-post_office package.
pip install django-post_officeIn settings.py, let’s add the Post Office to the list of installed apps. Just add "post_office" at the end of the list.
INSTALLED_APPS = (
   "post_office",
)
Run Django migration:
python manage.py migrateThe Post Office provides its own Custom Email Backend. We’ll also need to set it in settings.py:
EMAIL_BACKEND = 'post_office.EmailBackend' Lastly, in the views.py file, use Post Office’s mail.send method to send emails. This way, the emails are now sent asynchronously.
from post_office import mail
from django.http import HttpResponse

def send_example_email(request):
    try:
        response = mail.send(
            'recipient@example.com',
            'reply@your_mailtrap_domain',
            subject='Post Office Email',
            html_message='Hi! This is a Post Office Email from <strong>Mailtrap!</strong>!',
            priority='now',
        )
        print(response)

        return HttpResponse('Email sent successfully!')
    except Exception as e:
return HttpResponse(f'Failed to send email: {str(e)}')Important: mail.send may not send your emails immediately because it puts them in a queue. For the email to be sent immediately, you need to pass priority=’now’, like in the example above.
Send bulk email
For this example, we won’t need the Post Office, so we’ll go back to django.core.mail and the default configuration required for it in the settings.py file. This way, we can use the send_mass_email function to send multiple emails in one go.
Simply copy/paste the following code snippet in the views.py file:
from django.core.mail import send_mass_mail
from django.http import HttpResponse
def send_example_email(request):
try:
message1 = ('Subject 1', 'Message body 1', 'from@your_mailtrap_domain', ['to@example.com'])
message2 = ('Subject 2', 'Message body 2', 'from@your_mailtrap_domain', ['to@example.com'])
messages = (message1, message2)
sent_count = send_mass_mail(messages, fail_silently=False)
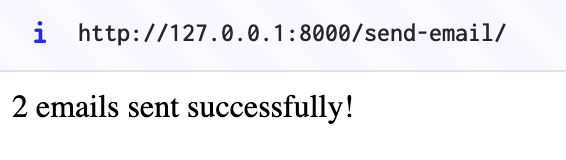
return HttpResponse(f'{sent_count} emails sent successfully!')
except Exception as e:
return HttpResponse(f'Failed to send emails: {str(e)}')Upon running the server and opening the /send-email page, you should see the following message:
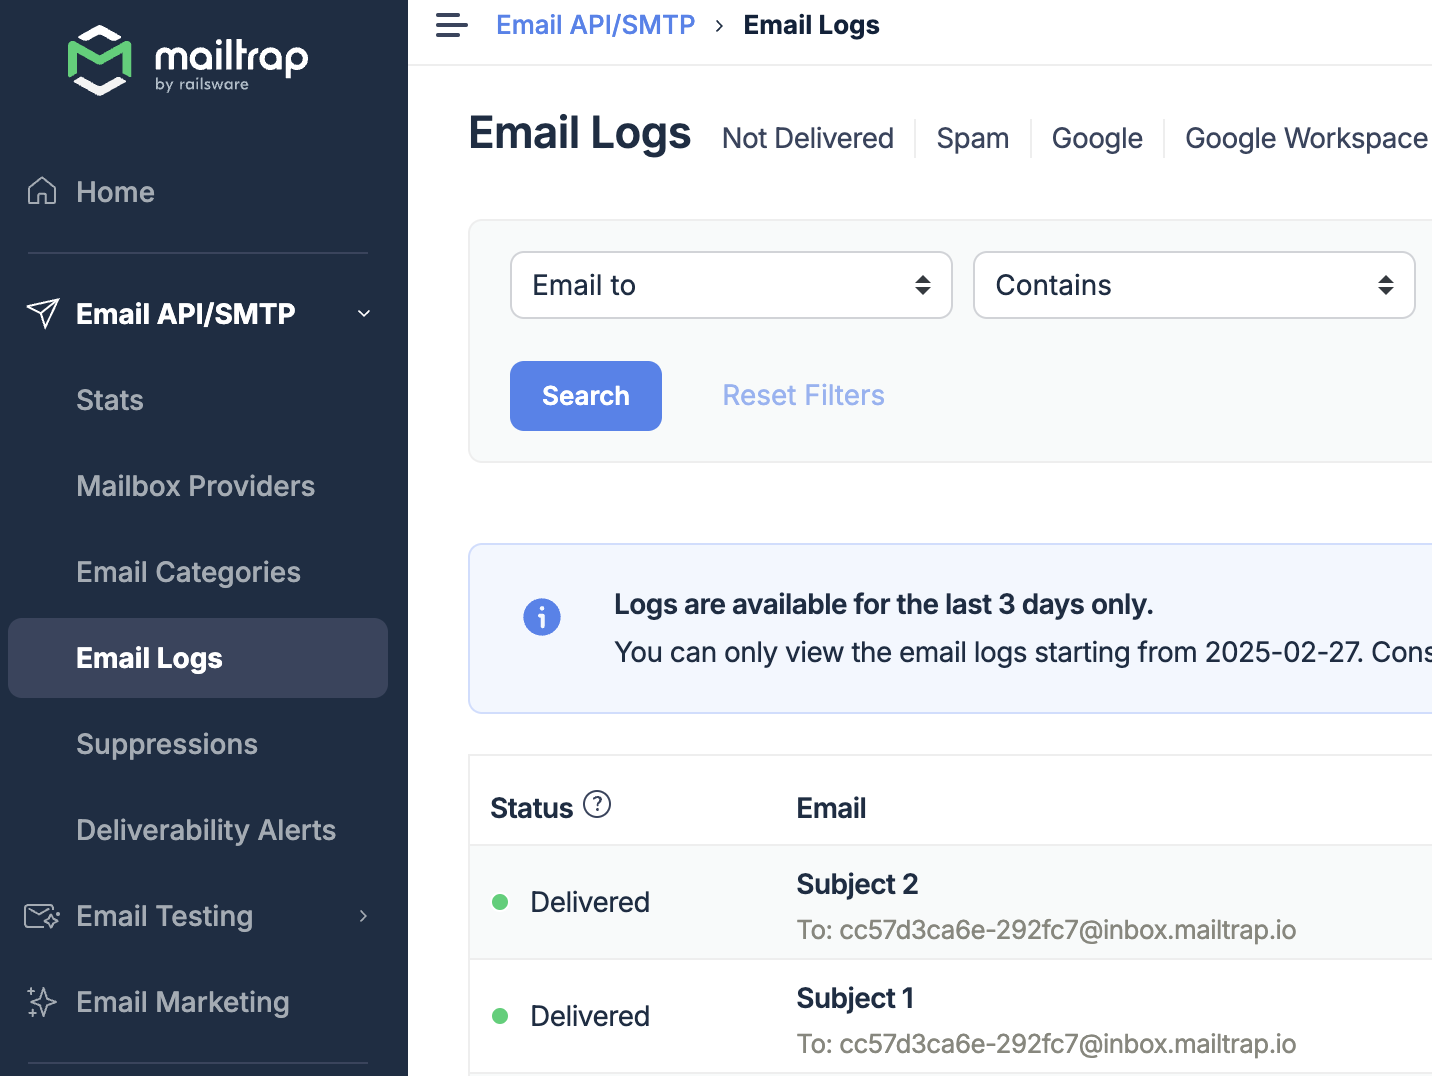
And two emails waiting for you in the Email Logs:
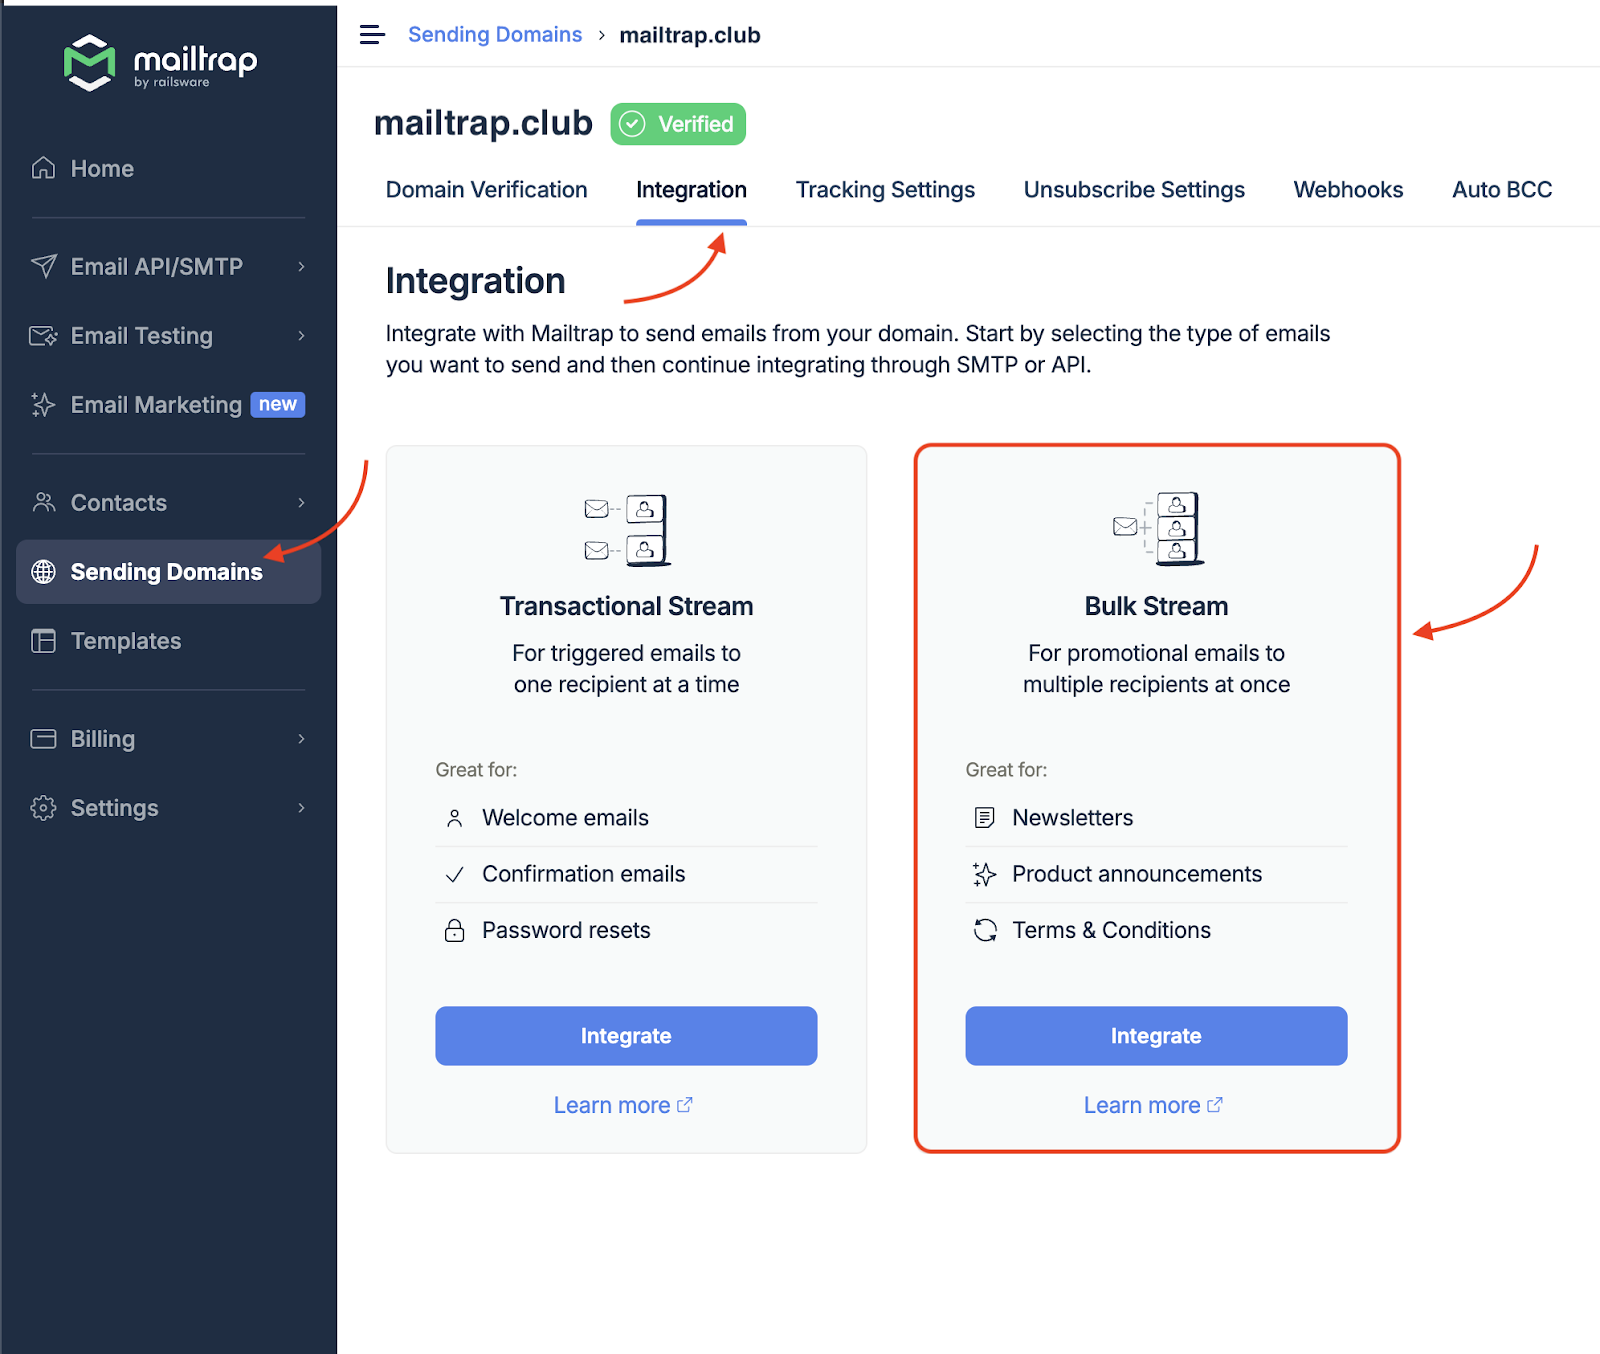
Note: You can also use the dedicated Mailtrap Bulk Stream, which is designed to handle large amounts of emails without a stutter, all the while keeping your deliverability high.
Send emails in Django using email API
Sending emails using email API isn’t much different from how we did it for the SMTP approach, so the code examples are going to be very similar in most of the subtopics. The primary difference here is that using Mailtrap Python SDK as our email API solution, we’ll have much less fuss configuring the Django project.
Start by making a separate working directory and initializing the Django project:
$ mkdir django-email-api
$ django-admin startproject email_api_emails django-email-api
Then, install Mailtrap Python SDK with pip if you haven’t:
pip install mailtrapOnce the installation is complete, go to the settings.py file and add the following code at the end of the file:
MAILTRAP_API_KEY = 'your_mailtrap_key'Note: Make sure to provide your Mailtrap API key from the dashboard.
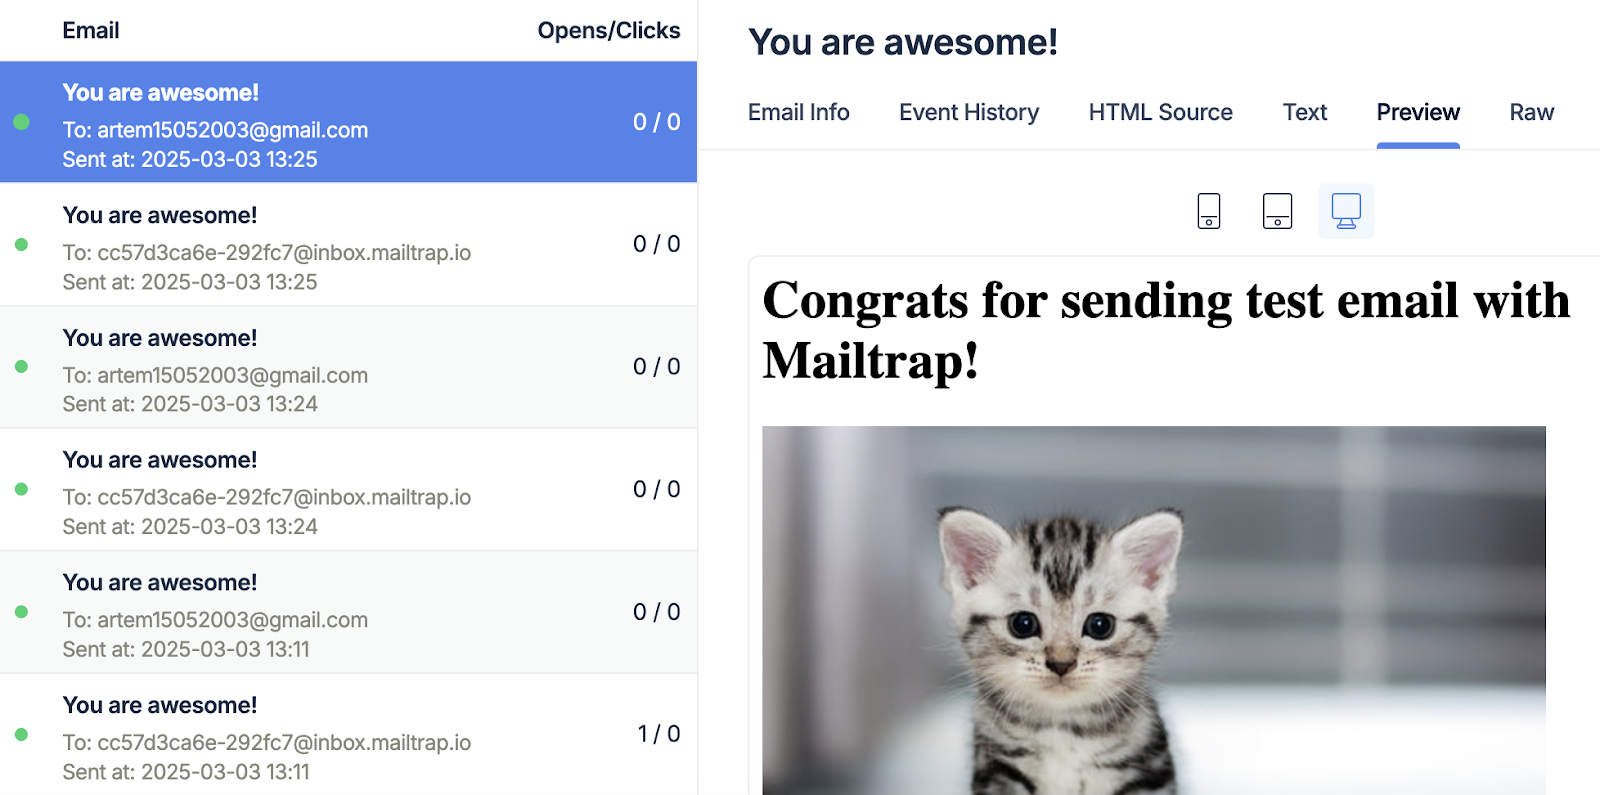
Send plain text email
Next, copy/paste the following script into your views.py file:
from django.http import HttpResponse
from django.conf import settings
import mailtrap as mt

client = mt.MailtrapClient(token=settings.MAILTRAP_API_KEY)

def send_example_email(request):
    try:
        mail = mt.Mail(
            sender=mt.Address(email="from@your_mailtrap_domain", name="Mailtrap Test"),
            to=[mt.Address(email="your@email.com")],
            subject="You are awesome!",
            text="Congrats for sending test email with Mailtrap!",
        )
        client.send(mail)

        return HttpResponse(f'Email sent successfully!')
    except Exception as e:
        return HttpResponse(f'Failed to send email: {str(e)}')
Before opening the browser and sending an email, the last thing you need to do is configure urls.py to add a required URL-view association:
from django.contrib import admin
from django.urls import path
from . import views

urlpatterns = [
    path('admin/', admin.site.urls),
    path('send-email/', views.send_example_email, name='send_example_email'),
]
Send HTML email
To send HTML emails in Django, we’ll add the html property to our code:
from django.http import HttpResponse
from django.conf import settings
import mailtrap as mt

client = mt.MailtrapClient(token=settings.MAILTRAP_API_KEY)

def send_example_email(request):
    try:
        mail = mt.Mail(
            sender=mt.Address(email="from@your_mailtrap_domain", name="Mailtrap Test"),
            to=[mt.Address(email="your@email.com")],
            subject="You are awesome!",
            html="<h1>Congrats for sending test email with Mailtrap!</h1>",
        )
        client.send(mail)

        return HttpResponse(f'Email sent successfully!')
    except Exception as e:
        return HttpResponse(f'Failed to send email: {str(e)}')
Send email to multiple recipients
Sending an email to multiple recipients is just as easy. As you can see, in the to parameter we use a list to pass all the recipients. So, let’s add an extra recipients to the list:
from django.http import HttpResponse
from django.conf import settings
import mailtrap as mt

client = mt.MailtrapClient(token=settings.MAILTRAP_API_KEY)

def send_example_email(request):
    try:
        mail = mt.Mail(
            sender=mt.Address(email="from@your_mailtrap_domain", name="Mailtrap Test"),
            to=[mt.Address(email="your1@email.com"), mt.Address(email="your2@email.com")],
            subject="You are awesome!",
            html="<h1>Congrats for sending test email with Mailtrap!</h1>",
        )
        client.send(mail)

        return HttpResponse(f'Email sent successfully!')
    except Exception as e:
        return HttpResponse(f'Failed to send email: {str(e)}')
Send email with attachments
For file attachment logic, we’re going to use the attachments property and mt.Attachment wrappers to pass the correct format of attachments. For this example, we’re going to use the Kitten Mailtrap.jpg file.
To send an email with attachments, let’s modify the example in the views.py file with the following code:
from django.http import HttpResponse
from django.conf import settings
from pathlib import Path
import mailtrap as mt
import base64

client = mt.MailtrapClient(token=settings.MAILTRAP_API_KEY)

def send_example_email(request):
    image = Path(settings.BASE_DIR).joinpath("Kitten Mailtrap.jpg").read_bytes()

    try:
        mail = mt.Mail(
            sender=mt.Address(email="from@your_mailtrap_domain", name="Mailtrap Test"),
            to=[mt.Address(email="recipient@example.com")],
            subject="You are awesome!",
            html="<h1>Congrats for sending test email with Mailtrap!</h1>",
            attachments=[
                mt.Attachment(
                    content=base64.b64encode(image),
                    filename="kitten.jpg",
                    disposition=mt.Disposition.ATTACHMENT,
                    mimetype="image/jpeg",
                )
            ],
        )
        client.send(mail)

        return HttpResponse(f'Email sent successfully!')
    except Exception as e:
        return HttpResponse(f'Failed to send email: {str(e)}')
Important: Pay attention to the disposition property. There are 2 types of dispositions in Mailtrap Python SDK: INLINE and ATTACHMENT. We will use INLINE type in the next subtopic, and for this subtopic, we have to use ATTACHMENT.
Send email with embedded image
To send an email with an embedded image, insert the following snippet into your views.py:
from django.http import HttpResponse
from django.conf import settings
from pathlib import Path
import mailtrap as mt
import base64


client = mt.MailtrapClient(token=settings.MAILTRAP_API_KEY)

def send_example_email(request):
    image = Path(settings.BASE_DIR).joinpath("Kitten Mailtrap.jpg").read_bytes()

    try:
        mail = mt.Mail(
            sender=mt.Address(email="from@your_mailtrap_domain", name="Mailtrap Test"),
            to=[mt.Address(email="to@example.com")],
            subject="You are awesome!",
            html='''
                <h1>Congrats for sending test email with Mailtrap!</h1>
                <img src="cid:kitten" alt="Kitten" />
            ''',
            attachments=[
                mt.Attachment(
                    content=base64.b64encode(image),
                    filename="kitten.jpg",
                    disposition=mt.Disposition.INLINE,
                    mimetype="image/jpeg",
                    content_id="kitten",
                )
            ],
        )
        client.send(mail)

        return HttpResponse(f'Email sent successfully!')
    except Exception as e:
        return HttpResponse(f'Failed to send email: {str(e)}')
Code breakdown:
- First, we changed the disposition property to
mt.Disposition.INLINE. Then we would need to provide a newcontent_id="kitten"property. The property is used to associate the attached image with the HTML element in the markup that we have in the example. - In the tag’s src property we use cid:kitten. Basically, it looks for an image with content_id kitten in the attachments, and displays it in the HTML document if such an image is found.
And here’s our kitten in the Mailtrap Email Logs.
Asynchronous email sending
To send emails in Mailtrap Python SDK asynchronously, we can still use the Post Office library. However, this approach is considerably more complex, since the Post Office library has its own API and methods for email sending, which means that we would have to create a Custom Email Backend over their own email backend to make it work.
Instead, we’re going to use django-q, another solid multiprocessing task-queue library, which allows us to perform asynchronous tasks in Django easily. Unlike with Celery, we don’t need to set up a message broker in both Post Office and django-q, meaning we can use this tool right from the box without any extra fuss in configuring things.
So, let’s install django-q using the pip package manager:
pip install django-q2Note that the django-q package is for older versions of Django, whereas for the newest version, we will use django-q2.
Next, add django_q to INSTALLED_APPS in the settings.py file to the bottom of the list. Also, in the same file, let’s add a new Q_CLUSTER configuration to configure django-q2 to use Django’s Backend as a message broker, just like so:
INSTALLED_APPS = (
    'django_q',
)

Q_CLUSTER = {
    "name": "DjangORM",
    "workers": 4,
    "timeout": 60,
    "queue_limit": 50,
    "bulk": 10,
    "orm": "default",
}
Run migration to create the db tables for django-q:
python manage.py migrateRun the Django Q2 Cluster in the terminal to handle asynchronous tasks:
python manage.py qclusterUse async_task function, and pass the client.send function with the mail as a parameter:
from django_q.tasks import async_task
from django.http import HttpResponse
from django.conf import settings
import mailtrap as mt

client = mt.MailtrapClient(token=settings.MAILTRAP_API_KEY)

def send_example_email(request):
    try:
        mail = mt.Mail(
            sender=mt.Address(email="from@your_mailtrap_domain", name="Mailtrap Test"),
            to=[mt.Address(email="recipient@example.com")],
            subject="You are awesome!",
            html='<h1>Congrats for sending test email with Mailtrap!</h1>',
        )
        async_task(client.send, mail)

        return HttpResponse(f'Email sent successfully!')
    except Exception as e:
        return HttpResponse(f'Failed to send email: {str(e)}')
Send bulk email
To bulk send emails, we’ll send multiple emails in one go using loops. Similarly, you can make a list of recipients to send an email for each recipient in the list:
from django.http import HttpResponse
from django.conf import settings
import mailtrap as mt

client = mt.MailtrapClient(token=settings.MAILTRAP_API_KEY)

def send_example_email(request):
    email_list = [
        mt.Mail(
            sender=mt.Address(email="from@your_mailtrap_domain", name="Mailtrap Test"),
            to=[mt.Address(email="to@example.com")],
            subject="Email 1",
            html='<h1>Congrats for sending an email with Mailtrap!</h1>',
        ),
        mt.Mail(
            sender=mt.Address(email="from@your_mailtrap_domain", name="Mailtrap Test"),
            to=[mt.Address(email="to@example.com")],
            subject="Email 2",
            html='<h1>Congrats for sending another email with Mailtrap!</h1>',
        )
    ]

    try:
        for email in email_list:
            client.send(email)

        return HttpResponse(f'{len(email_list)} emails sent successfully!')
    except Exception as e:
        return HttpResponse(f'Failed to send emails: {str(e)}')
Pro tip: As with the SMTP method in the previous chapter, I recommend you use the Mailtrap Bulk Stream again here for its ability to handle large volumes of emails.
Send emails in Django using Anymail
Anymail is a collection of email backends and webhooks that works with the django.core.mail module and normalizes the functionality of transactional email service providers, including Mailtrap.
To use Anymail for sending emails through Mailtrap, all you need to do is open your settings.py file and insert the following code-snippet:
| EMAIL_BACKEND = “anymail.backends.mailtrap.EmailBackend” ANYMAIL = { “MAILTRAP_API_TOKEN”: “<your API token>”, } |
Notes:
- Don’t forget to insert your Mailtrap API Token under “MAILTRAP_API_TOKEN”
- If you don’t set ANYMAIL[“MAILTRAP_API_TOKEN”] or ANYMAIL_MAILTRAP_API_TOKEN, Anymail will look for the token at the root of the settings file.
- The default Mailtrap API base URL is “https://sandbox.api.mailtrap.io/api/”
- Although you don’t necessarily need to change the URL, you can set it to https://bulk.api.mailtrap.io/api/” if you wish to use Mailtrap’s bulk stream.
- Anymail doesn’t include the “/send” endpoint, so the value must be only the API base URL.
For more information, please consult the official Anymail and Mailtrap integration page.
Send emails in Django using custom email backend
With custom email backends, we can create our own wrapper over Mailtrap’s Python SDK and have our own Custom Email Backend configured with Mailtrap in Django. This way, we will be able to use the django.core.mail package, while using Mailtrap’s SDK in Django.
Additionally, with this approach, we don’t need to configure email keys in the settings.py file. We can simply specify the token variable to use in our code when passing to Mailtrap’s SDK client initialization method, and the email backend we’re using.
First, install the Mailtrap Python SDK using pip:
pip install mailtrapThen, in the emails folder, create a backends.py file, where we’ll specify our own custom Email backend class. All custom backends are extended from the Django’s BaseEmailBackend class.
The implementation is simple: we just initialize MailtrapClient as a connection, configure send_messages to implement email sending logic of the Custom backend, and disable fail_silently. For your convenience, here’s a code snippet you can use:
from django.conf import settings
from django.core.mail.backends.base import BaseEmailBackend
import mailtrap as mt

class MailtrapEmailBackend(BaseEmailBackend):
    def __init__(self, fail_silently=False, *args, **kwargs):
        super().__init__(fail_silently=fail_silently, *args, **kwargs)
        self.connection = mt.MailtrapClient(token=settings.MAILTRAP_API_KEY)

    def send_messages(self, email_messages):
        sent_count = 0
        for message in email_messages:
            print(message)
            mail = mt.Mail(
                sender=mt.Address(email=message.from_email),
                to=[mt.Address(email) for email in message.recipients()],
                subject=message.subject,
                text=message.body,
            )
            response = self.connection.send(mail)
            if response.get('success'):
                sent_count += 1
        return sent_count
What’s cool about this approach is that we don’t need any specific keys like we did in the django.core.mail example. In the settings.py file, we will just specify 2 keys: path to the custom email backend to configure it in the Django application, and Mailtrap API key used. Since it’s an Email API based approach, all the connection logic is configured in the Mailtrap SDK.
In settings.py, you can replace the previously defined keys with these 2 lines:
EMAIL_BACKEND = 'emails.backends.MailtrapEmailBackend'
MAILTRAP_API_KEY = 'your_mailtrap_key' Important: In the EMAIL_BACKEND variable, make sure to use the following format: 'project_name.file.class'.
As for the API key, you can find it in your Mailtrap Dashboard in the API tab:

Conclusion
That was a lot of code, wasn’t it? Hopefully, you now understand how to send emails in Django!
If you don’t know which method to choose, here’s a quick summary table for you:
| Method | Best for | Key advantage |
| SMTP | Simple integration, quick setup | Native Django support + sandbox ready |
| Email API (SDK) | Modern apps, bulk sends, structured workflows | Cleaner logic, fewer connection issues |
| Custom backend | Large Django apps, reusable architecture | Centralized SDK logic, scalable design |
And if you’re up for more reads, here are some of our other Python-related articles from:
- How to Send Email in Python: SMTP & Email API
- Create, Manage, and Send Email from a Python Contact Form
- Django Contact Form: Tutorial with Code Snippets


Comments
3 replies