How it works
Connect Mailtrap to VS Code to inspect sandbox inboxes and messages, manage templates, and send transactional or test emails – all via simple prompts. No coding required, just tell the agent what you need, and VS Code will execute the API call.
Configuration
Step 1: Add Mailtrap MCP to VS Code
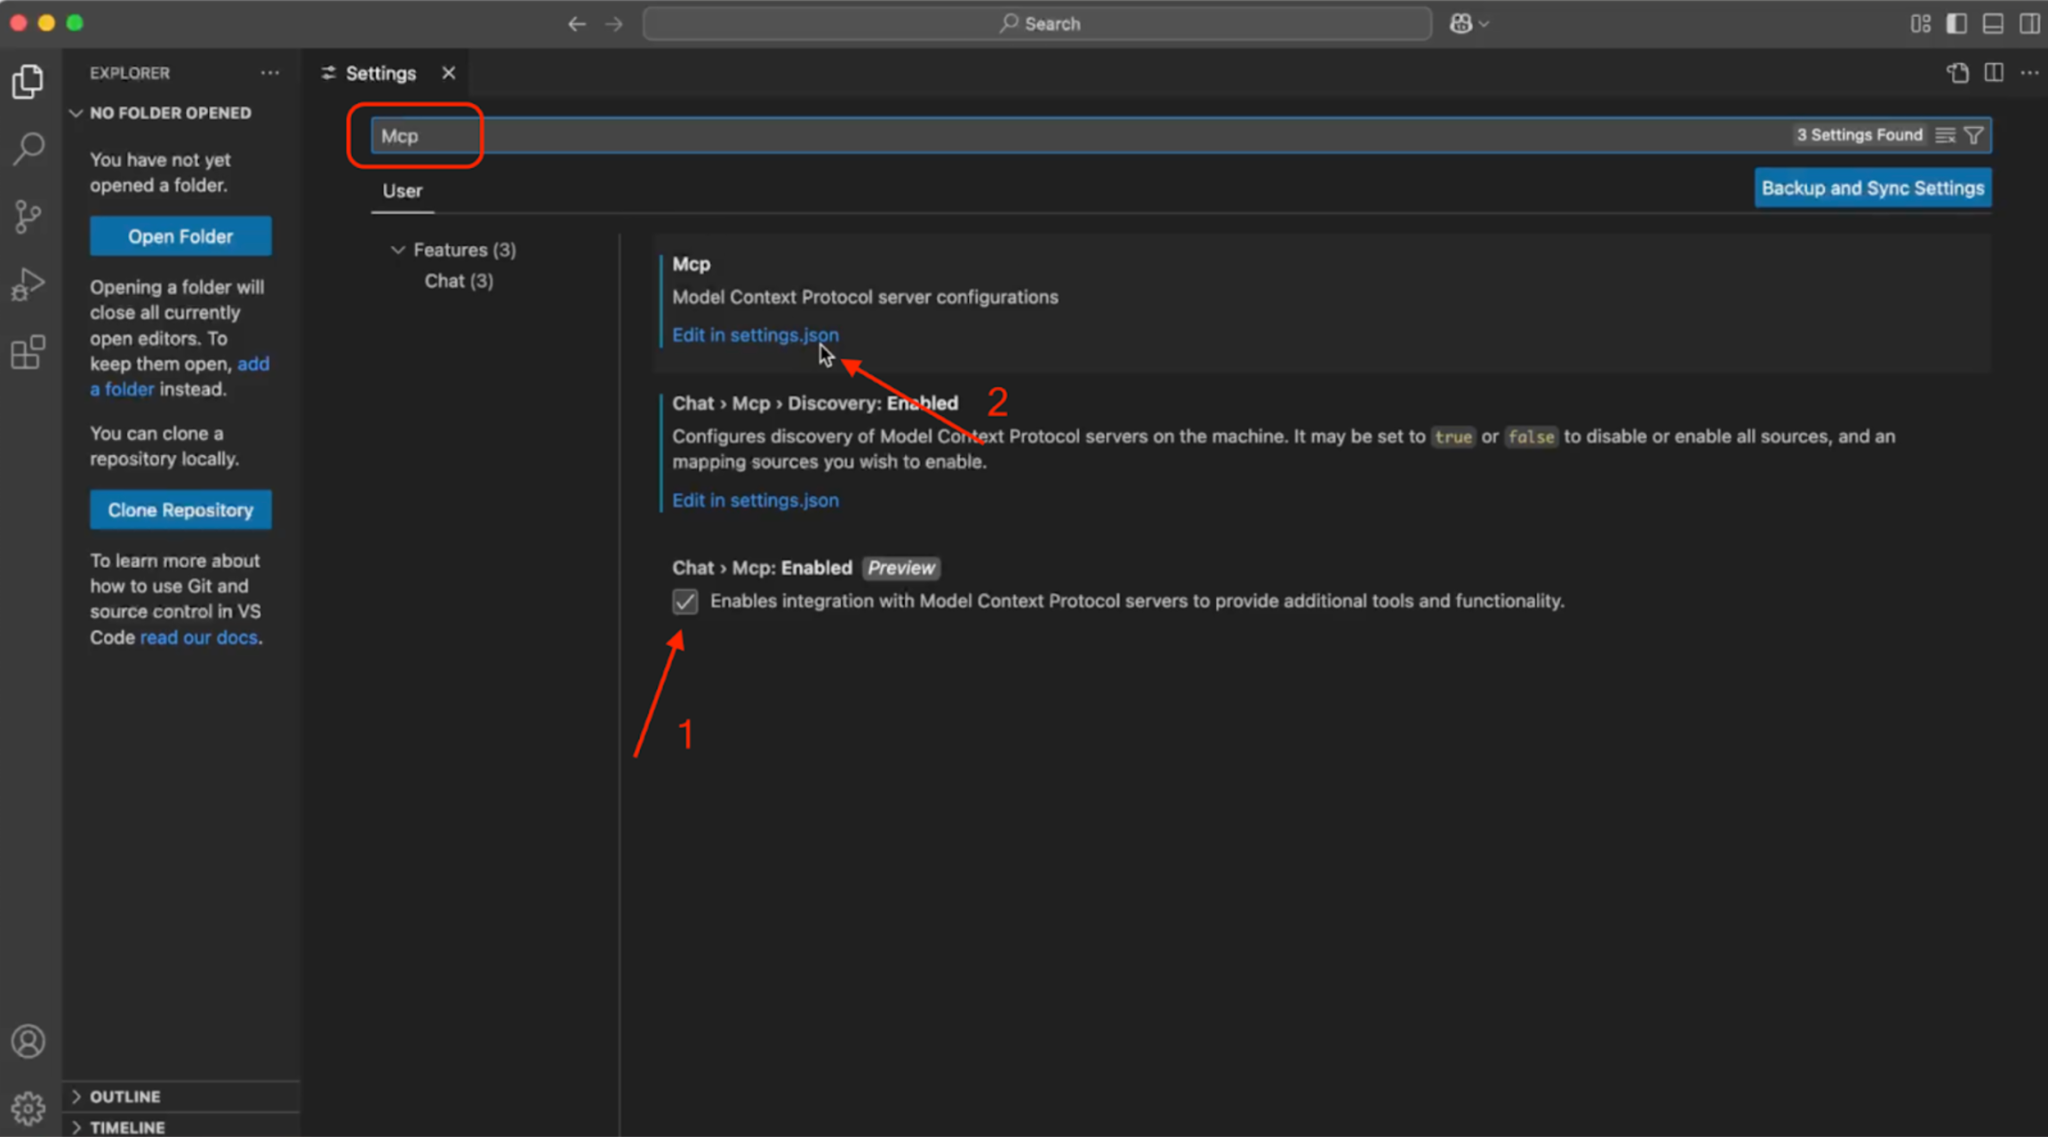
Use the quick install link or open the MCP settings in VS Code, tick the Chat > MCP: Enabled option, and click Edit in settings.json.
Then, paste the Mailtrap MCP snippet into the mcp_config.json file.
{
  "mcpServers": {
    "mailtrap": {
      "command": "npx",
      "args": ["-y", "mcp-mailtrap"],
      "env": {
        "MAILTRAP_API_TOKEN": "your_mailtrap_api_token",
        "DEFAULT_FROM_EMAIL": "your_sender@example.com",
        "MAILTRAP_ACCOUNT_ID": "your_account_id",
        "MAILTRAP_TEST_INBOX_ID": "your_test_inbox_id"
      }
    }
  }
}
Link to the official GitHub repository.
Step 2: Insert your Mailtrap credentials
Replace the placeholders in settings.json with your:
MAILTRAP_API_TOKEN– Required for all operations.DEFAULT_FROM_EMAIL– Must match the domain from your Sending Domains.MAILTRAP_ACCOUNT_ID– Required for template management.MAILTRAP_TEST_INBOX_ID– Required for Sandbox features.
Make sure to refresh the page or restart VS Code for the changes to take place.
Use cases
- Integrate Mailtrap into your project or migrate from another solution
- Send transactional emails to single or multiple recipients (with CC/BCC)
- List sent email logs and get full details of your delivered messages
- Get sending statistics without leaving the terminal
- List all sending domains, and create or delete one
- Retrieve and search the sandbox inbox messages
- Create, list, update, and delete email templates
For more information, please consult the official knowledge base article.