
Once you’ve picked Microsoft Azure services as a cloud-computing platform for your environment, you’ll definitely need to set up email sending – and this might be troublesome.
Even though it’s now possible to send emails directly from Azure with Azure Communication Service, this feature is still in public review (at the time of writing). This means that it’s not suitable for usage in production yet.
Azure also has SMTP restrictions, limiting who can send emails directly to external domains.
In today’s in-depth tutorial, we’ll explain different methods of sending emails from Azure to help you find your way around these restrictions.
Send emails from Azure with Azure Communication Service
Azure Email or Azure Communication Service Email is a new feature that allows users to send bulk emails directly from their app. It can be integrated with ready-made software development kits (SDKs) for four programming languages: C#, JavaScript, Java, and Python. It leverages an email processing service and uses Exchange Online to deliver emails to recipients.
Creating Email Communication Service and Communication Service resources
To start sending emails from Azure, first, you need to create an Email Communication Service resource. Here’s how:
1. Go to the Azure Portal and sign into your account;
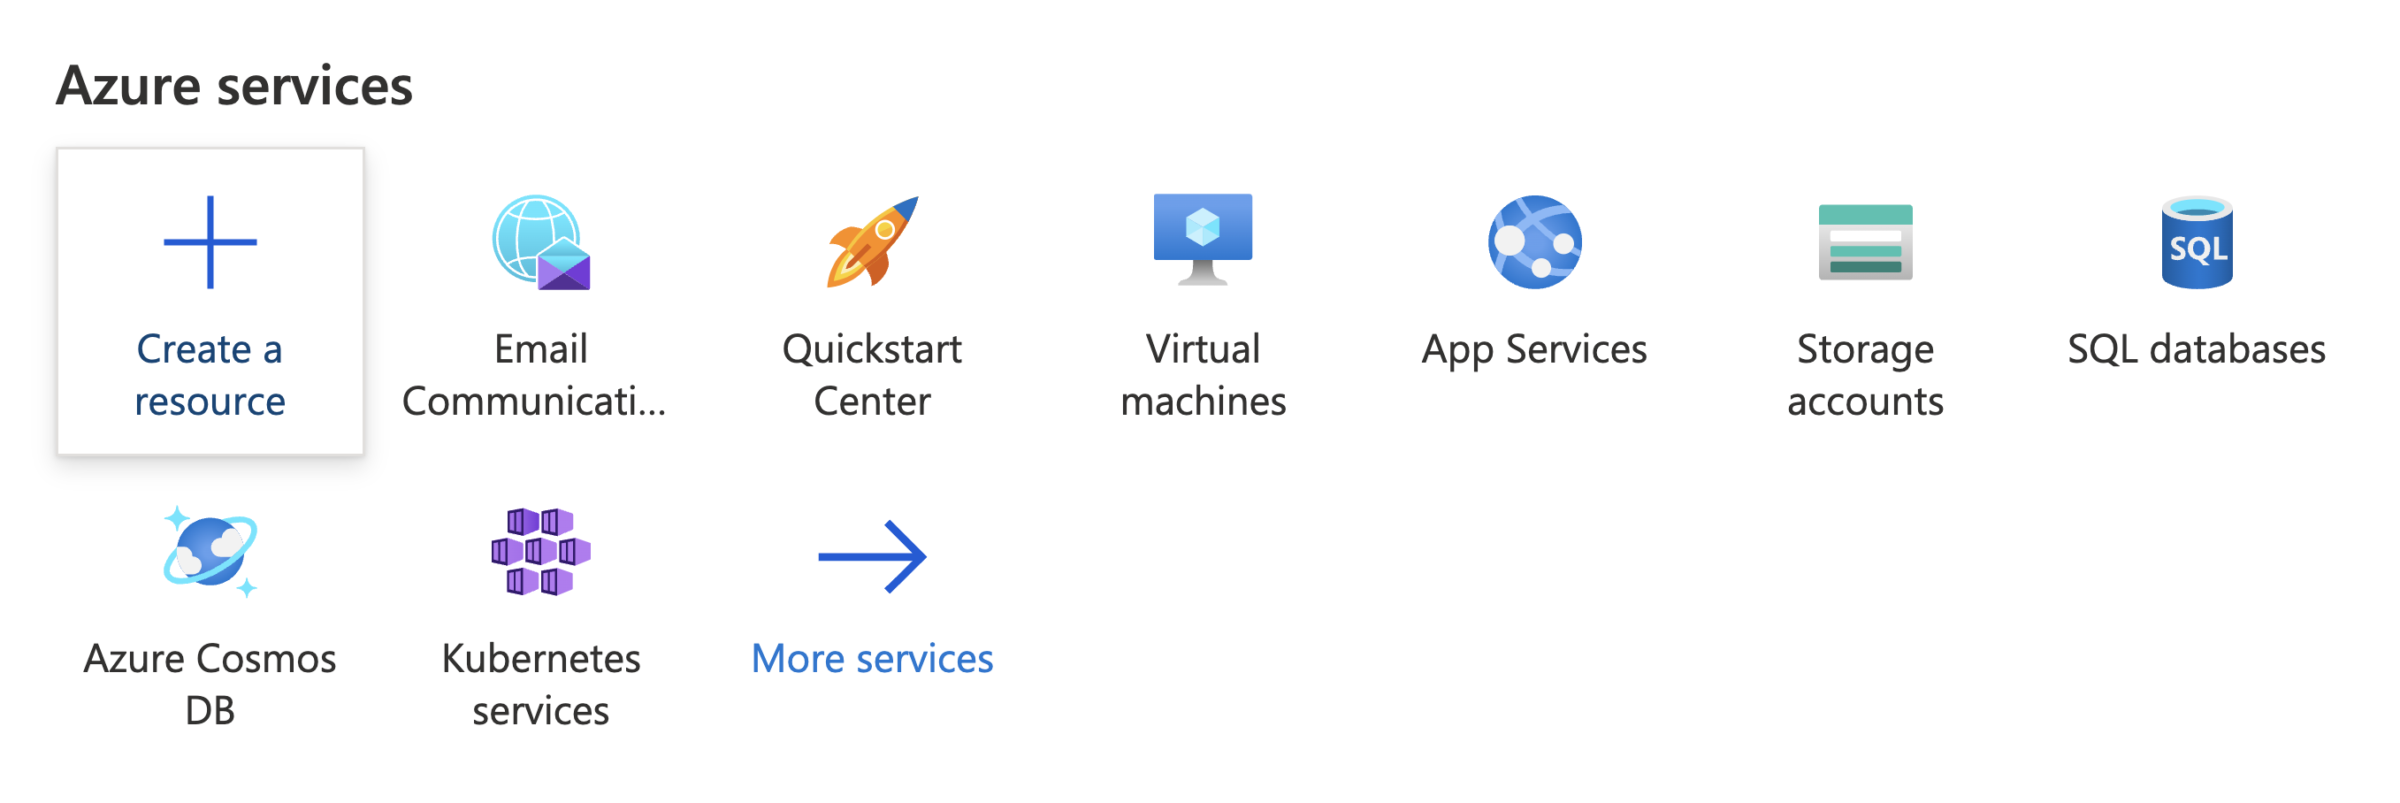
2. Click ‘Create a resource’ in the Azure services tab;
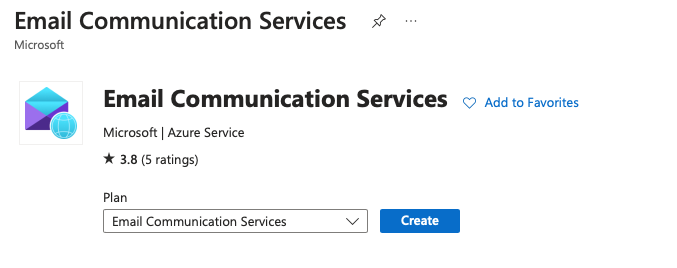
3. Type ‘Email Communication Services’ in the search box and press ‘enter’. You’ll see Email Communication Services in the results tab. Open it and press ‘create’.
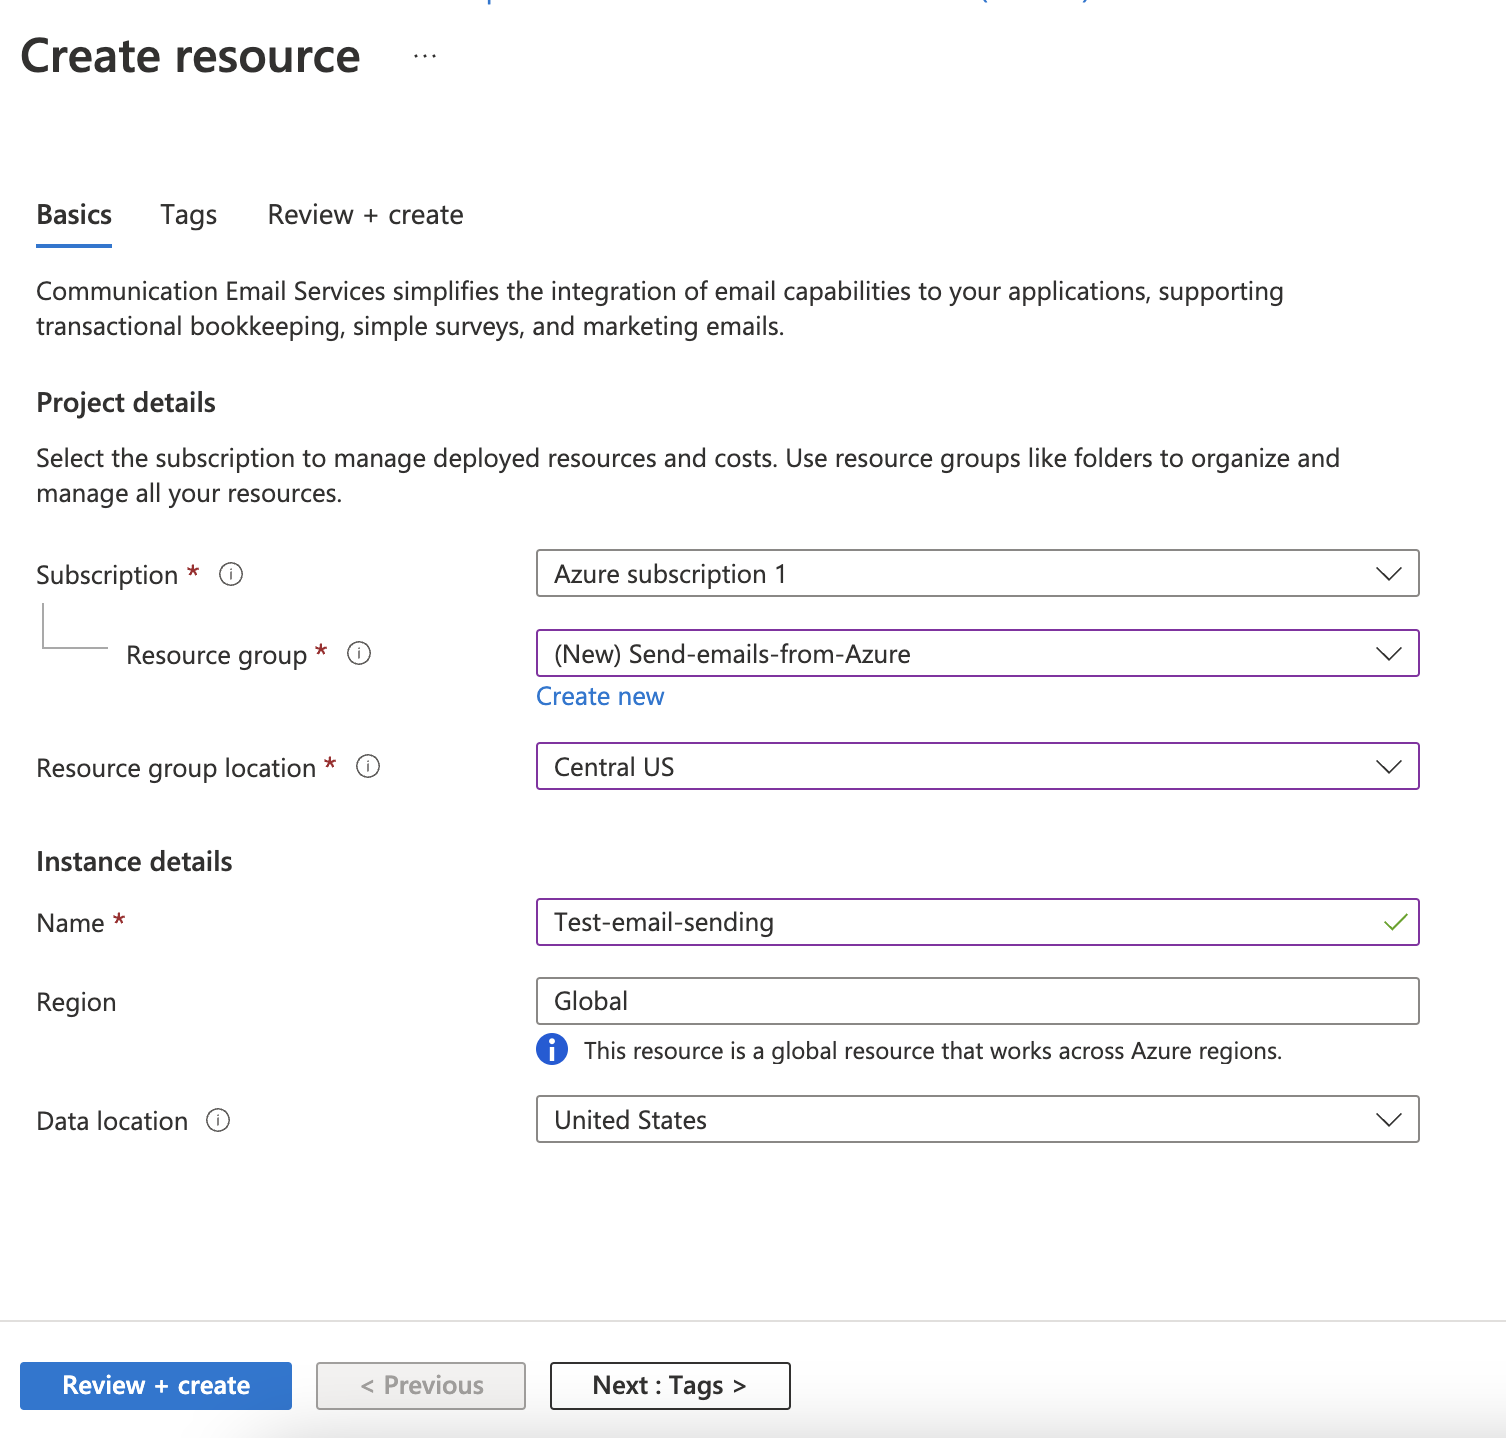
4. Fill out the necessary fields in the basics tab, add tags if desired, and press ‘Review + create’.
5. Wait for the validation to be completed and make corrections if the validation is rejected. Once you see the message ‘Validation Passed’, click ‘Create’.
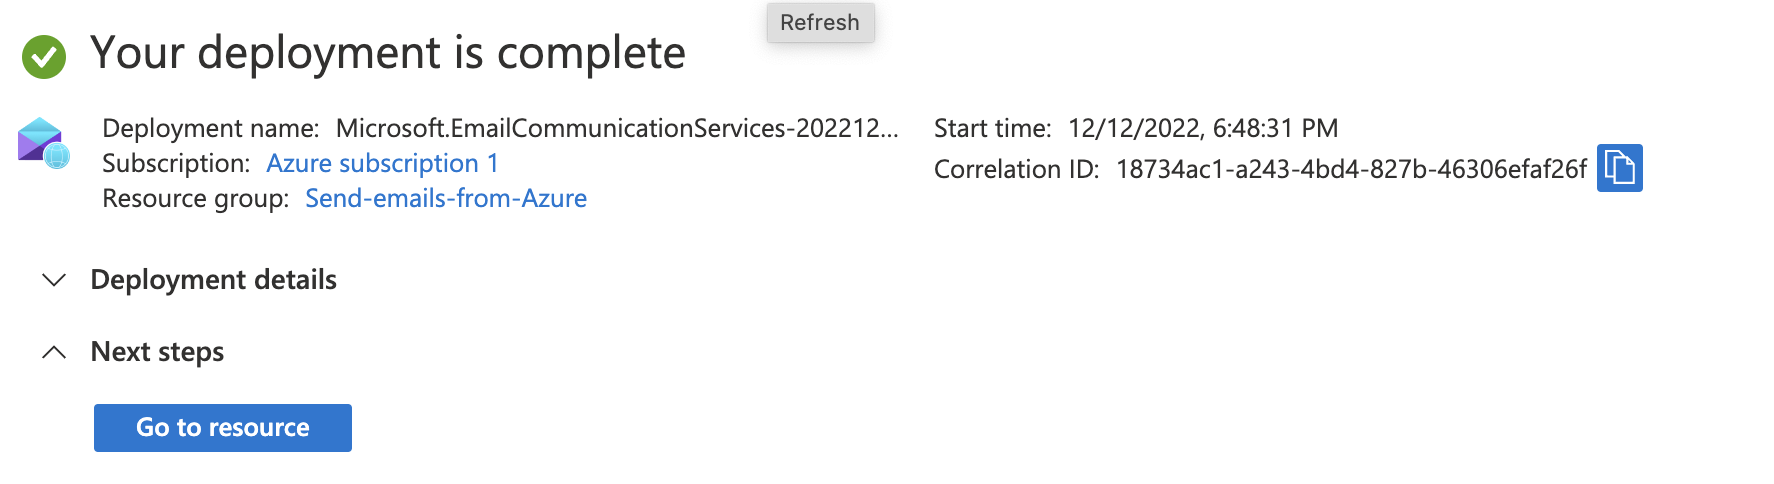
6. You’ll be redirected to a tab that says ‘Deployment in progress’. When the deployment is completed, click ‘Go to resource’.
At this point, you can choose to add an Azure subdomain or set up a custom domain. If you’re using Email Communication Services for business purposes, you should opt for a custom domain. You’ll find detailed information on setting up and verifying a custom domain here.
Once the domain is verified, you should connect it to the Azure Communication Service resource.
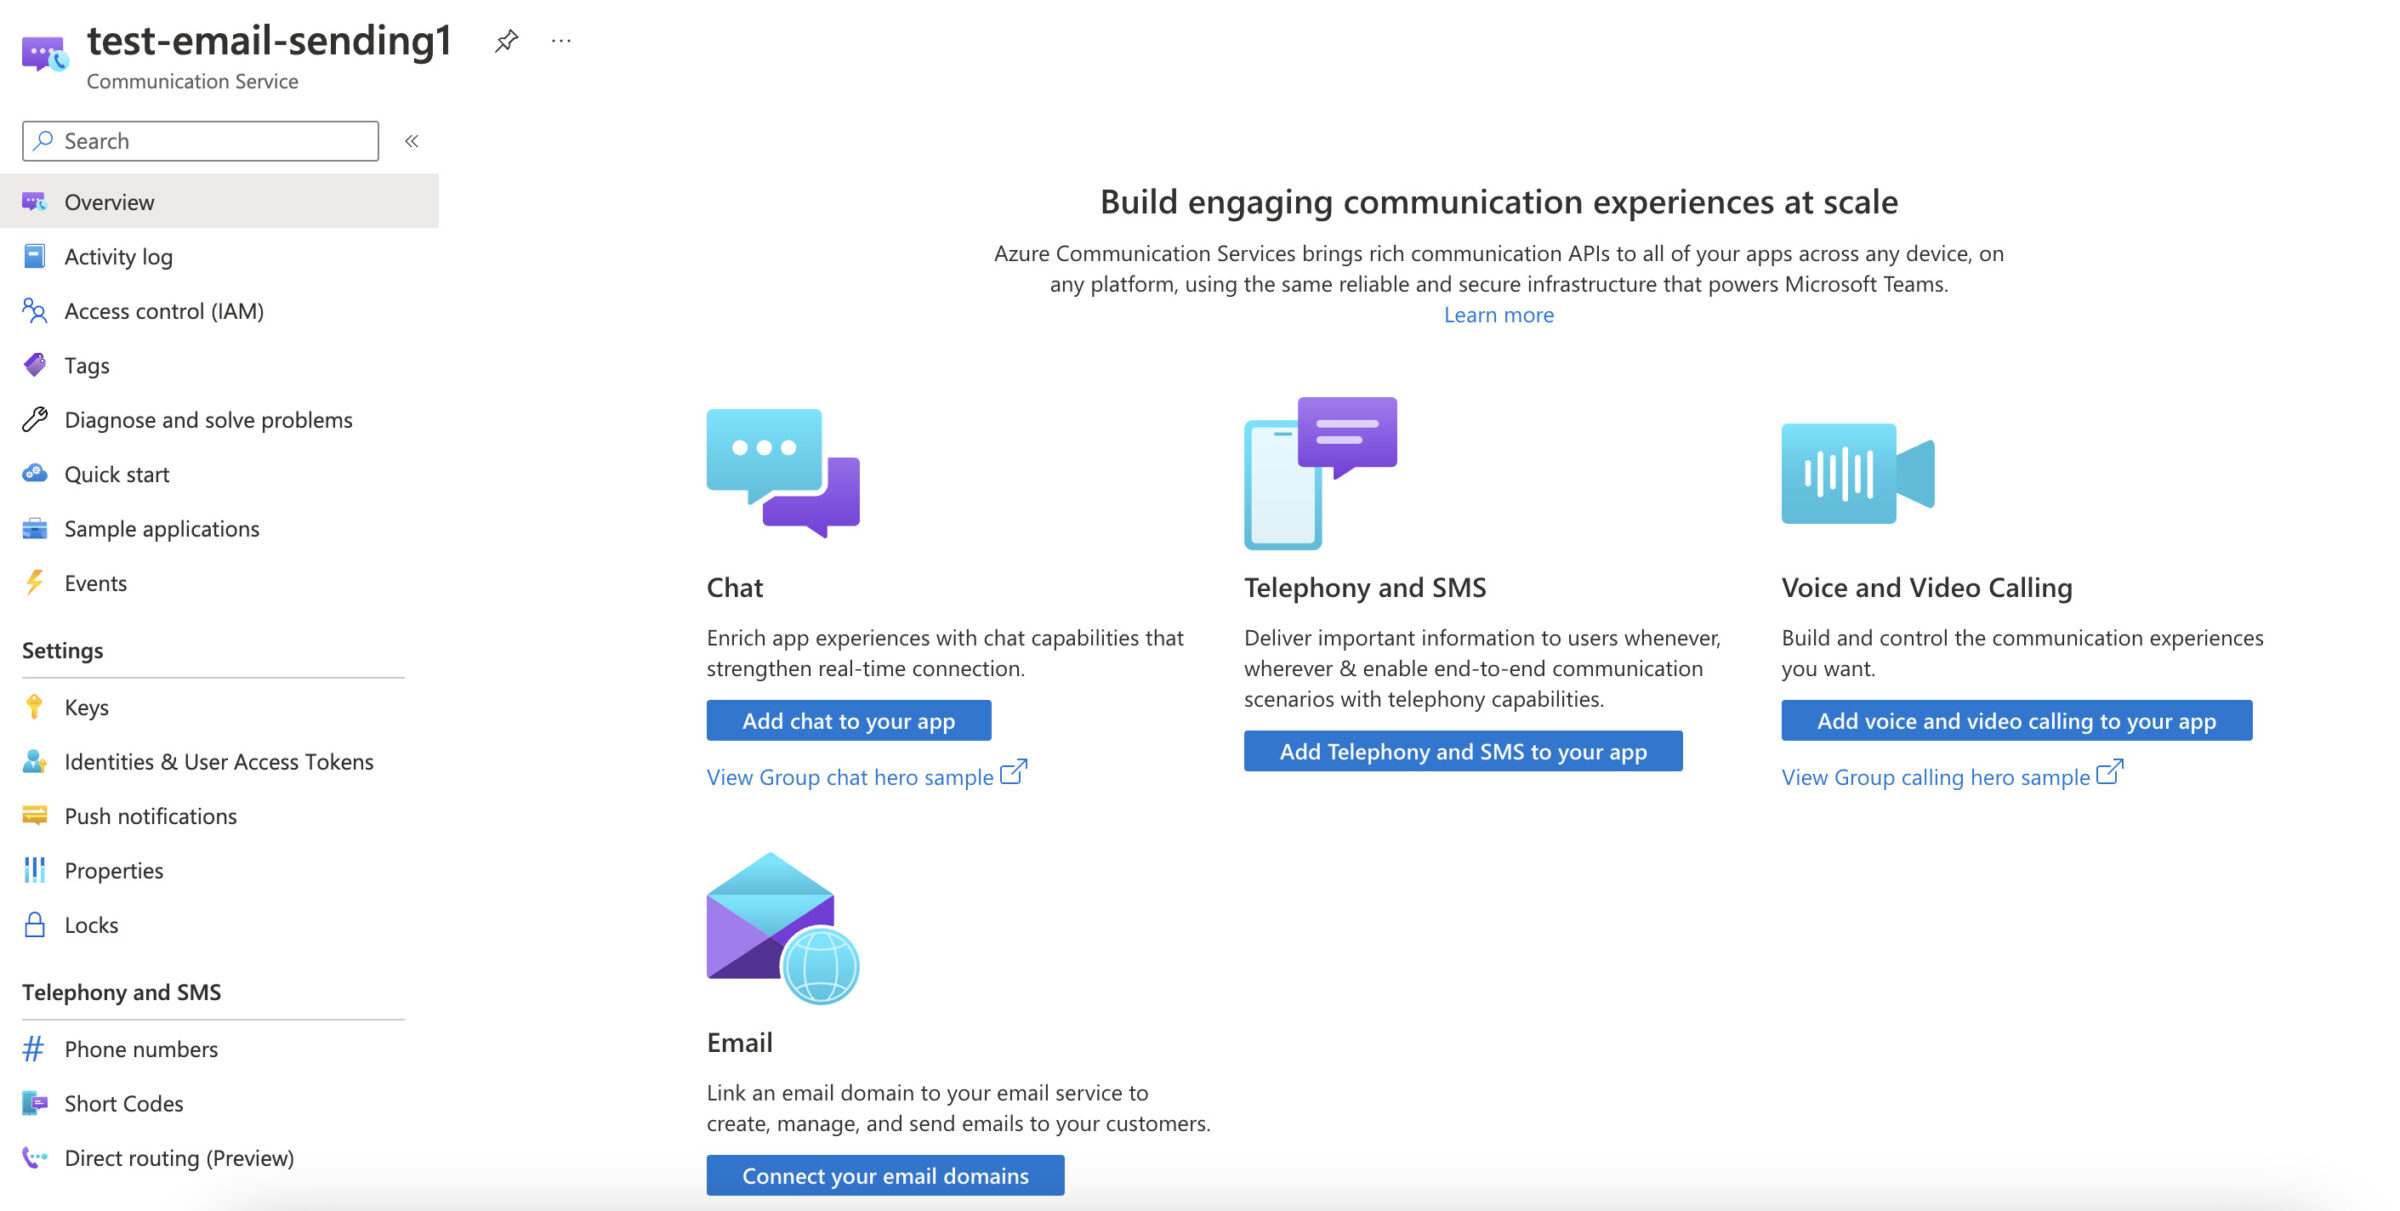
1. Create an Azure Communication Service resource the way we created Email Communication Service;
2. Once the deployment is complete, press ‘Go to resource’ and press ‘Connect your email domains’;
3. Press ‘Connect domain’ and filter results by selecting a subscription, resource group, email service, and the verified domain you wish to connect.
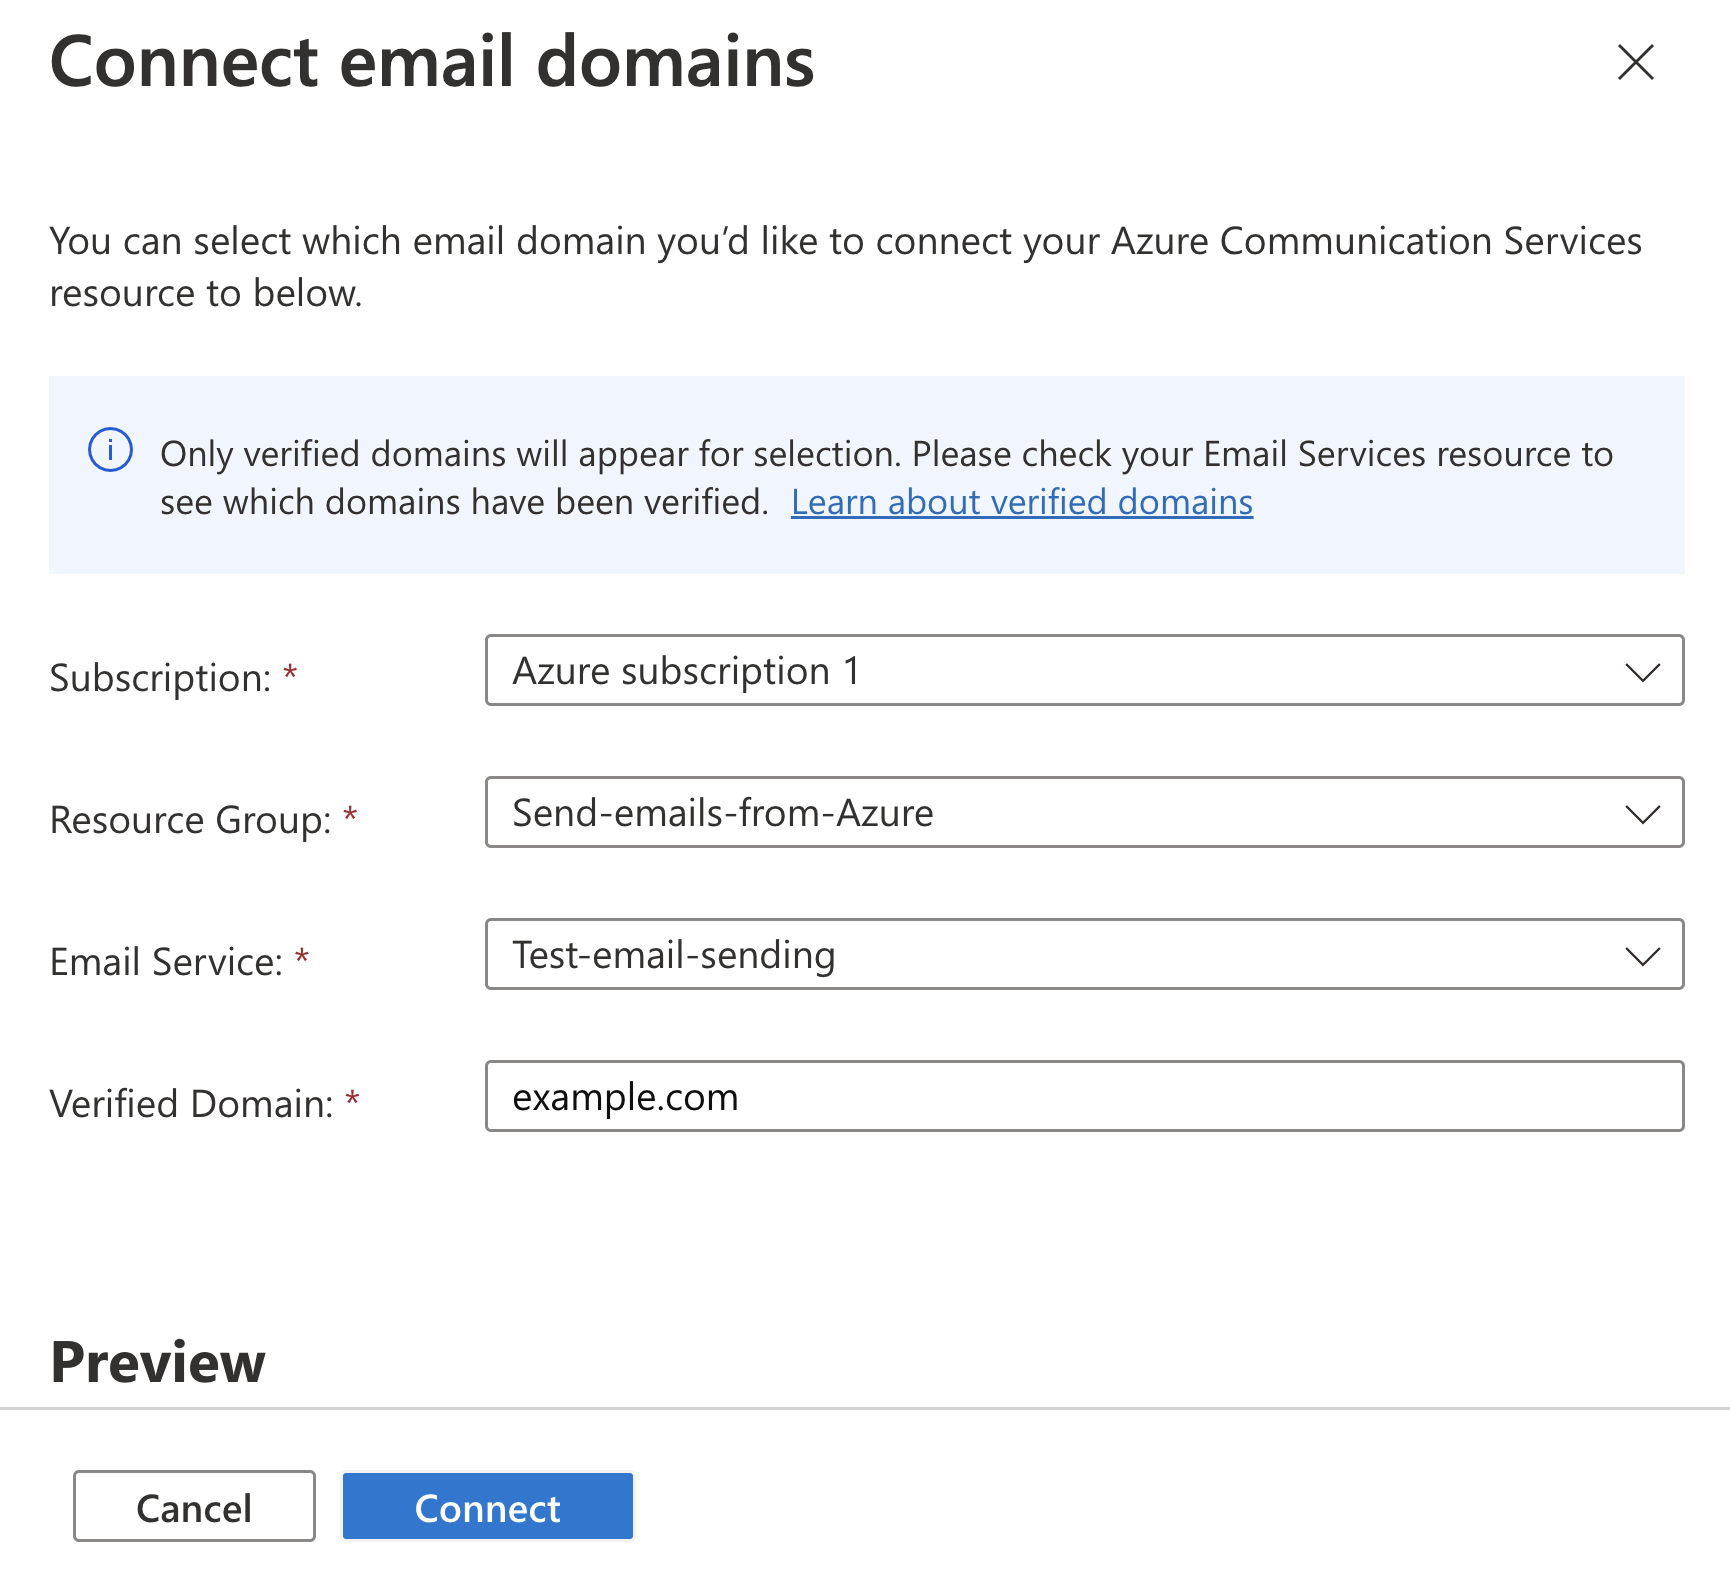
4. Press ‘Connect’, and your verified domain will be connected.
Sending emails from Azure
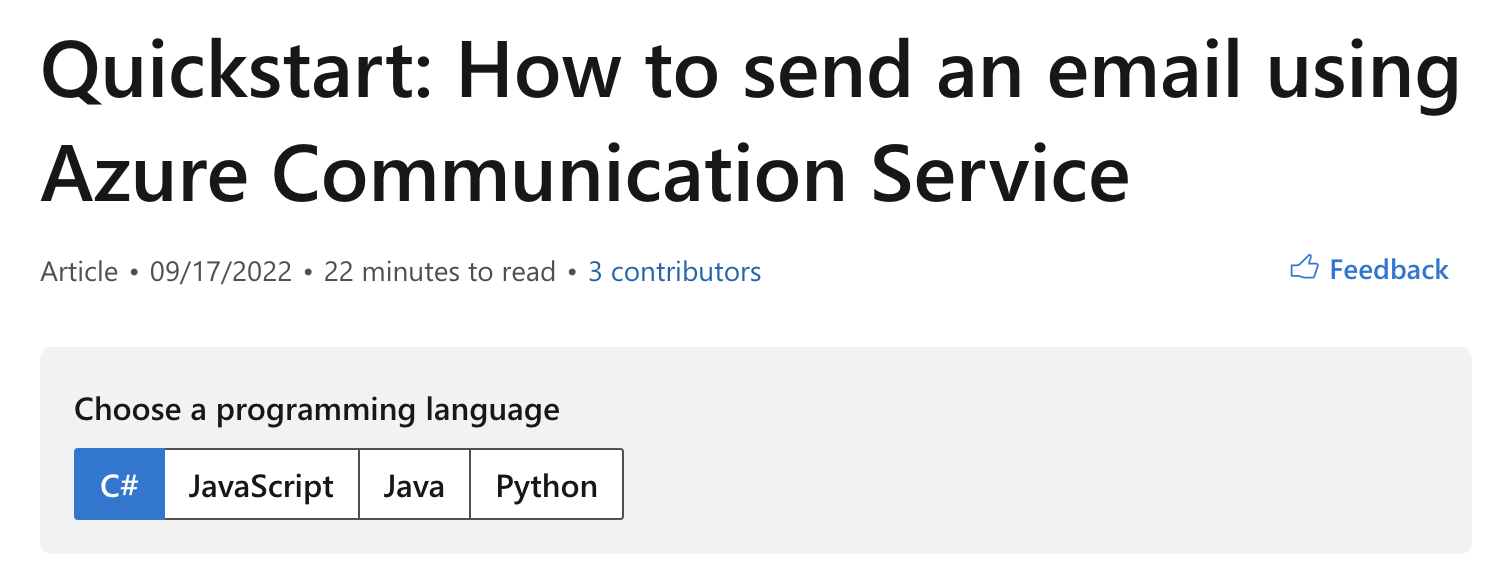
After verifying the domain, you can send emails from Azure by integrating the SDKs for C#, JavaScript, Java, or Python. The flow is similar for all these programming languages, and today we’ll demonstrate it with C# code samples.
To send emails from Azure with C#, you’ll need the latest version of the .NET client library. Run the dotnet command and check if the library is installed. If so, create a new app using the dotnet new command and specify the name as EmailQuickStart:
dotnet new console -o EmailQuickstartThen start building the new app with the dotnet build command:
cd EmailQuickstart

dotnet build
The next step is to install the Azure Communication Service Email library. This is done with the help of the dotnet add package command:
dotnet add package Azure.Communication.EmailBefore we get to the email-sending part, it’s important to authenticate EmailClient. There are two main ways:
- Authenticate with the connection string that you’ll find in the communication service resource in the Azure portal. It’s located in the tab ‘Keys’:
string connectionString = Environment.GetEnvironmentVariable("COMMUNICATION_SERVICES_CONNECTION_STRING");
EmailClient emailClient = new EmailClient(connectionString);- Authenticate with Azure AD by installing Azure.Identity library package and using the code below:
string resourceEndpoint = "<ACS_RESOURCE_ENDPOINT>";
EmailClient emailClient = new EmailClient(new Uri(resourceEndpoint), new DefaultAzureCredential());
Now you can send a simple email with the following code sample by indicating your actual access key, substituting email addresses, and customizing the subject and the message:
using Azure;
using Azure.Communication.Email;


namespace EmailSendingTest;


public static class SendMultiple
{
   public static void Main()
   {
       var connectionString =
           "endpoint=https://emailsendingcomunicationservice.unitedstates.communication.azure.com/;accesskey=your_access_key";


       var emailClient = new EmailClient(connectionString);
       var emailContent = new EmailContent("Welcome to Azure Communication Service Email APIs.")
       {
           PlainText =  "This email message is sent from Azure Communication Service Email. This mail was sent using .NET SDK!!",
           Html = "<html><body><h1>Quick send email test</h1><br/><h4>This email message is sent from Azure Communication Service Email.</h4><p>This mail was sent using .NET SDK!!</p></body></html>"
       };

       var toRecipients = new List<EmailAddress>
       {
           new("kate.doe@example.com"),
           new("john.doe@example.com")
       };

       var ccRecipients = new List<EmailAddress>
       {
           new("<ccemail@example.com>")
       };

       var bccRecipients = new List<EmailAddress>
       {
           new("<bccemail@example.com>")
       };

       var emailRecipients = new EmailRecipients(toRecipients, ccRecipients, bccRecipients);
       var emailMessage = new EmailMessage("no-reply@example.com", emailRecipients, emailContent);


       try
       {
           var emailSendOperation = emailClient.Send(WaitUntil.Completed, emailMessage);
           Console.WriteLine($"Email Sent. Status = {emailSendOperation.Value.Status}");

           var operationId = emailSendOperation.Id;
           Console.WriteLine($"Email operation id = {operationId}");
       }
       catch (RequestFailedException ex)
       {
           Console.WriteLine($"Email send operation failed with error code: {ex.ErrorCode}, message: {ex.Message}");
       }
   }
}
As you can see in the code sample above, it’s possible to track email delivery by getting MessageId back from response. The status of the message can be retrieved with GetSendStatus.
Azure Email Communication Service also allows you to send emails to multiple recipients.
using Azure;
using Azure.Communication.Email;


namespace EmailSendingTest;


public static class SendMultiple
{
   public static void Main()
   {
       var connectionString =
           "endpoint=https://emailsendingcomunicationservice.unitedstates.communication.azure.com/;accesskey=your_access_key";


       var emailClient = new EmailClient(connectionString);
       var emailContent = new EmailContent("Welcome to Azure Communication Service Email APIs.")
       {
           PlainText =  "This email message is sent from Azure Communication Service Email.",
           Html = "<html><body><h1>Quick send email test</h1><br/><h4>This email message is sent from Azure Communication Service Email.</h4><p>This mail was sent using .NET SDK!!</p></body></html>"
       };

       var toRecipients = new List<EmailAddress>
       {
           new("kate.doe@example.com"),
           new("john.doe@example.com")
       };

       var ccRecipients = new List<EmailAddress>
       {
           new("<ccemail@example.com>")
       };

       var bccRecipients = new List<EmailAddress>
       {
           new("<bccemail@example.com>")
       };

       var emailRecipients = new EmailRecipients(toRecipients, ccRecipients, bccRecipients);
       var emailMessage = new EmailMessage("no-reply@example.com", emailRecipients, emailContent);


       try
       {
           var emailSendOperation = emailClient.Send(WaitUntil.Completed, emailMessage);
           Console.WriteLine($"Email Sent. Status = {emailSendOperation.Value.Status}");

           var operationId = emailSendOperation.Id;
           Console.WriteLine($"Email operation id = {operationId}");
       }
       catch (RequestFailedException ex)
       {
           Console.WriteLine($"Email send operation failed with error code: {ex.ErrorCode}, message: {ex.Message}");
       }
   }
}
For more information on sending emails using attachments, refer to the Microsoft documentation or Github. Code samples for other programming languages are available here. Just press the language you’re using, and you’ll find the relevant information.
Why is it better to send emails with a third-party SMTP service?
If it’s possible to send emails with Azure Communication Service, why do we need an SMTP service? There are three main reasons:
- Azure Communication Service Email is still under public review and can’t be used in production until it becomes generally available. You can read more on Azure Active Directory (Azure AD) previews here.
- Azure email has limitations when it comes to sending volume, and users can send:
- 10 emails per minute
- 25 per hour
- 100 per day
Microsoft justifies these limitations by saying that Email Communication Service is designed as a sandbox to be used during the app development stage. The limits can be increased once the app is live by contacting support. And honestly, that’s too much of a hassle.
- Finally, Microsoft doesn’t allow outbound SMTP communication from Azure since November 5, 2017, to protect Azure data center IP addresses from reputation abuse. The restriction applies to unauthenticated email delivery (without SPF, DKIM, and DMARC records) via SMTP port 25 through direct DNS MX lookups. It mostly affects users with free Azure subscriptions. Pay-As-You-Go subscribers can unblock the restriction by contacting support and getting the approval of Microsoft. Enterprise users won’t be affected.
The solution to all three is to use an authenticated SMTP relay service, also known as a Smart Host, with TLS support. It provides an intermediary SMTP server between the mail servers of the sender and recipient.
The TCP connection is established via the secure 587 or 443 ports (other SMTP ports may also be supported depending on the scenario). Using SMTP relay services reduces the likelihood that an email provider will reject your email. This, in turn, maintains the sender reputation.
Below, we’ll break down how to send emails with Mailtrap Email Sending – a third-party SMTP.
Send emails with Mailtrap
Mailtrap is an email delivery platform with high deliverability rates by design.
Apart from sending emails, Mailtrap Email Sending also provides access to actionable analytics with helicopter-view dashboards and drill-down reports for mailbox providers and email categories.
To send emails from Azure with Mailtrap Email Sending, you can use both the Email API or SMTP Service.
Whichever option you choose, here’s how it works:
- Create a Mailtrap account;
- Go to ‘Sending Domains‘ and add and verify your domain according to these instructions:
- Navigate ‘SMTP/API Settings‘ under ‘Sending Domains‘ to find code samples and SMTP credentials;
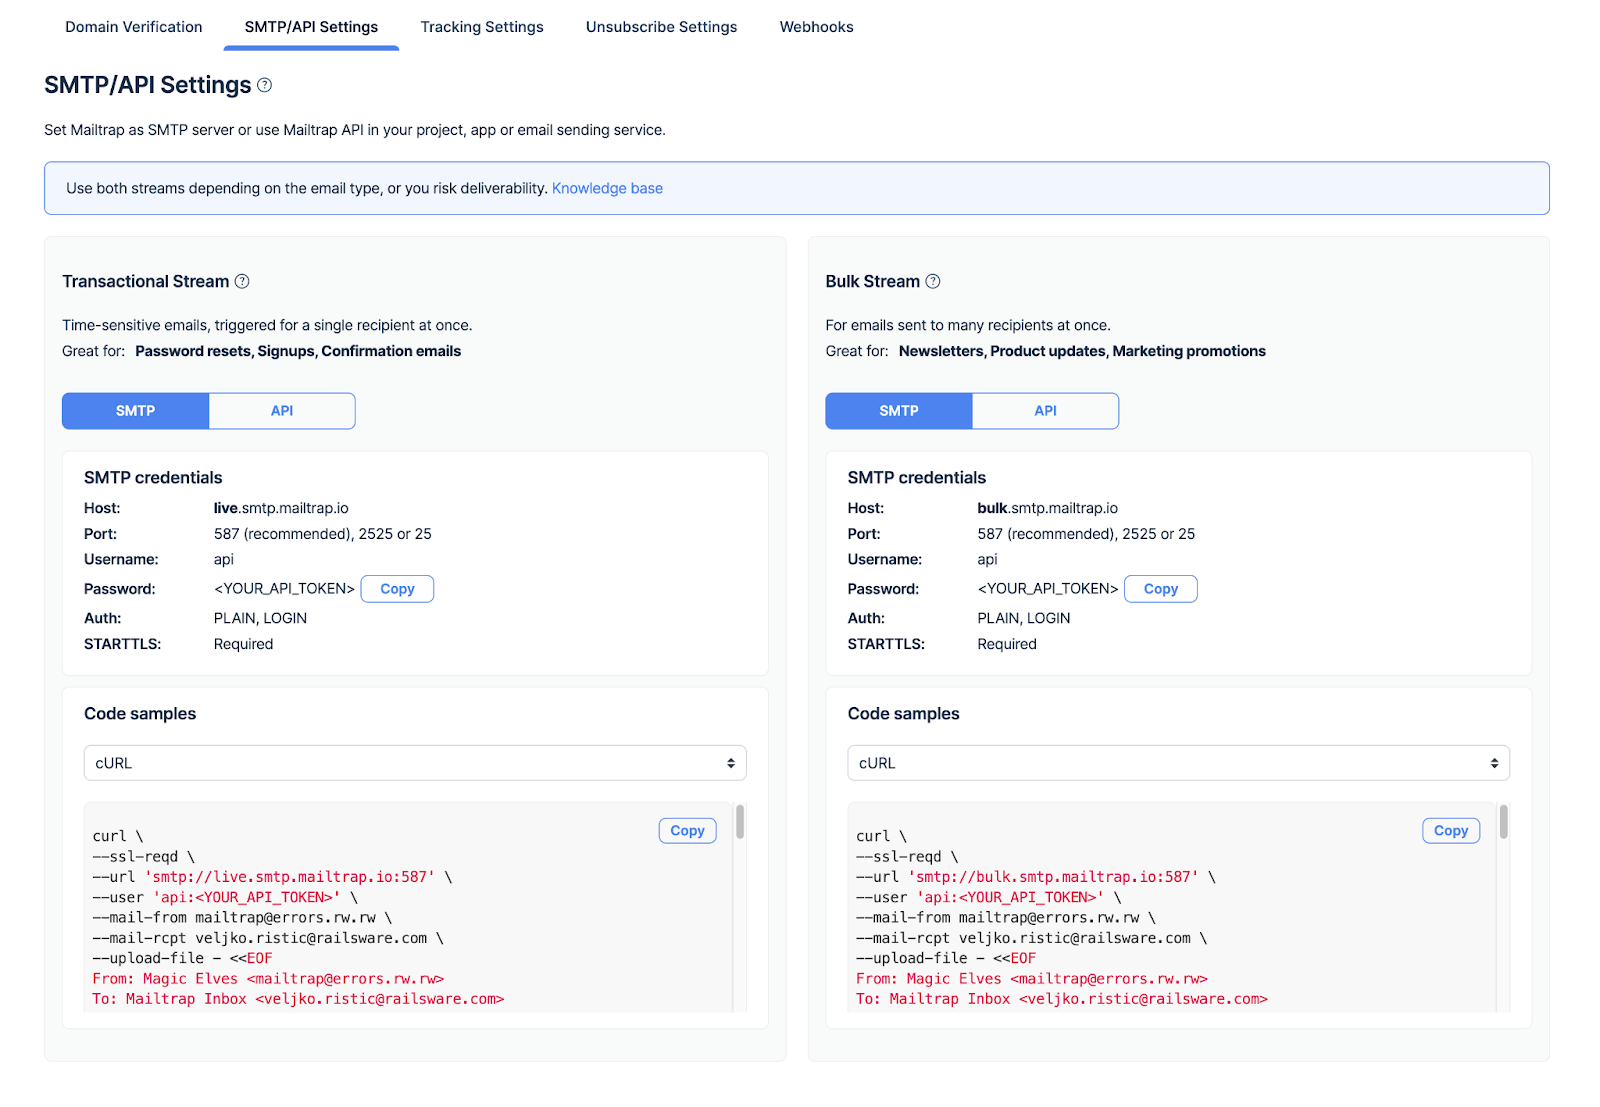
- Choose API or SMTP integration and follow the instructions below.
Sending emails from Azure with Mailtrap via SMTP
To integrate Mailtrap Email Sending in your app using SMTP credentials, you should use the SMTP client library for the programming language you’re working with. For example, you can install the Nodemailer library in the Azure project using the following command:
npm install nodemailerImport the library and create a new transporter object. Specify the credentials, such as host, port, username, and password (once again, you can find those in your Email Sending account):
const nodemailer = require('nodemailer');

const transporter = nodemailer.createTransport({
  host: 'live.smtp.mailtrap.io',
  port: 587,
  auth: {
    user: 'your_mailtrap_username',
    pass: 'your_mailtrap_token'
  }
});

const mailOptions = {
  from: 'sender@your.domain',
  to: 'recipient@example.com',
  subject: 'Sending Email using Node.js and Mailtrap Email Sending',
  text: 'That was easy!'
};

transporter.sendMail(mailOptions, function(error, info){
  if (error) {
    console.log(error);
  } else {
    console.log('Email sent: ' + info.response);
  }
});
Another option is to use Azure Logic Apps to send emails with Mailtrap via SMTP as a response to specific events. For example, if someone adds a new tweet, the Logic Apps will send an email automatically. Naturally, you’d need to create a new Logic App to get started.
1. Type Logic App in the search box of your Azure portal. Open the Logic App and press ‘Add’;
2. Fill out the empty fields by choosing the resource group, Logic App name, Region, Plan Type, and Zone redundancy;
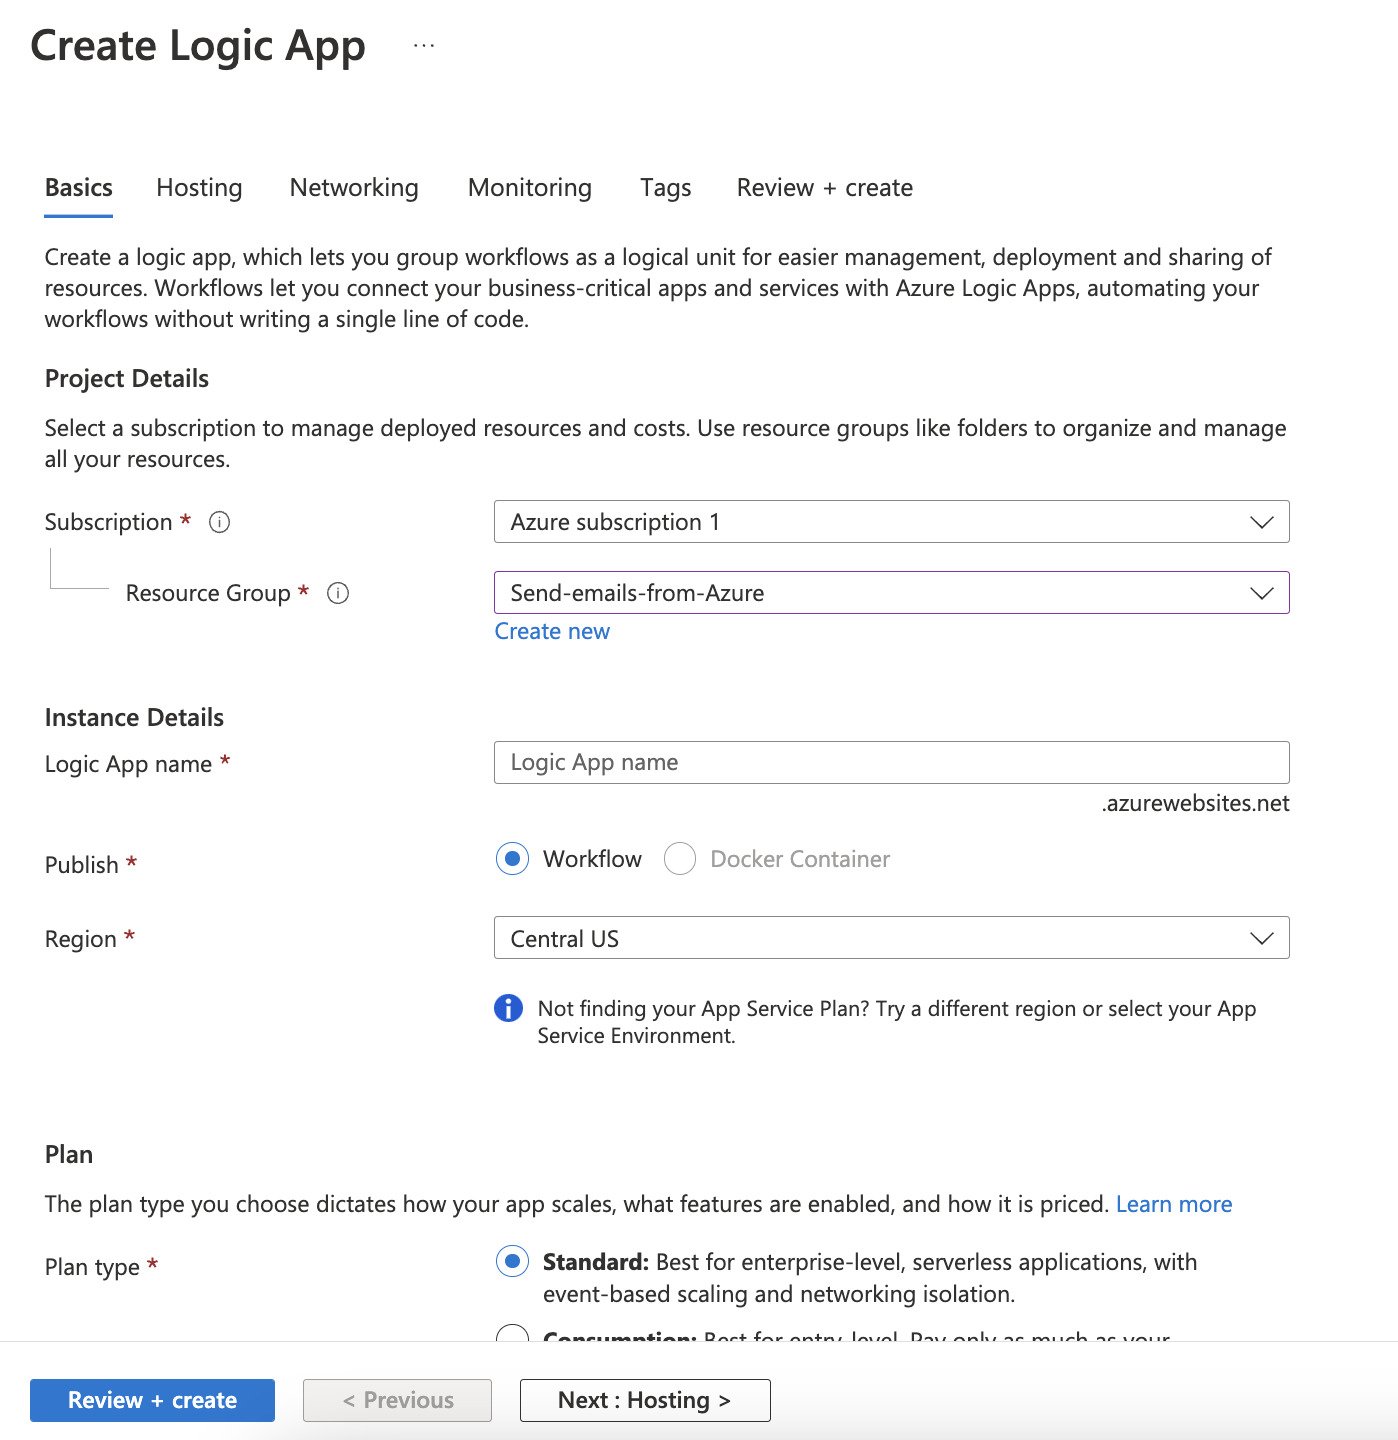
3. Click ‘Review + create’ and wait for the deployment to be completed. Click ‘Go to resource’ and navigate to the ‘Logic app designer’ tab. Select the ‘Blank Logic App template to start with a blank canvas.
4. Create a trigger that will be followed with an SMTP action. For example, you could use a ‘Recurrence’ trigger to send an email on a regular basis (such as every hour or every day), or you could create a ‘Salesforce trigger’ to send an email to a new lead;
5. Press ‘New step’ and type SMTP in the search box. Select ‘SMTP’ and press ‘Send email’;
6. Now go to your Mailtrap Email Sending account, navigate to the ‘API and SMTP’ tab, and copy your SMTP credentials;
7. Go back to the Azure Logic App and fill out the empty fields with the SMTP credentials you copied in the previous step. Note: You should use the username and password indicated in the SMTP tab in your Mailtrap account;
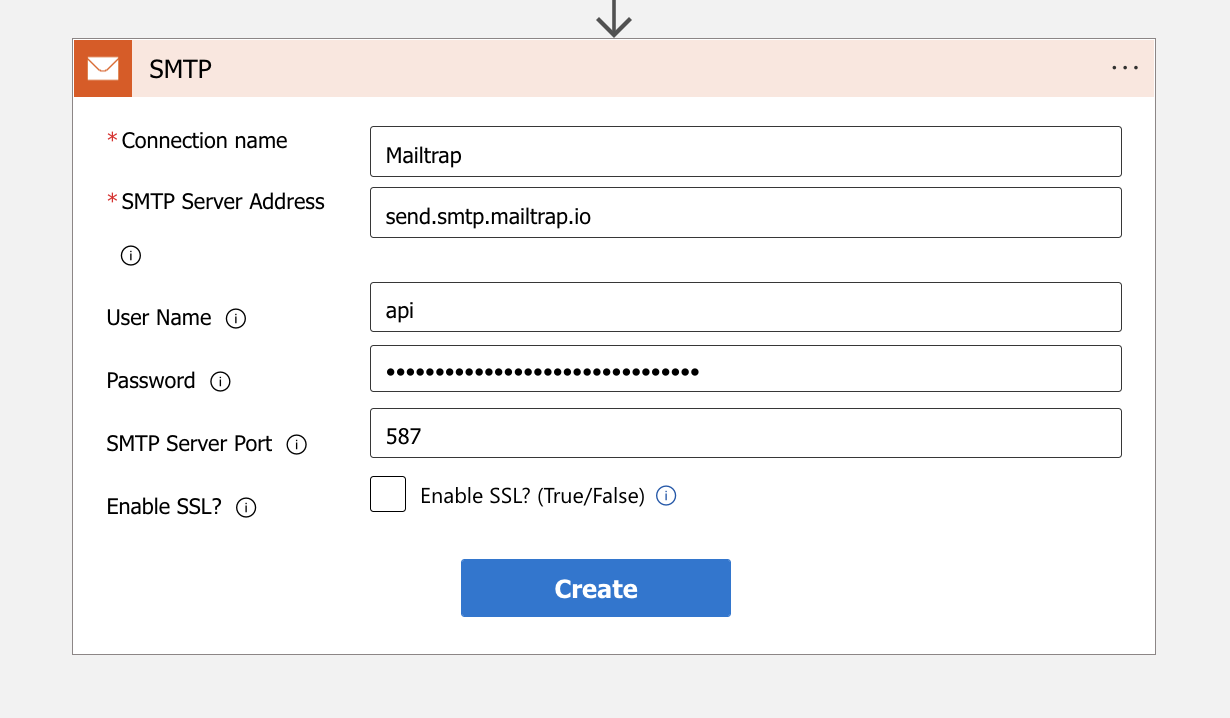
8. Press ‘Create’ and then ‘Add parameter’. Select all the parameters you want to include in your email;
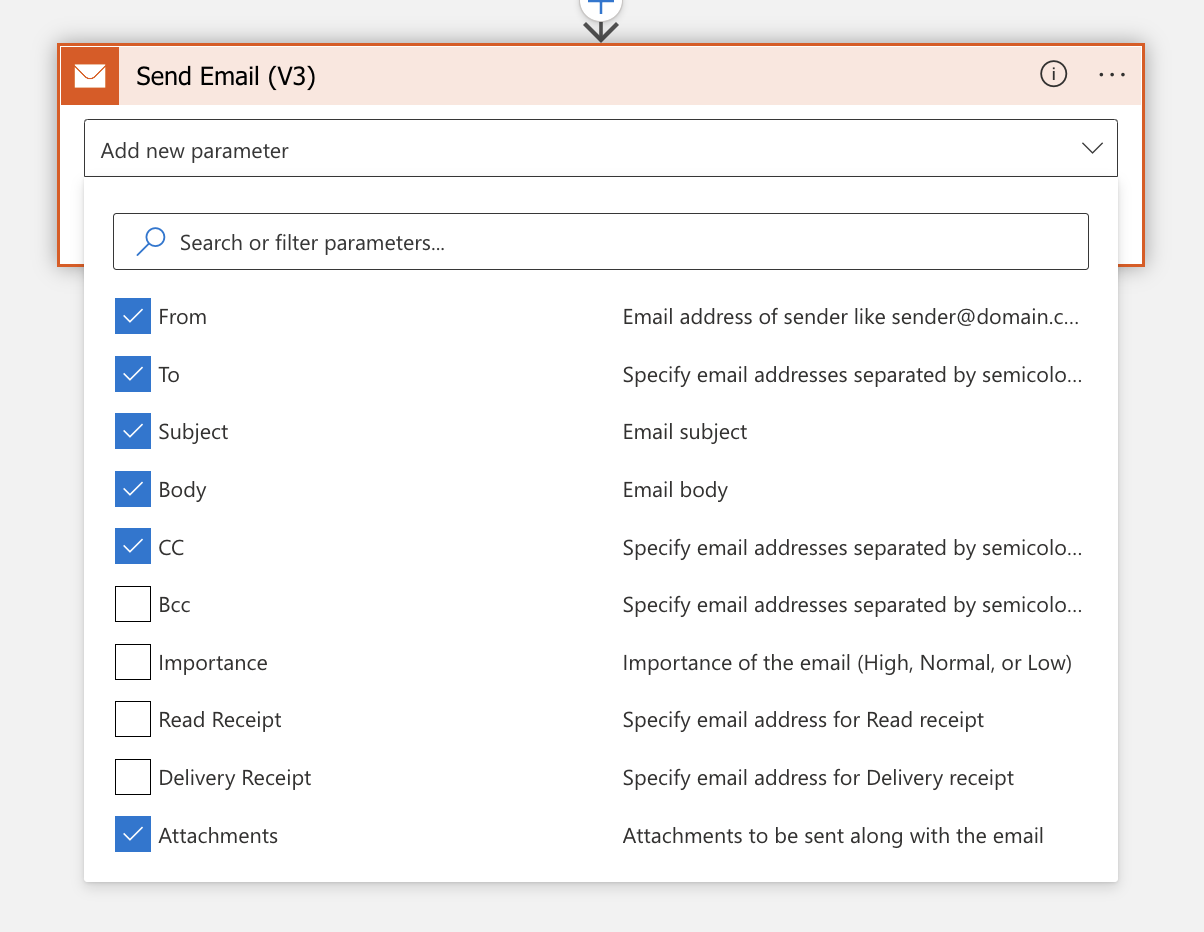
9. Compile an email by specifying From, To, Subject, and Body parameters;
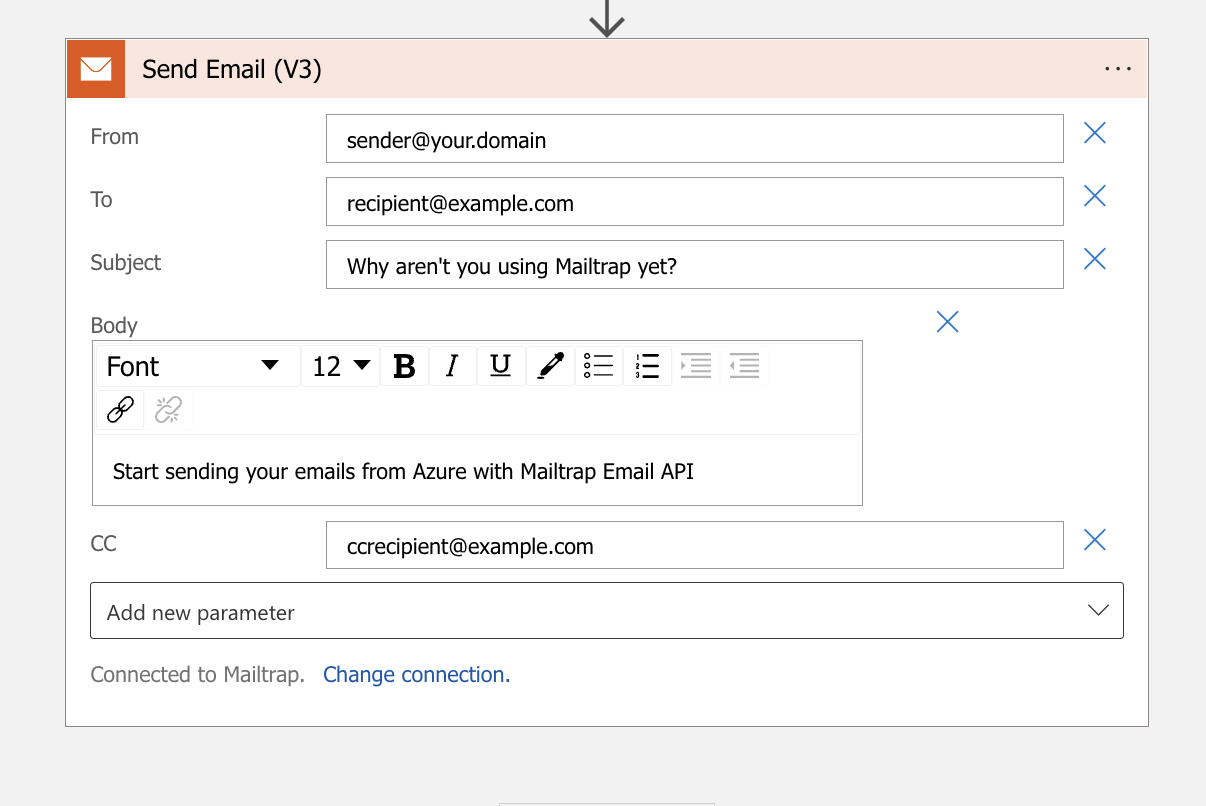
10. Save the Logic App to start sending emails in response to the selected trigger.
Finally, you can use Microsoft PowerShell and its Send-MailMessage command to integrate Email Sending with Azure using SMTP.
Open a new PowerShell session and use Send-MailMessage cmdlet to start compiling an email. Copy the credentials of Mailtrap’s SMTP server. Paste the host (live.smtp.mailtrap.io) in the SmtpServer parameter and your Mailtrap username and password in the SmtpCredentials parameter:
$smtpServer = "live.smtp.mailtrap.io"
$smtpFrom = "sender@your.domain"
$smtpTo = "recipient@example.com"
$messageSubject = "Test Email"
$message = New-Object System.Net.Mail.MailMessage $smtpfrom, $smtpto
$message.Subject = $messageSubject
$message.IsBodyHTML = $true
$message.Body = "<h1>Hello World!</h1>"
$smtp = New-Object Net.Mail.SmtpClient($smtpServer)
$smtp.EnableSsl = $true
$smtp.Credentials = New-Object System.Net.NetworkCredential("YOUR_USERNAME", "SECRET_API_TOKEN");
$smtp.Send($message)
It’s possible to run PowerShell from the Azure Function. We’ll talk about creating and using Azure Function Apps below.
Send emails from Azure with Mailtrap via API
You can send emails from Azure using Mailtrap Email Sending and Azure Function App.
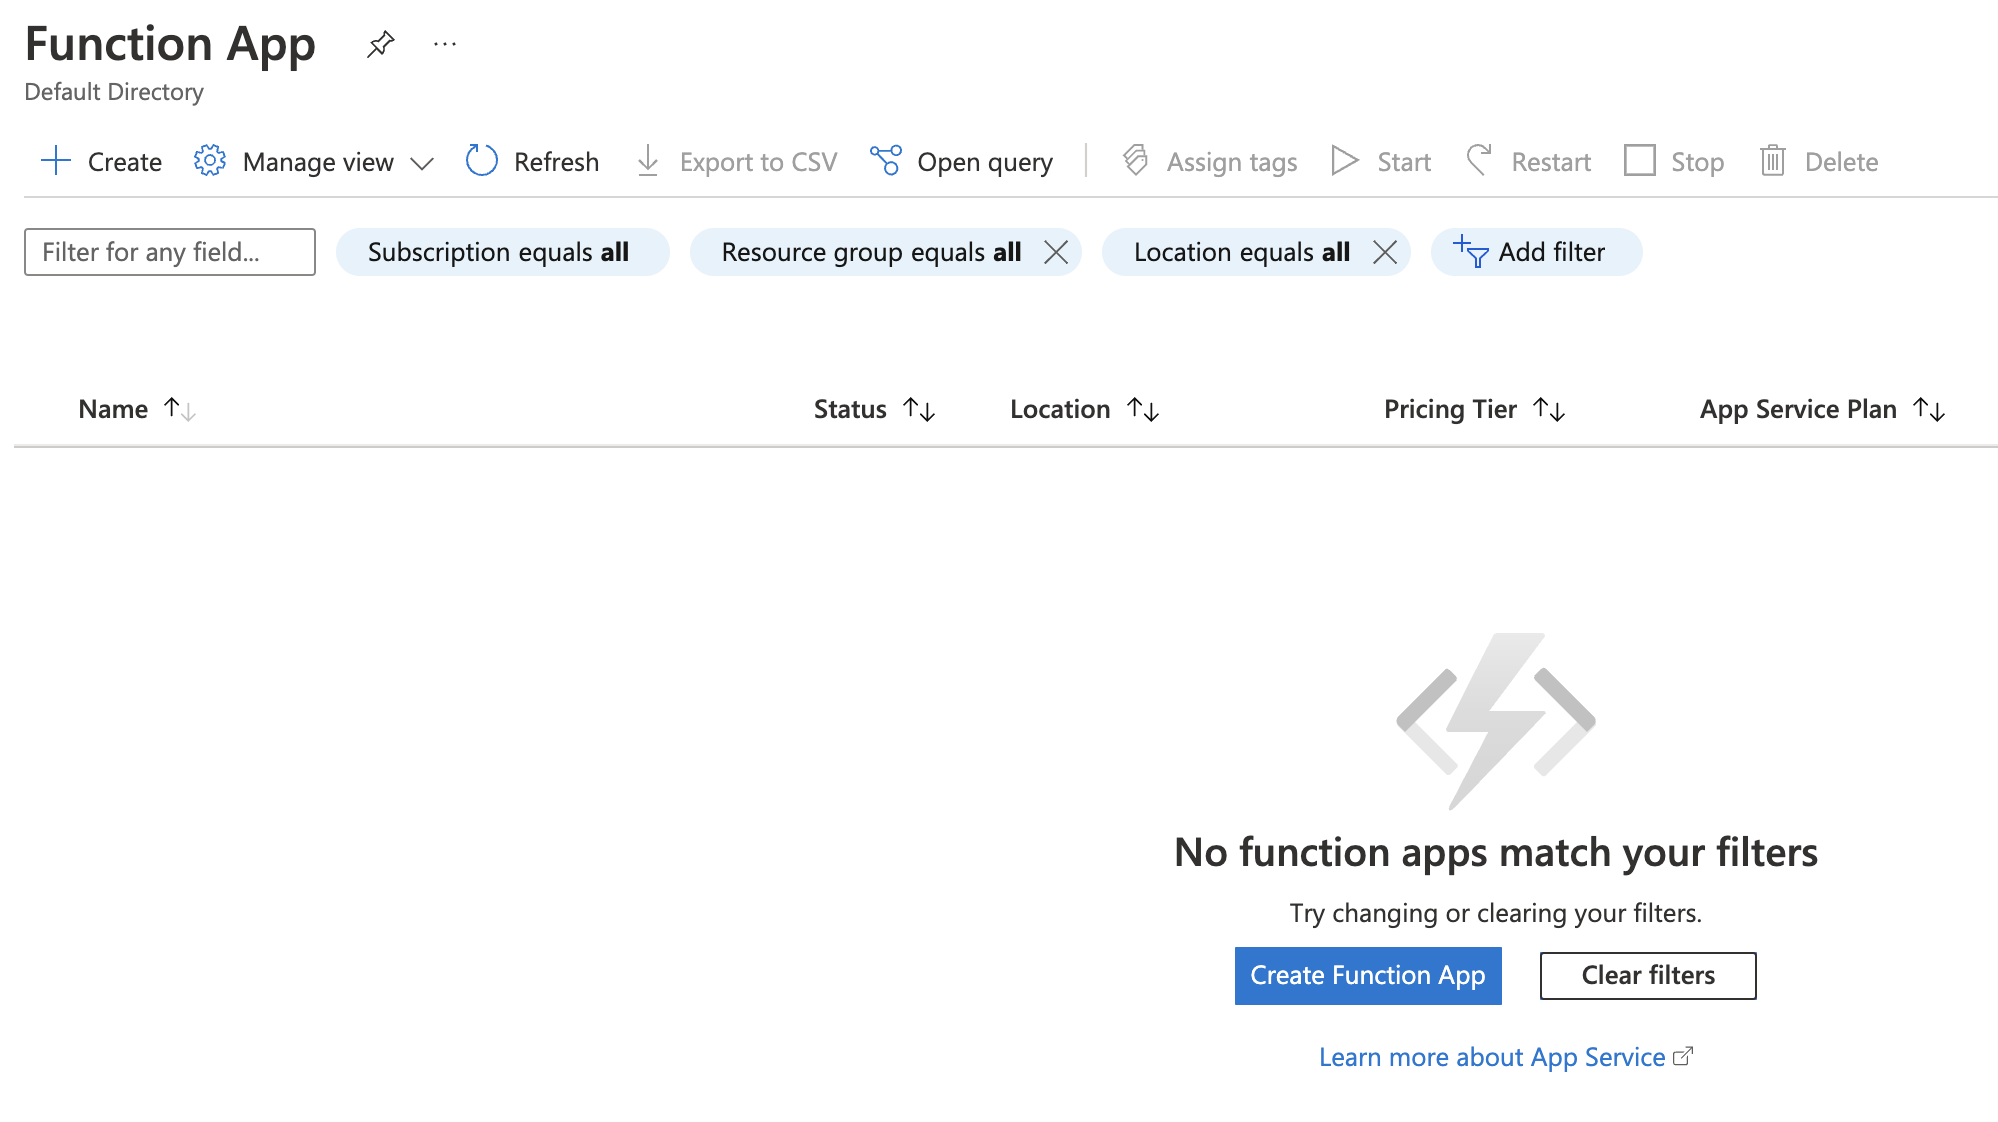
1. Go to the Azure portal and type ‘Function App’ in the search box;
2. Open Function App and press ‘Create’;
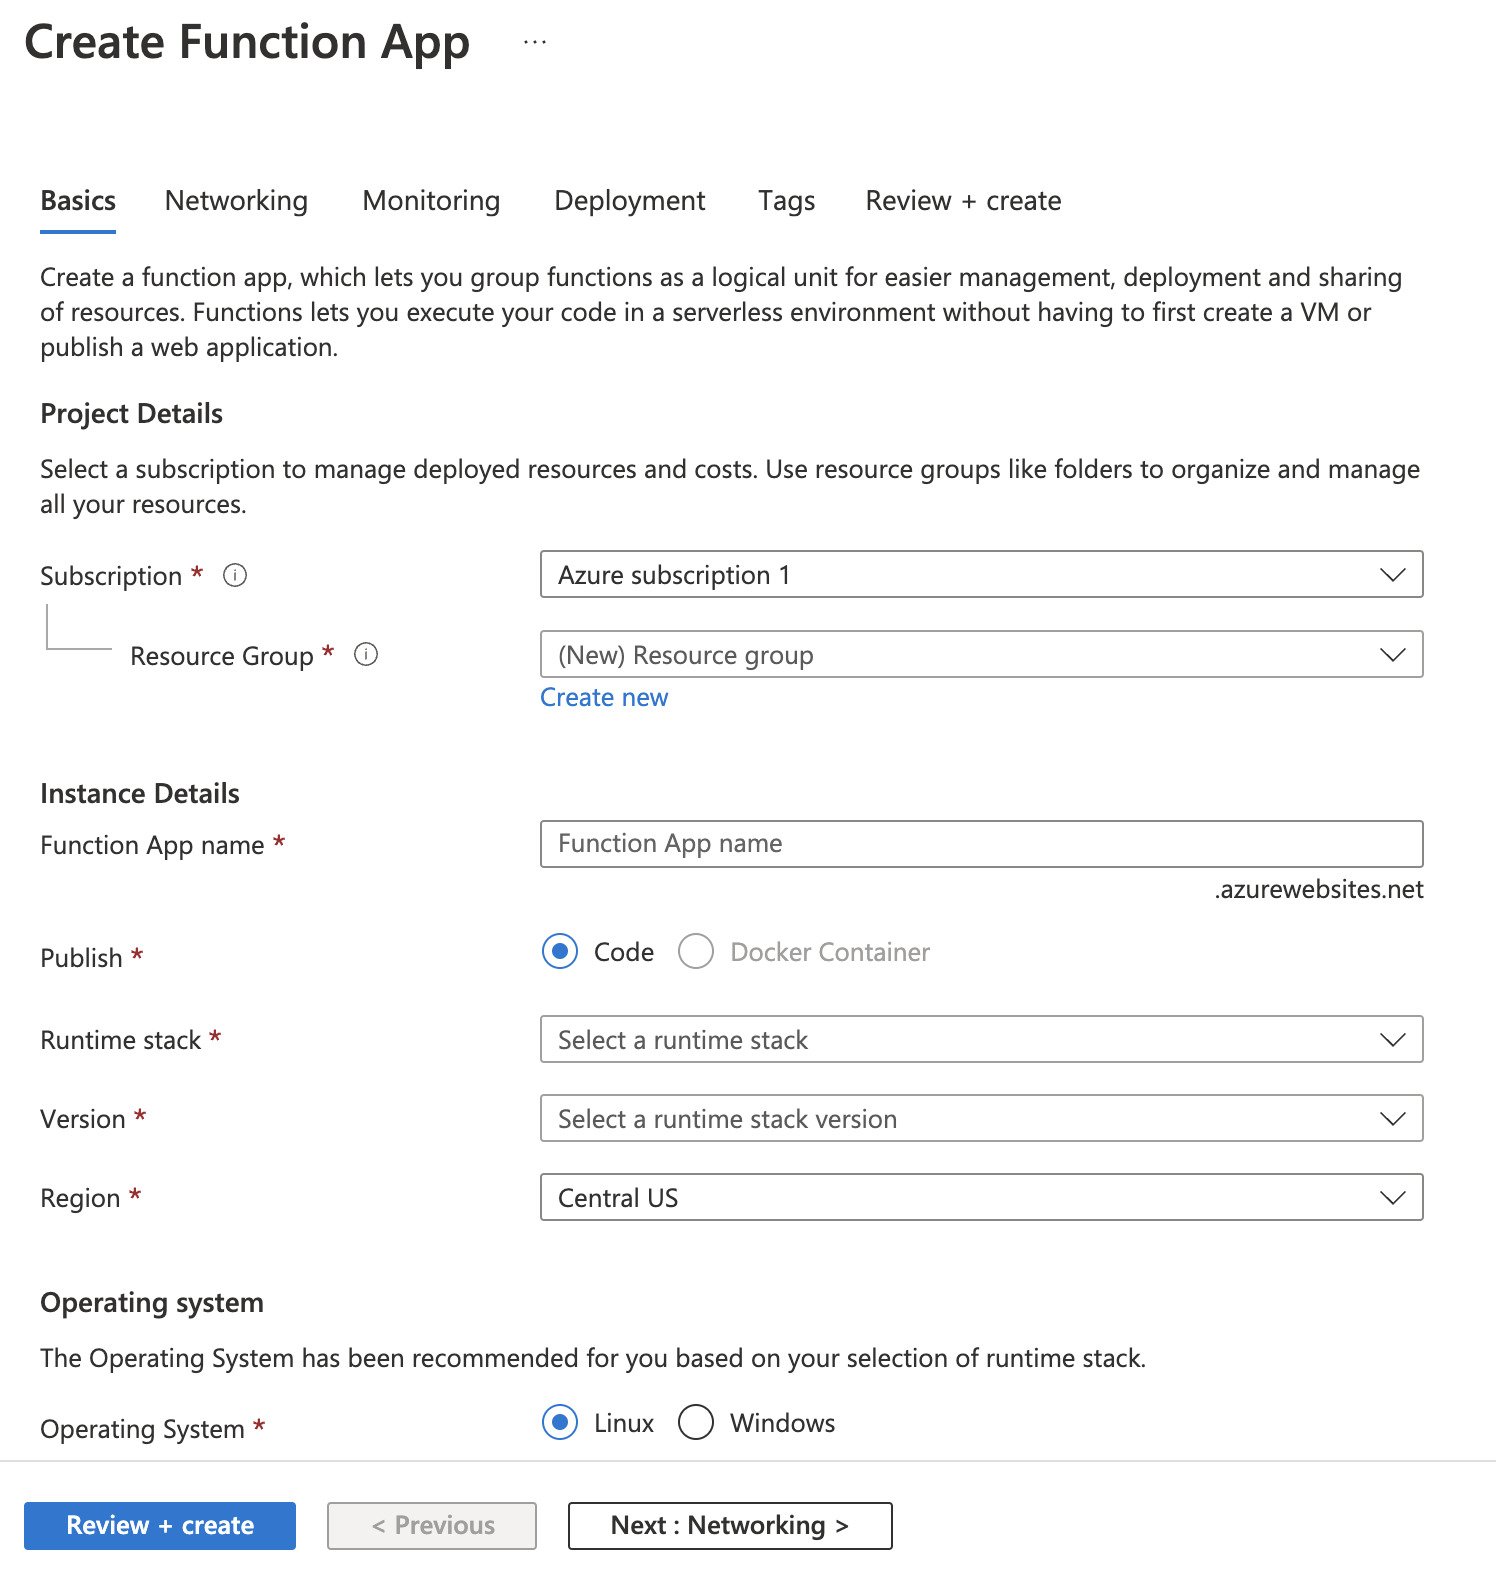
3. Fill out the details in all the tabs and press ‘Review + Create’;
4. When the deployment is complete, press ‘Go to resource’ and navigate to the ‘Functions’ tab from the left panel. Press ‘Create’;
5. Choose the development environment and select the ‘HTTP trigger’ under the templates section. Specify the name of the trigger and choose Authorization level;
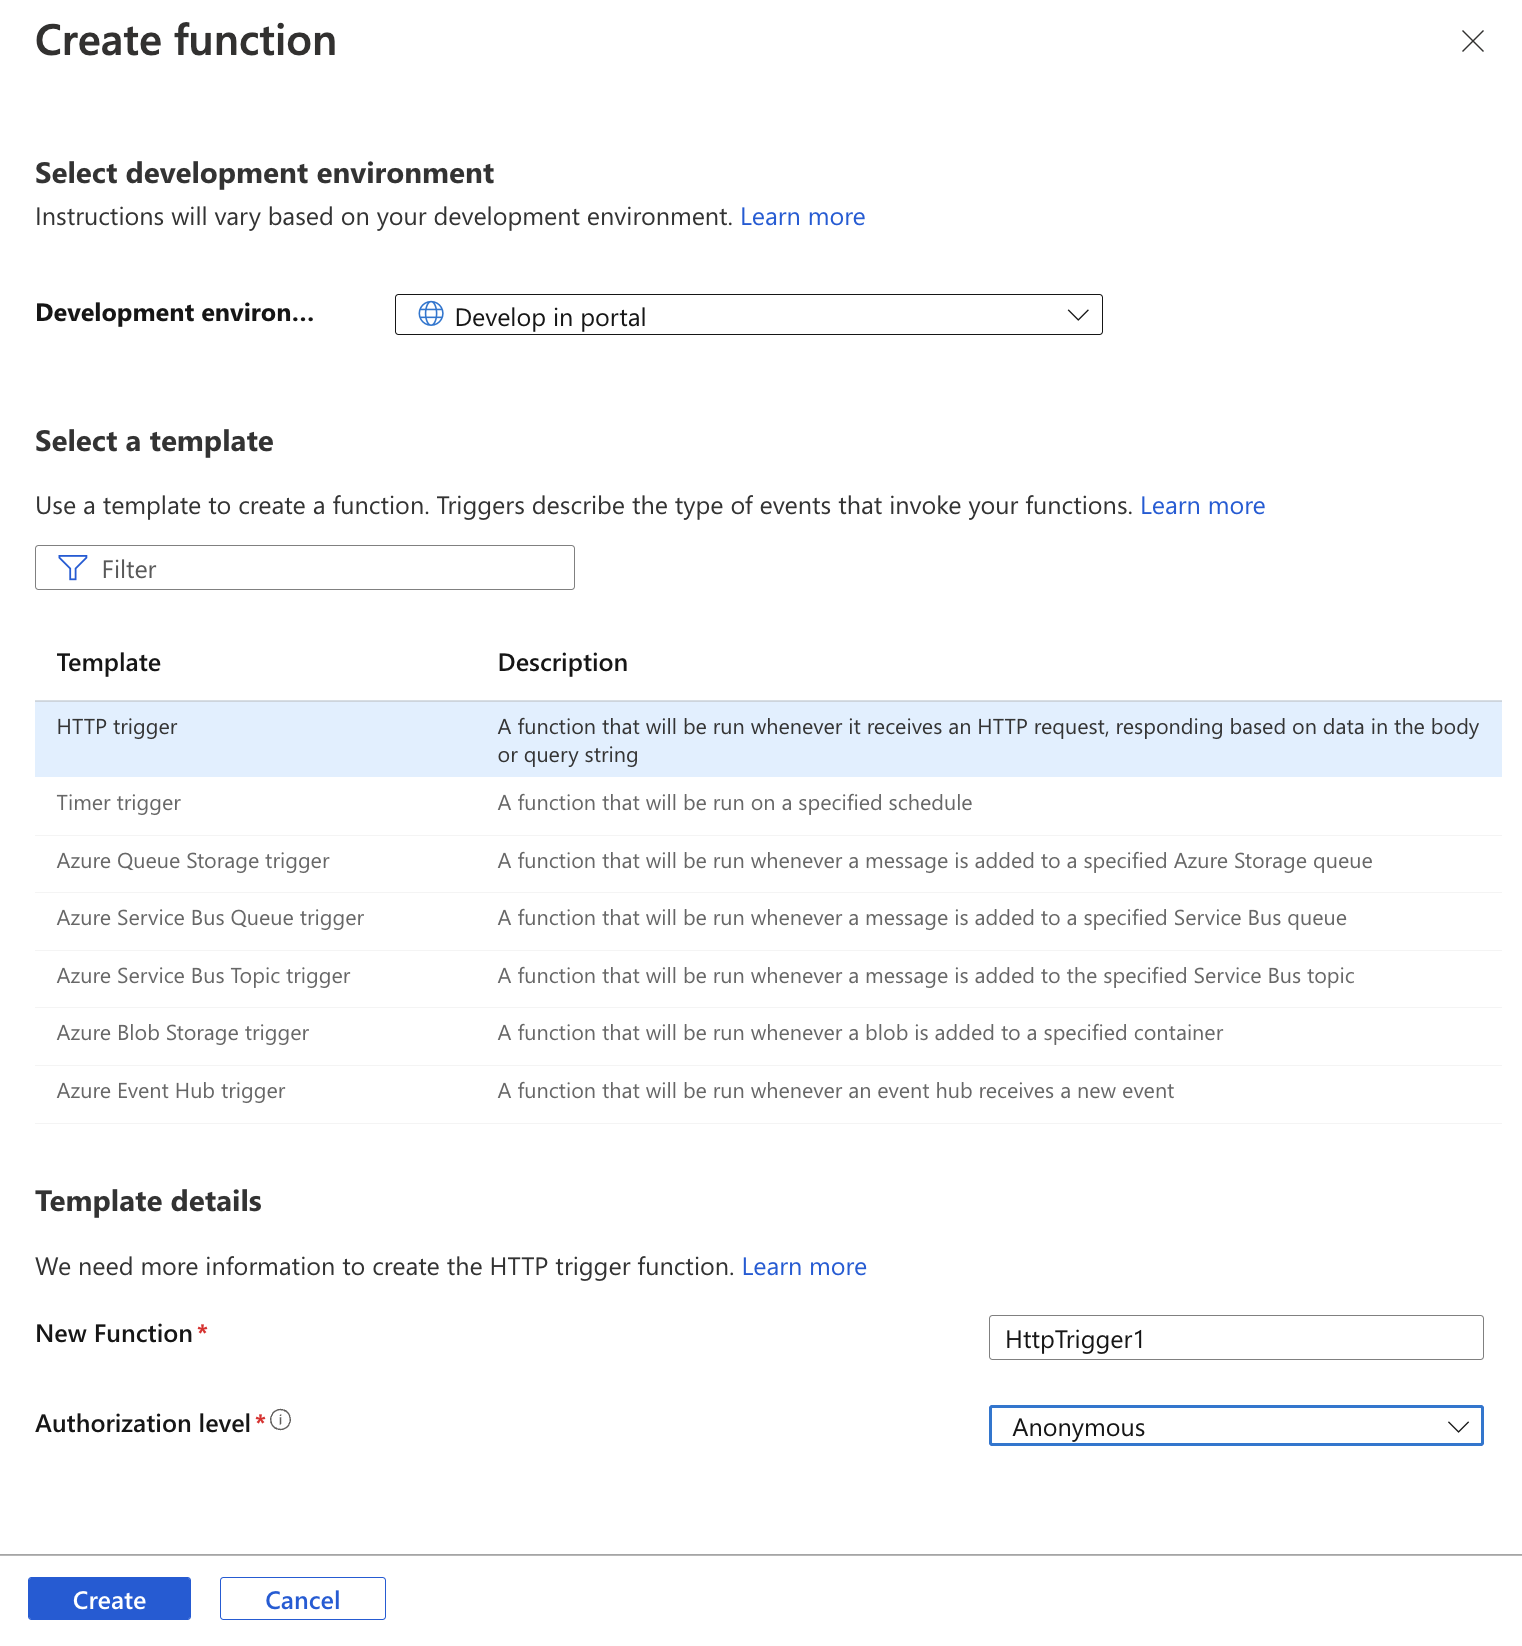
6. Click ‘Create’ and you’re Function App will be ready. Navigate to the ‘Code+test’ tab to create and test your HTTP trigger if you use the Azure portal as your development environment. If not, you can continue in your editor.
Here’s a sample code that creates an HTTP trigger and sends emails with Mailtrap via API. Replace your_api_key with your actual Mailtrap API key and the email addresses, email subject, and body with the appropriate values.
#r "Newtonsoft.Json"
using System.Net;
using System.Net.Http;
using System.Text;
using System.Threading.Tasks;
using Microsoft.AspNetCore.Mvc;
using Microsoft.Extensions.Primitives;
using Microsoft.Azure.WebJobs;
using Microsoft.AspNetCore.Http;
using Microsoft.Extensions.Logging;
using Newtonsoft.Json;
public static async Task<IActionResult> Run(HttpRequest req, ILogger log)
{
    log.LogInformation("C# HTTP trigger function processed a request.");
    string requestBody = await new StreamReader(req.Body).ReadToEndAsync();
    dynamic data = JsonConvert.DeserializeObject(requestBody);

    string toEmail = data.toEmail;
    string fromEmail = data.fromEmail;
    string subject = data.subject;
    string body = data.body;
    var msg = await SendEmailAsync(fromEmail, toEmail, subject, body);
    return new OkObjectResult(msg);
}
private static async Task<string> SendEmailAsync(string fromEmail, string toEmail, string subject, string body)
{
    try
        {
        var apiKey = "your_api_key";
        var emailContent = new
        {
                @from = new
                {
                    email = fromEmail
                },
                to = new[]
                {
                    new
                    {
                        email = toEmail
                    }
                },
                subject = subject,
                text = body
        };
        var content = new StringContent(JsonConvert.SerializeObject(emailContent), Encoding.UTF8, "application/json");
        using var httpClient = new HttpClient()
        {
            BaseAddress = new Uri("https://send.api.mailtrap.io/api/")
        };
        httpClient.DefaultRequestHeaders.Add("Authorization", $"Bearer {apiKey}");
        var response = await httpClient.PostAsync("send", content);
        return await response.Content.ReadAsStringAsync();
    }catch(Exception ex)
    {
        return ex.Message;
    }
}
Similar to SMTP, Azure Logic Apps can be used with Mailtrap API as well.
1. Create a new Logic App according to the instructions we described above and select the ‘Blank Logic App’ under the templates section;
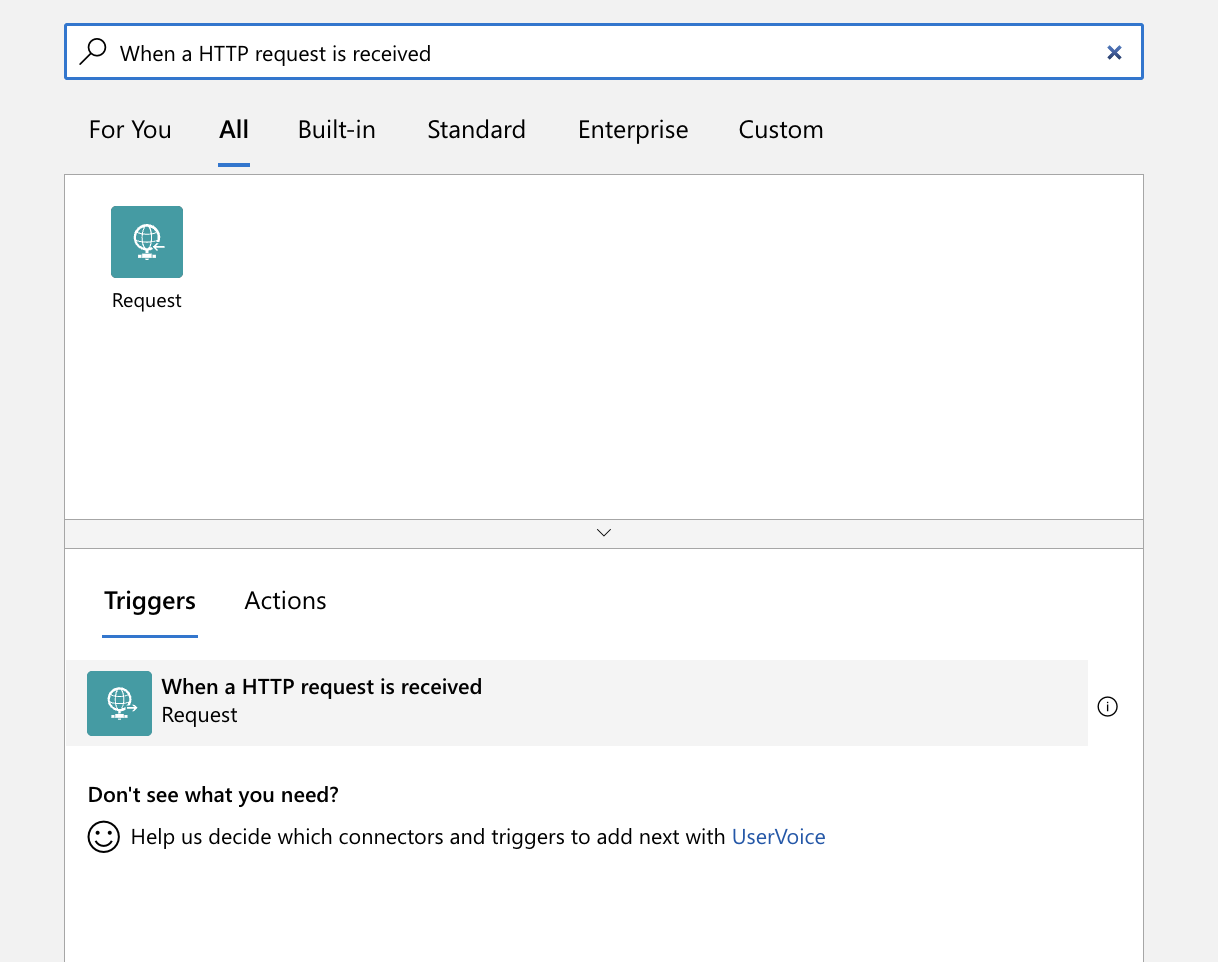
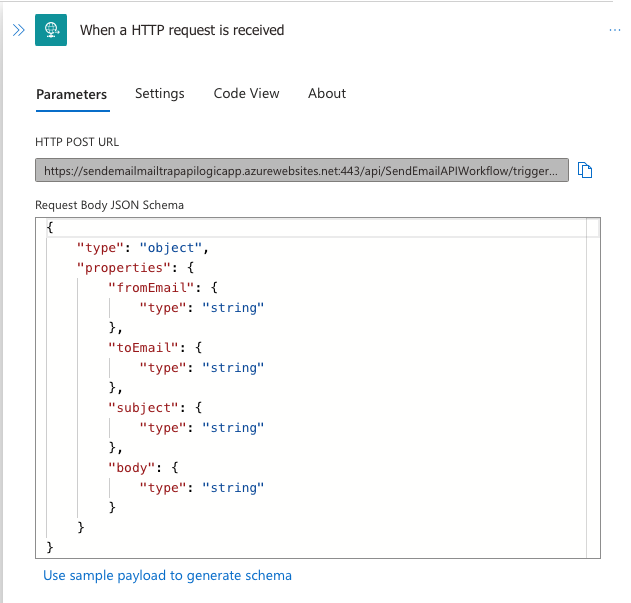
2. Search for and select the ‘When a HTTP request is received’ trigger. This trigger will be used to start your Logic App when the Mailtrap API receives a request to send an email.
3. Press ‘New Step’;
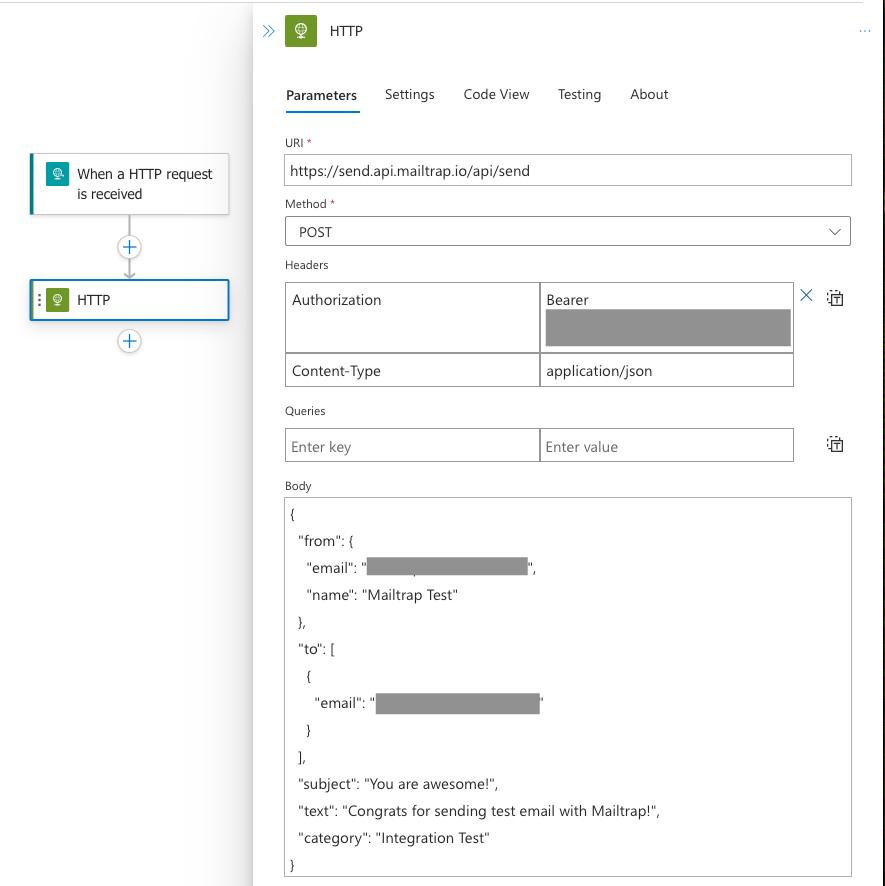
4. Add an ‘HTTP’ action. This action will be used to make an HTTP request to the Mailtrap API to send the email. In the ‘URI’ field, enter the URL of the Mailtrap API endpoint for sending emails (https://send.api.mailtrap.io/api/send);
5. In the ‘Headers’ section of the HTTP action, add two headers: ‘Content-Type’ with a value of ‘application/json’, and ‘Api-Token’ with a value of the Mailtrap API token for your account;
6. In the ‘Body’ section of the HTTP action, enter the JSON payload for the email you want to send. This should include the email’s recipient, subject, and body, as well as any other email properties you want to set up.
7. Save your Logic App and then test it by sending an HTTP request to the trigger URL. This will send the email through the Mailtrap API to the recipient’s inbox.
Here’s what a complete Logic App will look like:
{
    "triggers": {
        "when_a_http_request_is_received": {
            "inputs": {
                "method": "POST",
                "uri": "/send-email"
            },
            "recurrence": null,
            "type": "Request"
        }
    },
    "actions": {
        "http_action": {
            "inputs": {
                "method": "POST",
                "uri": "https://send.api.mailtrap.io/api/send",
                "headers": {
                    "Content-Type": "application/json",
                    "Api-Token": "<your_api_token>"
                },
                "body": {
                    "to": "recipient@example.com",
                    "subject": "Test email from Azure Logic App",
                    "text": "This is a test email sent from an Azure Logic App using the Mailtrap Email API"
                }
            },
            "runAfter": {},
            "type": "Http"
        }
    },
    "outputs": {},
    "metadata": {
        "flowSystemMetadata": {
            "
Send emails from Azure with Office 365
If you have an Office 365 subscription, you can use it to send and receive emails from Azure web apps. You’ll need to insert your SMTP server credentials and employ the System.Net.Mail class. Check out the following script as an example:
namespace SmtpMail {
class Program {
static void Main() {
MailMessage msg = new MailMessage();
msg.To.Add(new MailAddress("user@recipient.com", "The Recipient"));
msg.From = new MailAddress("user@sender.com", "The Sender");
msg.Subject = "Test Email from Azure Web App using Office365";
msg.Body = "<p>Test emails on Azure from a Web App via Office365</p>";
msg.IsBodyHtml = true;
SmtpClient client = new SmtpClient();
client.UseDefaultCredentials = false;
client.Credentials = new System.Net.NetworkCredential("<Office365-username>", "<Office365-password>");#insert your credentials
client.Port = 587;
client.Host = "smtp.office365.com";
client.DeliveryMethod = SmtpDeliveryMethod.Network;
client.EnableSsl = true;
try {
client.Send(msg);
statusLabel.Text = "Email Successfully Sent";
}
catch(Exception ex) {
statusLabel.Text = ex.ToString();
}
}
}
}
Office 365 Outlook connector
Microsoft Azure provides a connector to Outlook Office 365 in the Azure logic app. You already know how to create a Logic App, so we can skip directly to the Logic app designer.
Browse Office 365 in the search box and select it.

Pick an action and a trigger. For example:
- Action: Send an email.
- Trigger: When an upcoming event is starting soon.
You’ll be offered to sign in to Office 365. The connection has been created. Now, let’s tweak both the action and the trigger:
The Trigger
- Select a calendar from the drop-down list.
- Adjust Frequency and Interval. For example, we need to trigger the action (Send an email) 10 minutes before the calendar event is about to start: set Frequency to Minute, Interval to 15.
- Save your changes.
The Action
- Add a Send an email action.
- Adjust variables and save changes.
Now, your logic app is saved and automatically enabled.
Send emails from Azure with Gmail
To send emails from Azure with Gmail, you have two options:
- Create an SMTP action in Azure Logic Apps as we did with Mailtrap Email API. You just need to insert the credentials for your Gmail’s SMTP server;
- Create a connector the way we did for Office 365 Outlook. Use ‘When a HTTP request is received’ as a trigger and choose Gmail and ‘Send Email’ as an action. You’ll be redirected to a window in which you should sign into your Google account. Simply choose To addresses and compile an email by selecting parameters from the dropdown menu.
How to test emails before sending them from Azure
No matter which method of sending emails you choose for your Azure project, you can’t skip the testing portion of the development. You have to make sure your emails are bug-free before you start sending them to the recipients. To avoid the hassles of manual testing, it’s recommended to opt for a tool that is specifically designed for email testing.
Mailtrap Email Testing, a part of the Mailtrap Email Delivery Platform, is an Email Sandbox for inspecting and debugging emails in staging and dev environments. With Email Testing, you can validate HTML/CSS, test Bcc email headers, view emails in raw and text formats, and analyze them for spam and blacklists.
Try Mailtrap Email Testing Today
To test emails in your Azure project, you’ll need to integrate Mailtrap Email Testing with your app via an API or SMTP or send emails directly to your inbox.
- Sign in to your Mailtrap account and navigate to the ‘Email Testing’ tab;
- Select your preferred inbox;
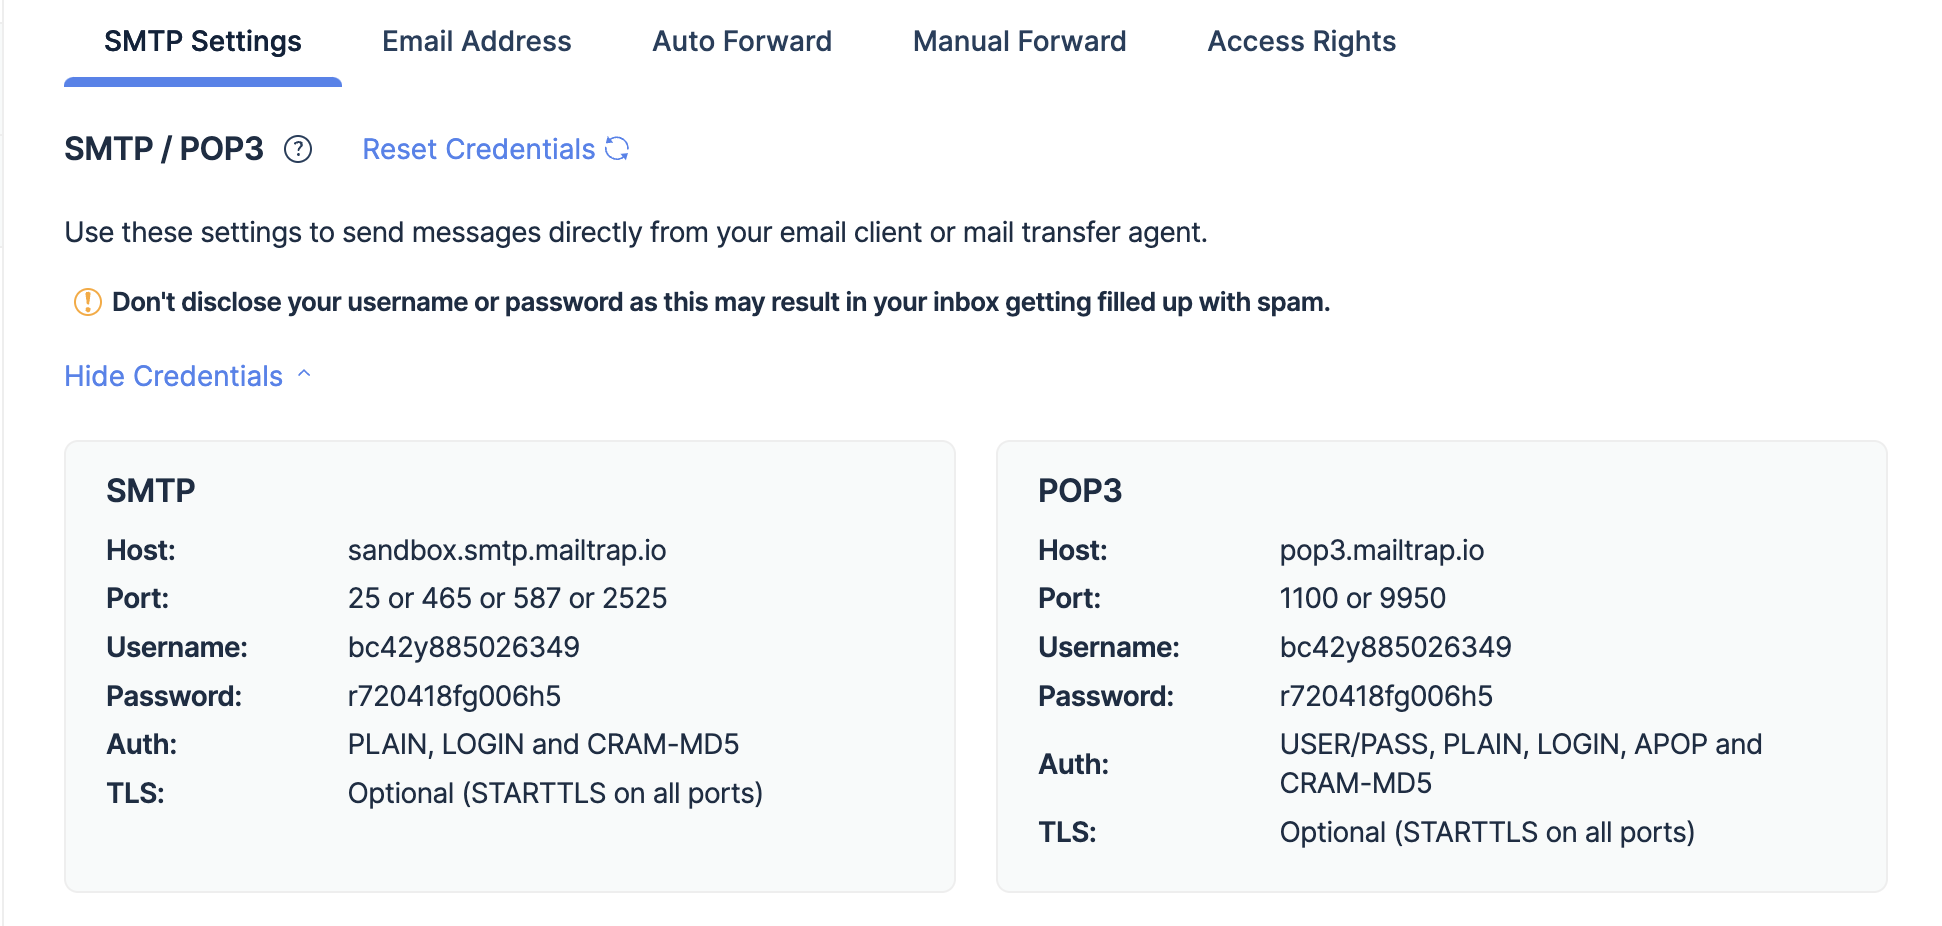
- Open the ‘SMTP Settings’ tab where you’ll find API integrations for different programming languages;
- Choose the language you’re using with your Azure app from the dropdown menu:
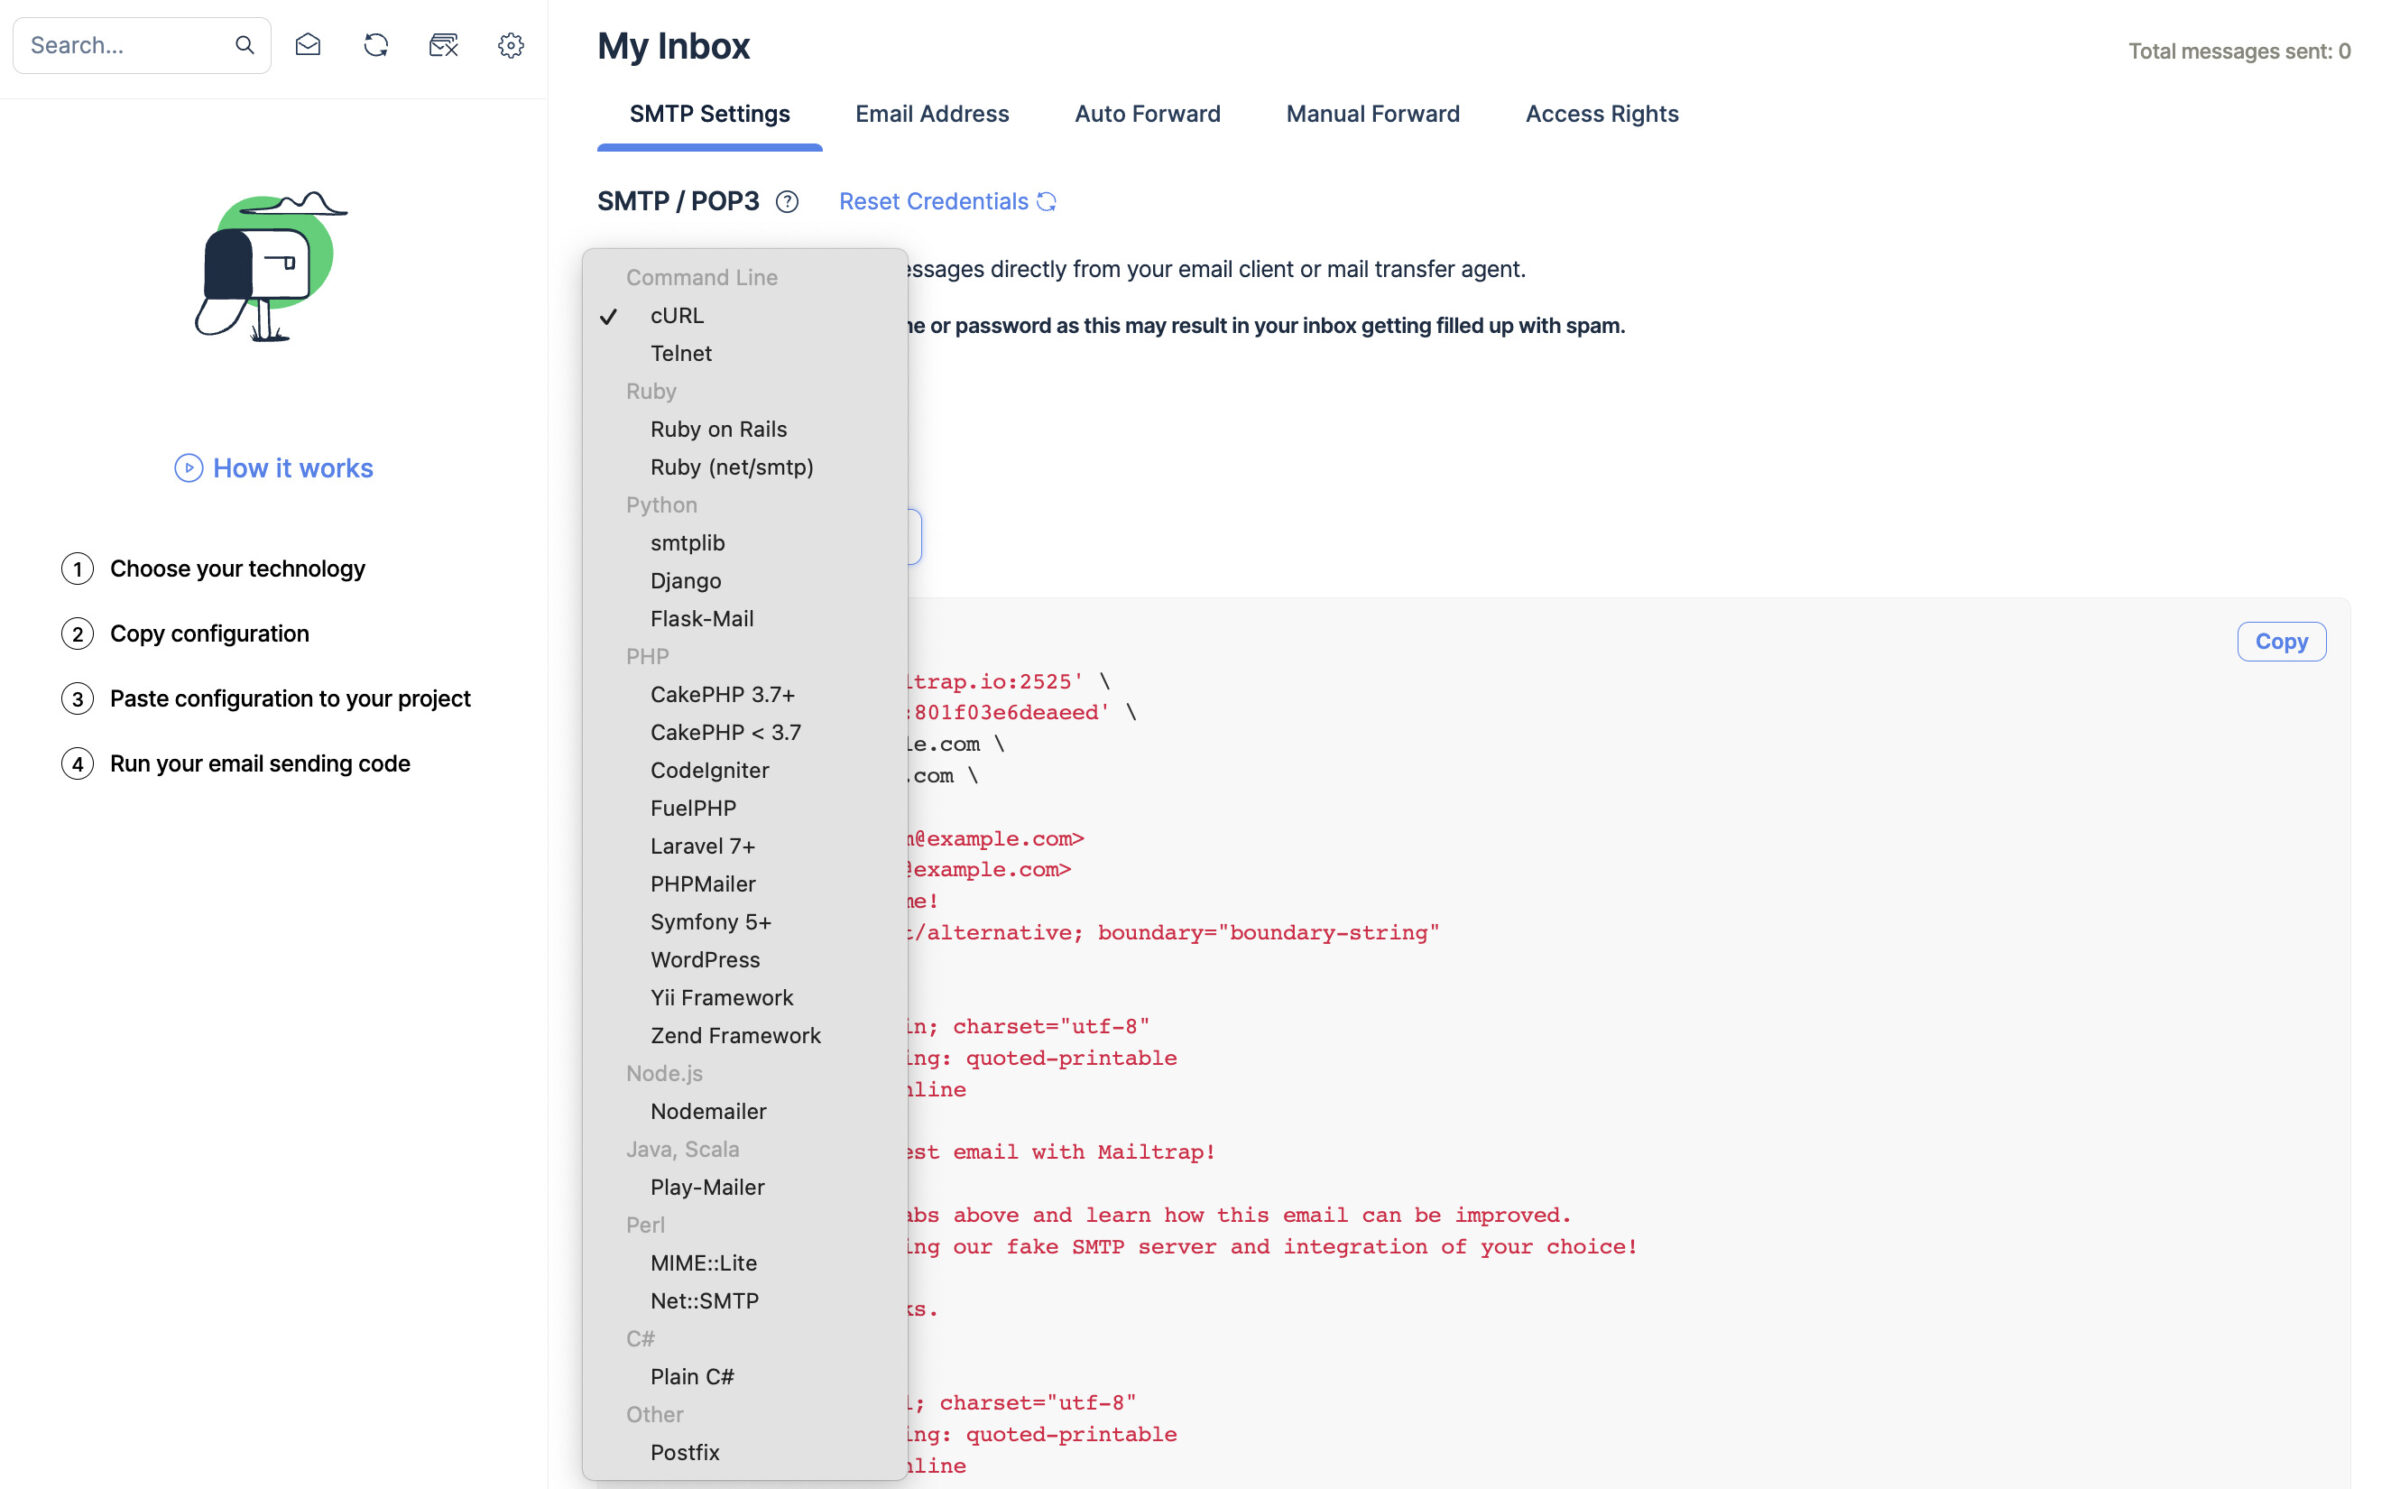
This is what a sample code would look like in C#:
using System;
using System.Collections.Generic;
using System.Linq;
using System.Text;
using System.Net.Mail;
using System.Net;

namespace ConsoleApplication2
{
    class Program
    {
        static void Main(string[] args)
        {
            var client = new SmtpClient("sandbox.smtp.mailtrap.io", 2525)
            {
                Credentials = new NetworkCredential("Username", "Password"),
                EnableSsl = true
            };
            client.Send("from@example.com", "to@example.com", "Hello world", "testbody");
            Console.WriteLine("Sent");
            Console.ReadLine();
        }
    }
}
For SMTP integration, press ‘Show Credentials’ in the ‘SMTP Settings’ tab. Copy credentials and use them to send emails from your email client.
If you wish to send emails directly to Mailtrap’s inbox, navigate to the ‘Email Address’ tab and copy the email address you’ll see there.
Note: the email address feature is available for Business, Premium, and Enterprise plans.
Wrapping up
As a cloud computing platform, Azure supports multiple ways of sending emails. For more hands-on learning, check out these interactive cloud courses covering cloud technologies, including Microsoft Azure. We covered most of them from Azure Email Communication Service to Outlook and Gmail connectors. We also touched upon third-party SMTP services such as Mailtrap Email Sending.
Don’t forget to test your emails before sending them to users with Mailtrap Email Testing. That way, you’ll avoid spamming real inboxes with your test emails.
To find more information on sending emails from frameworks that are compatible with Azure, check out our blog posts about Go, Python, JavaScript, Java, and C#.
Thanks for reading!


Comments
3 replies