SendGrid To Mailtrap:
A Migration Guide
This guide covers core principles of how to migrate from SendGrid to Mailtrap seamlessly: terminology comparisons, SMTP or API Configurations, and other tech specifications needed for the smooth switch.


Key Differences Between SendGrid and Mailtrap
- Depending on the pricing plan, Mailtrap stores emails in the Email Logs for up to 30 days. Email content and historical data are stored and accessible for 3 to 7 days without any additional fees.
- You can request annual billing/plan with Mailtrap, not only monthly-billed plans.
Terminology comparison
- User Management
- Templates
- Suppressions
- Email Categories
- Webhooks
- Headers
- X-MT-Custom-Variables
- Teammates
- SendGrid Templates
- Suppressions
- Categories
- Webhooks
- X-SMTPAPI
- unique_args
General step-by-step flow for migration
-
Sign up for Mailtrap, add your sending domain under the Sending Domains menu, and verify it. For more details, see our Getting Started Guide for more details.

-
If you use SMTP service, change your settings accordingly.
-
If you use API, check our libraries and API documentation.
-
Export your contacts list from SendGrid as CSV and import them to Mailtrap. Check our step-by-step guide.
Need some help?
Contact our support and our tech experts will help you with it.

-
You can also import your email templates as HTML or create new ones using an HTML or drag-and-drop template builder. For more information, go to the Email Templates guide.
-
In case you plan to send more than 200K emails a month, contacting Mailtrap support is highly recommended. They will help you through the process, assign a dedicated IP, and check if everything is set up correctly.
Mailtrap Tip
Use ActionMailer Balancer Ruby gem to proportionally distribute the email sending load between two different sending services (e.g. 70% SendGrid and 30% Mailtrap) to mitigate the sending risks.


Getting started
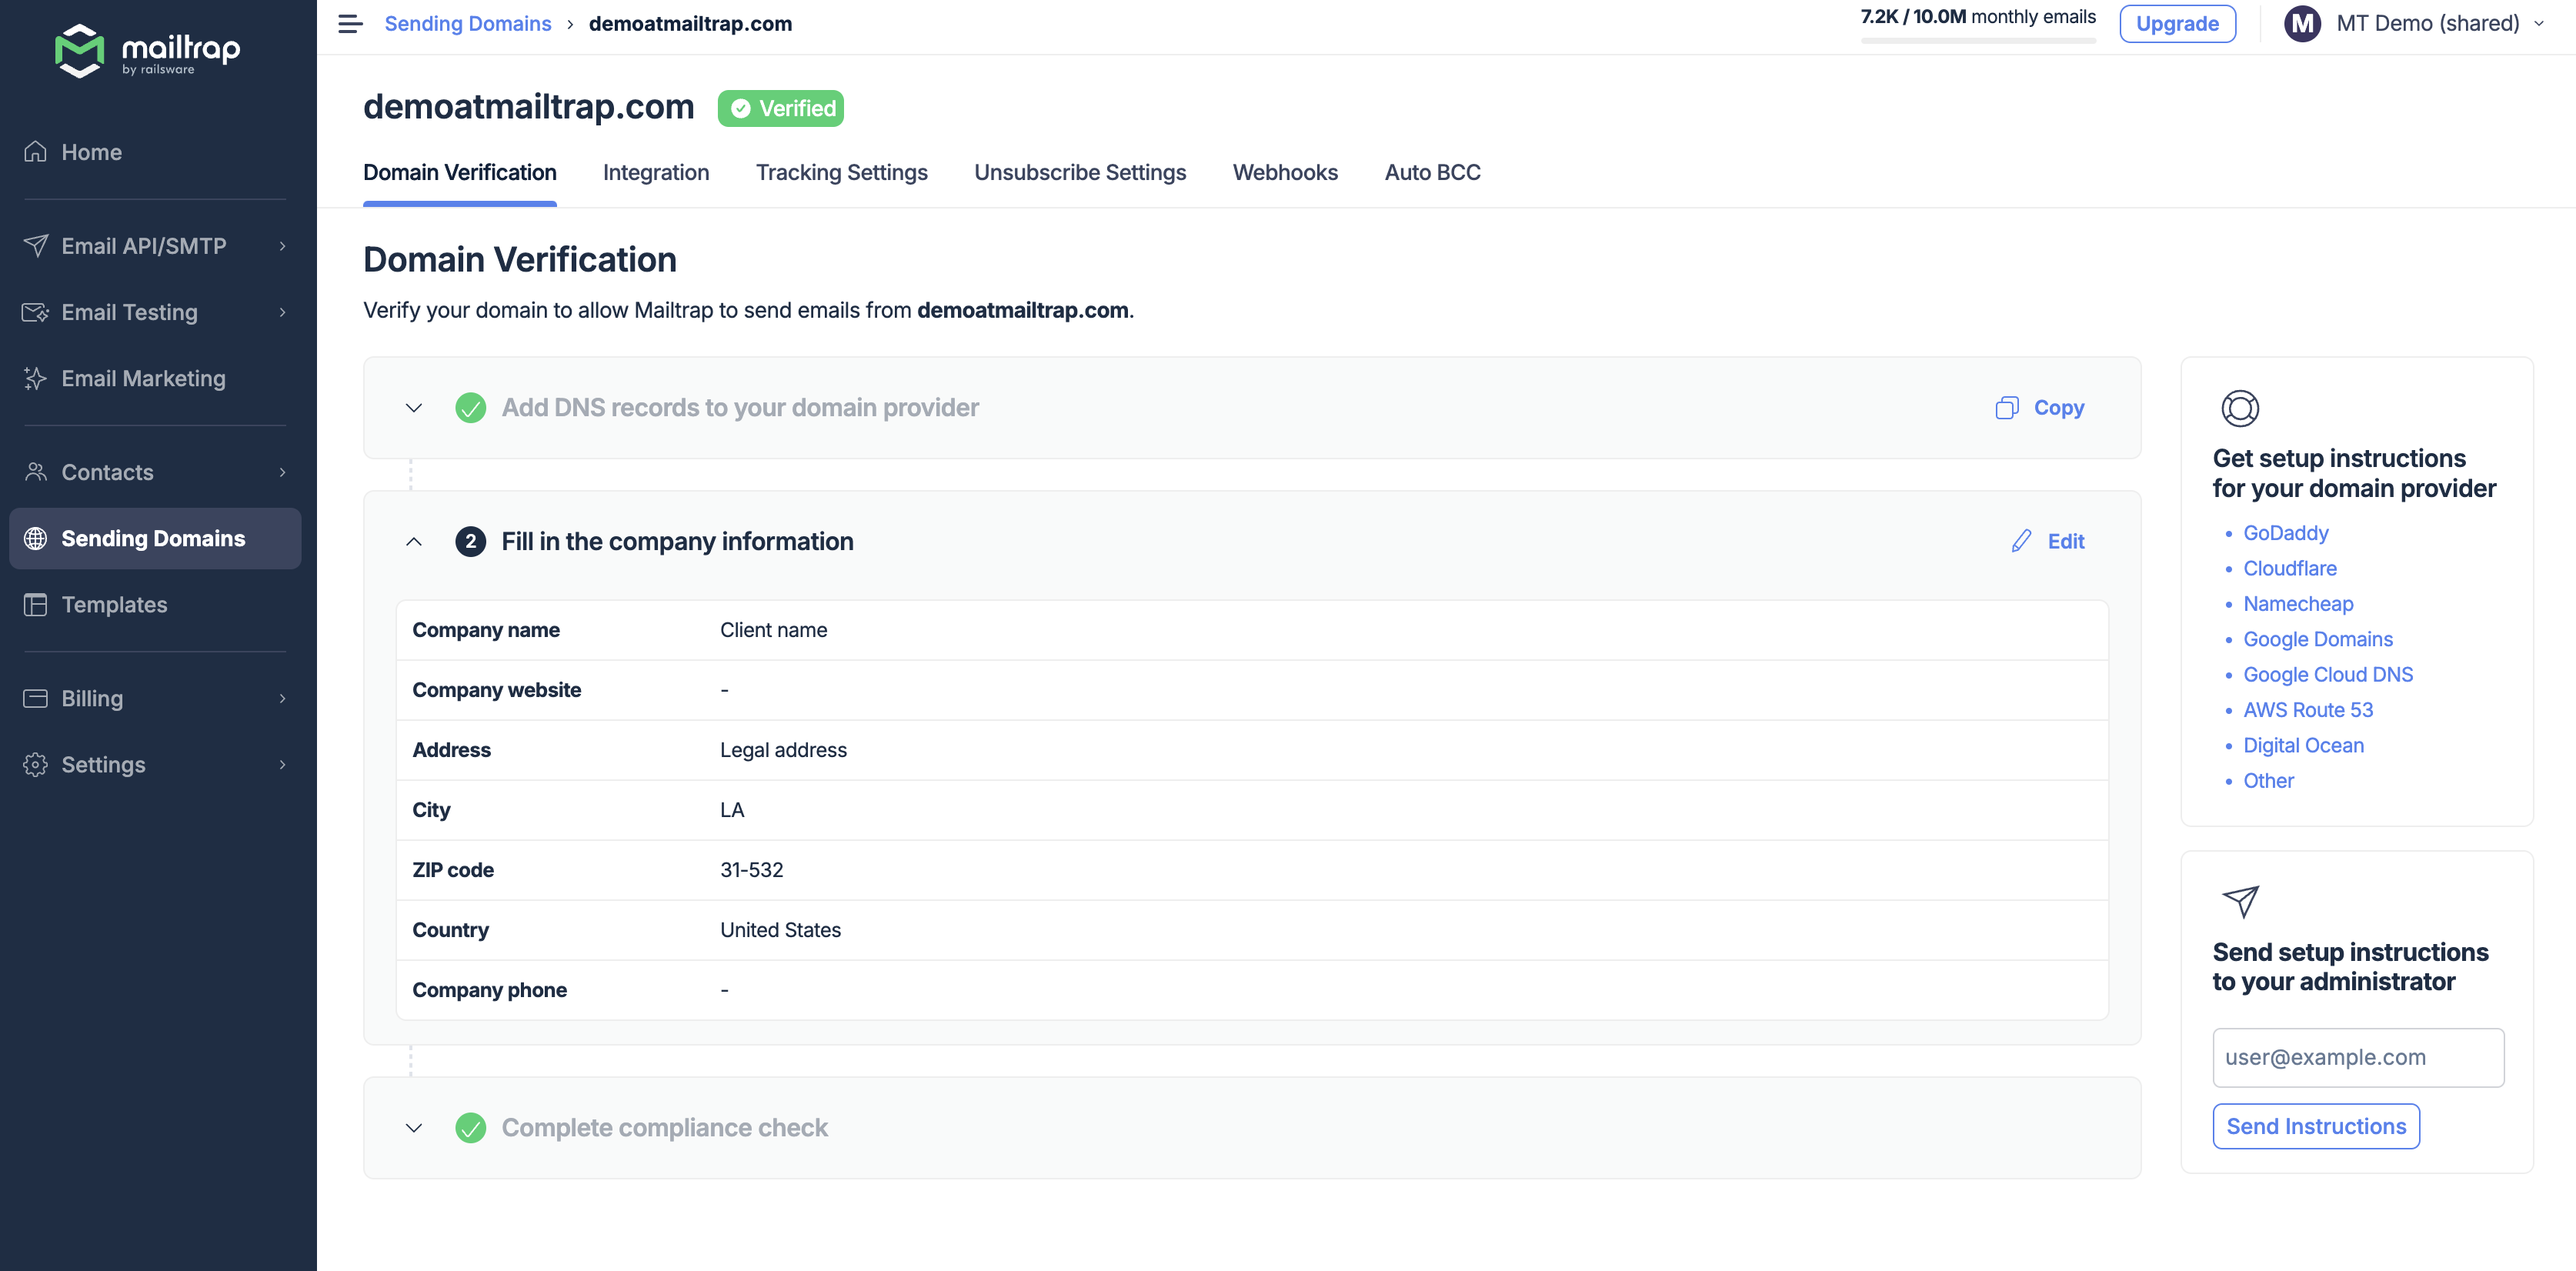
To start sending emails with Mailtrap, you only need to create an account and verify your domain. Domain setup and verification are done from the Sending Domains menu. Read this article to learn more about that process.
Domain verification
- Once your domain is verified using the provided DNS records, it undergoes an automatic Compliance Check. This process usually takes from a couple of minutes to several hours. You can send emails only after the Compliance Check is fully passed and you see the verified status next to your domain.
- Set unsubscribe options with Mailtrap and import your suppression lists from SendGrid. As a reminder, import your email list and HTML templates into Mailtrap.
- Optionally, create webhooks to receive information about bounces, spam complaints, opens, clicks, and other events.
- Enable open and click tracking to understand how customers interact with your emails.
Sending with Mailtrap SMTP
SMTP Endpoints
| live.smtp.mailtrap.io bulk.smtp.mailtrap.io | smtp.sendgrid.net |
SMTP Ports
| Port | Function | Mailtrap support | SendGrid support |
| 587 | Recommended for encrypted TLS SMTP connection | ||
| 25 | May be problematic due to blocking by some mailbox providers to avoid abuse | ||
| 2525 | For unencrypted/TLS |
SMTP Configuration
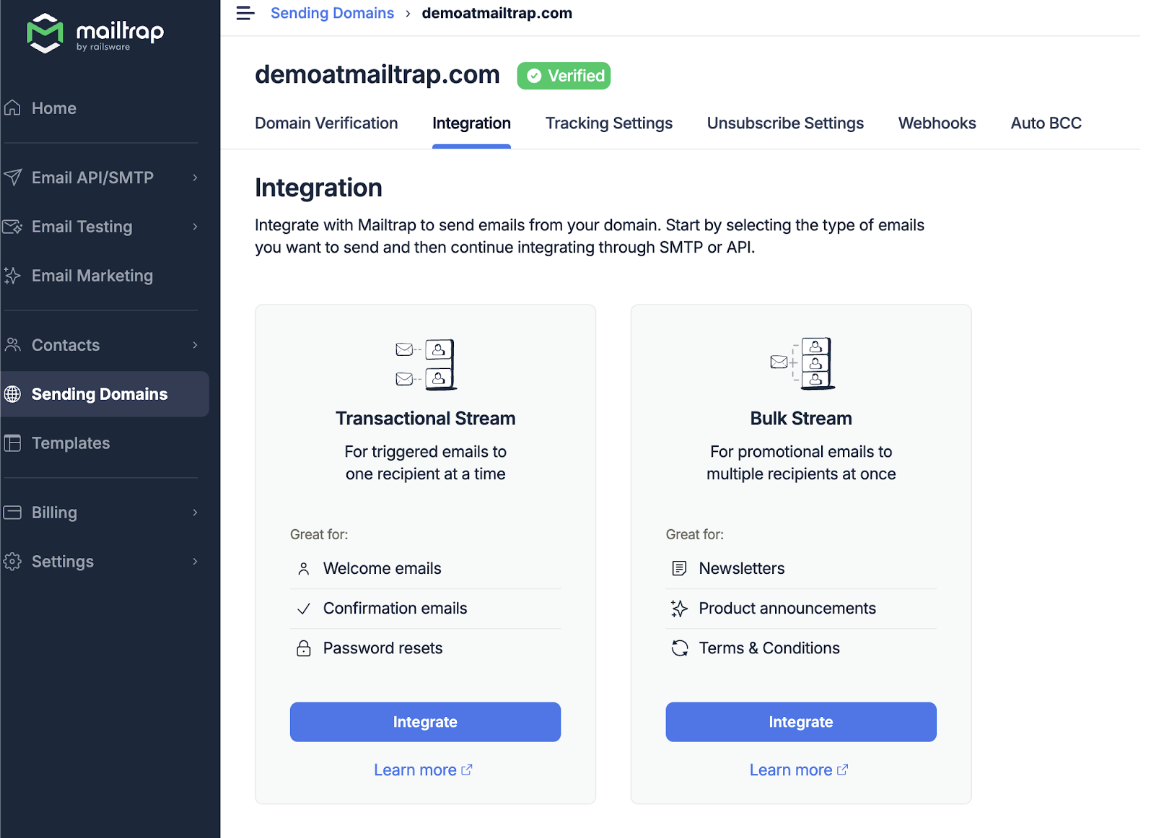
Go to Sending Domains and click the verified domain you want to send emails from. Go to the Integration tab and click Integrate under Transactional or Bulk Stream, depending on the type of emails you’d like to send.
Copy and paste the credentials (for the stream you chose) into your app or project, and you’ll be ready to start sending emails. Read more about SMTP integration here.
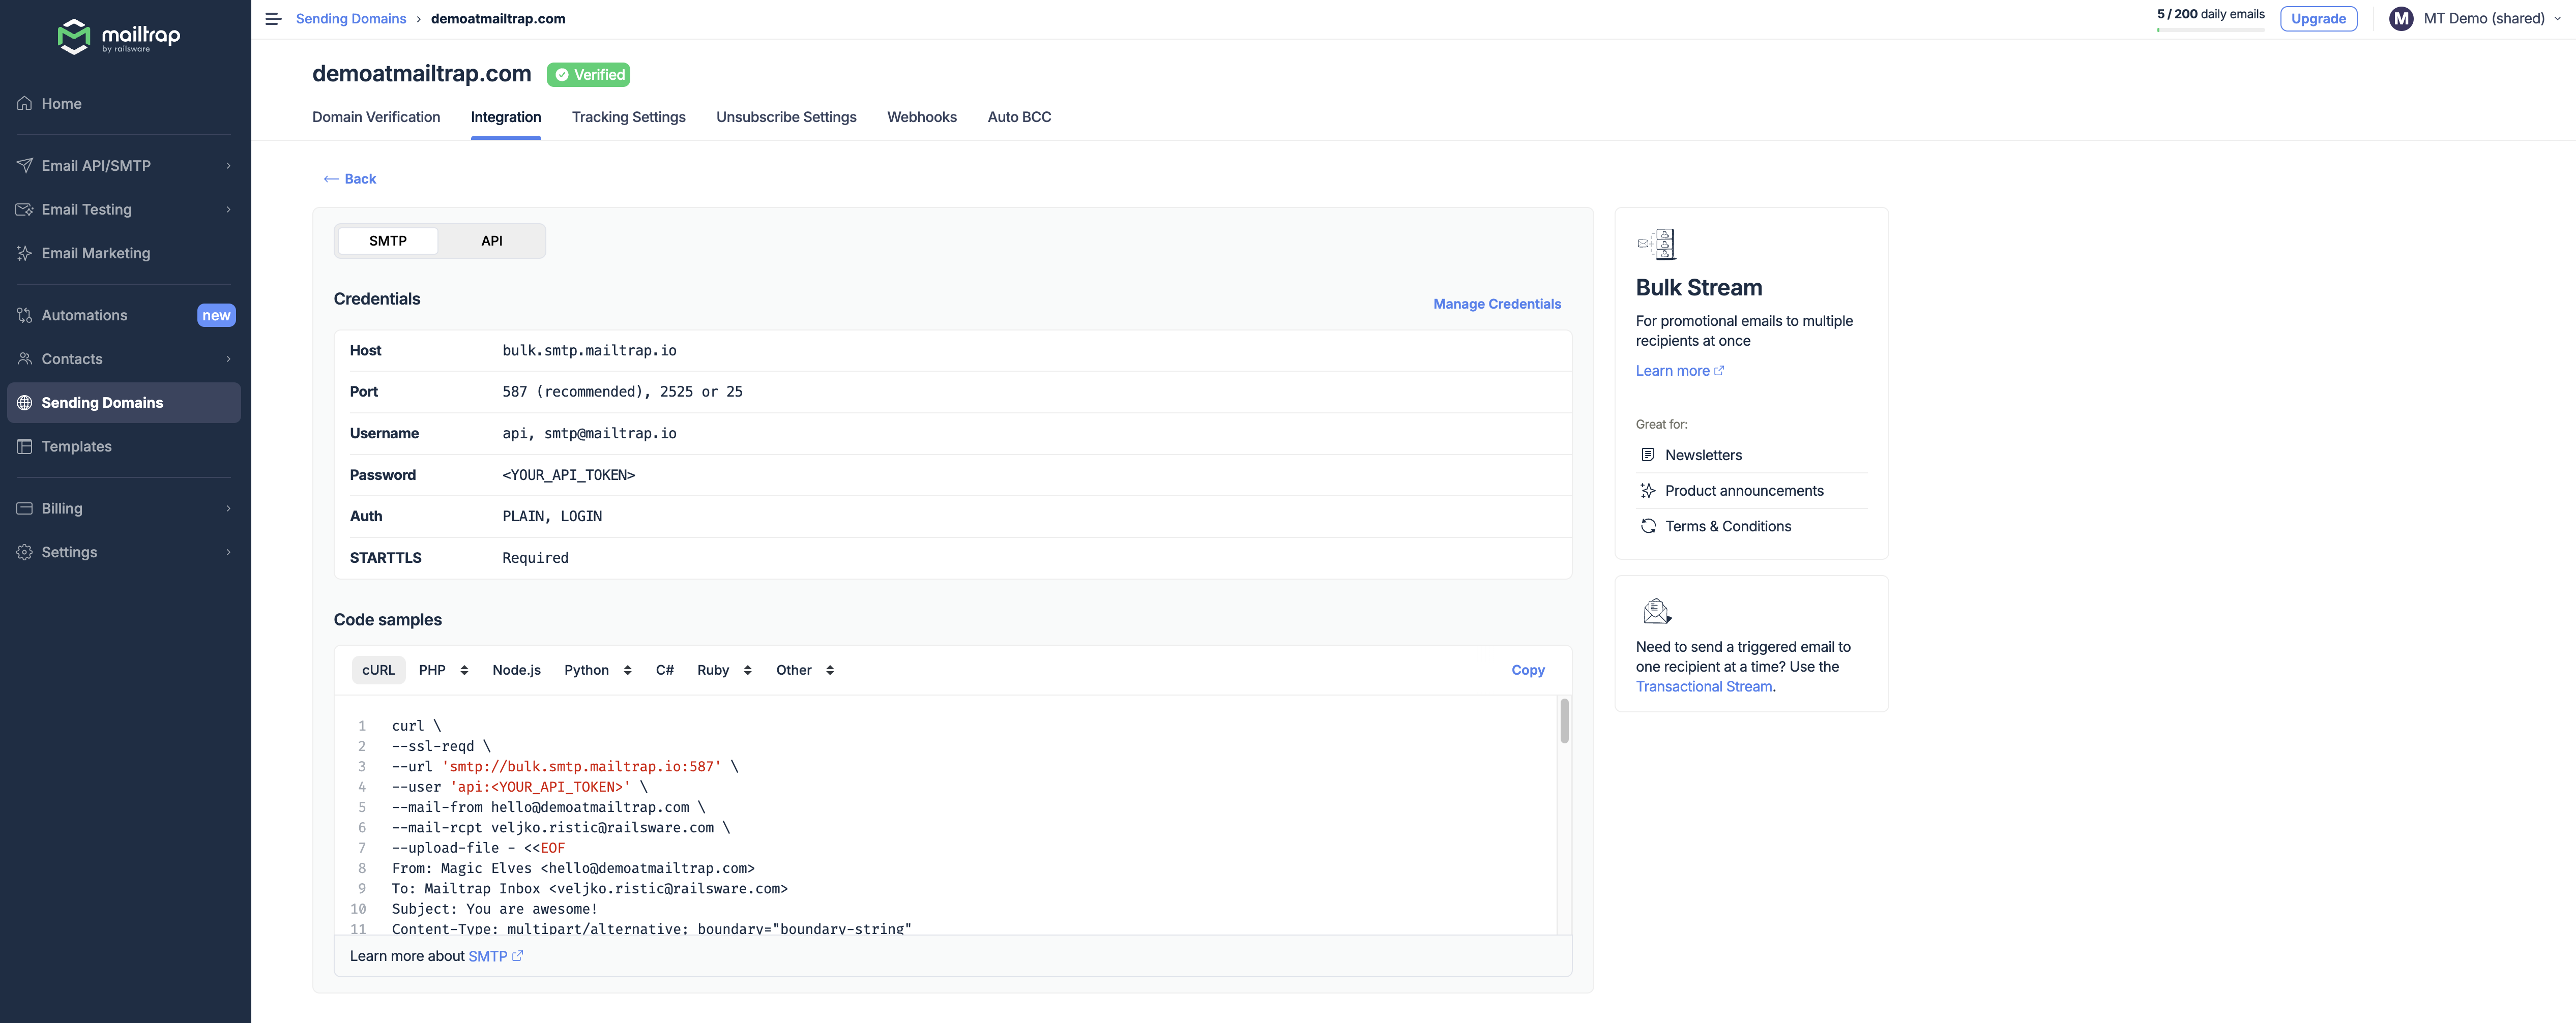
Note: Turning TLS on is mandatory as mentioned in the credentials.
Sending with Mailtrap API
Mailtrap API tokens
Mailtrap automatically creates a token when you add a domain. By default, the token has Domain Admin access permission. Add or remove token permissions in the API Tokens menu under Settings.
Learn more on how to manage API tokens in our guide.
API Mapping
| API type | Mailtrap | SendGrid |
| Email sending | Send email | |
| User management | User management | Teammates |
| Sandbox | Sandbox API |
API Libraries
At the moment there are nine libraries available at Mailtrap.
| Programming Language | Mailtrap | SendGrid |
| Node.js | Node.js SDK | NodeJS |
| NodeMailer (Node.js) | NodeMailer SDK | Not supported |
| PHP | PHP SDK | PHP |
| PHP (Laravel + Symphony) | PHP SDK | Not supported (one community driver available) |
| Ruby | Ruby SDK | Ruby |
| Ruby (ActionMailer) | ActionMailer SDK | One community library |
| Python | Python SDK | Python |
| Elixir | Elixir SDK | Community libraries only |
| Java | Java SDK | Java |
API Authentication
We use Bearer authentication. Pass the API token into the code under the header Authorization.
Permissions/User management
If you are on the Business plan or higher, you can add users to your account and manage their permissions. To do it, click the User Management menu under Settings, then the three dots (more menu) on the right. You can also manage users and permissions with API.

Based on the permissions users get, they can view, access, and/or modify specific functionalities of an app. Note that a user needs Admin permissions to get authenticated and send emails via API.
Additionally, Mailtrap allows you to enable or disable app-based 2FA for all or some users within your account with an option to enforce 2FA for all users. Check our 2FA guide for more details.
If you want to learn more about managing users’ permissions, click this link ◀️.
ActionMailer Balancer for smooth migration
For Ruby on Rails applications, Mailtrap offers an ActionMailer Balancer that makes the migration smooth.
ActionMailer extension allows for the proportional distribution of the email-sending load between two different sending services and mitigates sending risks.
After you install the Balancer and make some minor configurations, ActionMailer’s sending method will get extended.
For more detailed info on the boilerplate and use in development, read the Mailtrap ActionMailer Balancer GitHub page.