 Skip to Navigation


In this guide, I will walk through the process of sending emails from a Next.js application hosted on Vercel. To handle the email-sending functionality, I’ll use Nodemailer, a popular Node.js module for sending emails. This approach includes:
- Setting up a Next.js project
- Sending emails from Vercel using API (Mailtrap Integration)
- Sending emails from Vercel using Mailtrap SMTP (manual configuration)
- Deploying the Next.js app to Vercel
Also, you check the official Mailtrap and Vercel integration tutorial.
Want a no-code option? This quick video shows how to send emails from Vercel using v0 and an email API – no Nodemailer setup needed.
Disclaimer: For the code from this article to work, you’ll need Next.js 13.4 or 14.x, Nodemailer 6.9.x or later, and Node.js 18.x. or 20.x.
Set up a Next.js app
By the end of this guide, you’ll have a fully functional email-sending setup deployed on Vercel. To implement it, we’ll use Vercel Functions. You can read about them in more detail here or on the official documentation page.
Prerequisites:
- A Vercel account – You can register by visiting this link and the process is straightforward.
- Mailtrap Email API/SMTP account with a verified domain. We’ll show you both methods:
- A GitHub account for Vercel deployment workflow.
Okay, let’s get down to some coding.
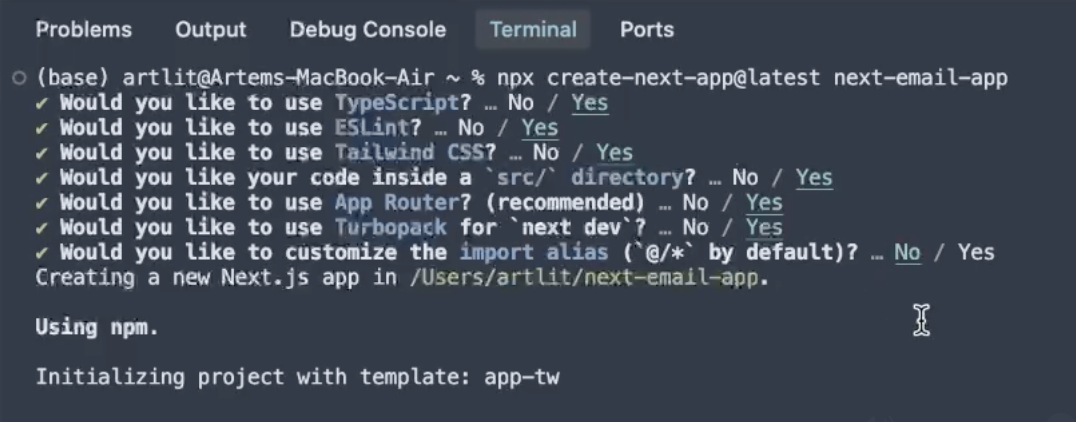
First, start by creating a Next.js project via npx:
npx create-next-app@latest my-next-email-appNote: You will be given a few options during the process: if you want to use TypeScript or not, if you want to use ESLint, etc. Feel free to choose the option that matches your preferences. For this example, we’ll use all of them except for the customization of the import alias.
And just like that, we have installed all of our required dependencies and set up a Next.js project!
To navigate to the newly created directory, simply run the following cd (chdir) command, like so:
cd my-next-email-appTip: If you’re using a code editor like VSC, I suggest reloading it.
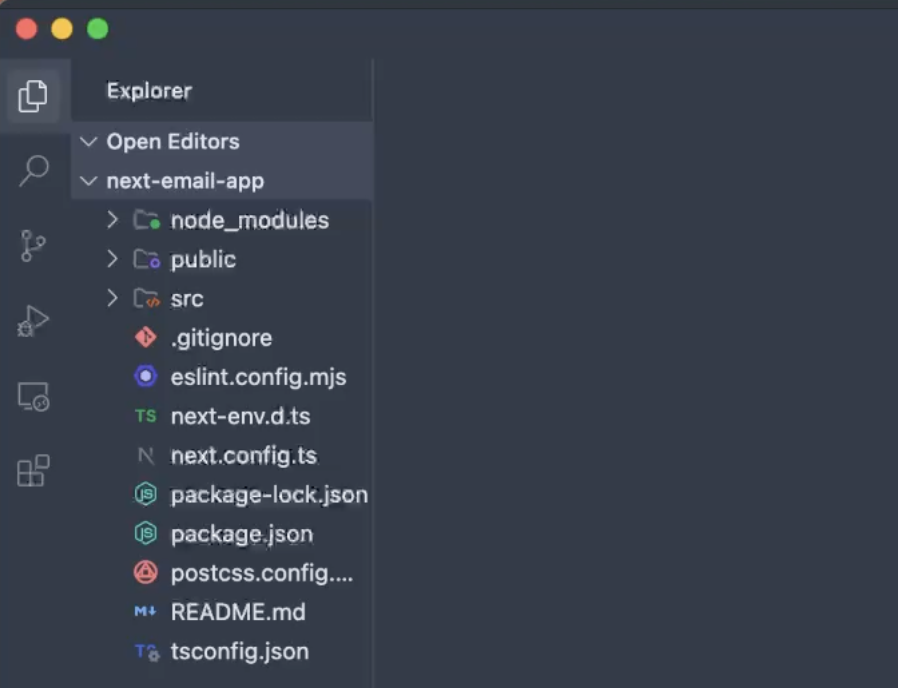
With that out of the way, here’s what your project directory should look like:
Send email from Vercel using email API
As hinted, you can integrate Mailtrap with Vercel manually, but the native integration removes setup friction, minimizes configuration mistakes, and makes it easy to follow a reliable sandbox-to-production email workflow.
Set up Mailtrap integration
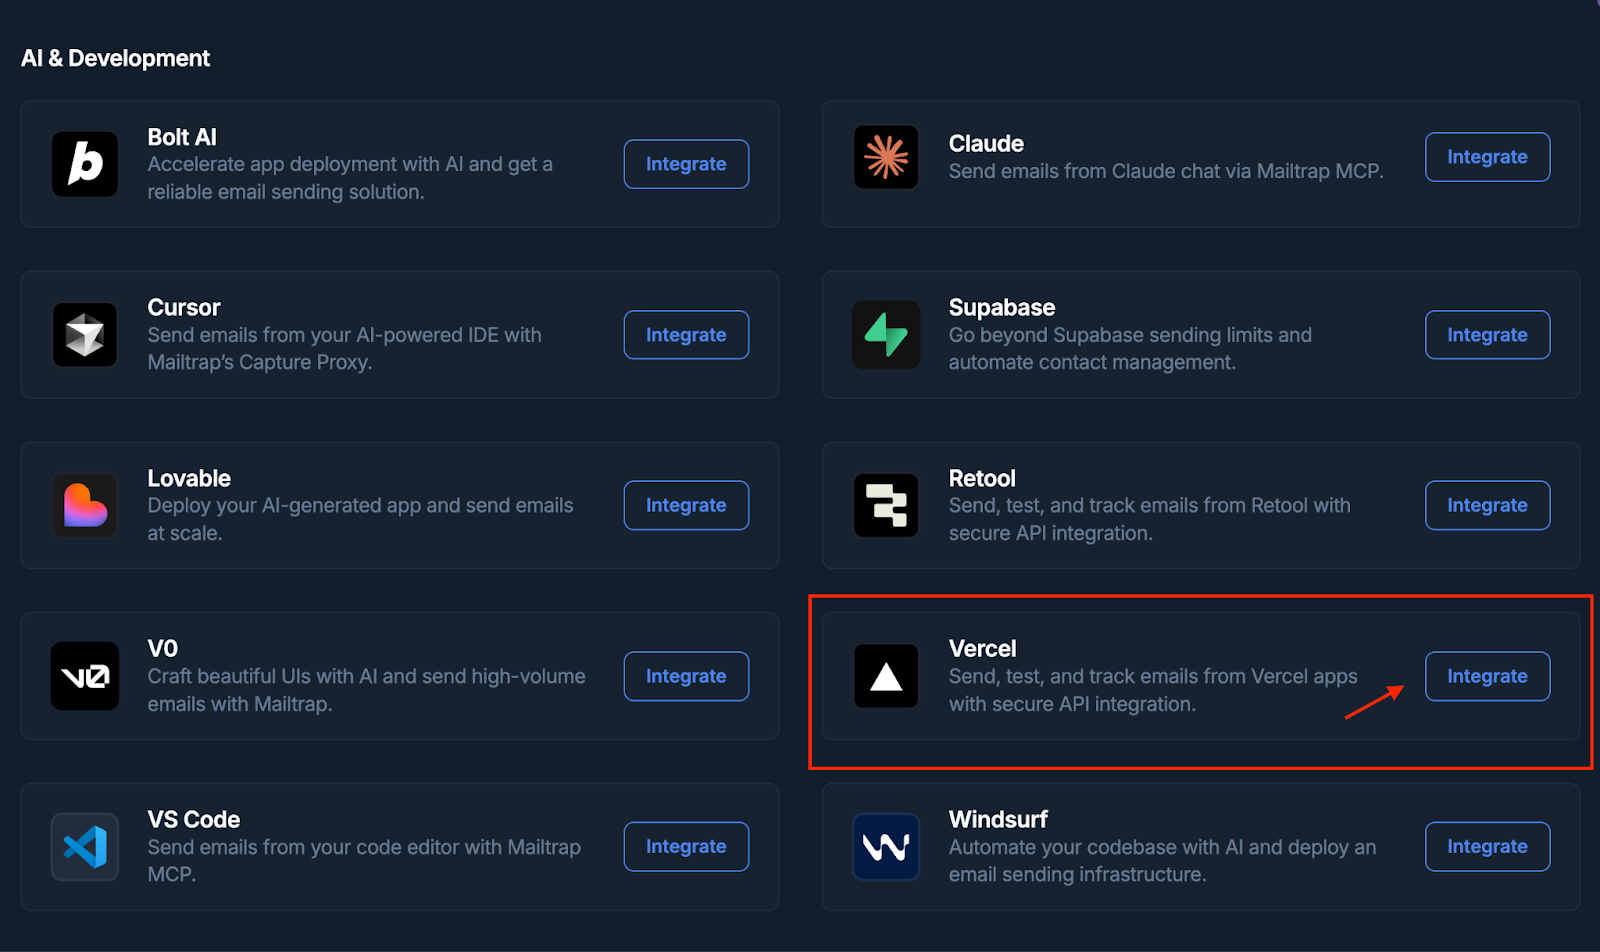
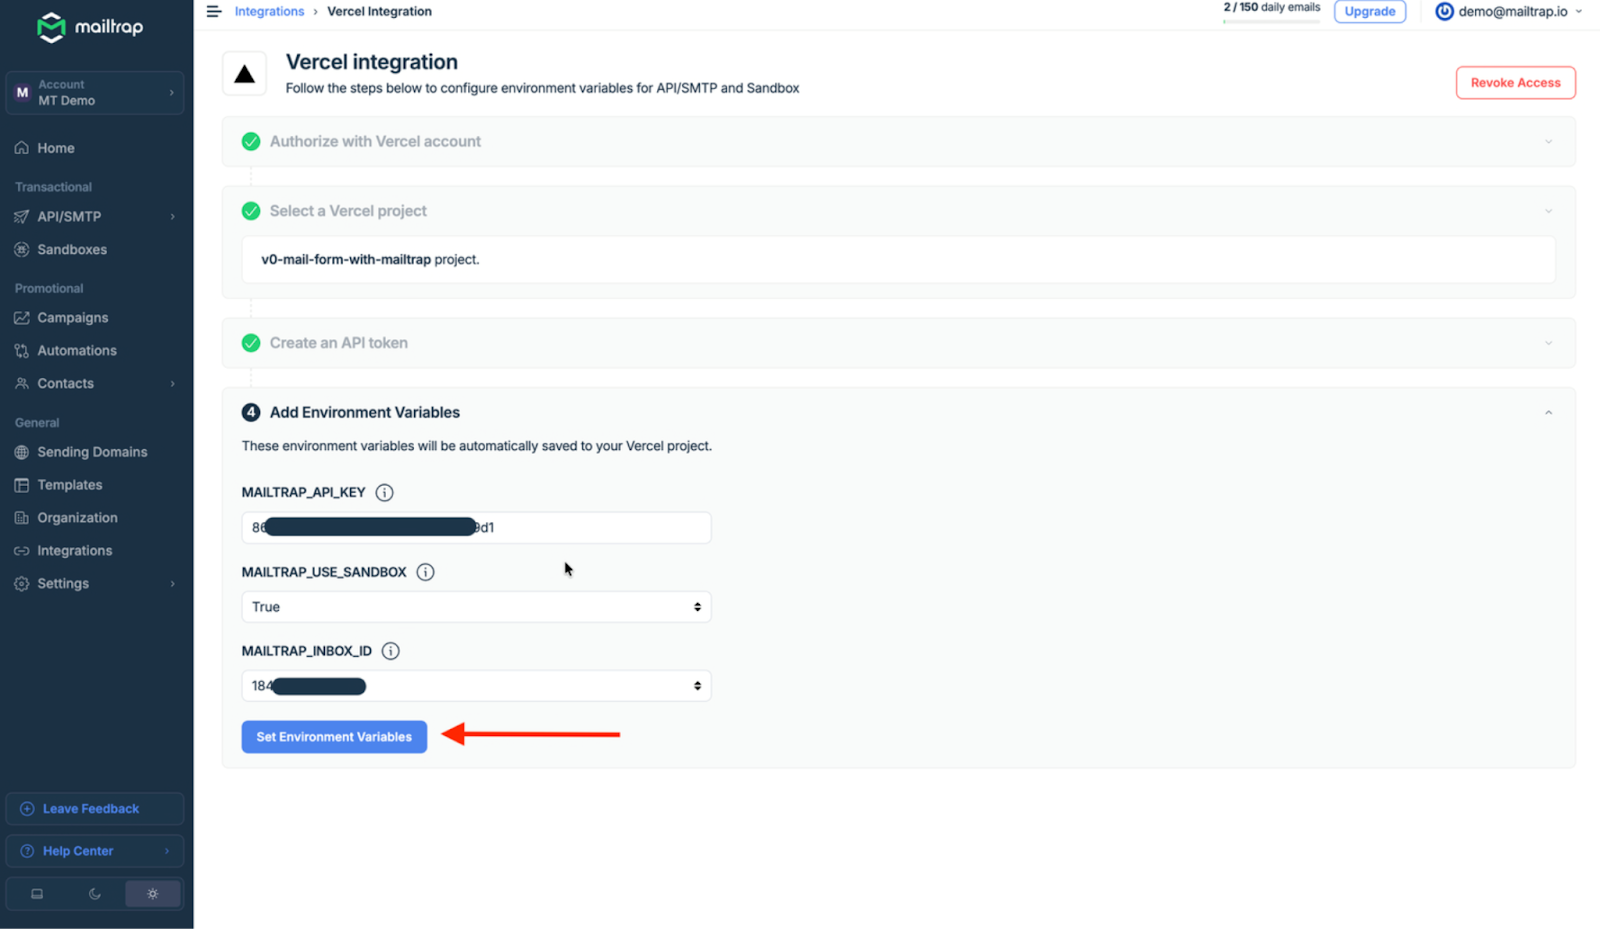
- Go to Mailtrap Integrations under your account, select Vercel and hit Integrate.
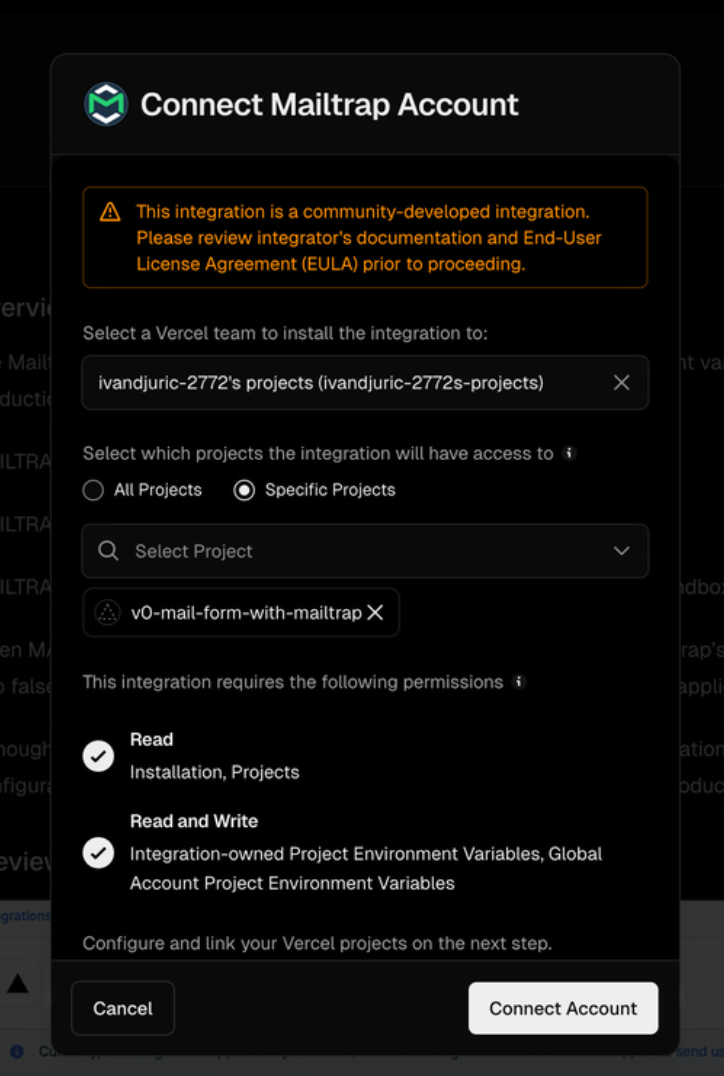
- Click ‘Authorize with Vercel account’ and select the Vercel team, specific projects the integration applies to, and click the ‘Connect Account’ button to move on.
- In the new popup, choose the Vercel Project and domain you plan to use for emails, then hit ‘Create Token’ to generate a domain-level token.

- Review the following Environment Variables before you click ‘Set Environment Variables’ to complete the installation.
MAILTRAP_API_KEY: Required whether you’re using testing or sending.MAILTRAP_USE_SANDBOX: Choose False if you want to use production sending, or choose True if you want to use the Sandbox for testing.MAILTRAP_INBOX_ID: Required for the testing Sandbox; choose the related Inbox from the dropdown.
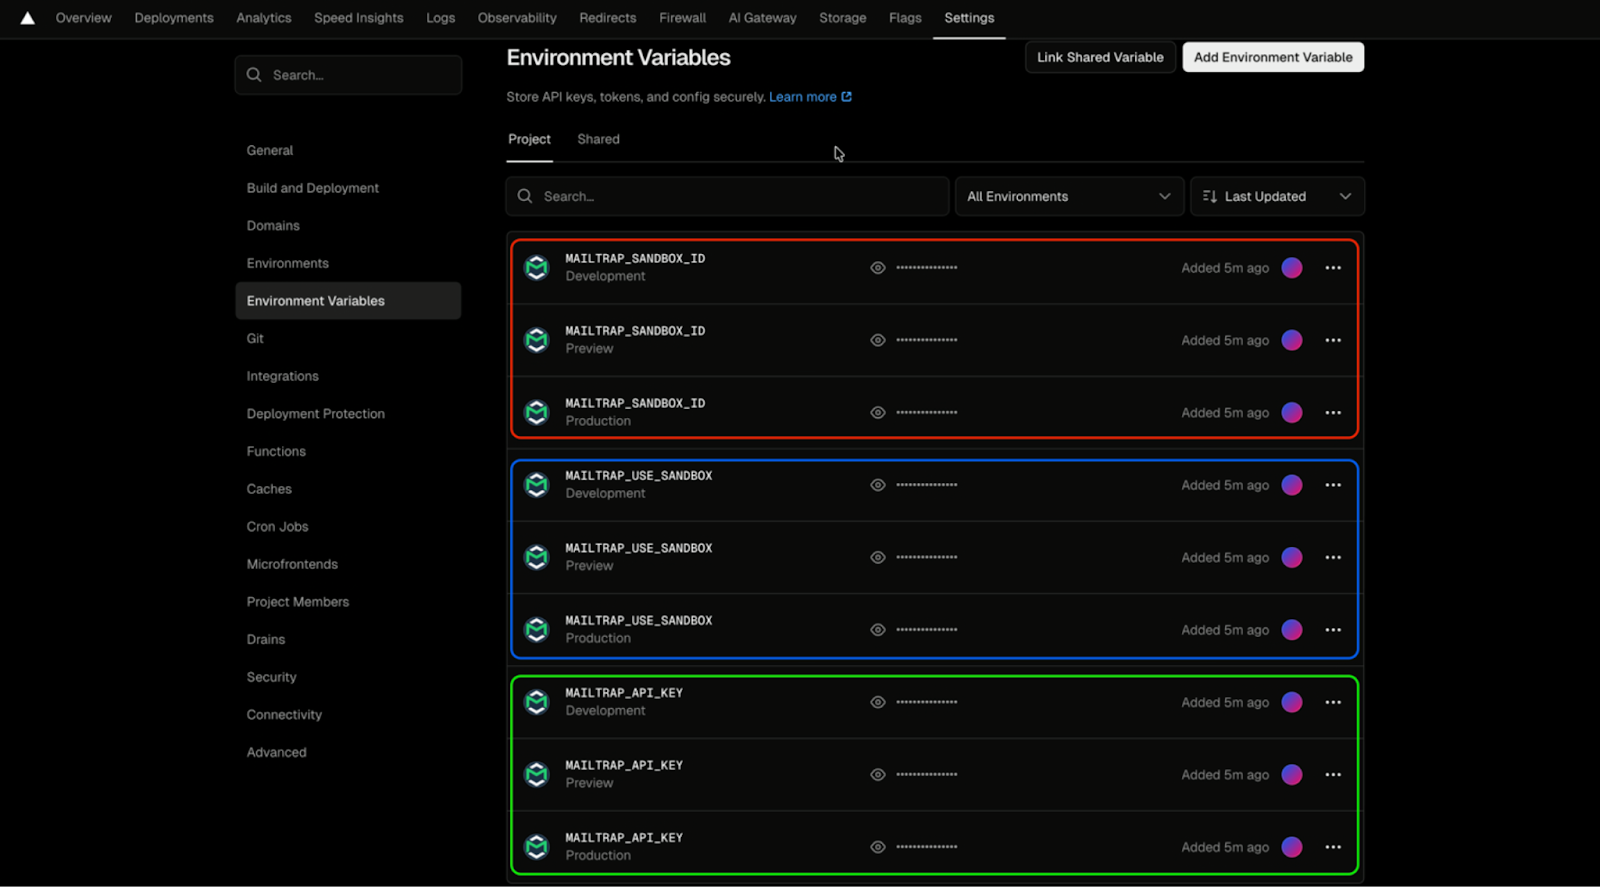
- After completing the setup, go to your Vercel project settings and check if there are nine Environment Variable – a set of three for each Vercel environment: Development, Preview, and Production.
Install Mailtrap npm
With the Mailtrap integration set up and environment variables configured, move on to install Mailtrap Node.js SDK to send emails via the API.
You can do it using npm:
npm install mailtrapOr yarn:
yarn add mailtrapNow, create the API route that will handle email sending. Here’s how to do it:
- Create a folder inside
src/appcalledapi. - Inside the
apifolder, create another folder namedsend-email. - Within
send-email, create aroute.jsfile with the following code:
// app/api/send-email/route.js

import { MailtrapClient } from "mailtrap";

const client = new MailtrapClient({
  token: process.env.MAILTRAP_API_KEY,
});

export async function POST(req) {
  const { subject, text, to } = await req.json();

  const sender = {
    email: "sender@your-domain.com",
    name: "Your App Name",
  };

  const recipients = [
    {
      email: to,
    },
  ];

  try {
    await client.send({
      from: sender,
      to: recipients,
      subject,
      text,
    });

    return new Response(
      JSON.stringify({ message: "Email sent successfully!" }),
      { status: 200 }
    );
  } catch (error) {
    return new Response(
      JSON.stringify({ message: "Error sending email", error }),
      { status: 500 }
    );
  }
}
Code breakdown:
- Import
MailtrapClientfrom the Mailtrap SDK and initialize it with the API key from our environment variables (automatically set by the Vercel integration). - The sender object defines the
fromaddress, which must use your verified Mailtrap domain. - The recipients array contains the email addresses you want to send to.
- The
client.send()method handles the email delivery through Mailtrap’s API. - We return appropriate responses based on success or failure.
Send plain-text email
Now, I’ll create a frontend component to trigger the email-sending functionality. Navigate to src/app and update the page.tsx file with the following code:
"use client";

export default function EmailForm() {
  const sendEmail = async () => {
    const mailOptions = {
      subject: "Test email from Next.js app on Vercel using Mailtrap API",
      to: "recipient@example.com",
      text: "This is a test email sent from a Next.js app deployed on Vercel using Mailtrap API.",
    };

    const res = await fetch("/api/send-email", {
      method: "POST",
      headers: {
        "Content-Type": "application/json",
      },
      body: JSON.stringify(mailOptions),
    });

    if (res.ok) {
      alert("Email sent successfully");
    } else {
      alert("Error sending email");
    }
  };

  return (
    <div
      style={{
        minHeight: "100vh",
        display: "flex",
        justifyContent: "center",
        alignItems: "center",
      }}
    >
      <button
        onClick={sendEmail}
        style={{
          padding: "10px 20px",
          backgroundColor: "#0070f3",
          color: "white",
          border: "none",
          borderRadius: "4px",
          cursor: "pointer",
          fontSize: "16px",
        }}
      >
        Send Example Email
      </button>
    </div>
  );
}
```

**Technical details:**

- The **"use client"** directive enables browser-side interactivity for event handlers like **onClick**.

- The **sendEmail** function creates the **mailOptions** object and sends a POST request to our API route.

- The response determines whether we show a success or error message to the user.

To test the implementation locally, run:

npm:
```
npm run dev
```

Or yarn:
```
yarn dev
To test this setup, open the localhost link in your browser and click the “Send Example Email” button. If everything is configured correctly, you should see a success message, and the email will appear in your Mailtrap Email Logs.
Note: Make sure to replace sender@your-domain.com in the API route with an email address using your verified Mailtrap sending domain, and update recipient@example.com with your actual test recipient.
How to send emails from Vercel using Nodemailer and SMTP
The following sections cover setting up everything manually and feature ready-to-use scripts to send plain-text and HTML emails as well as emails with attachments, and emailing multiple recipients.
Set up Nodemailer
Nodemailer is a popular module that allows you to send emails from Node.js applications. Additionally, you can use it to easily implement email-sending logic in the Vercel Functions.
Fortunately, this time, we won’t need to set up a separate Node.js project since Next.js already provides us with access to a server environment in certain files, where we’ll store the Vercel Function for sending emails.
To install Nodemailer, you can either use the npm package manager:
npm install nodemailerOr yarn, whichever you prefer:
yarn add nodemailerNow, let’s set up the SMTP transporter, which is virtually a “box” with all methods preconfigured to work with the SMTP credentials that we pass to it.
For this, create a folder inside src/app called api. Then, inside the api folder, create yet another folder named, for example, send-email. Finally, within send-email, create a route.js file, where you’ll copy the following code snippet:
// app/api/send-email/route.js
import nodemailer from "nodemailer";

const transporter = nodemailer.createTransport({
  host: process.env.SMTP_HOST,
  port: process.env.SMTP_PORT,
  auth: {
    user: process.env.SMTP_USER,
    pass: process.env.SMTP_PASS,
  },
});

export async function POST(req) {
  const { subject, text, to, html } = await req.json();

  const mailOptions = {
    from: "sender@your-domain",
    to,
    subject,
    text,
    html,
  };

  try {
    await transporter.sendMail(mailOptions);

    return new Response(
      JSON.stringify({ message: "Email sent successfully!" }),
      { status: 200 }
    );
  } catch (error) {
    return new Response(
      JSON.stringify({ message: "Error sending email", error }),
      { status: 500 }
    );
  }
}
Code breakdown:
- We have defined API routes inside the app/api directory.
- We’ve used Nodemailer’s transporter to configure an instance containing email-sending methods with our SMTP credentials.
- The POST function will handle incoming email requests. The function you’re working with should be named after the HTTP method you’re using (in this case, we’re using POST method).
- You can read about Vercel Functions here. 👀
req.json()method allows us to extract parameters from the body of an HTTP request.- Using
transporter.sendMail, we attempt to send an email with the appropriate options created from the extracted request body’s parameters. - The global
Responseclass will return a successful message or an error from the API route depending on the result of the email sending.
Creating environment variables (recommended)
Now, let’s set up environment variables to store our Mailtrap SMTP credentials safely.
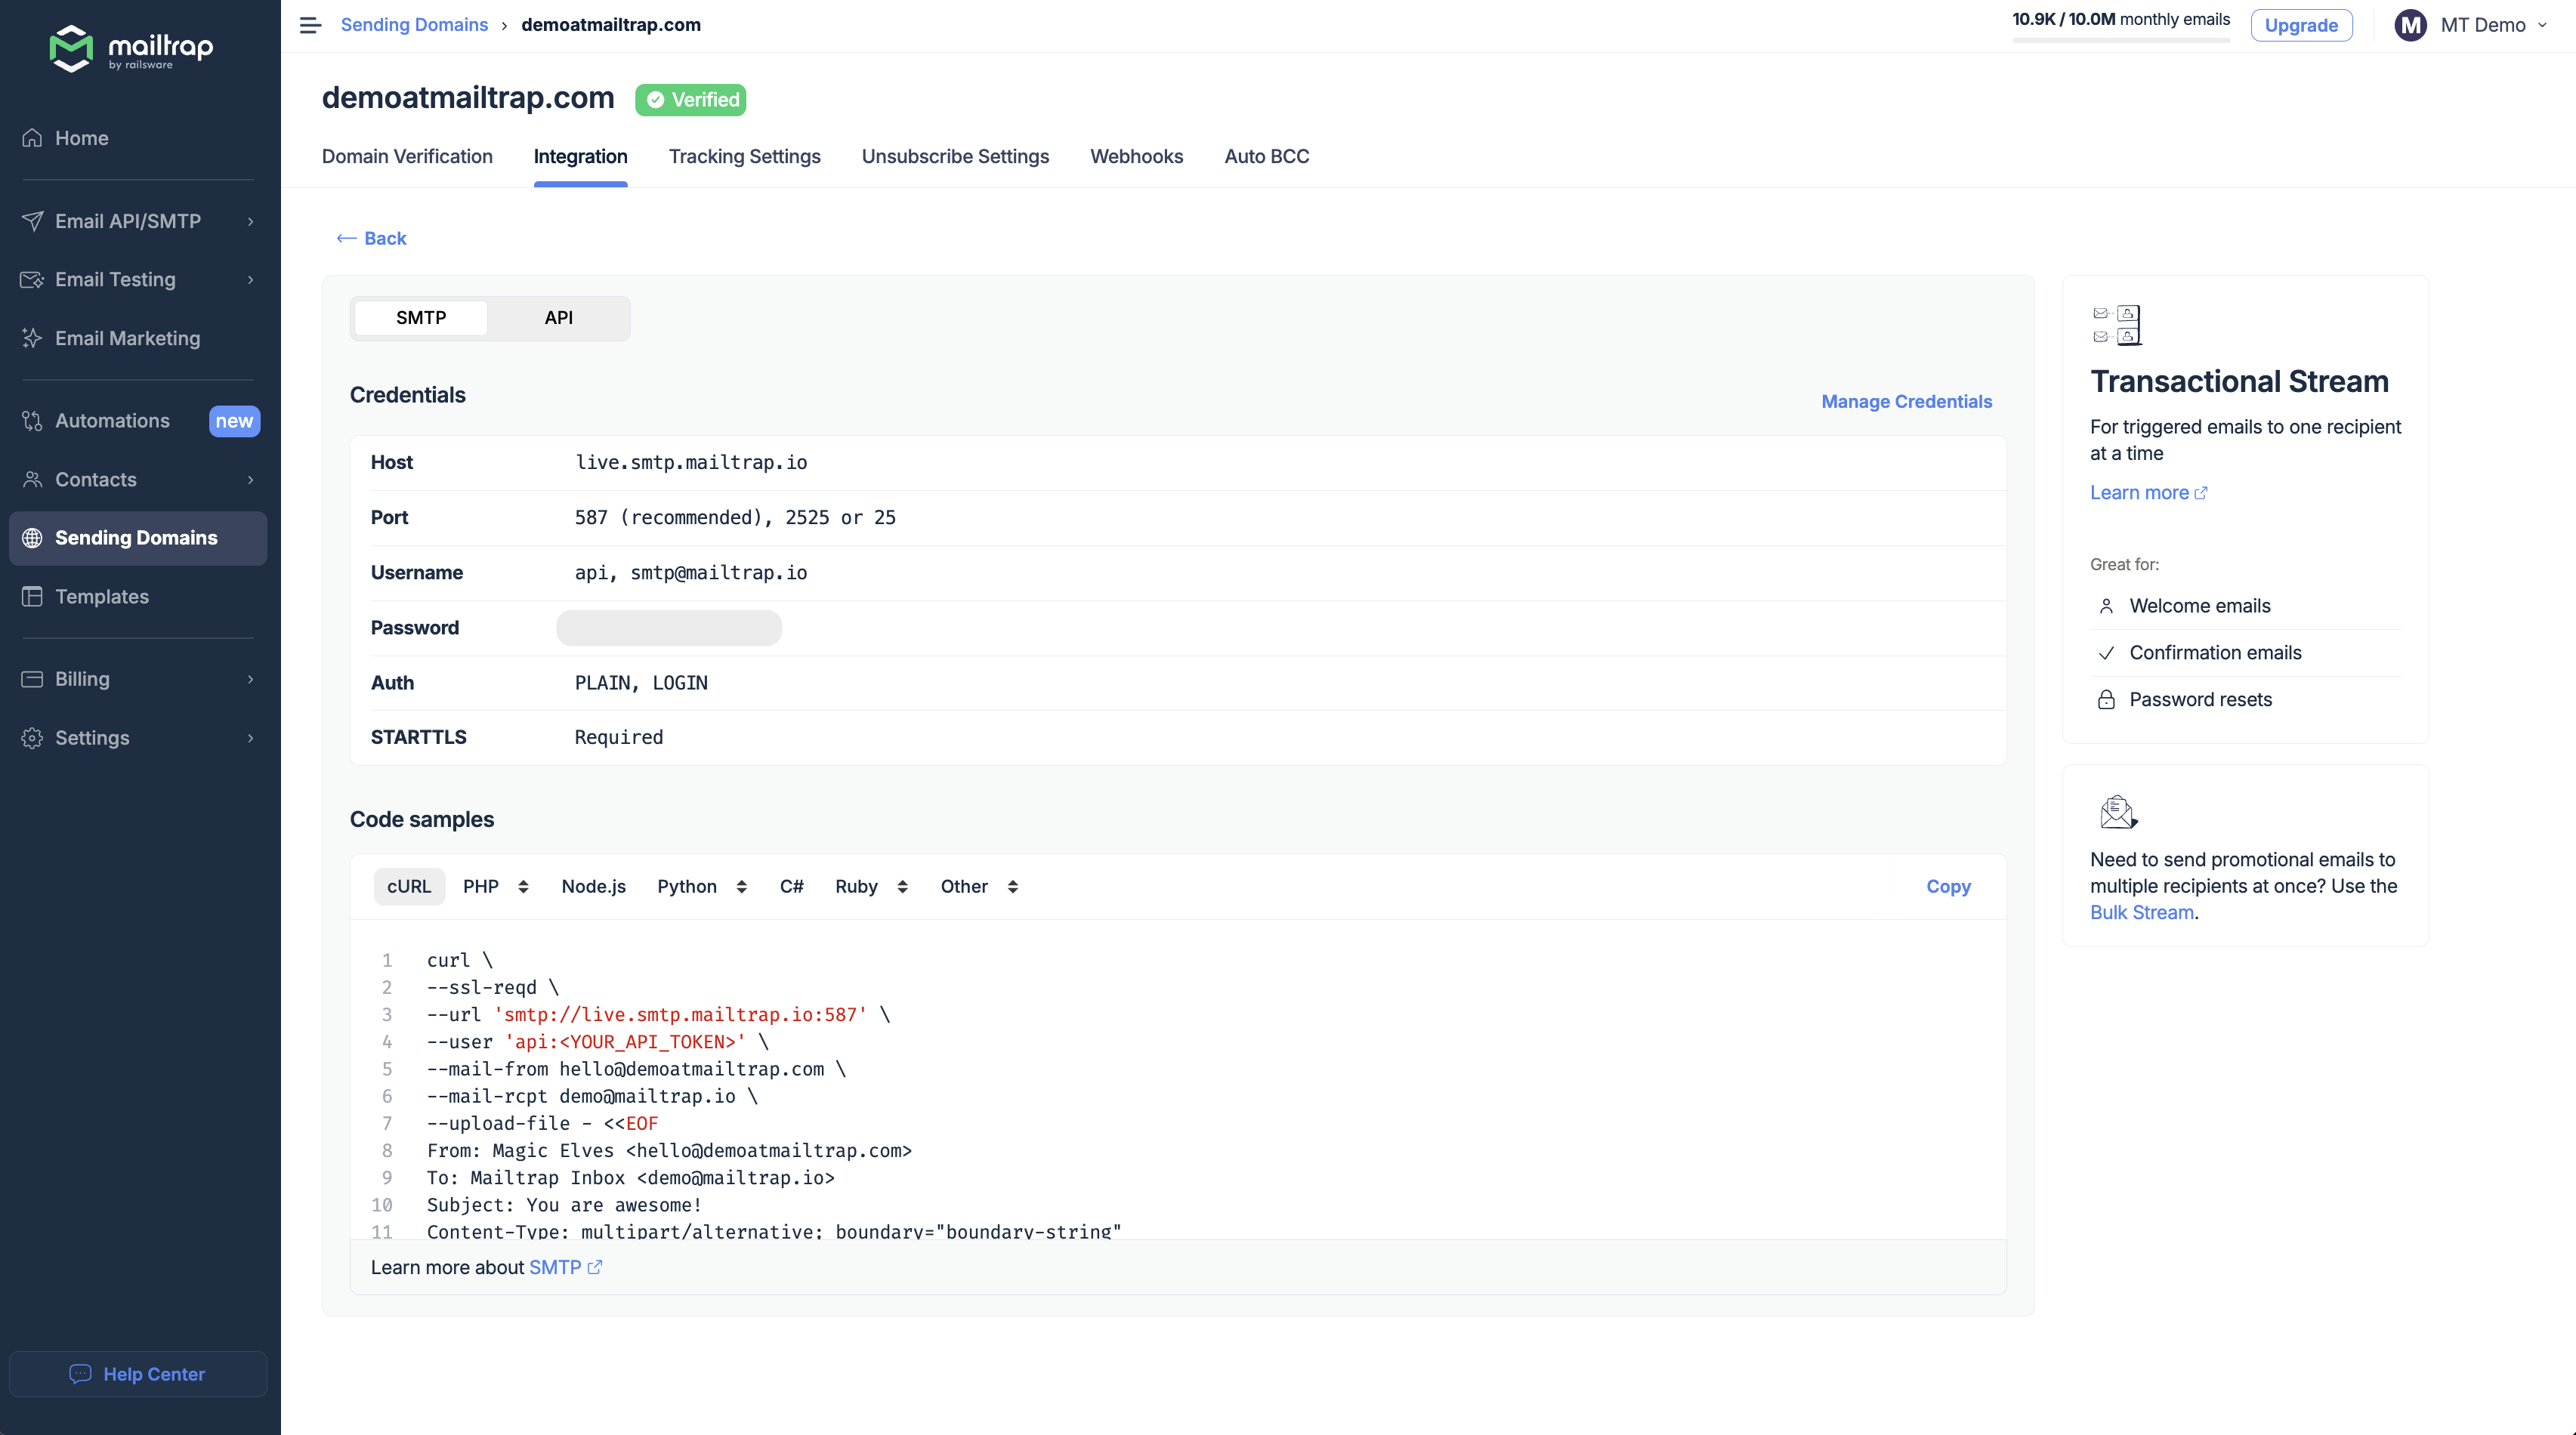
To do this, create an .env.local file in the root folder and add environment variables from your Mailtrap dashboard. You can find the credentials in Sending Domains → Your Domain → Integration → Transactional Stream (Integrate Button).
And here’s how your .env.local file should look like:
SMTP_HOST=your-smtp-host
SMTP_PORT=your-smtp-port
SMTP_USER=your-smtp-user
SMTP_PASS=your-smtp-password
Deploying the Next.js app to Vercel
For Vercel to define our API route as a Vercel Function, let’s deploy the Next.js application.
Tech Tip: If you used Mailtrap Vercel integration, your environment variables are already configured.
Now, let’s deploy our app:
1. Push your app to GitHub
First, let’s push our Next.js application to a Git Hosting solution of your choice. Vercel allows you to choose from GitHub, GitLab, or Bitbucket. For our example, we’ll use GitHub.
Start by initializing a Git repository for your project by running the following command:
git initAdd all the project files to Git:
git add .Commit the files with a descriptive message:
git commit -m "Initial commit"2. Create a new GitHub repository
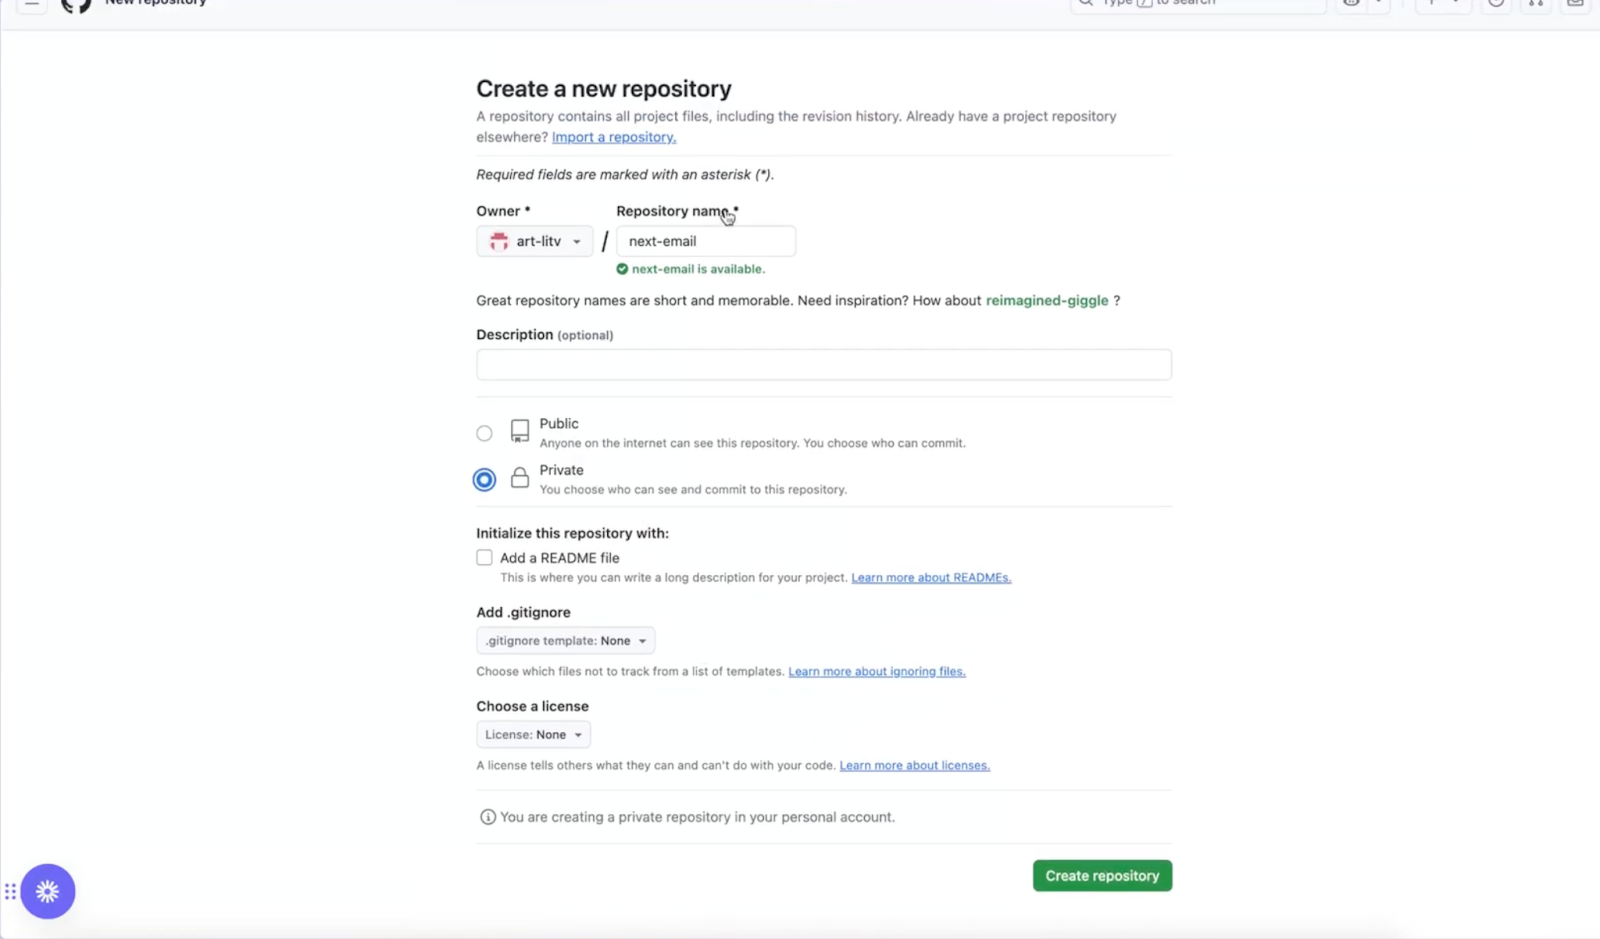
Then, go to GitHub, create a new repository, and select your preferred options.
Important: I should note that you shouldn’t worry about your SMTP credentials being leaked even if you’re using a Public Repository since in .gitignore Next.js includes all .env files by default, so the credentials from our .env.local file won’t be pushed to GitHub.
Next, create a link to your GitHub repository by running:
git remote add origin
https://github.com/your-username/your-repository-name.git
Then, push your code to the GitHub repository with the following command:
git push -u origin main3. Deploy the Next.js app
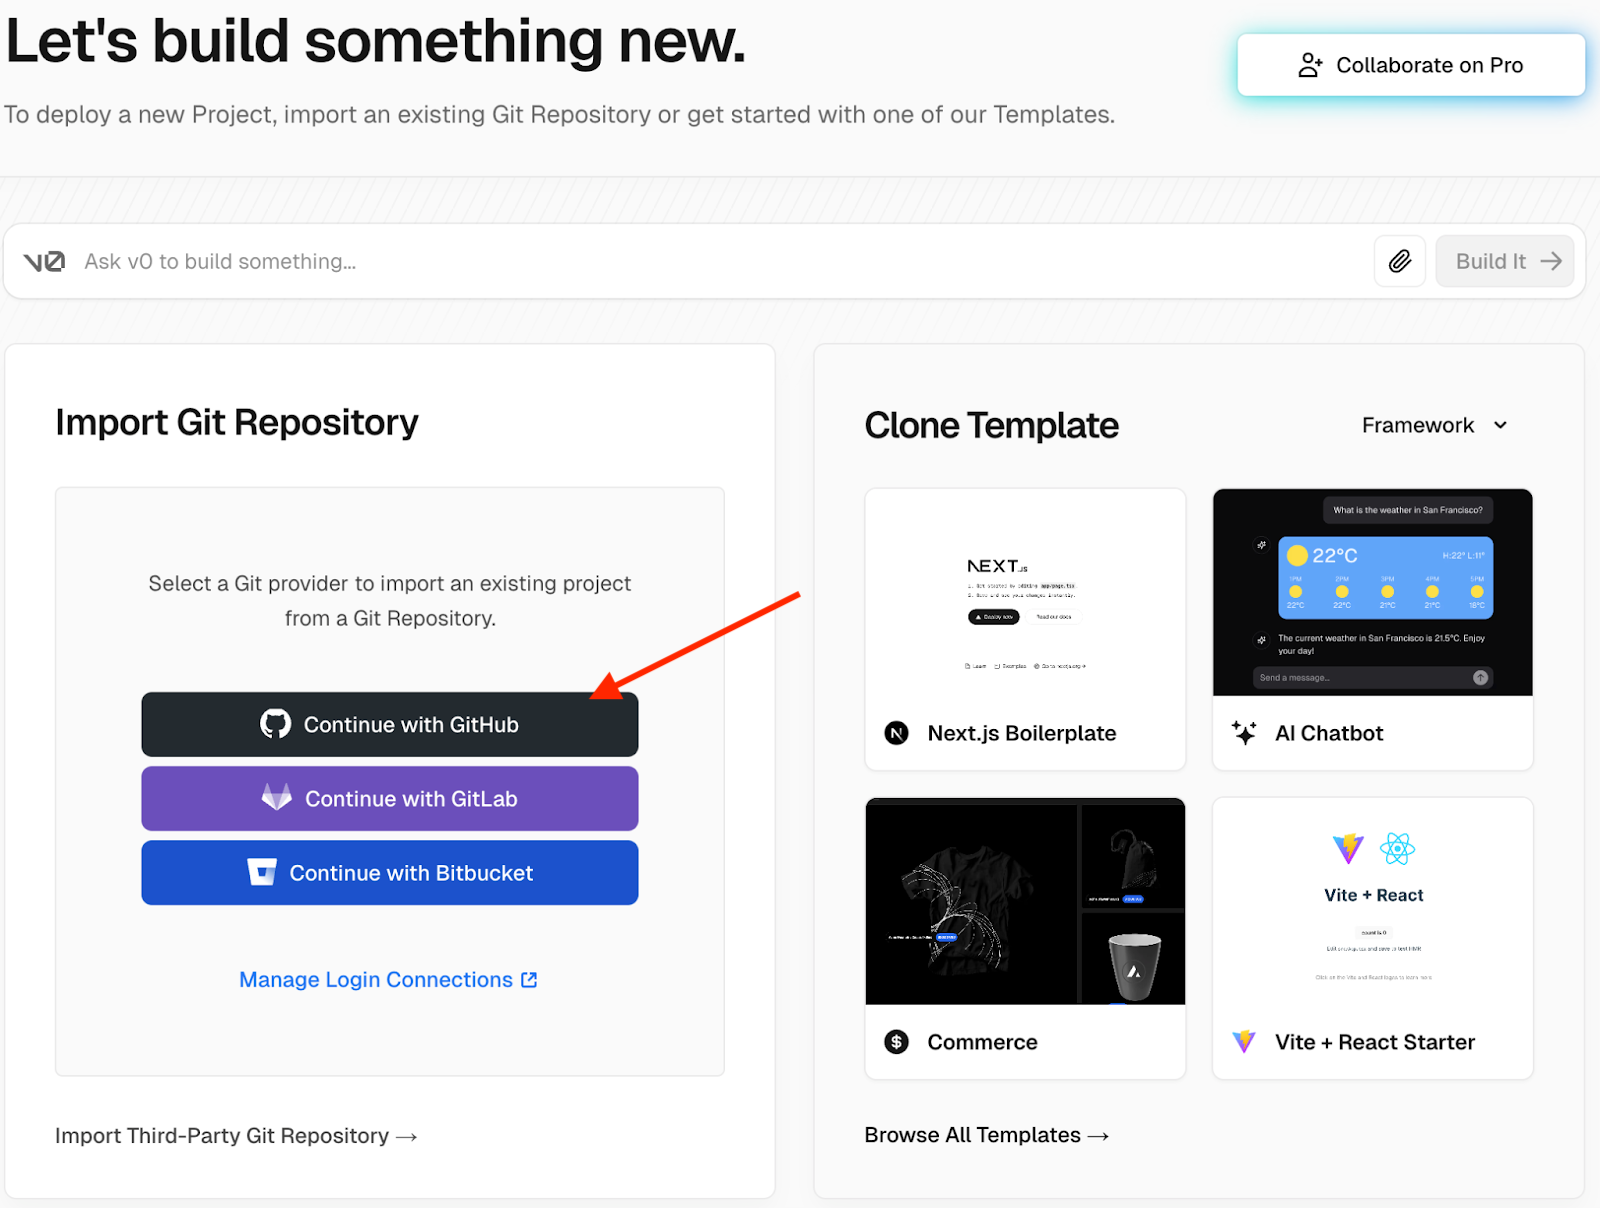
Go to the Vercel New App page and select Continue with GitHub.
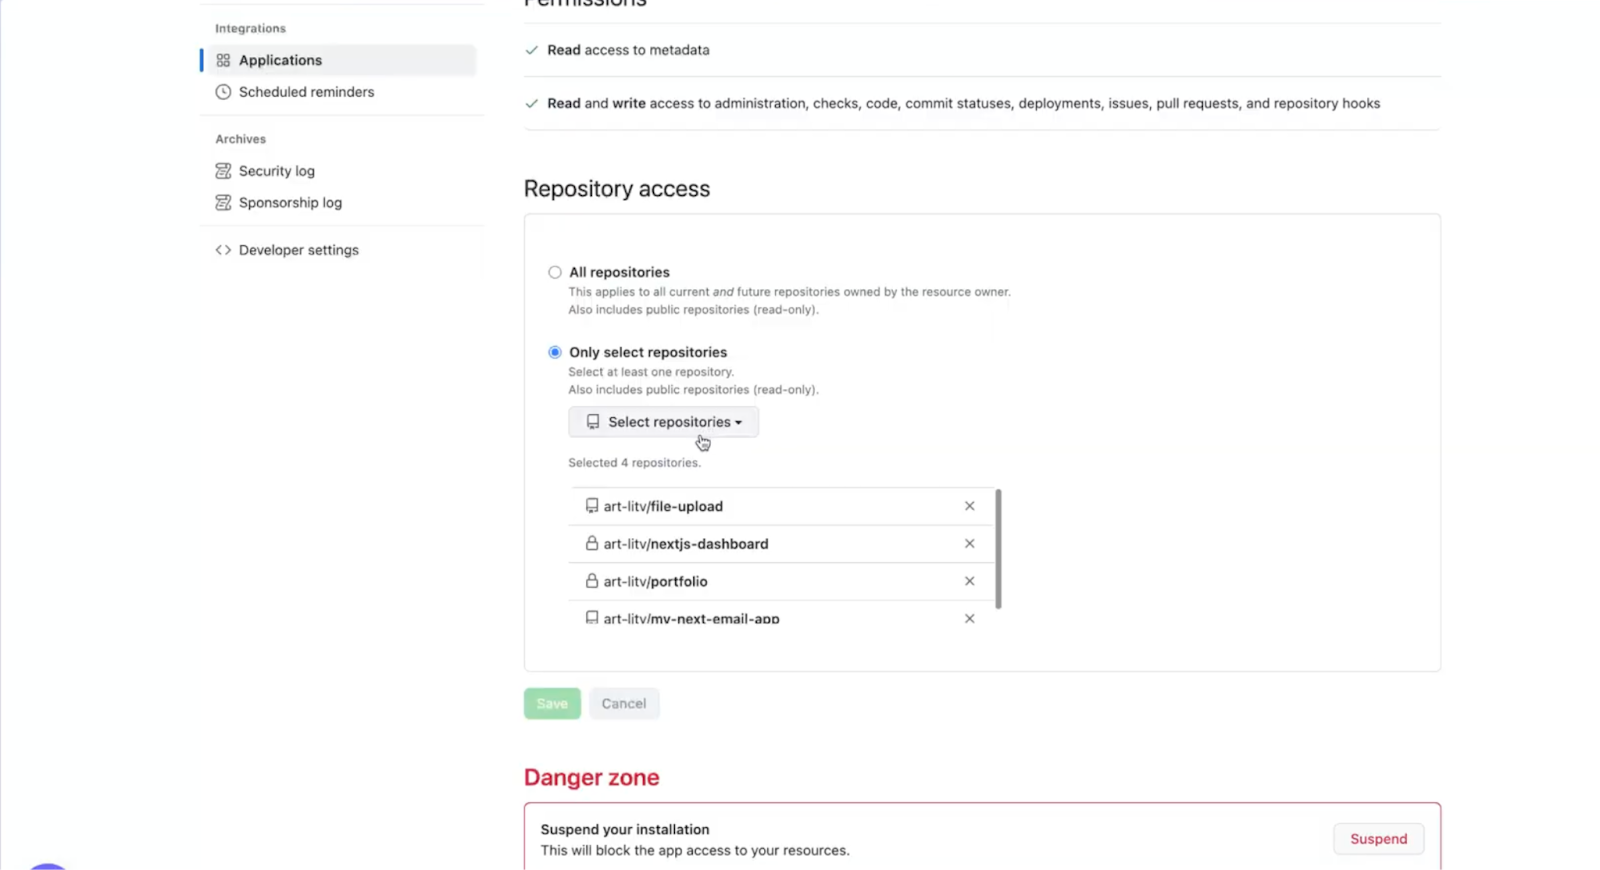
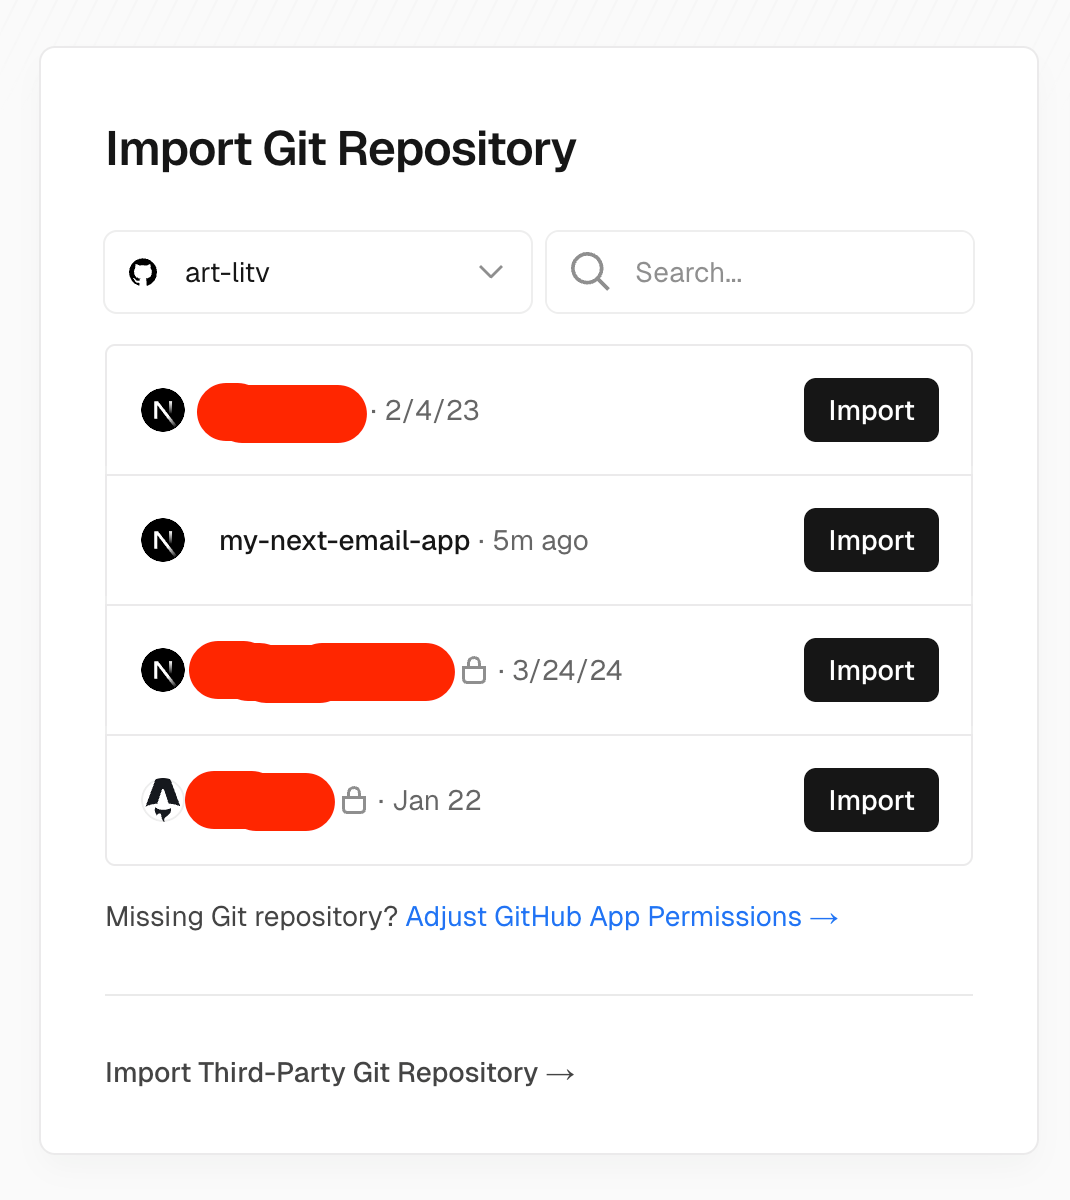
On the next page, click Adjust Github App Permissions.
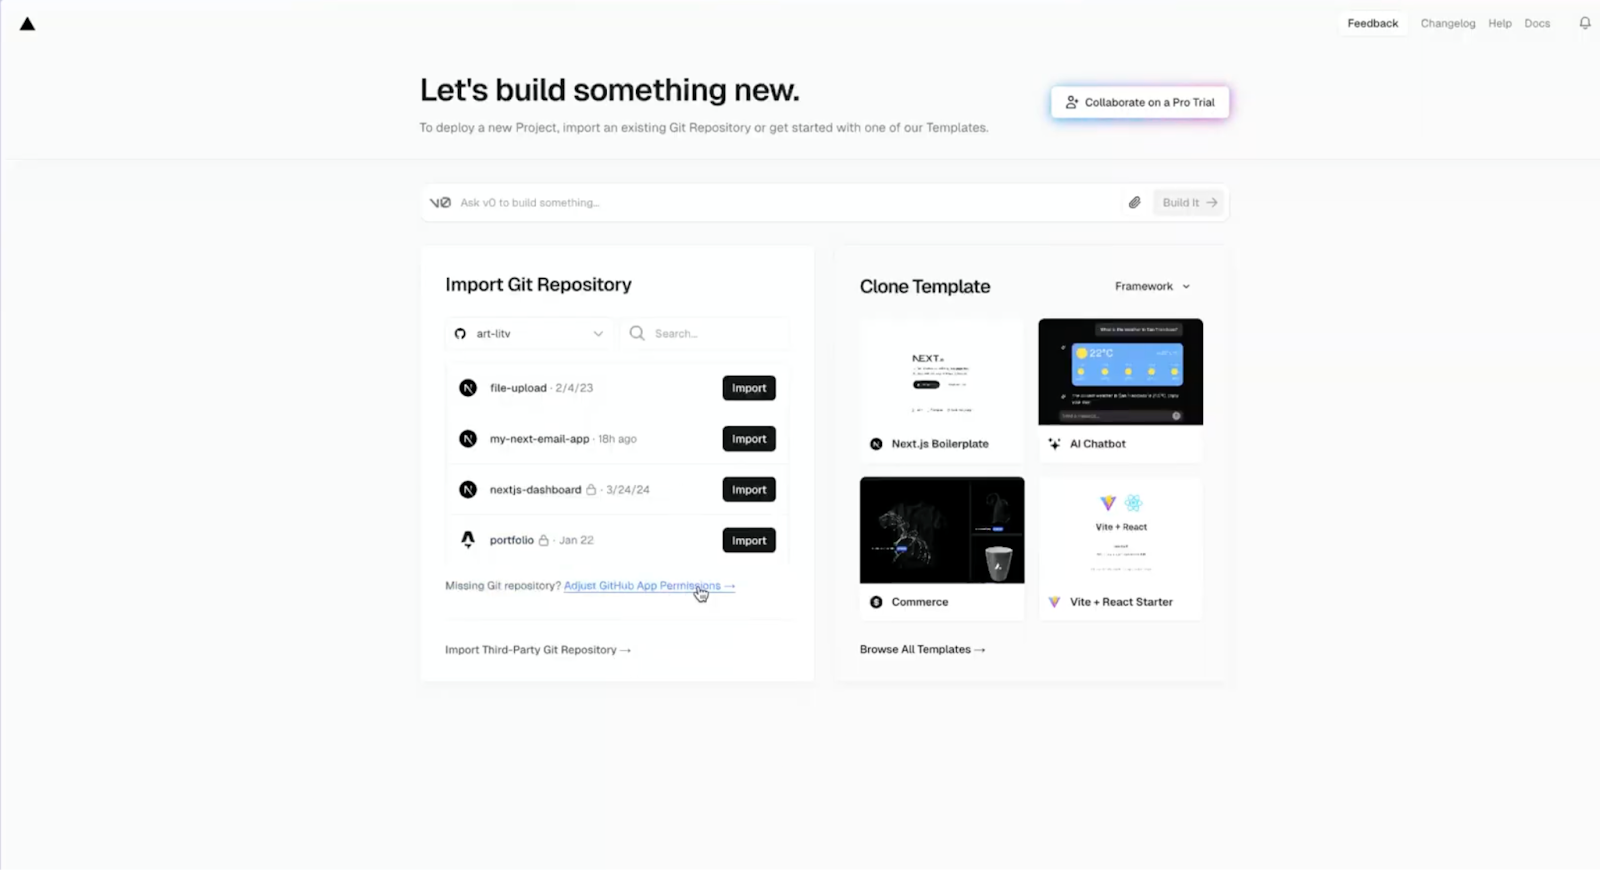
Then, choose your account, login, select the new repository and click Save.
The added repository should then appear in the Vercel tab again. After that, click Import.
In the opened window, leave everything the same—just make sure to add your own environment variables, as you can see in the picture, and click Deploy.

If everything was set up correctly, your Next.js app should have been successfully deployed.
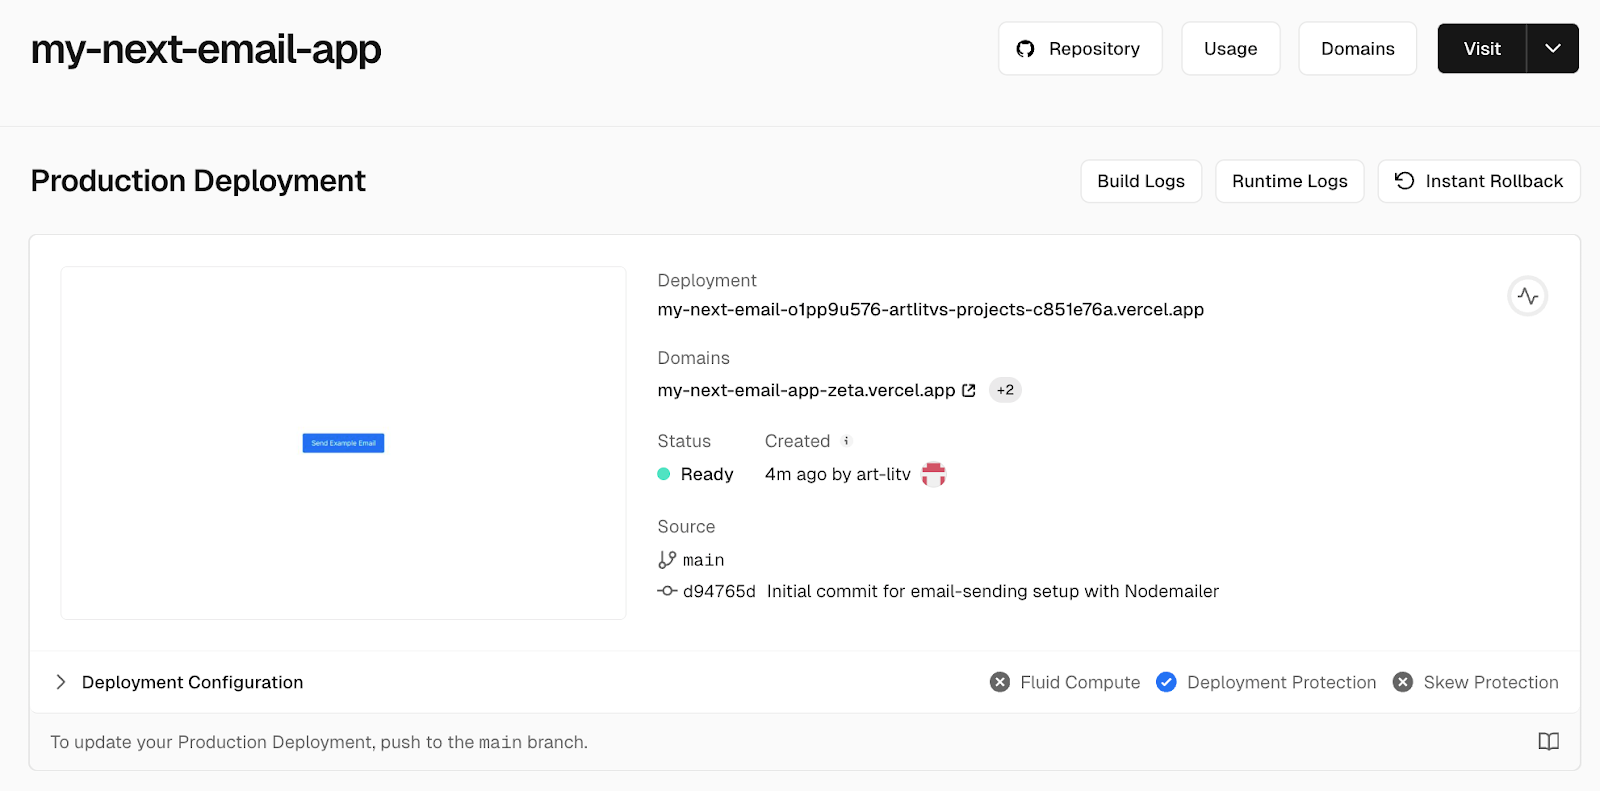
If you open the page by link, click the button a few times, and then go to the Observability tab in your project dashboard in Vercel, you’ll notice that now your /api/send-email API Route that we previously created is now treated like a Vercel Function. Again, this allows us to run server-side SMTP solutions like nodemailer in Next.js without setting up our own server.
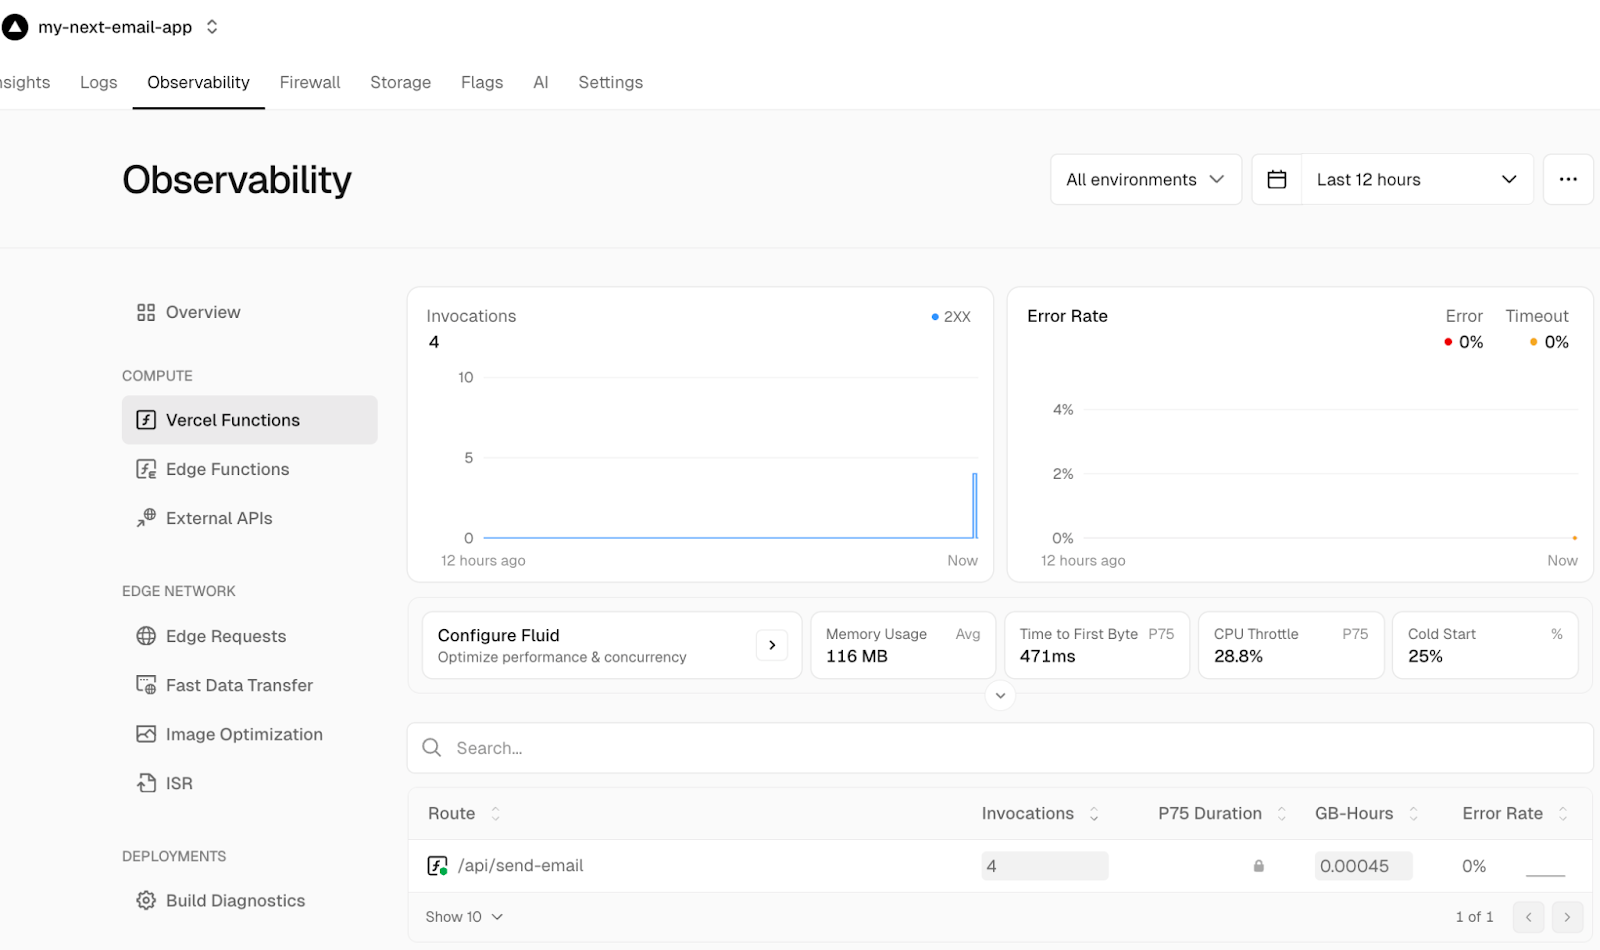
Also, Vercel Functions dynamically scale based on user demand, efficiently manage API and database connections and leverage fluid compute for improved concurrency, making them ideal for heavy tasks that require seamless scalability.
You can read about it in more detail in the official documentation.
Send plain-text email
To send a plain-text email from your frontend (Next.js client-side), you can create a component where a user can click a button and trigger the API call to send an example email. When we deploy our Next.js application to Vercel, the clicking the button will trigger a corresponding Vercel Function to send the email.
So, navigate to src/app and select the page.tsx file, which we’ll update to with our email-sending logic, where we call the previously created API route.
By default, it should contain some pre-generated code. Remove all of it and insert the following script inside:
"use client";

export default function EmailForm() {
  const sendEmail = async () => {
    const mailOptions = {
      subject: "Test email from Next.js app on Vercel using Mailtrap",
      to: "recipient@example.com",
      text: "This is a test email sent from a Next.js app deployed on Vercel using Mailtrap."
    };

    const res = await fetch("/api/send-email", {
      method: "POST",
      headers: {
        "Content-Type": "application/json",
      },
      body: JSON.stringify(mailOptions),
    });

    if (res.ok) {
      alert("Email sent successfully");
    } else {
      alert("Error sending email");
    }
  };

  return (
    <div
      style={{
        minHeight: "100vh",
        display: "flex",
        justifyContent: "center",
        alignItems: "center",
      }}
    >
      <button
        onClick={sendEmail}
        style={{
          padding: "10px 20px",
          backgroundColor: "#0070f3",
          color: "white",
          border: "none",
          borderRadius: "4px",
          cursor: "pointer",
          fontSize: "16px",
        }}
      >
        Send Example Email
      </button>
    </div>
  );
}
Technical details:
- We use the
“use client”statement now since we have event listeners likeonClickin the code; this is required to make components accessible in the browser environment in Next.js so that we can interact with those browser events. - We declare the
sendEmailfunction containing email-sending logic. First, we create themailOptionsobject containing the properties that we want to pass in the request body that we would later retrieve in our API route. - Then, we make a POST request to the API route we previously created, passing
mailOptionsin the request body. After that, we display the email-sending result. - Lastly, we’ll use the
onClickevent listener, which ensures that when the button is clicked, the email-sending code will be called.
Now, to run the application locally and verify that the email-sending functionality works correctly, you can again use either npm:
npm run devOr yarn:
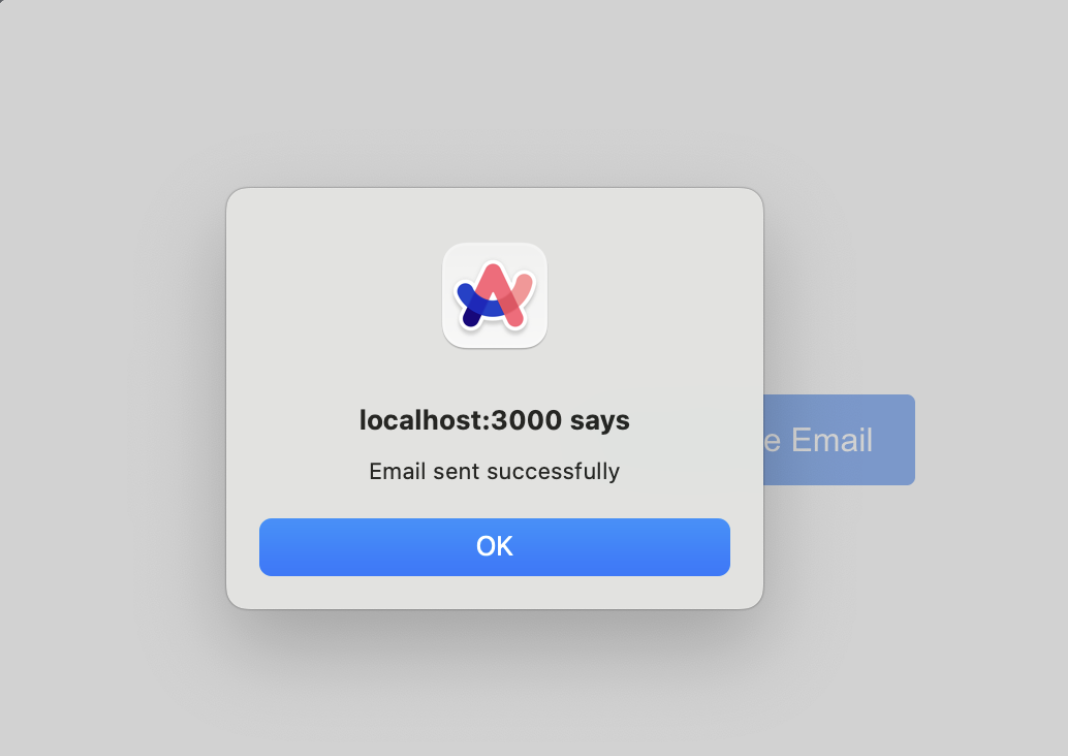
yarn devThen, open the localhost link and click on the ‘Send Example Email’ button. You should see the following:
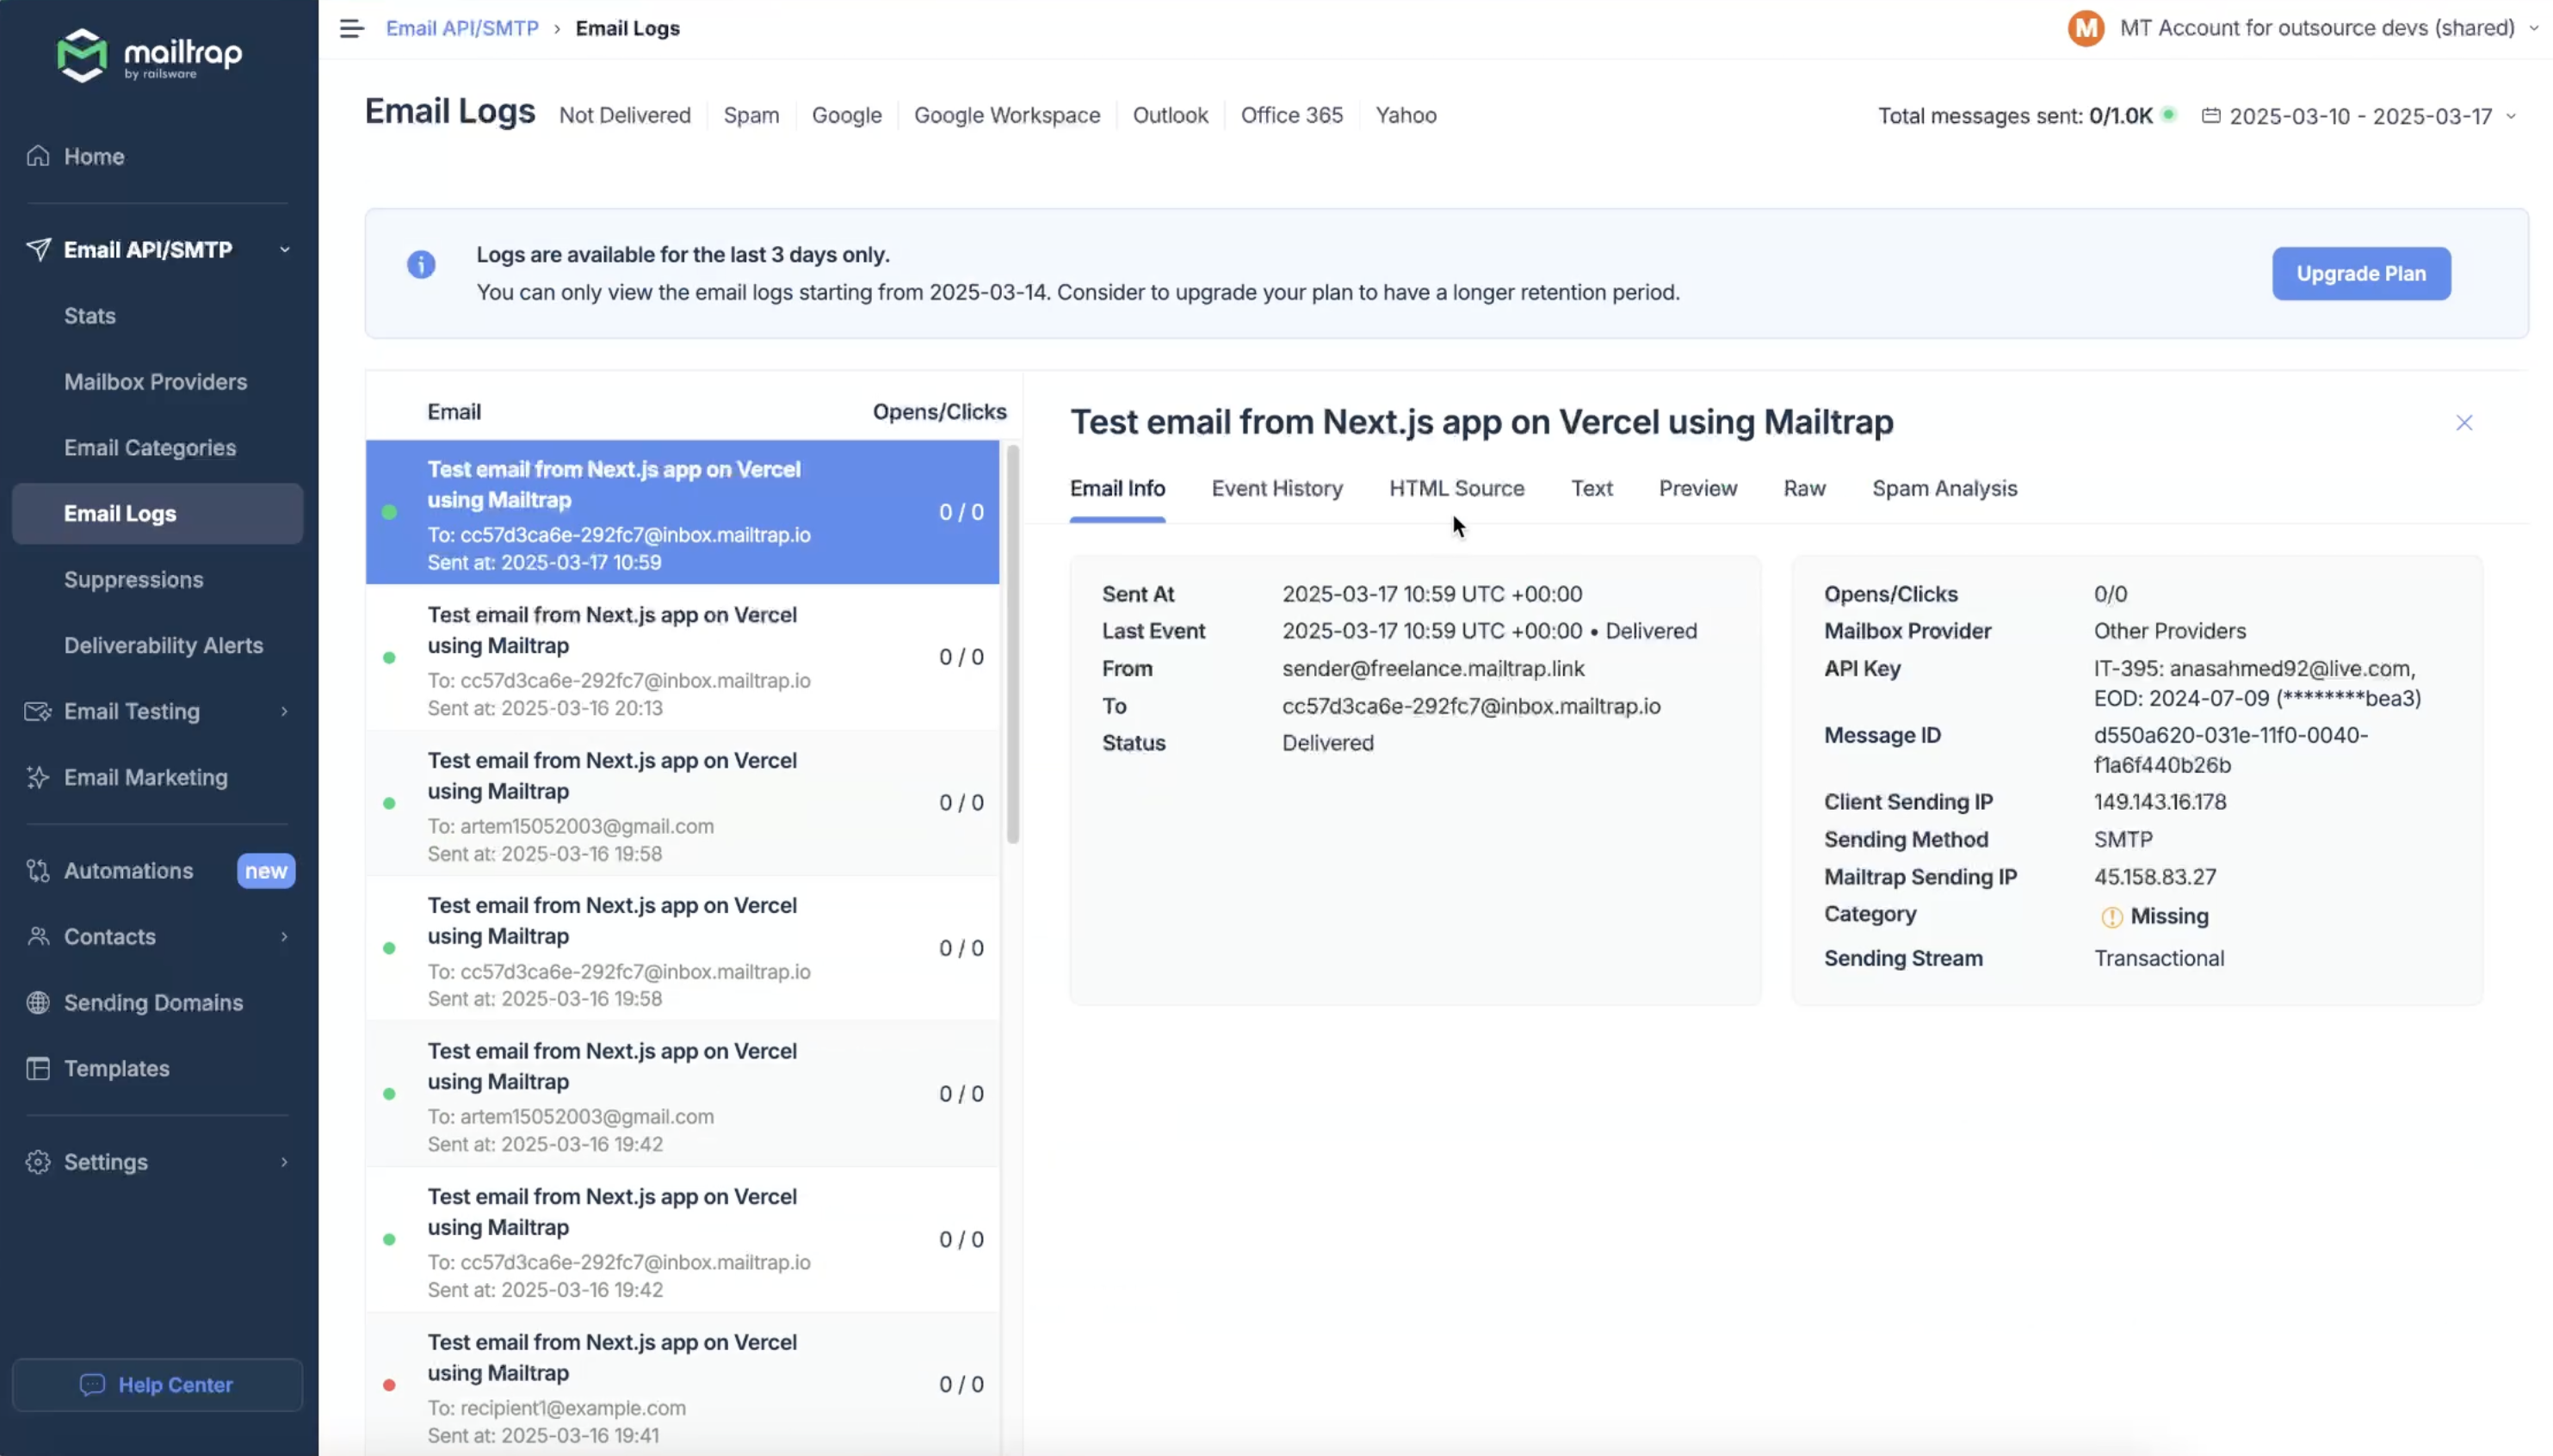
If you use Mailtrap’s SMTP, the email will appear in your Email Logs.
Note: Every bit of the code in this article has been tested before publication, so the email-sending logic should work fine. In case it doesn’t, simply double-check your credentials. 🙂
Send HTML email
If you want to send an HTML email, all you need to do is add the property and the desired message tucked within tags. It’s as simple as that, check it out:
"use client";

export default function EmailForm() {
  const sendEmail = async () => {
    const mailOptions = {
      subject: "Test email from Next.js app on Vercel using Mailtrap",
      to: "recipient@example.com",
      text: "This is a test email sent from a Next.js app deployed on Vercel using Mailtrap.",
      html: "<h1>HTML Content for test email from Next.js app on Vercel using Mailtrap</h1>",
    };

    const res = await fetch("/api/send-email", {
      method: "POST",
      headers: {
        "Content-Type": "application/json",
      },
      body: JSON.stringify(mailOptions),
    });

    if (res.ok) {
      alert("Email sent successfully");
    } else {
      alert("Error sending email");
    }
  };

  return (
    <div
      style={{
        minHeight: "100vh",
        display: "flex",
        justifyContent: "center",
        alignItems: "center",
      }}
    >
      <button
        onClick={sendEmail}
        style={{
          padding: "10px 20px",
          backgroundColor: "#0070f3",
          color: "white",
          border: "none",
          borderRadius: "4px",
          cursor: "pointer",
          fontSize: "16px",
        }}
      >
        Send Example Email
      </button>
    </div>
  );
}
Send email with attachment
Let’s make some changes so that our code also includes sending emails with attachments.
The code we’re about to write is going to be quite different. Because of the way files are sent over the network, we’ll use multipart/form-data instead of the json format that we’re currently using to send properties to our API route.
First, let’s update the page.tsx file to include the new approach using FormData:
"use client";

import { useState } from "react";

export default function EmailForm() {
  const [file, setFile] = useState(null);

  const handleFileChange = (e) => {
    const fileInput = e.target.files;
    if (fileInput && fileInput.length > 0) {
      setFile(fileInput[0]);
    }
  };

  const sendEmail = async () => {
    const formData = new FormData();
    formData.append(
      "subject",
      "Test email from Next.js app on Vercel using Mailtrap"
    );
    formData.append(
      "text",
      "This is a test email sent from a Next.js app deployed on Vercel using Mailtrap."
    );
    formData.append("to", "cc57d3ca6e-292fc7@inbox.mailtrap.io");

    if (file) {
      formData.append("file", file);
    }

    const res = await fetch("/api/send-email", {
      method: "POST",
      body: formData,
    });

    if (res.ok) {
      alert("Email sent successfully");
    } else {
      alert("Error sending email");
    }
  };

  return (
    <div
      style={{
        minHeight: "100vh",
        display: "flex",
        justifyContent: "center",
        alignItems: "center",
      }}
    >
      <div
        style={{
          display: "flex",
          flexDirection: "column",
          gap: 8,
          padding: "20px",
          borderRadius: "8px",
          boxShadow: "0 2px 4px rgba(0,0,0,0.1)",
          backgroundColor: "white",
        }}
      >
        <button
          onClick={sendEmail}
          style={{
            padding: "10px 20px",
            backgroundColor: "#0070f3",
            color: "white",
            border: "none",
            borderRadius: "4px",
            cursor: "pointer",
            fontSize: "16px",
          }}
        >
          Send Example Email
        </button>
        <input
          type="file"
          id="file"
          name="attachment"
          onChange={handleFileChange}
          style={{
            border: "1px solid #ccc",
            padding: "10px",
            borderRadius: "4px",
            cursor: "pointer",
          }}
        />
        {file && (
          <div style={{ fontSize: "14px", color: "#666" }}>
            Selected file: {file.name}
          </div>
        )}
      </div>
    </div>
  );
}
Key changes:
- We’re using a file input to let the user choose a file. So, when the file is selected, it’s stored in the component’s state (file).
- Now, we use FormData to send the email details (including the file) as a multipart/form-data request.
- On form submission, we’re sending the form data (with the file attachment) to the send-email API route.
- Additionally, we’re showing the selected file to the user for more clarity.
Next, we need to update the code in our route.js file. Since we’re no longer passing the data in requests using json, but passing the data in multipart/form-data format, the implementation is going to be different. Check it out:
// app/api/send-email/route.js
import nodemailer from "nodemailer";

const transporter = nodemailer.createTransport({
  host: process.env.SMTP_HOST,
  port: process.env.SMTP_PORT,
  auth: {
    user: process.env.SMTP_USER,
    pass: process.env.SMTP_PASS,
  },
});

export async function POST(req) {
  try {
    const formData = await req.formData();
    const subject = formData.get("subject");
    const text = formData.get("text");
    const to = formData.get("to");
    const file = formData.get("file");

    const mailOptions = {
      from: "sender@freelance.mailtrap.link",
      to,
      subject,
      text,
    };

    if (file) {
      const buffer = await file.arrayBuffer();
      mailOptions.attachments = [
        {
          filename: file.name,
          content: Buffer.from(buffer),
          contentType: file.type,
        },
      ];
    }

    await transporter.sendMail(mailOptions);

    return new Response(
      JSON.stringify({ message: "Email sent successfully!" }),
      { status: 200 }
    );
  } catch (error) {
    return new Response(
      JSON.stringify({ message: "Error sending email", error }),
      { status: 500 }
    );
  }
}
What’s changed:
- The
req.formData()method extracts thefromDataobject from the request. - We extract properties from the form one by one using the
fromData.getmethod, including the file property. - We read the file contents using the
file.arrayBuffer()method, and pass it to Nodemailer options together with filename and file type. Or, if the file isn’t attached, we skip it.
Before you push and deploy your new code, make sure to test that you don’t have any errors when running locally.
Again, you can use npm:
npm run devOr yarn:
yarn devOnce you’ve verified that everything works correctly, let’s push the new code to GitHub by running the following commands:
git add .
git commit -m "Add file attachment"
git push -u origin main
What’s nice about using Vercel is that we don’t have to focus on updating anything manually. As soon as the new code is pushed to GitHub, Vercel will redeploy the app with new changes for us. Open the live version of your website in the Vercel dashboard.

As you open the updated Vercel Application, you will see the new file attachment feature we implemented. This way, we can attach new files easily, and they’ll be included in Email Attachments.
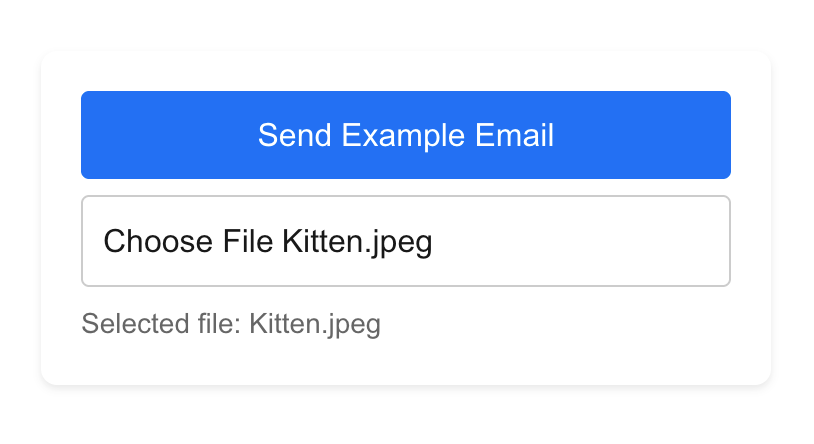
And here’s how it looks in the Mailtrap Email Logs:

Send email to multiple recipients
To send emails to multiple recipients, all you need to do is pass them as a comma-separated string on the page.tsx file and let Nodemailer handle it.
Feel free to use the following script:
"use client";

import { useState } from "react";

export default function EmailForm() {
  const [file, setFile] = useState<File | null>(null);

  const handleFileChange = (e: React.ChangeEvent<HTMLInputElement>) => {
    const fileInput = e.target.files;
    if (fileInput && fileInput.length > 0) {
      setFile(fileInput[0]);
    }
  };

  const sendEmail = async () => {
    const formData = new FormData();
    const recipients = ["recipient1@example.com", "recipient2@example.com"];

    formData.append(
      "subject",
      "Test email from Next.js app on Vercel using Mailtrap"
    );
    formData.append(
      "text",
      "This is a test email sent from a Next.js app deployed on Vercel using Mailtrap."
    );
    formData.append("to", recipients.join(", "));

    if (file) {
      formData.append("file", file);
    }

    const res = await fetch("/api/send-email", {
      method: "POST",
      body: formData,
    });

    if (res.ok) {
      alert("Email sent successfully");
    } else {
      alert("Error sending email");
    }
  };

  return (
    <div
      style={{
        minHeight: "100vh",
        display: "flex",
        justifyContent: "center",
        alignItems: "center",
      }}
    >
      <div
        style={{
          display: "flex",
          flexDirection: "column",
          gap: 8,
          padding: "20px",
          borderRadius: "8px",
          boxShadow: "0 2px 4px rgba(0,0,0,0.1)",
          backgroundColor: "white",
        }}
      >
        <button
          onClick={sendEmail}
          style={{
            padding: "10px 20px",
            backgroundColor: "#0070f3",
            color: "white",
            border: "none",
            borderRadius: "4px",
            cursor: "pointer",
            fontSize: "16px",
          }}
        >
          Send Example Email
        </button>
        <input
          type="file"
          id="file"
          name="attachment"
          onChange={handleFileChange}
          style={{
            border: "1px solid #ccc",
            padding: "10px",
            borderRadius: "4px",
            cursor: "pointer",
          }}
        />
        {file && (
          <div style={{ fontSize: "14px", color: "#666" }}>
            Selected file: {file.name}
          </div>
        )}
      </div>
    </div>
  );
}
Key changes:
- Used the recipients array to have a list of mock recipients to whom we want to send our email.
- Passed the array as a string with all recipients delimited by a comma, using the recipients.join(“, “) method. It transforms the array into a string this way
["recipient1@example.com", "recipient2@example.com"]
→
“recipient1@example.com, recipient2@example.com”
As always, before you push and deploy your new code, make sure to test that you don’t have any errors when running locally.
npm:
npm run devyarn:
yarn devAll works as it should? Let’s push new code to GitHub by running:
git add .
git commit -m "Add multiple recipients"
git push -u origin main
Vercel will then redeploy the app with new changes for us.
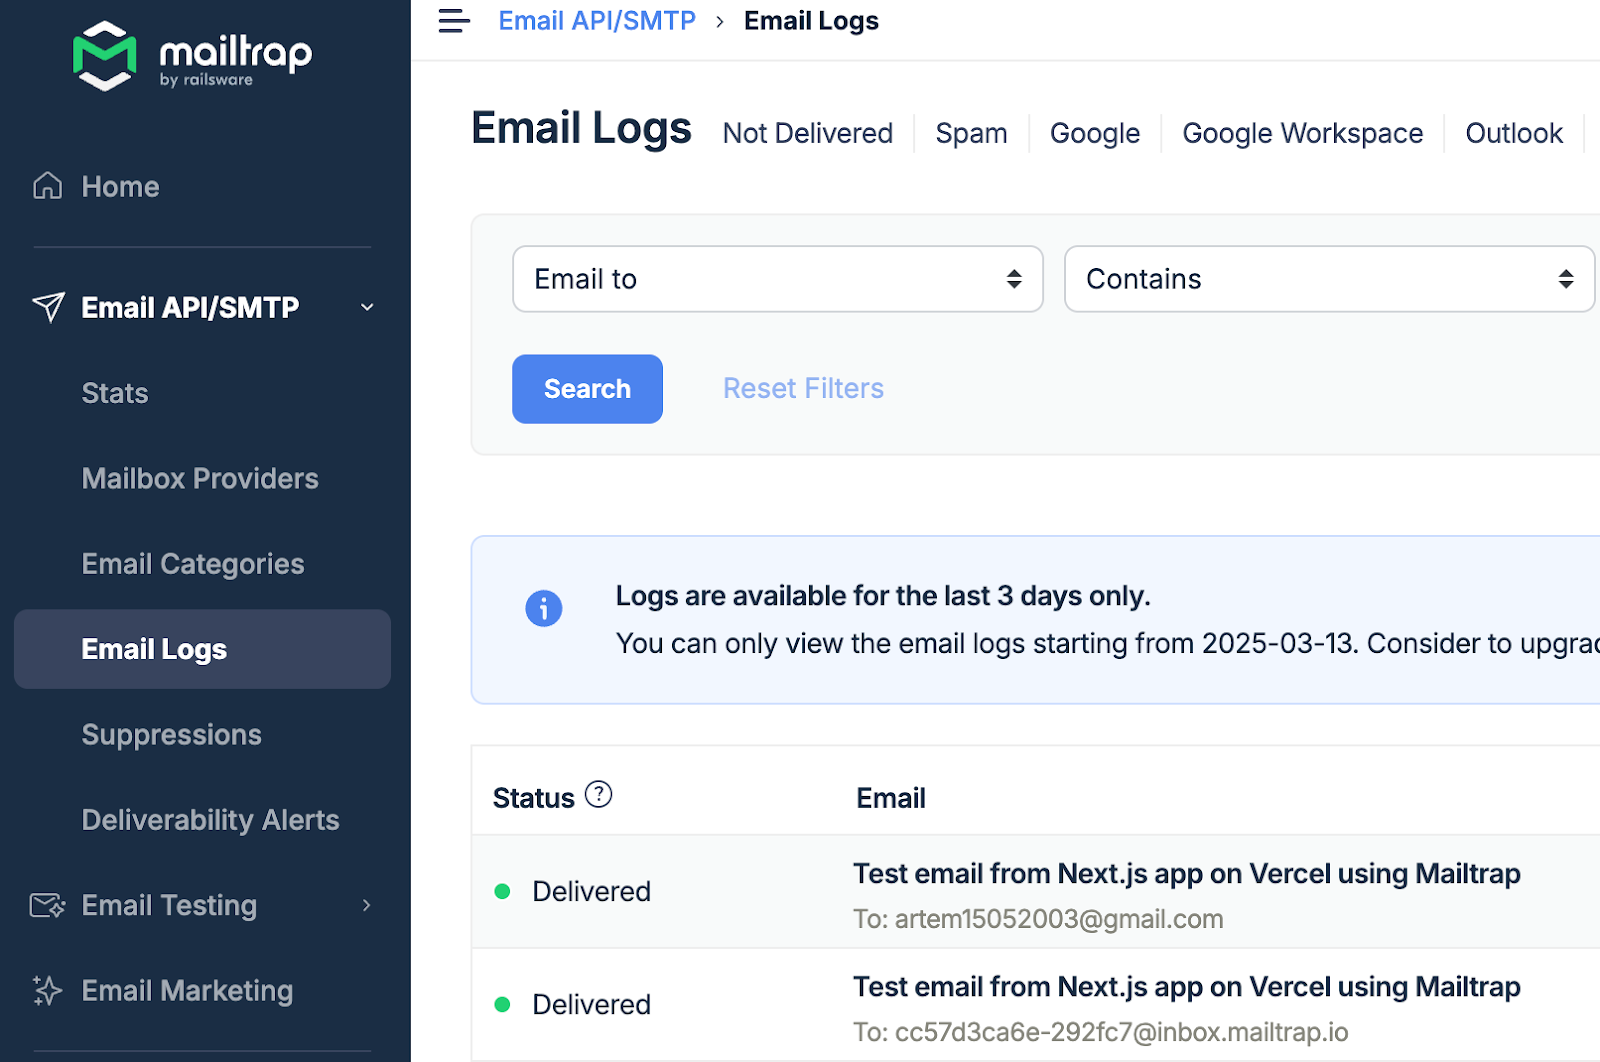
Now, you can open the live version of your website in the Vercel dashboard and click the button to send emails to the mentioned recipients. As you open your Email Logs tab in the Mailtrap dashboard, you should see 2 new emails successfully sent to these recipients accordingly:
Wrapping up
Overall, the scalability and simplicity offered by Vercel Functions paired with Mailtrap’s official integration or the SMTP service make this solution production-ready.
By using the setup from this article, you can confidently send transactional emails from your Next.js app—no need to maintain a separate backend server.
Feel like further expanding your development skills? If so, be sure to check out our blog, where you can find other related articles such as:

