Since its inception in 2004, Gmail has accumulated 1.8 billion active users worldwide and has gone through a lot of changes, including the simplification of the Gmail compose box/window and the removal of the HTML editor.
How did such changes affect users who want to send HTML email with Gmail, and what steps does the process consist of? We’ll answer these and many more questions in the text below, so stay tuned!
Why send HTML Gmail emails?
By default, Gmail users have access to the WYSIWYG (What You See Is What You Get) editor – a tool that lets you make changes in a simplified, code-free view. Although the WYSIWYG editor is great for day-to-day usage thanks to its speed and the options it offers (changing font/color/size, aligning copies, adding bullet points/indentations, and inserting images/emojis), it can’t substitute good-old HTML usage.
With HTML (and CSS), you can create the structure and styling of a page/email. So, if you want to add things such as company branding (logos, banners, etc.) and use complex formatting in an email campaign, you will need HTML and CSS, as doing so is not facilitated by the default editor.
Creating an HTML email in Gmail
Creating a simple email in Gmail is truly easy. Just click “Compose”, enter the details along with the copy, and you’re done. But when it comes to an HTML formatted email, on the other hand, things can get a bit more tricky.
Luckily, there are multiple methods available for completing this task.
Method #1 – Copy-paste rendered HTML into Gmail’s compose window
The first method we cover involves using rendered HTML, which might raise some eyebrows, but don’t worry, we’ll explain.
You see, if you were to just copy and paste HTML code into Gmail’s compose window, the email service wouldn’t render the code in any way. And once an email with the code was sent, the recipient would simply get a chunk of raw HTML from you.
To prevent this from happening, you’ll need to take a different approach consisting of a few steps:
Step #1 – Write the HTML code for your email and save it in a .html file on your device. When doing this, ensure that the editor you use to write the code saves files in plain text and doesn’t add any additional formatting. Failing to follow these instructions will lead to your code not being properly rendered.
Note: Those of you using macOS’ TextEdit to write the code will need to make a few tweaks explained in this article to have everything working as expected.
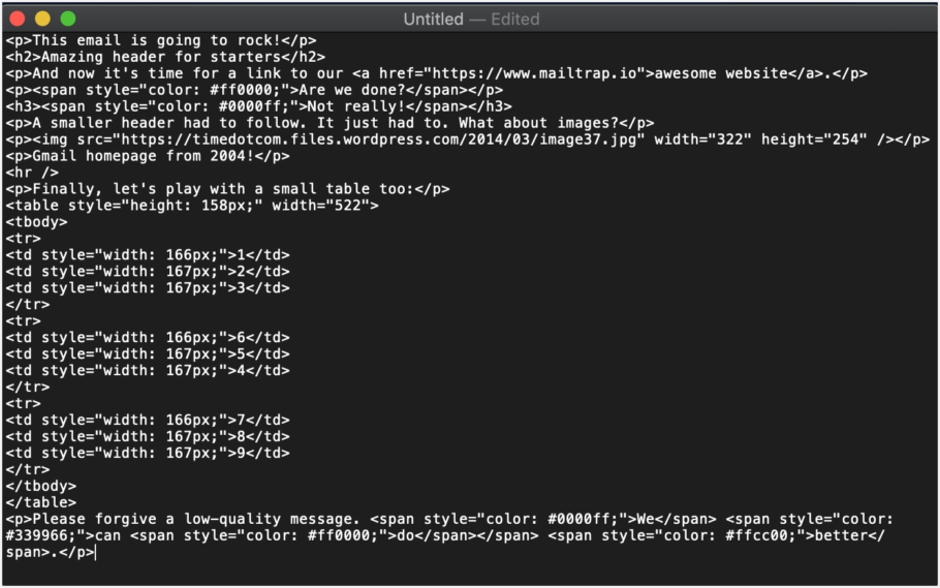
Step #2 – Open the .html file you created in a browser of your choice to see how it’s being rendered as a web page. In case you see raw HTML, double-check if everything was saved correctly and if your editor saves files in plain text.
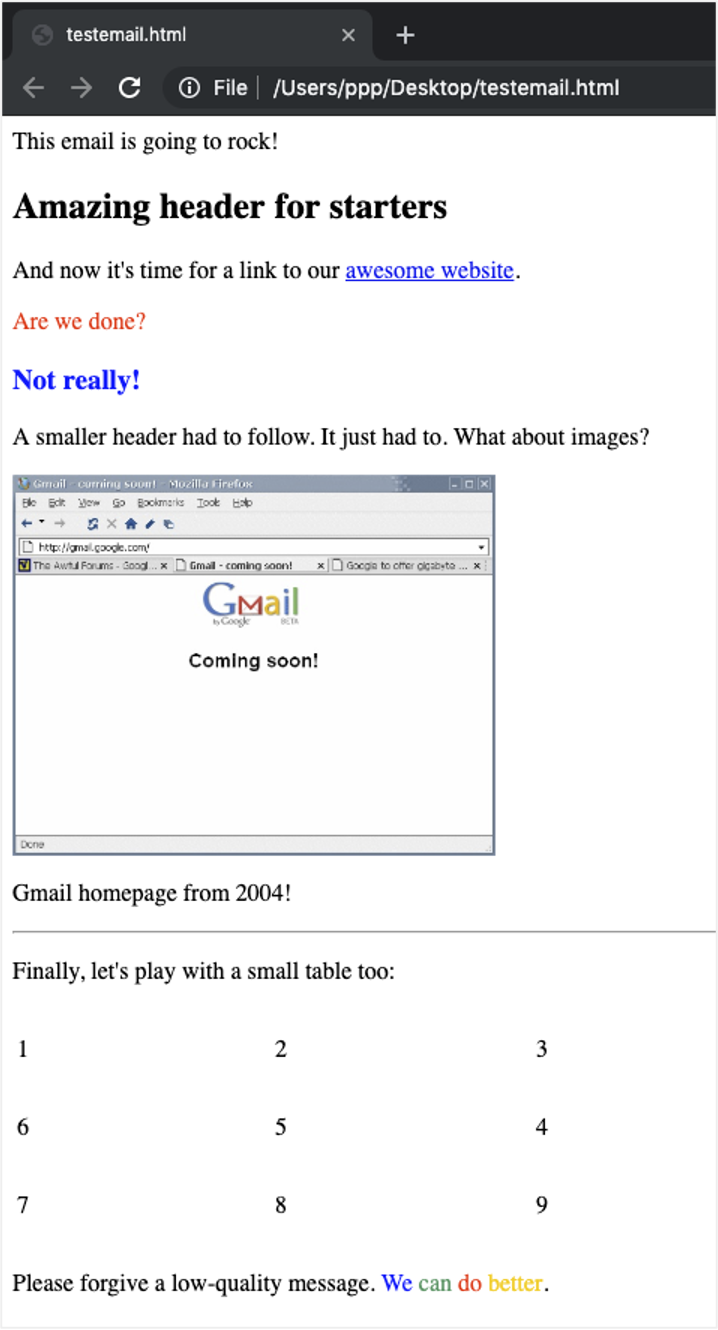
Step #3 – Copy the properly rendered web page from the browser using the keys Ctrl+A (Windows) / Cmd+A (Mac) or your PC mouse. Then, just paste the copied content into Gmail’s compose window.
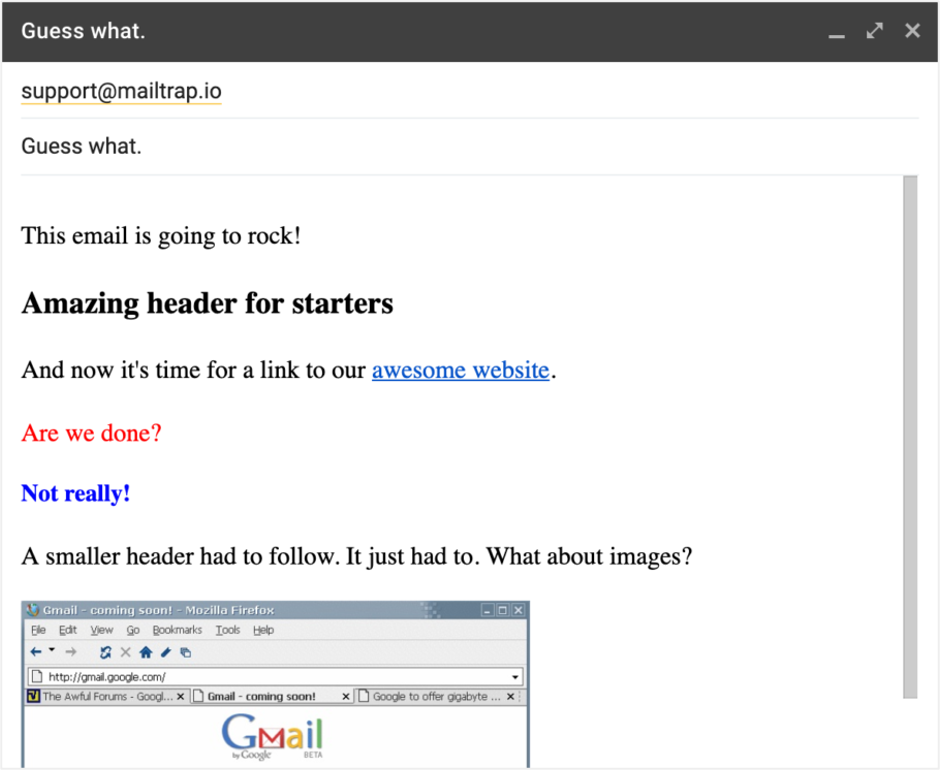
And that is it! In three simple steps, you have created an HTML email and can now send it off!
Method #2 – Make use of Chrome’s Developer Tools
While this method is not something you would think of right away on your own, it’s a great workaround for creating HTML emails.
Step #1 – Write your HTML code ready to go by opening the document it’s stored in.
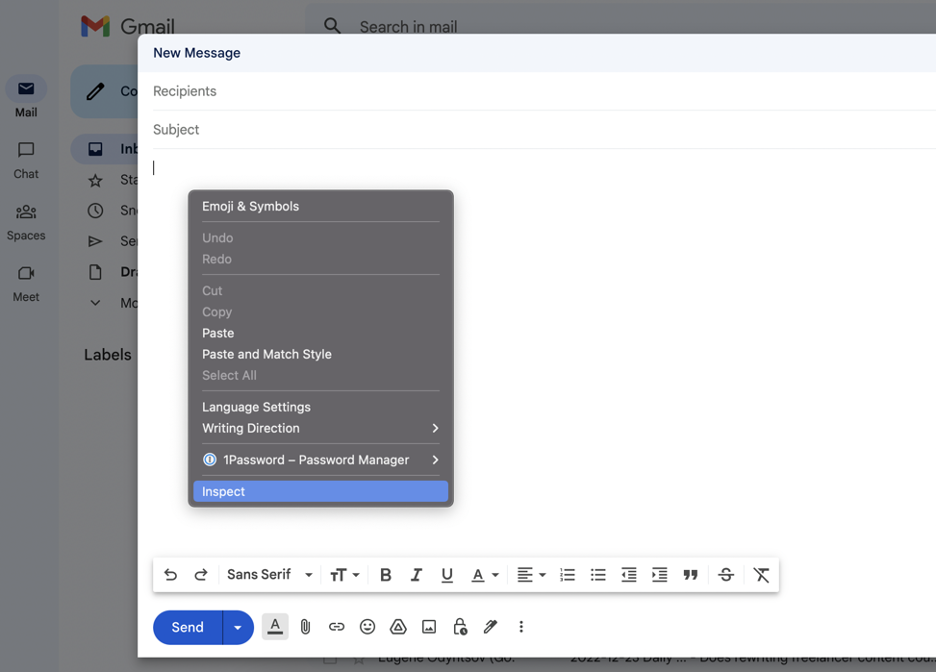
Step #2 – Click “Compose” in your Gmail account, and then in the window that opens, do a right-click. A small pop-up should appear through which you must select the “Inspect” option.
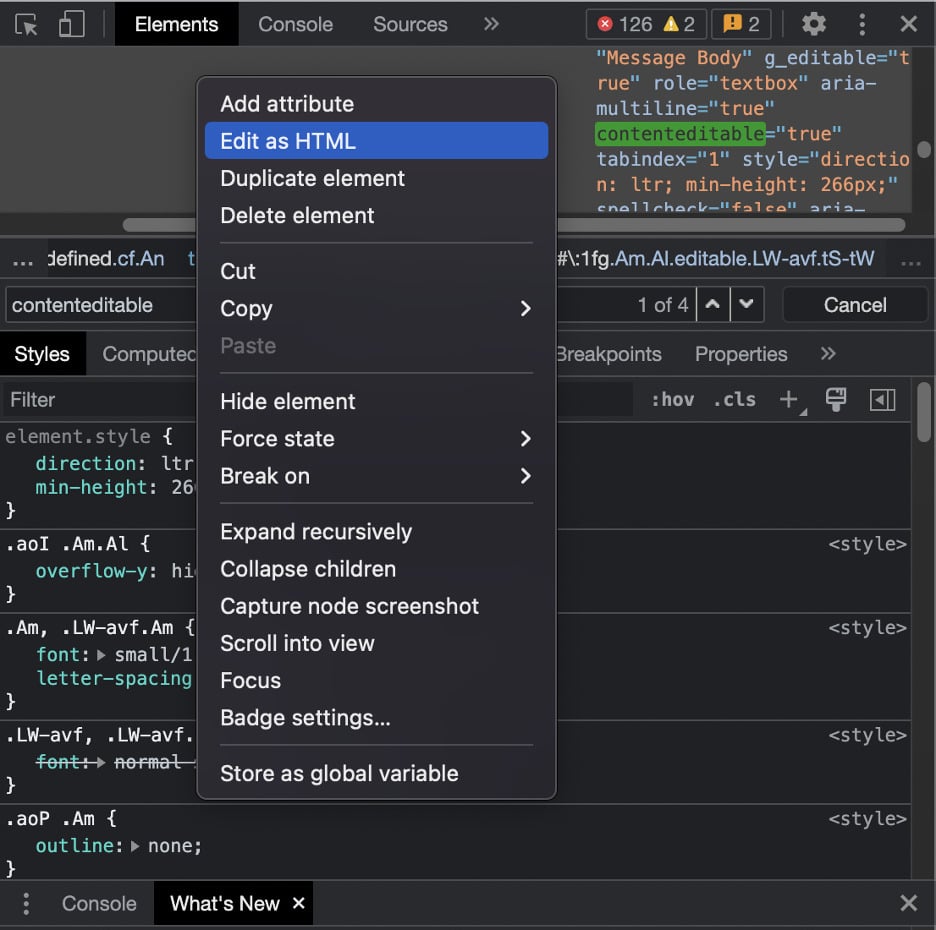
Step #3 – Selecting the “Inspect” option should open Chrome’s Developer Tools containing the source code of the compose window. There, a div element (<div> HTML tag) with the attribute “contenteditable=true” should be highlighted. Right-click on this element and select the “Edit as HTML” option.
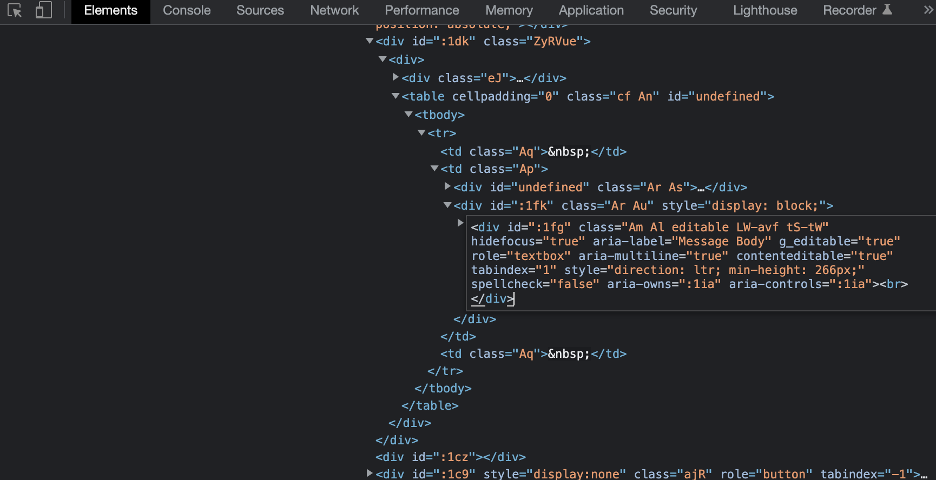
Step #4 – Remove the existing code in the div element and replace it with your HTML code.
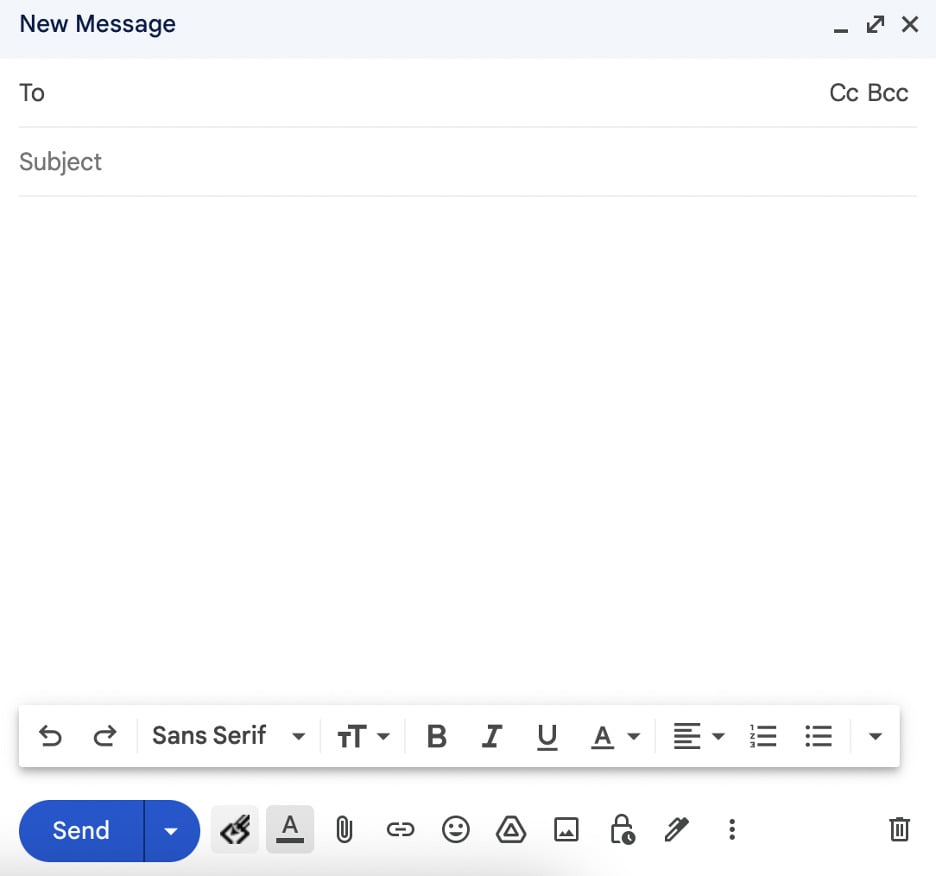
Step #5 – Exit Chrome’s Developer Tools window, and your custom HTML code should now be rendered in the compose window.
Method #3 – Make use of Chrome extensions
Chrome’s Developer Tools work great for editing an email’s HTML behind the scenes, but they are definitely not the most user-friendly option. So, if you find yourself not wanting to use them or confused when doing so, we suggest you go for a Chrome extension instead.
At your disposal is a range of extensions you can explore on the Chrome Web Store. But if you want a quick recommendation from our side, then we would have to mention Free HTML Editor for Gmail by cloudHQ and Send Mass Mail + HTML inserter for Gmail.
These two extensions function in a very similar way, with some differences here and there.
For instance, if you opt for using Free HTML Editor for Gmail by cloudHQ, you will have to create an account after installing the extension. Once you have done that, a small icon will appear next to the Send button in the compose window, allowing you to edit the email as HTML.
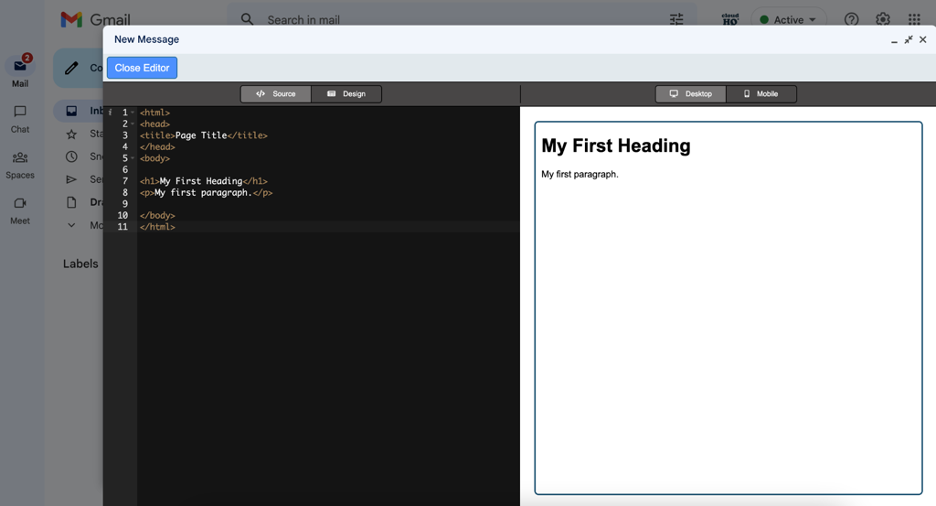
Users of Send Mass Mail + HTML inserter for Gmail, on the other hand, don’t need to create an account. To access the “Insert HTML” option in the Gmail compose window, which they can use to create and embed HTML, all they need to do is click on the downward-pointing arrow next to the “Send Mass” button.
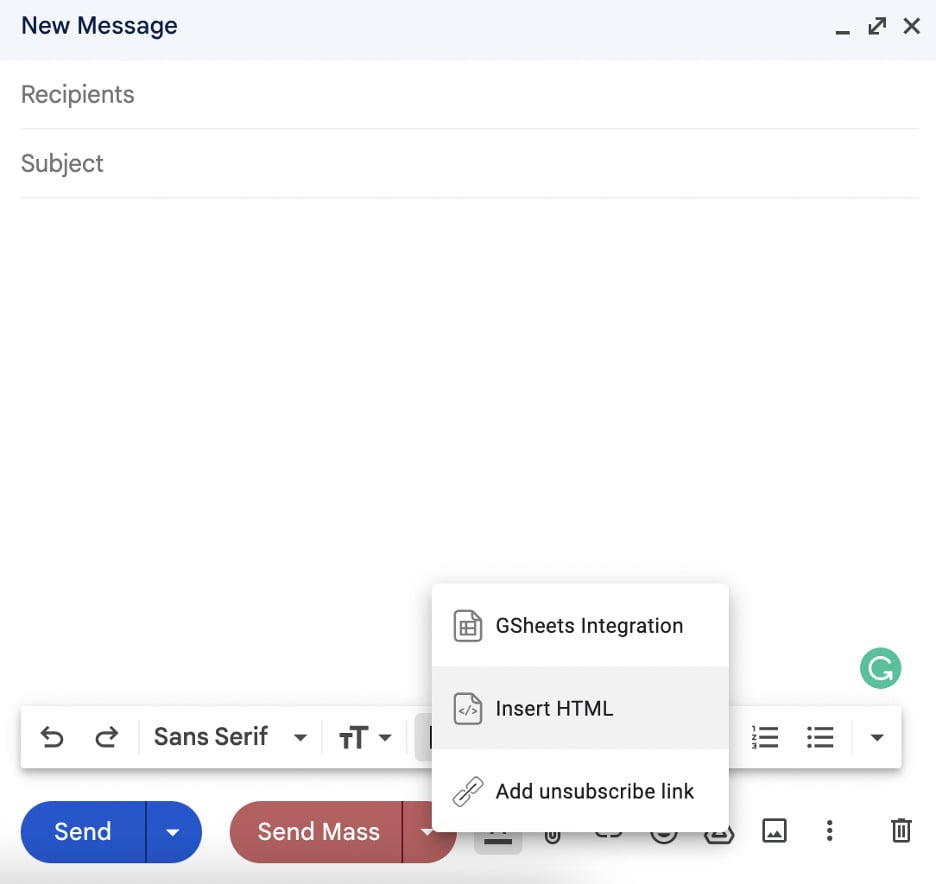

Much less intimidating than Chrome’s Developer Tools, don’t you think?
Checklist for HTML email creation in Gmail
Time and time again, you will hear that HTML is a very simple markup language. And while that is true, there are certain limitations that come to light when HTML is used to create a new email in Gmail.
- Images need to be hosted online and be publicly available – When including images in your HTML email, make sure those images are uploaded/stored on the internet and can be referenced with a link in the code. Some image-storing options you should consider are Google Drive (or other similar services) as well as your own server.
- External style sheets don’t work – Using external style sheets might be a recommendation when you are creating a web project, but it won’t be of any good use for emails as Gmail does not support them. As a substitute, you can simply use embedded CSS or inline styles.
Note: While it is totally up to you how much embedded or inline CSS you will include, it’s important to note that a good, responsive email typically has its fair share of inline CSS, used mainly to maintain the proper structure and styling of the email. So keep that in mind when adding CSS!
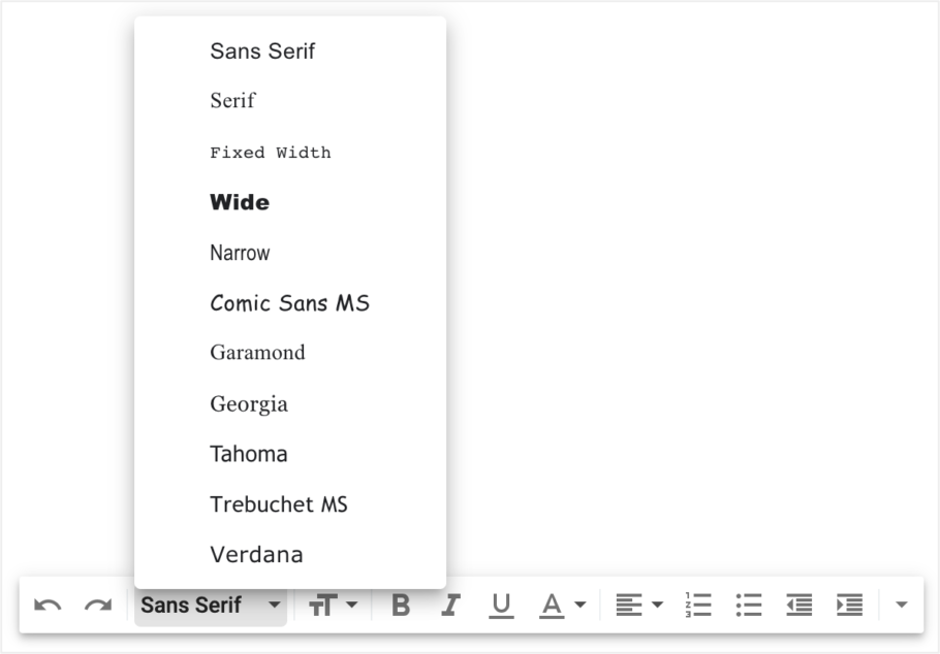
- Web fonts can’t be used – In Gmail, web typography, or in other words, web fonts, can’t be imported or used. So, if Gmail is your email service of choice for creating and sending HTML emails, you will have to settle for Arial (Gmail’s default font), Open Sans, Roboto, or some email-safe font.
Coding an HTML email from scratch vs using an HTML email editor
If you’ve spent some time mastering web development, then you might be thinking that coding an HTML email from scratch will be a quick and easy task. And while that could turn out to be absolutely the case, you should be aware that, at the fault of email clients (Gmail, Outlook, Apple Mail, etc.), you might encounter a few hiccups
Why so? Well, let’s just say that having advanced HTML rendering is not a top priority for most email clients, causing your professional email to be buggy even if you didn’t make any actual coding mistakes. Plus, as there is a wide range of email clients in use, you will have to cater to the requirements of the most popular ones (at least) with your code to ensure your HTML email looks decent when it arrives in recipient inboxes.
To avoid this hassle, many people simply decide to use an HTML email builder/editor, as most come with a range of benefits, including:
- Pre-made customizable HTML email templates
- Drag-and-drop email design building functionality
- Compatibility of HTML templates with popular email clients/email service providers
- Almost guaranteed responsiveness
- Built-in code editor
Considering the mentioned benefits (and others we haven’t listed), it comes as no surprise that HTML email editors are so popular. And if you need help picking one, we have an entire article dedicated to the topic.
Once you make your choice, pick one of the templates available, adjust it as necessary, and then copy-paste its HTML code into Gmail compose window as described earlier to create an eye-catching and responsive HTML email in Gmail.
Testing your HTML emails
Feeling ready to send the HTML email you crafted? Don’t forget to complete one more important step beforehand – testing the email.
This step is very important regardless of the type of email you are sending, be it a plain text personal email, an email newsletter, or an advanced email marketing campaign. Yet it is crucial when dealing with HTML. Why? Well, remember all the HTML rendering issues we mentioned throughout this article? With email testing, you can catch these before your recipients do. If you’re using a proper tool, that is.
We run our tests within the Mailtrap Email Delivery Platform. Mailtrap’s Email Testing tool enables inspecting and debugging in staging, dev, and QA environments without the risk of spamming users with testing emails.
The tool comes with a range of features, including spam analysis, blacklist reporting, email forwarding to whitelisted recipients, multiple inboxes for different projects and project stages, insight into detailed tech info (email headers and SMTP transaction), and more. But, among all its features, people looking to send HTML emails in Gmail will most benefit from email previewing and HTML/CSS analysis.
With the email previewing feature located in the HTML tab of Email Testing, you can check how your email will be rendered by a web browser while making sure images are displayed properly, links are correct, and variables are generated properly.
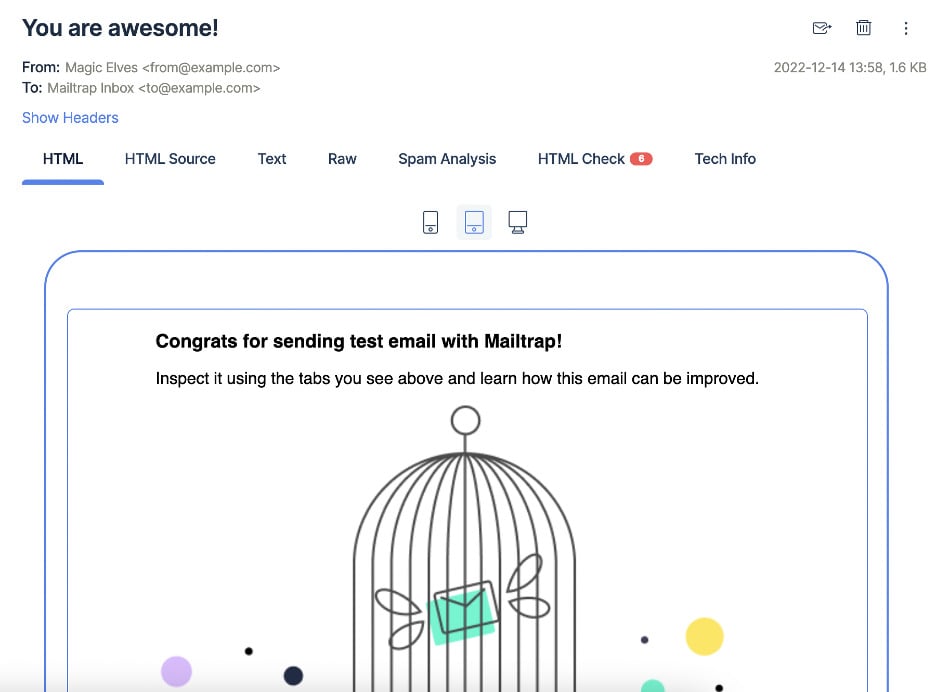
Responsiveness can also be tested by viewing your email on devices with a different screen size (smartphone, tablet, or desktop) within the same tab.
The HTML/CSS analysis feature, located in the HTML Check tab of Email Sandbox, is intended for scanning through your email code in search of elements causing errors, for example, HTML buttons or HTML tables, just to name a few. If any are found, they will be individually listed along with information on which email clients don’t support or only partially support them.
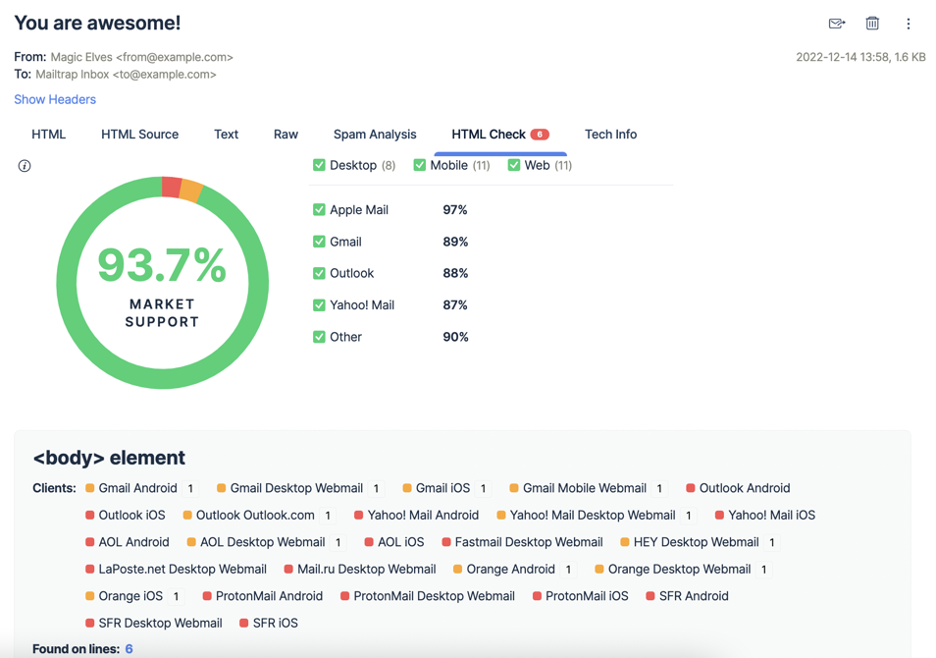
And if you are looking to get an estimate of the support popular email clients have for your email code, the same will be provided to you at the top of the HTML Check tab.
To start using Email Testing, you’ll have to create a Mailtrap account and pick one of the three methods of sending your first test email described in the Mailtrap knowledge base tutorial. Once the email arrives in your Email Testing virtual inbox, you are free to inspect and debug it!
Wrapping things up
Sending an HTML email in Gmail is not the toughest of tasks. All you have to do is have the HTML code ready and pick your favorite way of inserting it into Gmail. Add some email testing into the mix as well, and that email should look exactly as intended in the recipient’s inbox!


