In the DKIM Explained blog post, we featured a doleful story of a product owner named Mark who missed a chance to sell his product to a prospect named Yvonne. Mark’s marketing emails reached Yvonne’s mailbox but ended up in a ‘spam’ folder. So, she has signed with another company. The reason was quite simple: Mark’s emails lacked a DKIM signature. Don’t make his mistake – set up and learn to analyse your DKIM record with the help of this guide.
What is required for a DKIM signature?
DomainKeys Identified Mail (DKIM) is a digital signature added to outbound emails. It looks like a random set of characters mostly unreadable to a human user. Recipients don’t see this unless they dig into the source code of the email. DKIM is meant for the recipient’s email server, which authenticates the sender based on it and, if everything seems to be fine, lets pass the email to the mailbox. Here is an example of a regular DKIM record:
DKIM-Signature: v=1; a=rsa-sha256; c=relaxed/relaxed; d=asuswebstorage.com; s=default; t=1572282571; bh=NFzBvJ/pEmf+yUHDd/Y7dYNH9pE+Bx6o95KcxhwFL78=; h=From:To:Subject:From; b=QwgINKqwcBu3GbeWm2Be81qXks6Pq9yMmDZl9C6mT8moXVBeokpEmDN+0RyZFiOmNH30kbe6HbS2lY3b1Pf726UH/V/0VAH0nigTuir4TWdN/IUePV+goQdEJ2+sDQ1fHlVjyyJCRwCiFiZpBIjhTBNN0vrgNJZ/gSLLOvq6k3s=It consists of the following tags:
v=1– the version (always equals to 1)a=– a signing algorithm used for the creation of a DKIM recordc=– a canonicalization algorithm for the header and the bodyd=– a domain where the DKIM is signeds=– a DKIM selectort=– a timestamp of when the email was signedbh=– a hashed email bodyh=– a list of headersb=– a digital signature
To create the DKIM signature, you will have to specify only two tags of all the above: an authorized domain (d=) and a selector (s=).
Choose a domain
When validating DKIM signatures, the recipient’s mail server checks whether the domain included in the signature (d=) matches the domain included in the ‘From:‘ field of the email. You may use different domains for sending different types of emails, so make sure each is authorized.
NB: If you’re using different domains for sending emails, you’ll need to have separate DKIM signatures for each domain.
Pick a DKIM selector
A selector or a selector prefix is a name you need to specify to create the DKIM key. During the validation process, the server runs a DNS query according to the combination of the authorized domain (d=) and the selector (s=). This is required to fetch the public key.
Each selector is assigned to a separate private key. If you send different types of emails (marketing, transactional, etc.) from the same domain, it’s better to use separate keys for your convenience though you don’t have to. You’ll need to use different selectors to generate those. Pick any name for your selector.
Choose a public and private key generator
The domain and selector are the input data used to generate a key pair, which consists of the public and the private key. The public key is used in the DNS TXT record, whereas the private key is used for the sending MTA. Check our blog post, “What is an MTA?”, if you need to brush up on what that is.
The MTA uses the private key to hash headers (h=) and the body (bh=) of the outbound email. The private key is kept on the server and never leaves.
When an email with DKIM arrives, a receiving mail server makes a DNS query to get the public key. The server uses it to build its own hashes and then compares them with the ones received. If there’s a match, the email is let in.
You can generate these keys with one of the following tools:
- DKIM Core – the selector is assigned automatically.
- DKIM Generation Wizard by SocketLabs – allows you to assign a selector and generate 1024 and 2048 bit key pairs.
- DKIM Wizard by SparkPost – allows you to assign a selector and generate 1024 and 2048 bit key pairs. Previously known as Port25.
- DKIM Record Generator by Easy DMARC – allows you to assign a selector and lookup DKIM.
- DKIM Wizard by Unlock The Inbox – allows you to assign a selector and generate 512, 768 (keys smaller than 1024 bits are subject to off-line attacks), 1024, and 2048 bit key pairs.
- PuTTY – an installable tool for generating public-private key pairs on Windows and Linux.
- ssh-keygen – an installable tool for generating public-private key pairs on Linux.
With some tools, you can generate 2048-bit domain keys. They are more secure than 1024-bit ones. But you can use them only if your DNS system supports them.
How do I create a DKIM record for my domain?
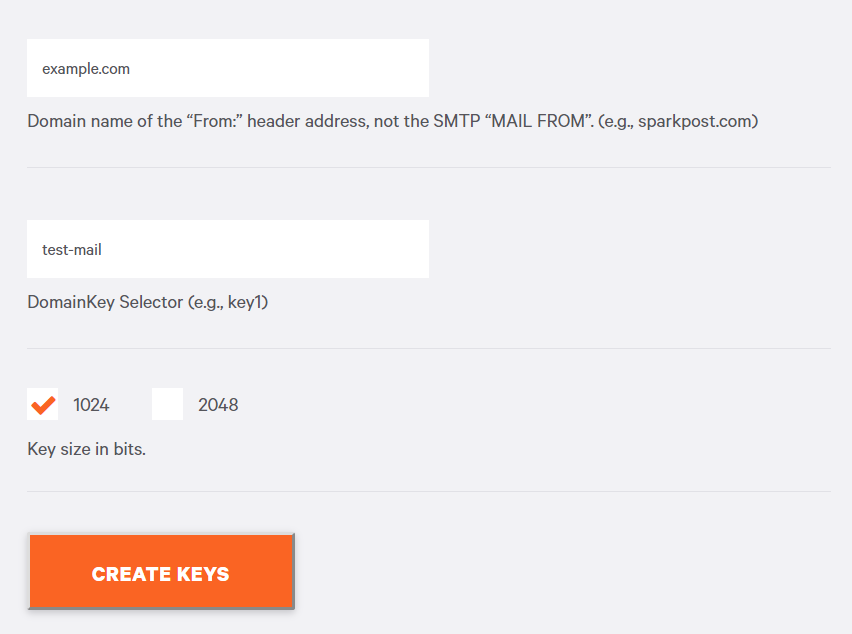
Now, the meat! Let’s go through the steps required to create a DKIM record online. As an example, we’ll use the domain ‘example.com’ and the selector ‘test-mail’.
Generate public and private keys
Generate your public and private key pair using a dedicated tool. We’re using DKIM Wizard by SparkPost, as follows:

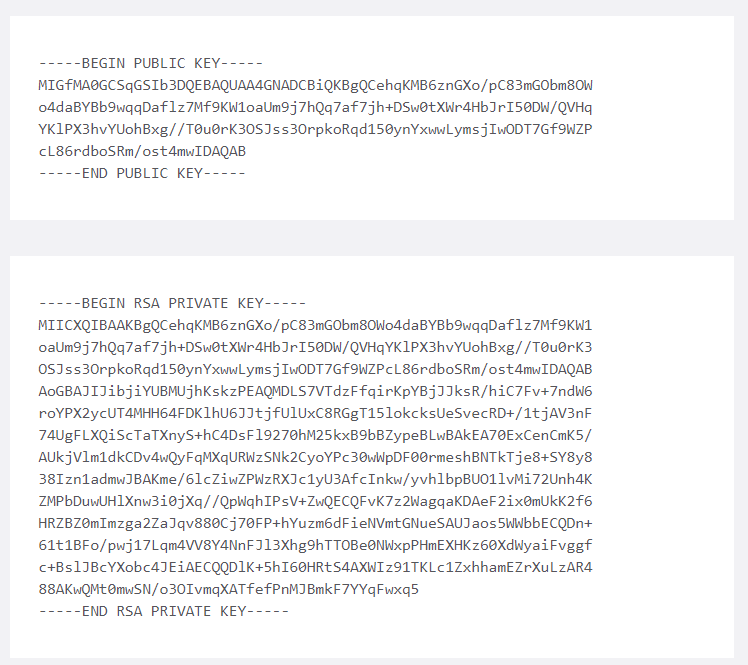
After the click on Create Keys, we’ve got two keys: public and private.

Configure the DNS server with the public key
Create a DKIM TXT record using the domain, selector and the public key. The record will carry the name of the authorized domain attached with the selector prefix, as follows:
test-mail._domainkey.example.comThe DKIM entry starts with the k= tag. It stands for ‘Key type’. Sending and receiving servers must support the rsa key type, which indicates that an ASN.1 DER-encoded public key is being used in the p= tag. The p= tag further encodes the value using base64. Here is what we’ve got:
test-mail._domainkey.example.com IN TXT
“k=rsa\; p=MIGfMA0GCSqGSIb3DQEBAQUAA4GNADCBiQKBgQCehqKMB6znGXo/pC83mGObm8OWo4daBYBb9wqqDaflz7Mf9KW1oaUm9j7hQq7af7jh+DSw0tXWr4HbJrI50DW/QVHqYKlPX3hvYUohBxg//T0u0rK3OSJss3OrpkoRqd150ynYxwwLymsjIwODT7Gf9WZPcL86rdboSRm/ost4mwIDAQAB”
Add this DKIM entry to your domain’s DNS records. In most cases, you’ll have to wait 24-48 hours for the changes to take effect.
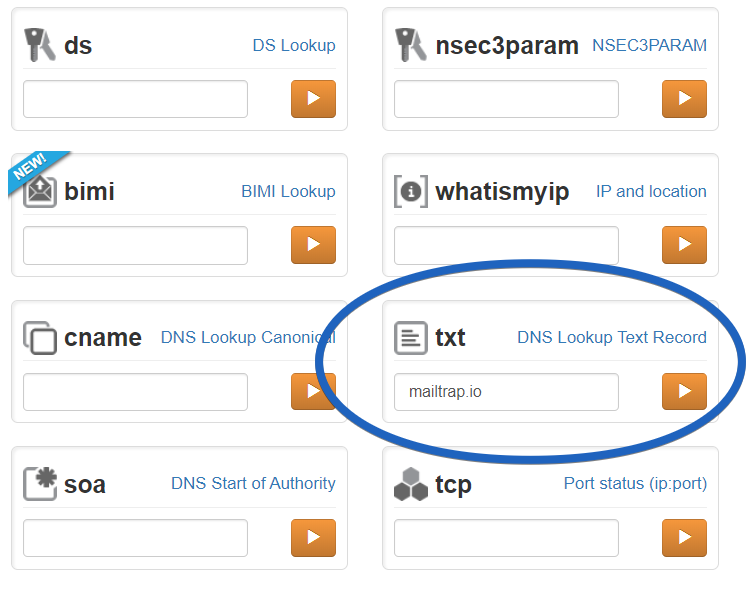
A DNS hosting service is commonly provided by a domain name registrar, but it’s not a must. You can find out which DNS provider you have using a dedicated online tool. For example, MXToolbox and its SuperTool. Let’s check out a DNS hosting provider for Mailtrap.

And that’s what we’ve got in response:

Save the private key to your MTA
Every mail transfer agent is different, and so are the ways to set up DKIM on them. On Exim, for example, you need to create a new file containing the private key and update the main configuration file. For Sendmail, Postfix, or another MTA that supports milters, you can use a tailored milter – OpenDKIM. Check the documentation of your MTA for more details. You can also read about the differences between Postfix, Sendmail, and Exim.
That’s it. Now you can send a test email from your domain. The flow for setting up DKIM might look a bit different for each provider, since they have their own procedures for creating DKIM records. Check out some of them.
Setting up DKIM records with Mailtrap Email API
Mailtrap Email API generates the DNS records you need to add to your domain registrar or manager, including two DKIM records. The records are created at once but rotated automatically, every four months, for increased security. And, to make sure this rotation does not cause a momentary mismatch between a DKIM signature and a public key in your DNS, only one key is rotated at a time while another key remains active.
The process of adding DKIM, as well as the rest of the DNS records, will vary from one domain registrar/manager to another. And on the domain setup page of the Mailtrap knowledgebase, you can view the process steps for Cloudflare, GoDaddy, and Google Domains.
Once added, you can go back to Mailtrap Email API and force a check of the records by pressing the Verify all button or wait until Mailtrap does that on its own, which happens every hour.
Note: If someone else does your DNS management, Mailtrap Email API allows you to copy all the DNS records at once so they can be shared in text form with an admin, for instance.
Setting up DKIM records at popular email service providers
Gmail
Gmail users whose domains were provided by a G Suite domain host partner need to turn on DKIM signing only. All the rest (domain key generation and adding it to domain’s DNS records) are done by Gmail. Regular users will have to do this manually according to the official procedure.
Office 365
In this Microsoft official guide, you’ll discover how to create a DKIM record Office 365, how to configure DKIM for more than one domain, how to upgrade 1024-bit keys to 2048-bit DKIM encryption keys, and much more.
Amazon SES
To create a DKIM record on AWS, you have to accomplish five steps laid out in this documentation. You will also find a list of the most common DNS providers to update the DNS records for your domain at ease.
MailChimp
In MailChimps documentation, the emphasis is made on both DKIM and SPF records. The process includes two parties where you’ll need to complete tasks: MailChimp and your domain provider editor.
Campaign Monitor
Campaign Monitor also provides a detailed “how to create DKIM record wizard”. You won’t have to generate a key pair using a third-party tool, since it’s available in-house. In the documentation, there is also a section about how to add DKIM records on popular DNS hosts.
To wrap up
DKIM is an advanced email authentication standard and every reputable email sender must implement it. Other options include Sender Policy Framework (SPF), which is a fundamental protection against email forgery. DMARC, in turn, leverages DKIM and/or SPF for more advanced checks on received emails. Handle your email security properly. This will let you enjoy the growing metrics of your email campaigns.


