


In this article, I’ll show you how to use TypeScript to send emails from your JS app through:
The code snippets I provide in this article are compatible with TypeScript 3.x and above.
Disclaimer: Every bit of code in this article has been prepared and tested by a developer before publication.
Send email using EmailJS
EmailJS is a client-side or frontend solution for sending emails in JavaScript, which can also be used to send emails via TypeScript. The service is super simple:
- You create an account
- Connect your preferred email service
- Create an email template
- Send the email via TypeScript
All of this, without the need for any server code. Now, let’s see how it works!
1. Register and set Up EmailJS
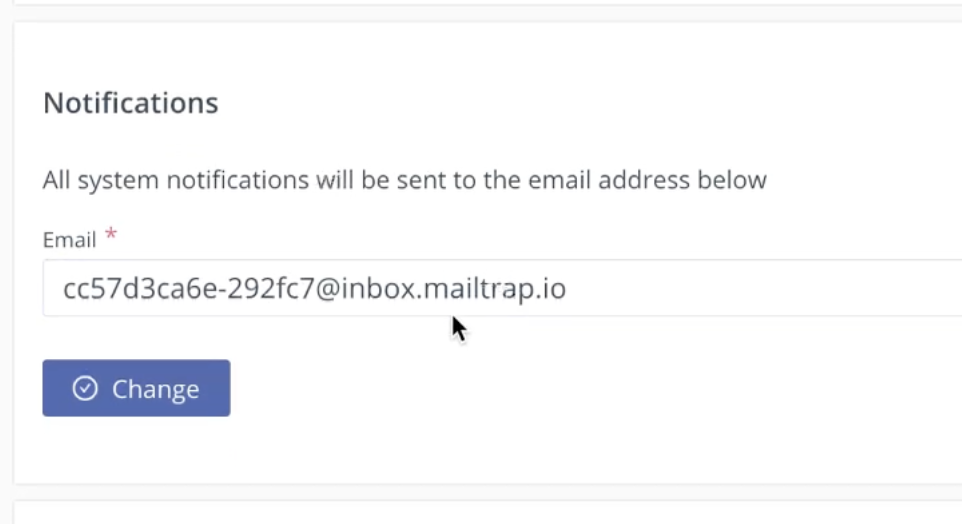
Let’s start by creating a free EmailJS account. Then once you sign up, navigate to the ‘Account’ page on the left-side menu, find ‘Notifications,’ and insert the desired domain you intend to use for email sending.
2. Connect your email-sending service
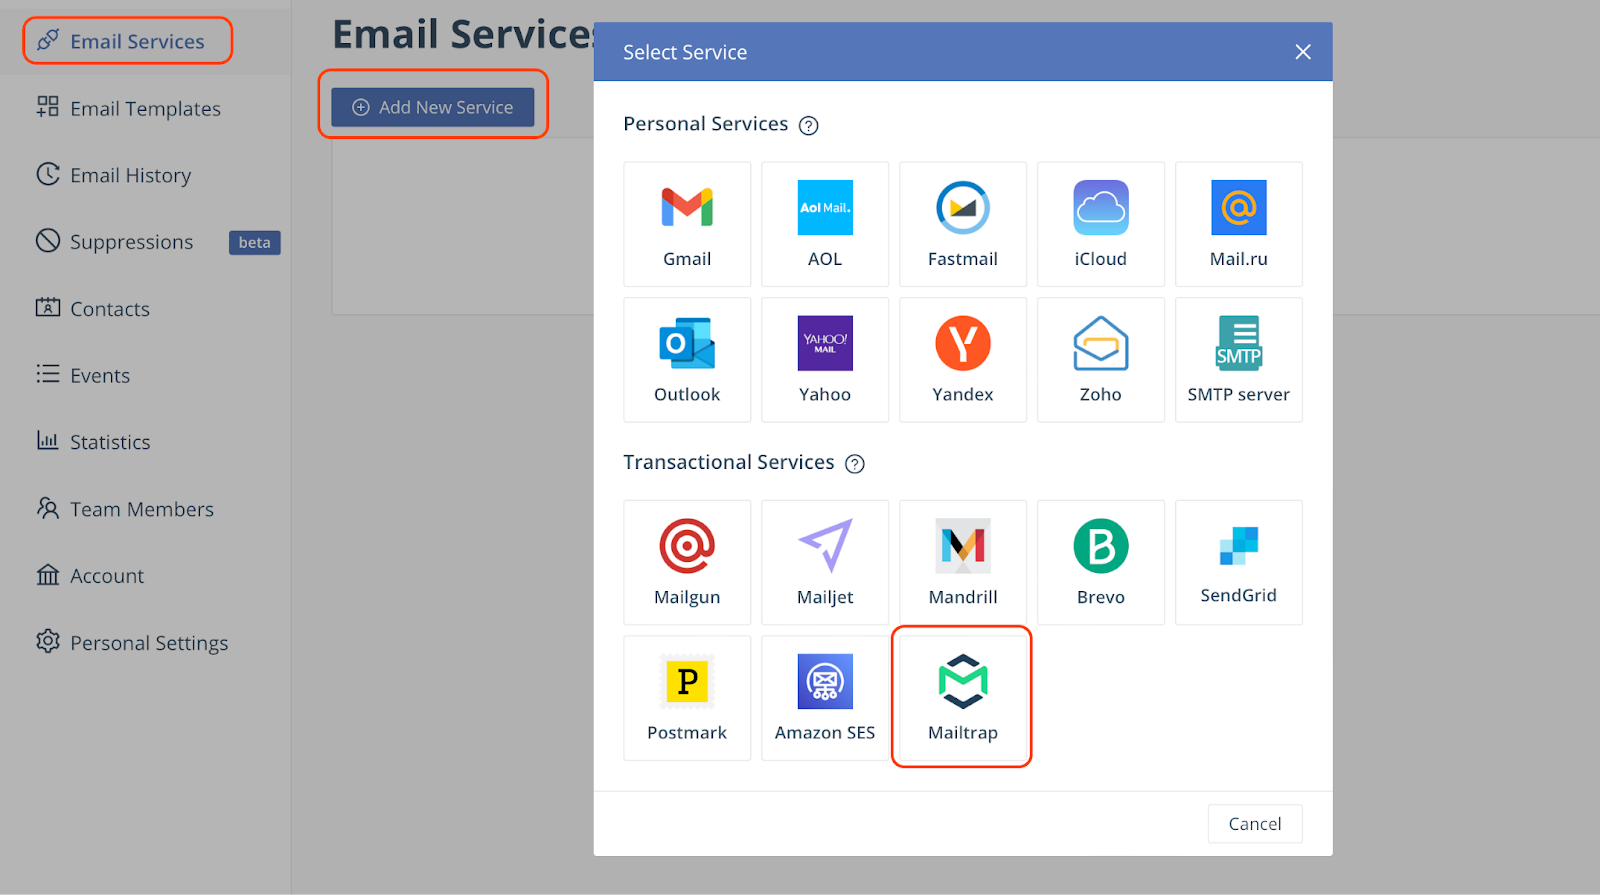
Next, in the ‘Email Services’ section, click on ‘Add New Service’ and select your desired email-sending service. For this demo and the rest of this article, I’ll use Mailtrap since it provides reliable SMTP and email API services.
To connect your email account, the setup wizard will ask you to provide the following details:
- Service ID – This field will have a pre-generated ID, although you can come up with your own.
- Username and Password – These two you need to copy from the ‘Integrations’ page within your Mailtrap account.
- Need help? If so, feel free to refer to our Knowledge Base. 👀
- Email Feature – Here, you need to select the ‘Sending’ feature from the dropdown menu.

Important: Make sure not to mark the ‘Send test email to verify configuration’ checkbox since the whole setup and configuration won’t work then.
With all the details provided, once you click on ‘Create Service,’ you should see the following entry on your Email Services screen:

3. Create an email template
Now, go to ‘Email Templates’ on the sidebar menu, click on ‘Create New Template’ and define your desired subject line, write your email, add recipients, attachments, etc.

Pro tips:
- Personally, I recommend adding placeholders like {{to_name}}, {{from_name}}, and {{message}} in the email body. These will be replaced later.
- Do not tick the “Use Default Email Address” box since there is currently an issue, which makes the whole integration obsolete since your EmailJS account won’t match the sending domain. Instead, enter your actual email-sending address.
- If you selected Mailtrap as your Email Feature, your sender email needs to be from the same domain you added and verified when you set up your Mailtrap account.
4. Setting up the project
Now, let’s create and navigate to a new directory where we’ll install our dependencies. For this, you can use the following commands:
mkdir emailjs-client ## create the directory
cd emailjs-client ## navigate to the new directory
Then, we’ll simplify the project setup and bundling configuration by using Vite, a bundler that can significantly streamline the EmailJS integration.
To install Vite, run the following commands:
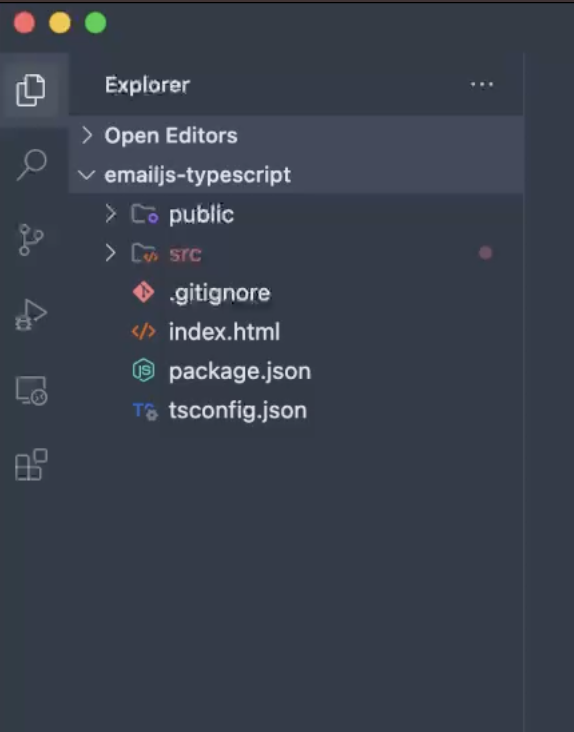
npm create vite@latest .Select ‘Vanilla’ as the framework and ‘TypeScript’ for the language to leverage TypeScript’s built-in type safety. Once the installation is complete, you should see a new folder structure with preconfigured files that allow us to start coding right away. It looks something like this:
Next, let’s install the official EmailJS SDK library:
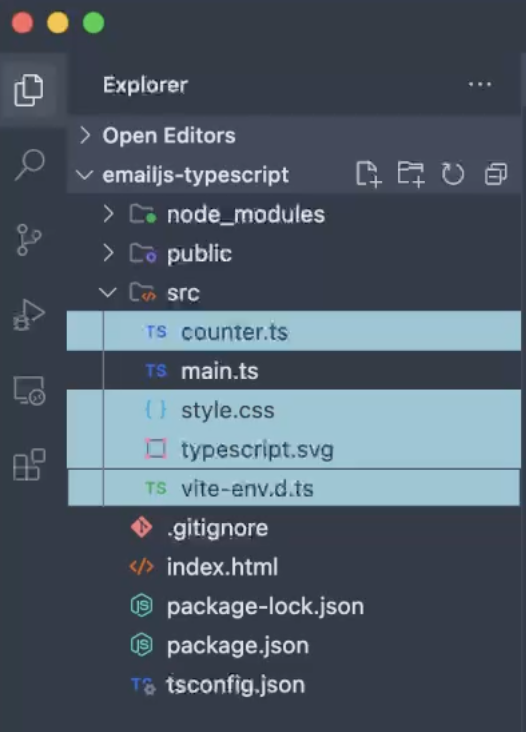
npm install @emailjs/browserOnce the library is installed, navigate to the src folder and, since we won’t need them, delete all files except main.ts:
You can also feel free to delete all of the preconfigured code in main.ts since we’re going to use our own code.
Send a plain-text email
In the first example, we’ll send a direct email using emailjs.send(). To do this, simply paste the following code snippet into your main.ts file:
import emailjs from "@emailjs/browser";

// Initialize EmailJS
emailjs.init("YOUR_PUBLIC_KEY");

// Example email data
const templateParams = {
  to_name: "Albert Doe",
  from_name: "John Doe",
  message: "Hello, this is a test email from TypeScript!"
};

// Function to send email
const sendEmail = async () => {
  try {
    const response = await emailjs.send(
      "YOUR_SERVICE_ID",
      "YOUR_TEMPLATE_ID",
      templateParams
    );

    console.log("✅ Email sent successfully!", response);
  } catch (error) {
    console.error("❌ Failed to send email:", error);
  }
};

// Run the function
sendEmail();
Code breakdown:
- The code is being sent with the sender’s name, email and message provided in
templateParams. - Since we are calling the
emailjs.send()method, we have to provide service and template IDs along with sender details and the message itself. - I’ve also added a few lines to make the code print success/error messages to the console, depending on the status of the email.
Additionally, it’s important to note that the field names should strictly match placeholder names from the template (to_name parameter name must be equal to {{to_name}} from the template). Otherwise, they will not be replaced with the values we’re passing, and we won’t see Albert Doe in the email as we expected from the code above.
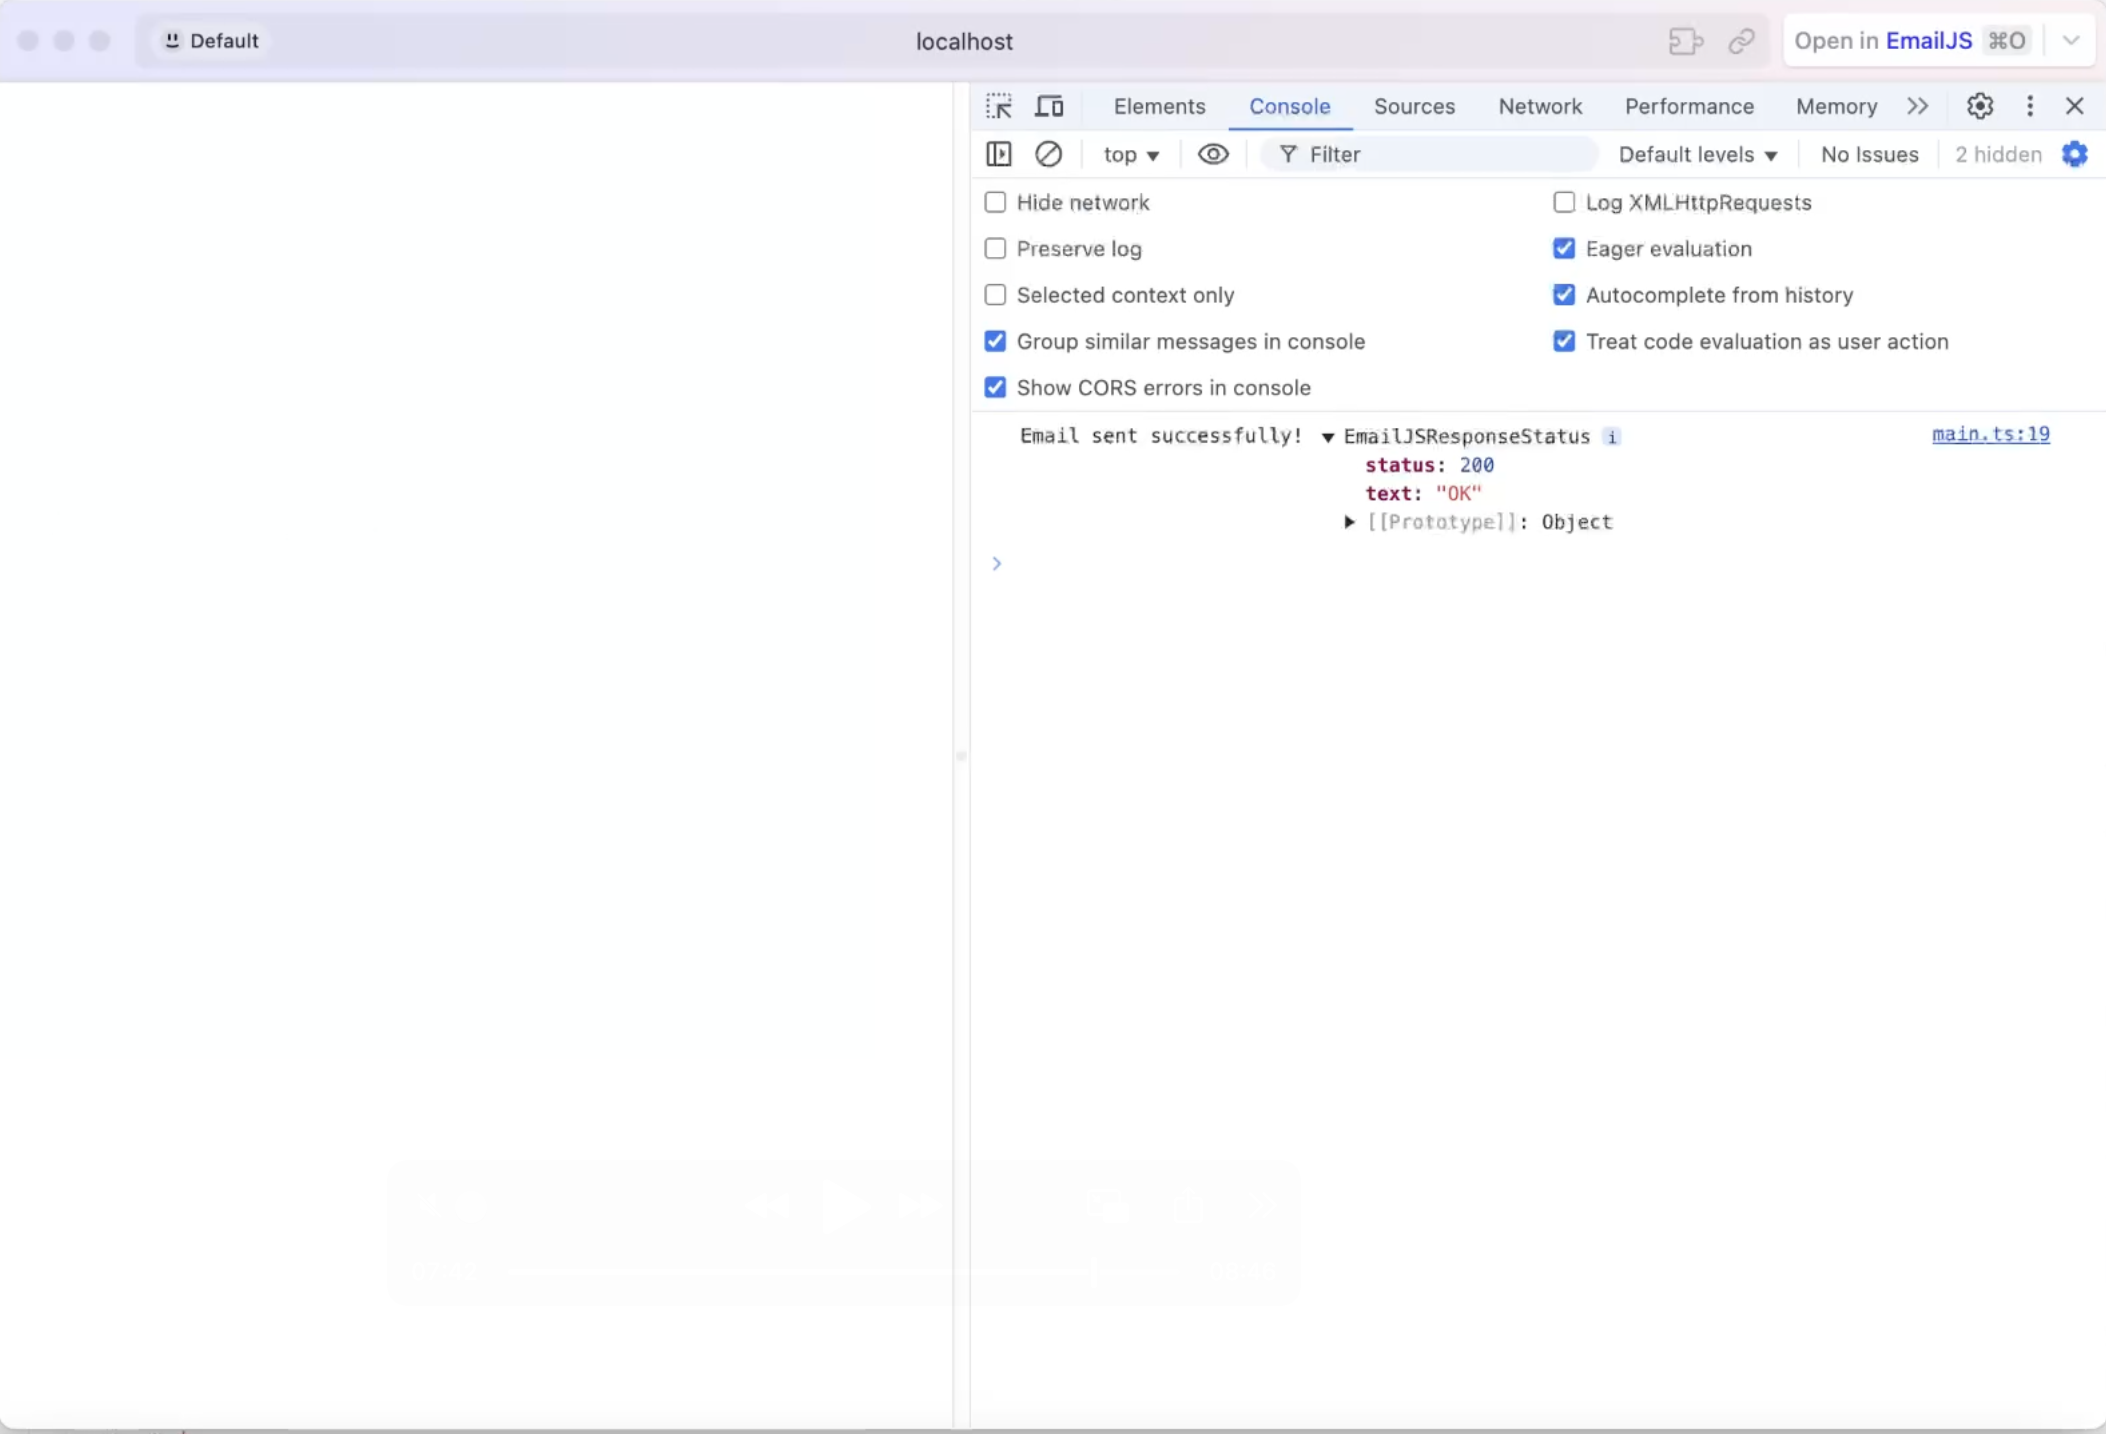
As soon as you’re ready, run the code with either npm or yarn:
npm run dev
yarn dev
Then, open the localhost link in the browser (it should be a blank page), and check what’s logged in the dev tools’ console (right-click anywhere and then click on Console). Hopefully, you’ll see something like this:
Send a plain-text email from a contact form
In our second example, we’ll create a contact form and add an email-sending logic to it.
For the form, delete everything in your index.html file and copy/paste the following code snippet there:
<!DOCTYPE html>
<html lang="en">
  <head>
    <meta charset="UTF-8" />
    <meta name="viewport" content="width=device-width, initial-scale=1.0" />
    <title>EmailJS + Vite</title>
  </head>
  <body>
    <h2>Send a Message</h2>
    <form id="email-form" style="display: flex; flex-direction: column; gap: 10px; width: 300px">
      <input type="text" name="to_name" placeholder="Recipient Name" required />
      <input type="text" name="from_name" placeholder="Your Name" required />
      <textarea name="message" placeholder="Your Message" required></textarea>
      <button type="submit">Send Message</button>
    </form>

    <script type="module" src="/src/main.ts"></script>
  </body>
</html>Notes:
- Of course, feel free to modify it according to your liking, since this is just a simple HTML form.
- The form data will be sent via EmailJS, which will collect the recipient’s name, sender’s name, and message.
- The field names should strictly match template’s placeholder names as mentioned before. So input’s name property should be the same as in the template.
Then, in our main.ts file, insert the following code, which will send an email using the form directly:
import emailjs from "@emailjs/browser";

// Initialize EmailJS
emailjs.init("YOUR_PUBLIC_KEY");

// Wait for the DOM to load, then add an event listener to the form
document.addEventListener("DOMContentLoaded", () => {
  const form = document.getElementById("email-form") as HTMLFormElement;

  form.addEventListener("submit", async (event) => {
    event.preventDefault(); // Prevent default form submission behavior

    try {
      const response = await emailjs.sendForm(
        "YOUR_SERVICE_ID",
        "YOUR_TEMPLATE_ID",
        form
      );

      console.log("✅ Email sent successfully!", response);
    } catch (error) {
      console.error("❌ Failed to send email:", error);
    }
  });
});
Explanation:
- Instead of passing individual details, we provide the forms’ ID as the third parameter.
- EmailJS automatically extracts the input values and sends the email.
- In this example, we wait for the form’s submit event by calling
form.addEventListenerand then sending the form as soon as it happens.
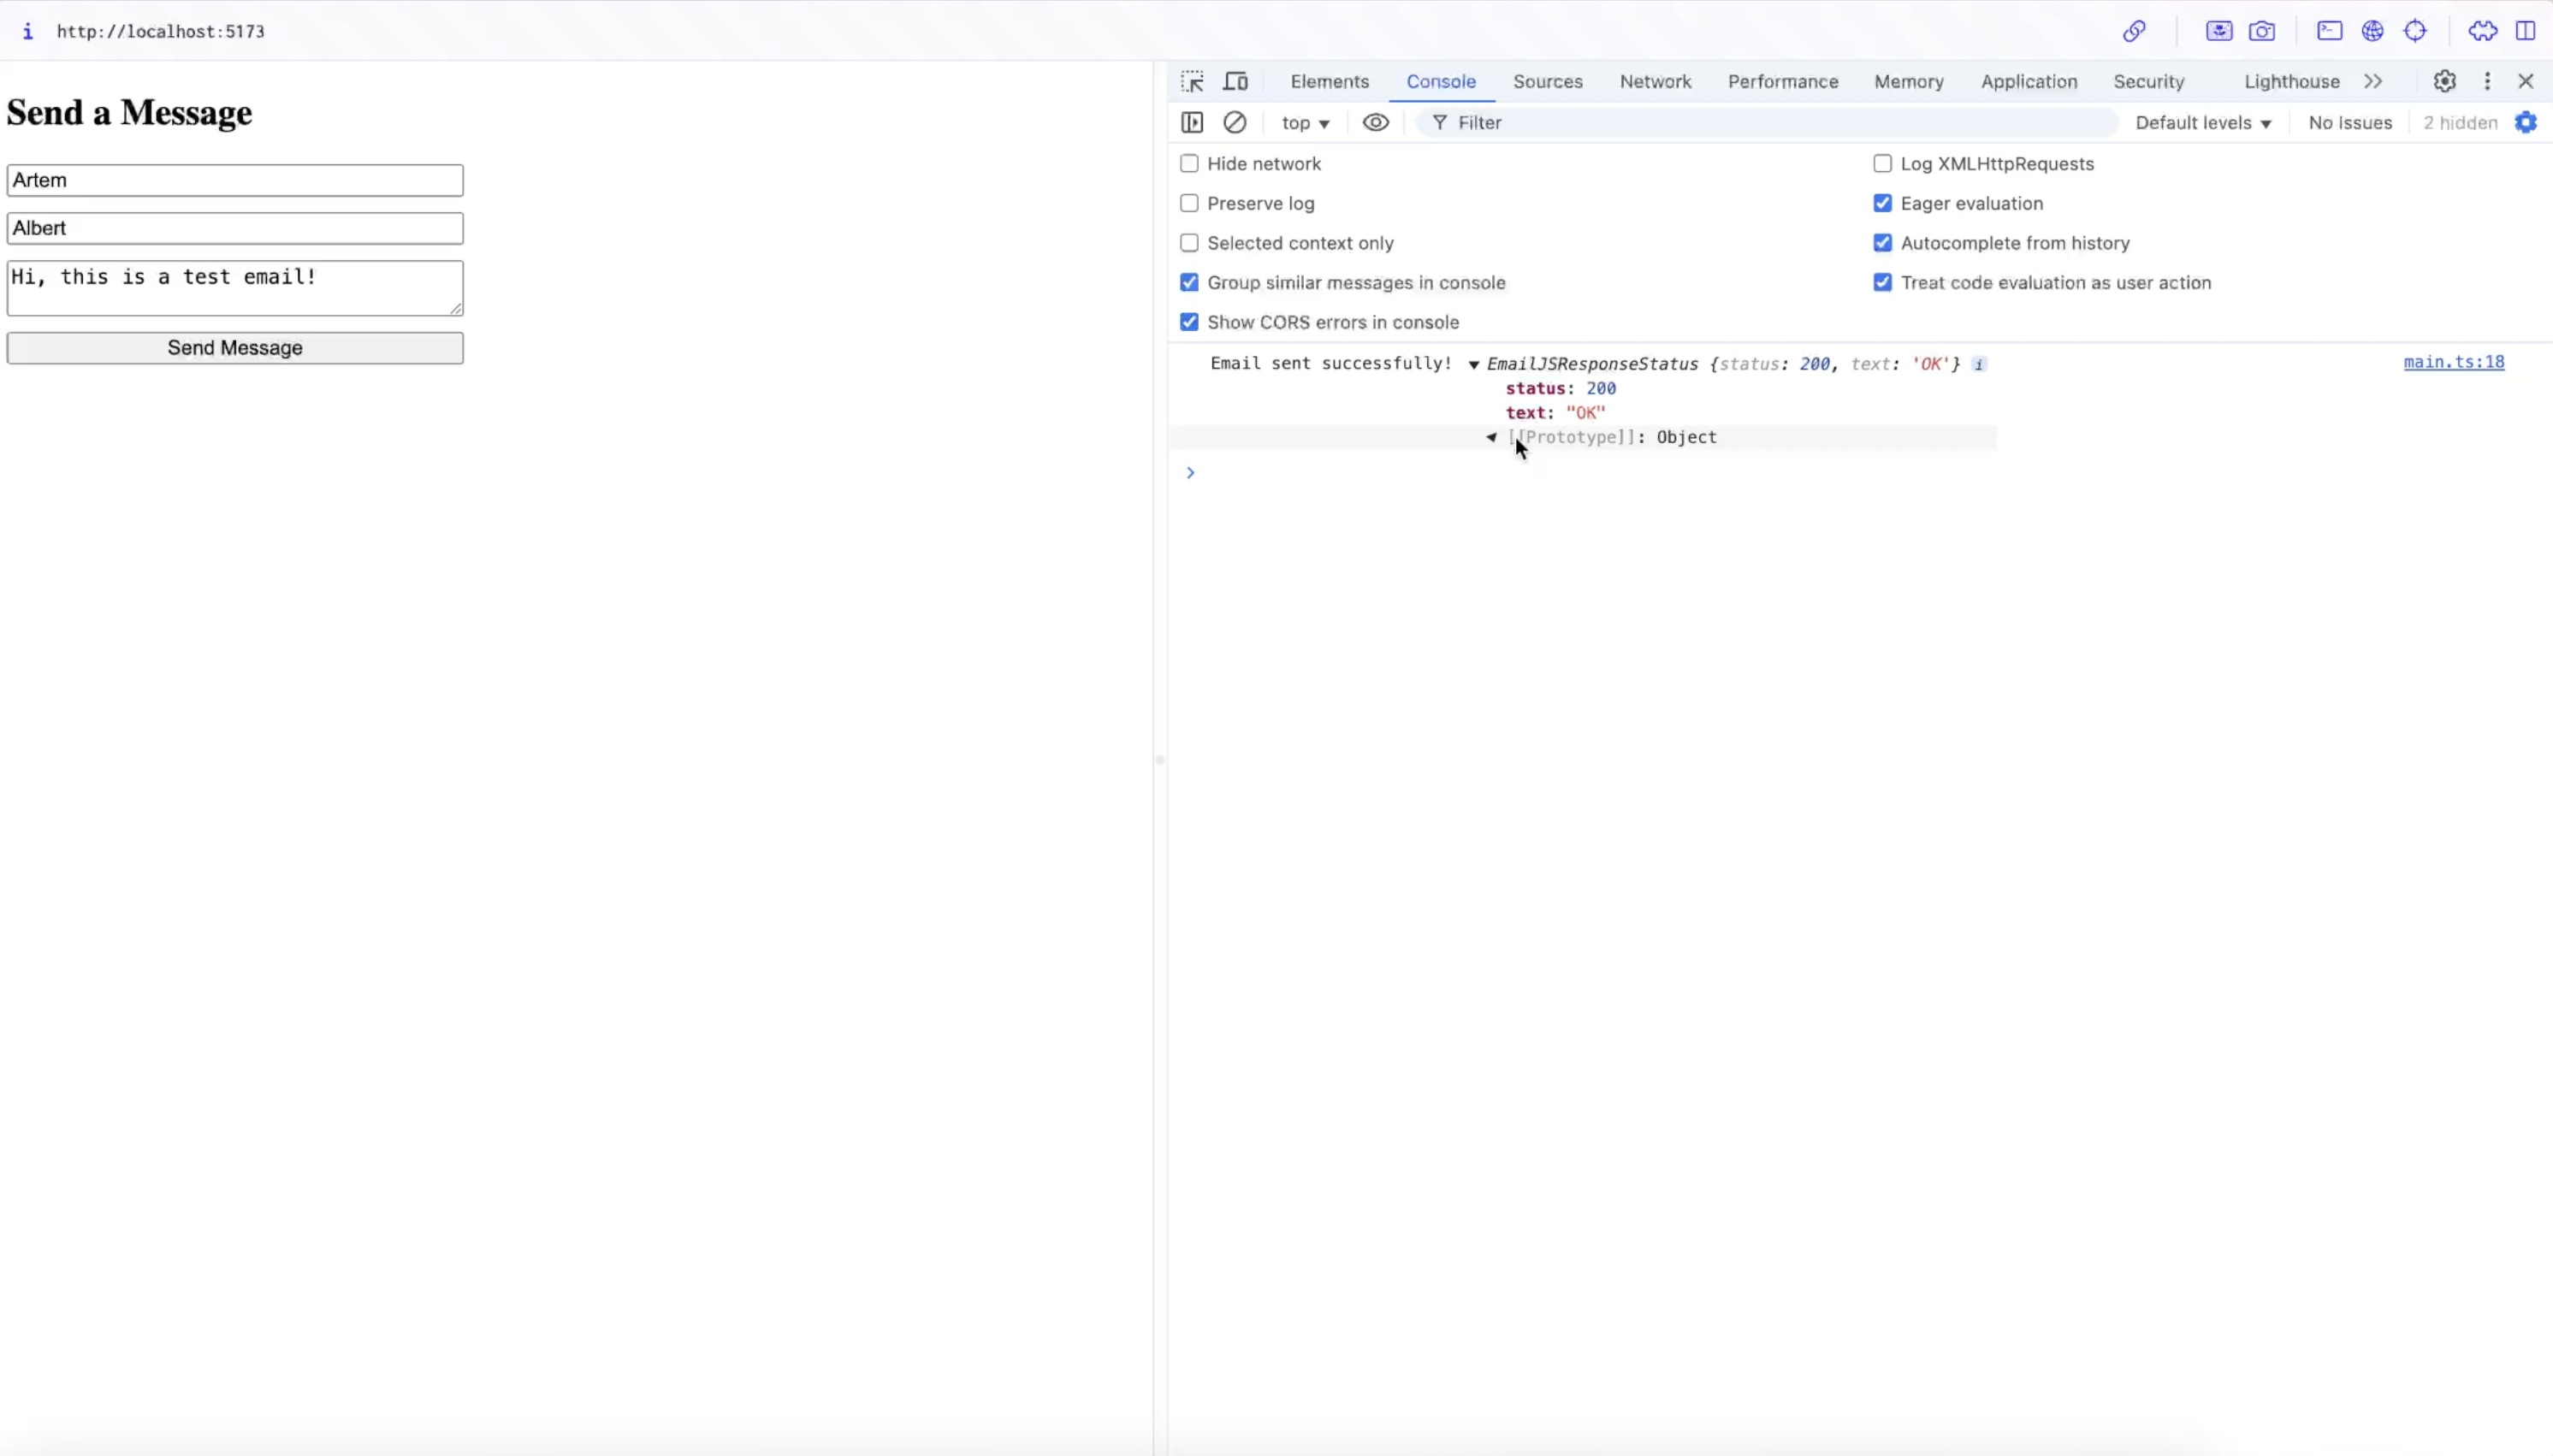
Lastly, like in the previous example, run the code with npm or yarn:
npm run dev
yarn dev
Open the localhost page in your browser, fill in and submit the form, and check what’s logged in the dev tools’ console. You should get the following results:
Send email using Node.js and Nodemailer
Using Nodemailer to send emails via TypeScript is an easy backend mailer solution since the former supports many sending cases, and the latter allows you to define the structure of email data and catch potential errors at compile time.
Moreover, implementing the sending logic is super simple. Check it out! ⬇️
1. Set up the project
If you don’t have a Node.js project yet, use the following two commands:
mkdir email-sender ## create the directory
cd email-sender ## navigate to the new directory
Then, install the dependencies with npm or yarn:
## npm
npm init -y
npm install nodemailer @types/nodemailer typescript ts-node dotenv

## yarn

yarn init -y
yarn add nodemailer @types/nodemailer typescript ts-node dotenv
In the root directory of our project, create a tsconfig.json file and copy/paste the following configuration inside it:
{
  "compilerOptions": {
    "target": "ES6",
    "module": "CommonJS",
    "strict": true,
    "esModuleInterop": true
  }
}
tsconfig.json configuration breakdown:
moduleproperty defines the module system.CommonJSis used for Node.js.esModuleInteropallows default imports from CommonJS modules, simplifying interoperability with packages like Nodemailer.
2. Configure Mailtrap SMTP
Now, we’ll create an .env file in the root directory of our project, where we’ll store our environment variables:
MAILTRAP_HOST=live.smtp.mailtrap.io
MAILTRAP_PORT=587
MAILTRAP_USER=api
MAILTRAP_PASS=mailtrap_pass

SENDER_EMAIL=sender_email
RECEIVER_EMAIL=your_emailNote: Since I’m using Mailtrap SMTP, my values look like MAILTRAP_HOST, MAILTRAP_PORT, etc. However, if you were to use another email service provider, like Gmail SMTP, for example, you would use regular values (e.g., HOST, PORT, etc.).
Next, we need to create a config.ts file in our src folder, which will serve as a module for storing our configuration for SMTP transport implemented in Nodemailer. The file should contain the following configuration:
import type { Options as SMTPTransportOptions } from "nodemailer/lib/smtp-transport";

export const mailtrapConfig: SMTPTransportOptions = {
  host: process.env.MAILTRAP_HOST,
  port: Number(process.env.MAILTRAP_PORT),
  auth: {
    user: process.env.MAILTRAP_USER,
    pass: process.env.MAILTRAP_PASS,
  },
};
Here, mailtrapConfig defines the SMTP configuration object required by Nodemailer, including the host, port, and authentication details to securely send emails through SMTP.
3. Add the sendEmail function
Next to config.ts in our src folder, let’s create an smtp.ts file, where we’ll copy the following code snippet:
import nodemailer, { type SendMailOptions } from "nodemailer";

import { mailtrapConfig } from "./config";

export const sendEmail = async (options: SendMailOptions) => {
  const transporter = nodemailer.createTransport(mailtrapConfig);

  const mailOptions: SendMailOptions = {
    from: process.env.SENDER_EMAIL,
    to: process.env.RECEIVER_EMAIL,
    ...options,
  };

  try {
    const info = await transporter.sendMail(mailOptions);
    console.log("Email sent:", info.messageId);
  } catch (error) {
    console.error("Error sending email", error);
  }
};
Code breakdown:
- The Nodemailer’s
createTransportmethod sets up the email transporter using the Mailtrap SMTP configuration. - The
mailOptionsobject defines the senderfrom, recipientto, and other properties, including email subjectsubject, contenttext, contenthtml. - The
sendMailmethod sends the email using the configured transporter. - The
info.messageIdproperty returns a unique identifier for the sent email, which, in case of success, is logged in the console.
Send a plain-text email
Now that we have created the function for sending emails through an SMTP server, let’s create an index.ts file to initialize process.env variables and execute the sendMail function to test and verify that the provided email is sent correctly.
In the index.ts file, paste the following code:
import dotenv from "dotenv";
dotenv.config();
import { sendEmail } from "./smtp";
sendEmail({
subject: "Hello from TypeScript",
text: "Hello world!",
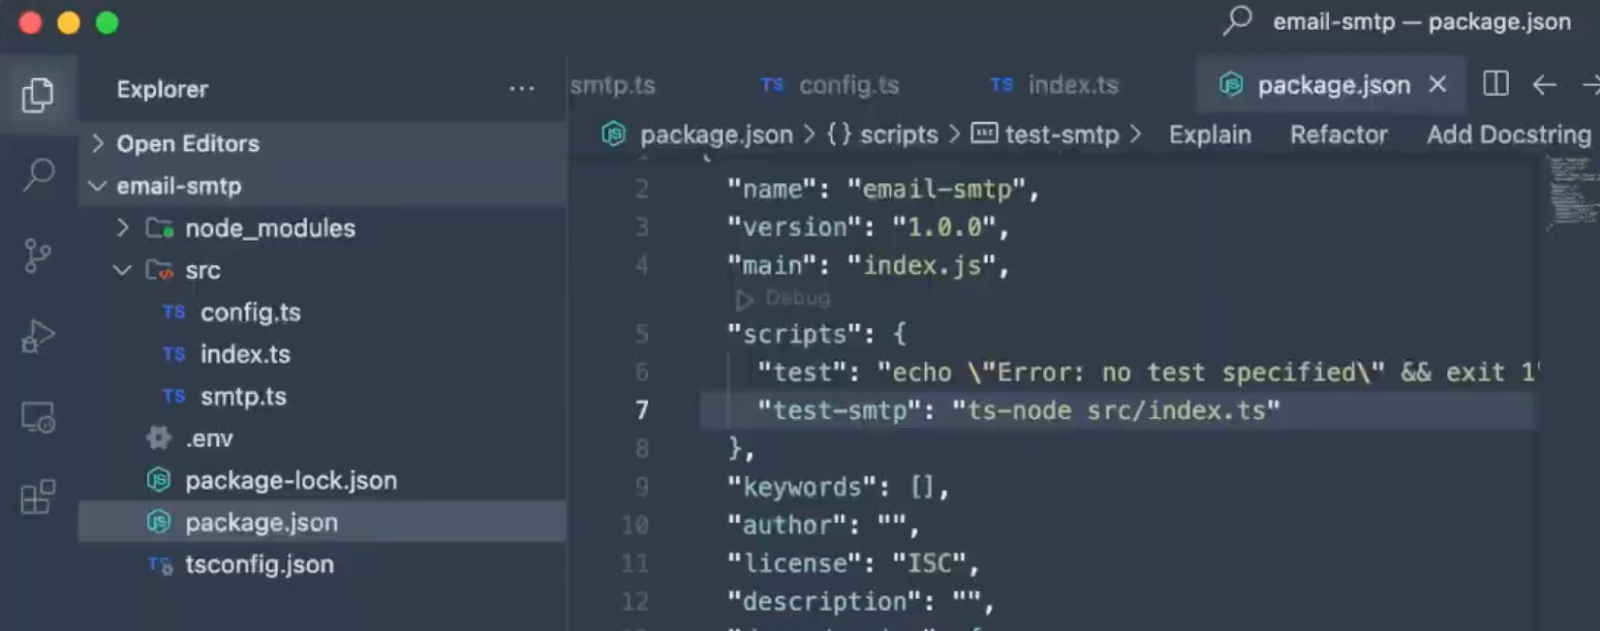
});Then, to simplify code execution and email sending, we’ll modify the package.json file by adding our custom command for email sending to the “scripts”. Find the “scripts” configuration and add a new line right after the “test” parameter – “test-smtp”, just like so:
...
"scripts": {
    "test": "echo \"Error: no test specified\" && exit 1",
    "test-smtp": "ts-node src/index.ts"
},
...
To make it easier for you, here it is in action:
To run the code, you can use:
npm run test-smtpYou should get a response similar to the following one:

Send HTML email
To send an HTML email, simply replace the text property with the html property and replace the text content with any HTML content, which allows for more visually engaging and styled emails.
For our example, we’ll send the same text wrapped in h1 tag and add a stock image of a cat underneath:
import dotenv from "dotenv";
dotenv.config();

import { sendEmail } from "./smtp";

sendEmail({
  subject: "Hello from TypeScript",
  html: `
		<h1>Hello World!</h1>
		<img
			src='https://images.pexels.com/photos/104827/cat-pet-animal-domestic-104827.jpeg?cs=srgb&dl=pexels-pixabay-104827.jpg&fm=jpg'
			style='width: 300px;'
		/>
  `,
});
To run the code, you can use the same old command:
npm run test-smtpSend email using Node.js SDK
One of the most efficient ways to automate the sending process in your Node.JS application via TypeScript is to use an email service provider’s official Node.js SDK. Luckily, Mailtrap offers its very own Node.js SDK, which is super straightforward to set up and requires minimal coding.
Here’s what you need to do:
1. Initialize a Node.js project
First things first, create a free Mailtrap account and verify your domain. The setup takes ~5 minutes to complete and you can even use our Knowledge Base article as a step-by-step guide.
Once you verify your domain, create a new project directory and navigate to it with these two commands:
mkdir mailtrap-ts-project ## create the directory
cd mailtrap-ts-project ## navigate to the new directory
To initialize the project, you can either use npm:
npm init -y
npm install typescript ts-node @types/node --save-dev
npm install mailtrap dotenv
Or, you can use yarn:
yarn init -y
yarn add typescript ts-node @types/node --dev
yarn add mailtrap dotenv
Next, run npx tsc --init to generate a TypeScript configuration file, or simply create it manually in the root directory of your project (e.g., tsconfig.json). When you create it, paste the following settings inside the file:
{
  "compilerOptions": {
    "target": "ES6",
    "module": "CommonJS",
    "esModuleInterop": true,
    "outDir": "./dist",
    "rootDir": "./src",
    "strict": true
  }
}
2. Set up environment variables
In the project root, create an .env file, which will hold our credentials, or, in this case, your Mailtrap API token.
To obtain the token, log in to your Mailtrap account, go to Sending Domains, choose your Domain, click on ‘Integration,’ choose your preferred stream (in this case, I recommend using the Transactional Stream), go to API, and copy/paste the token.
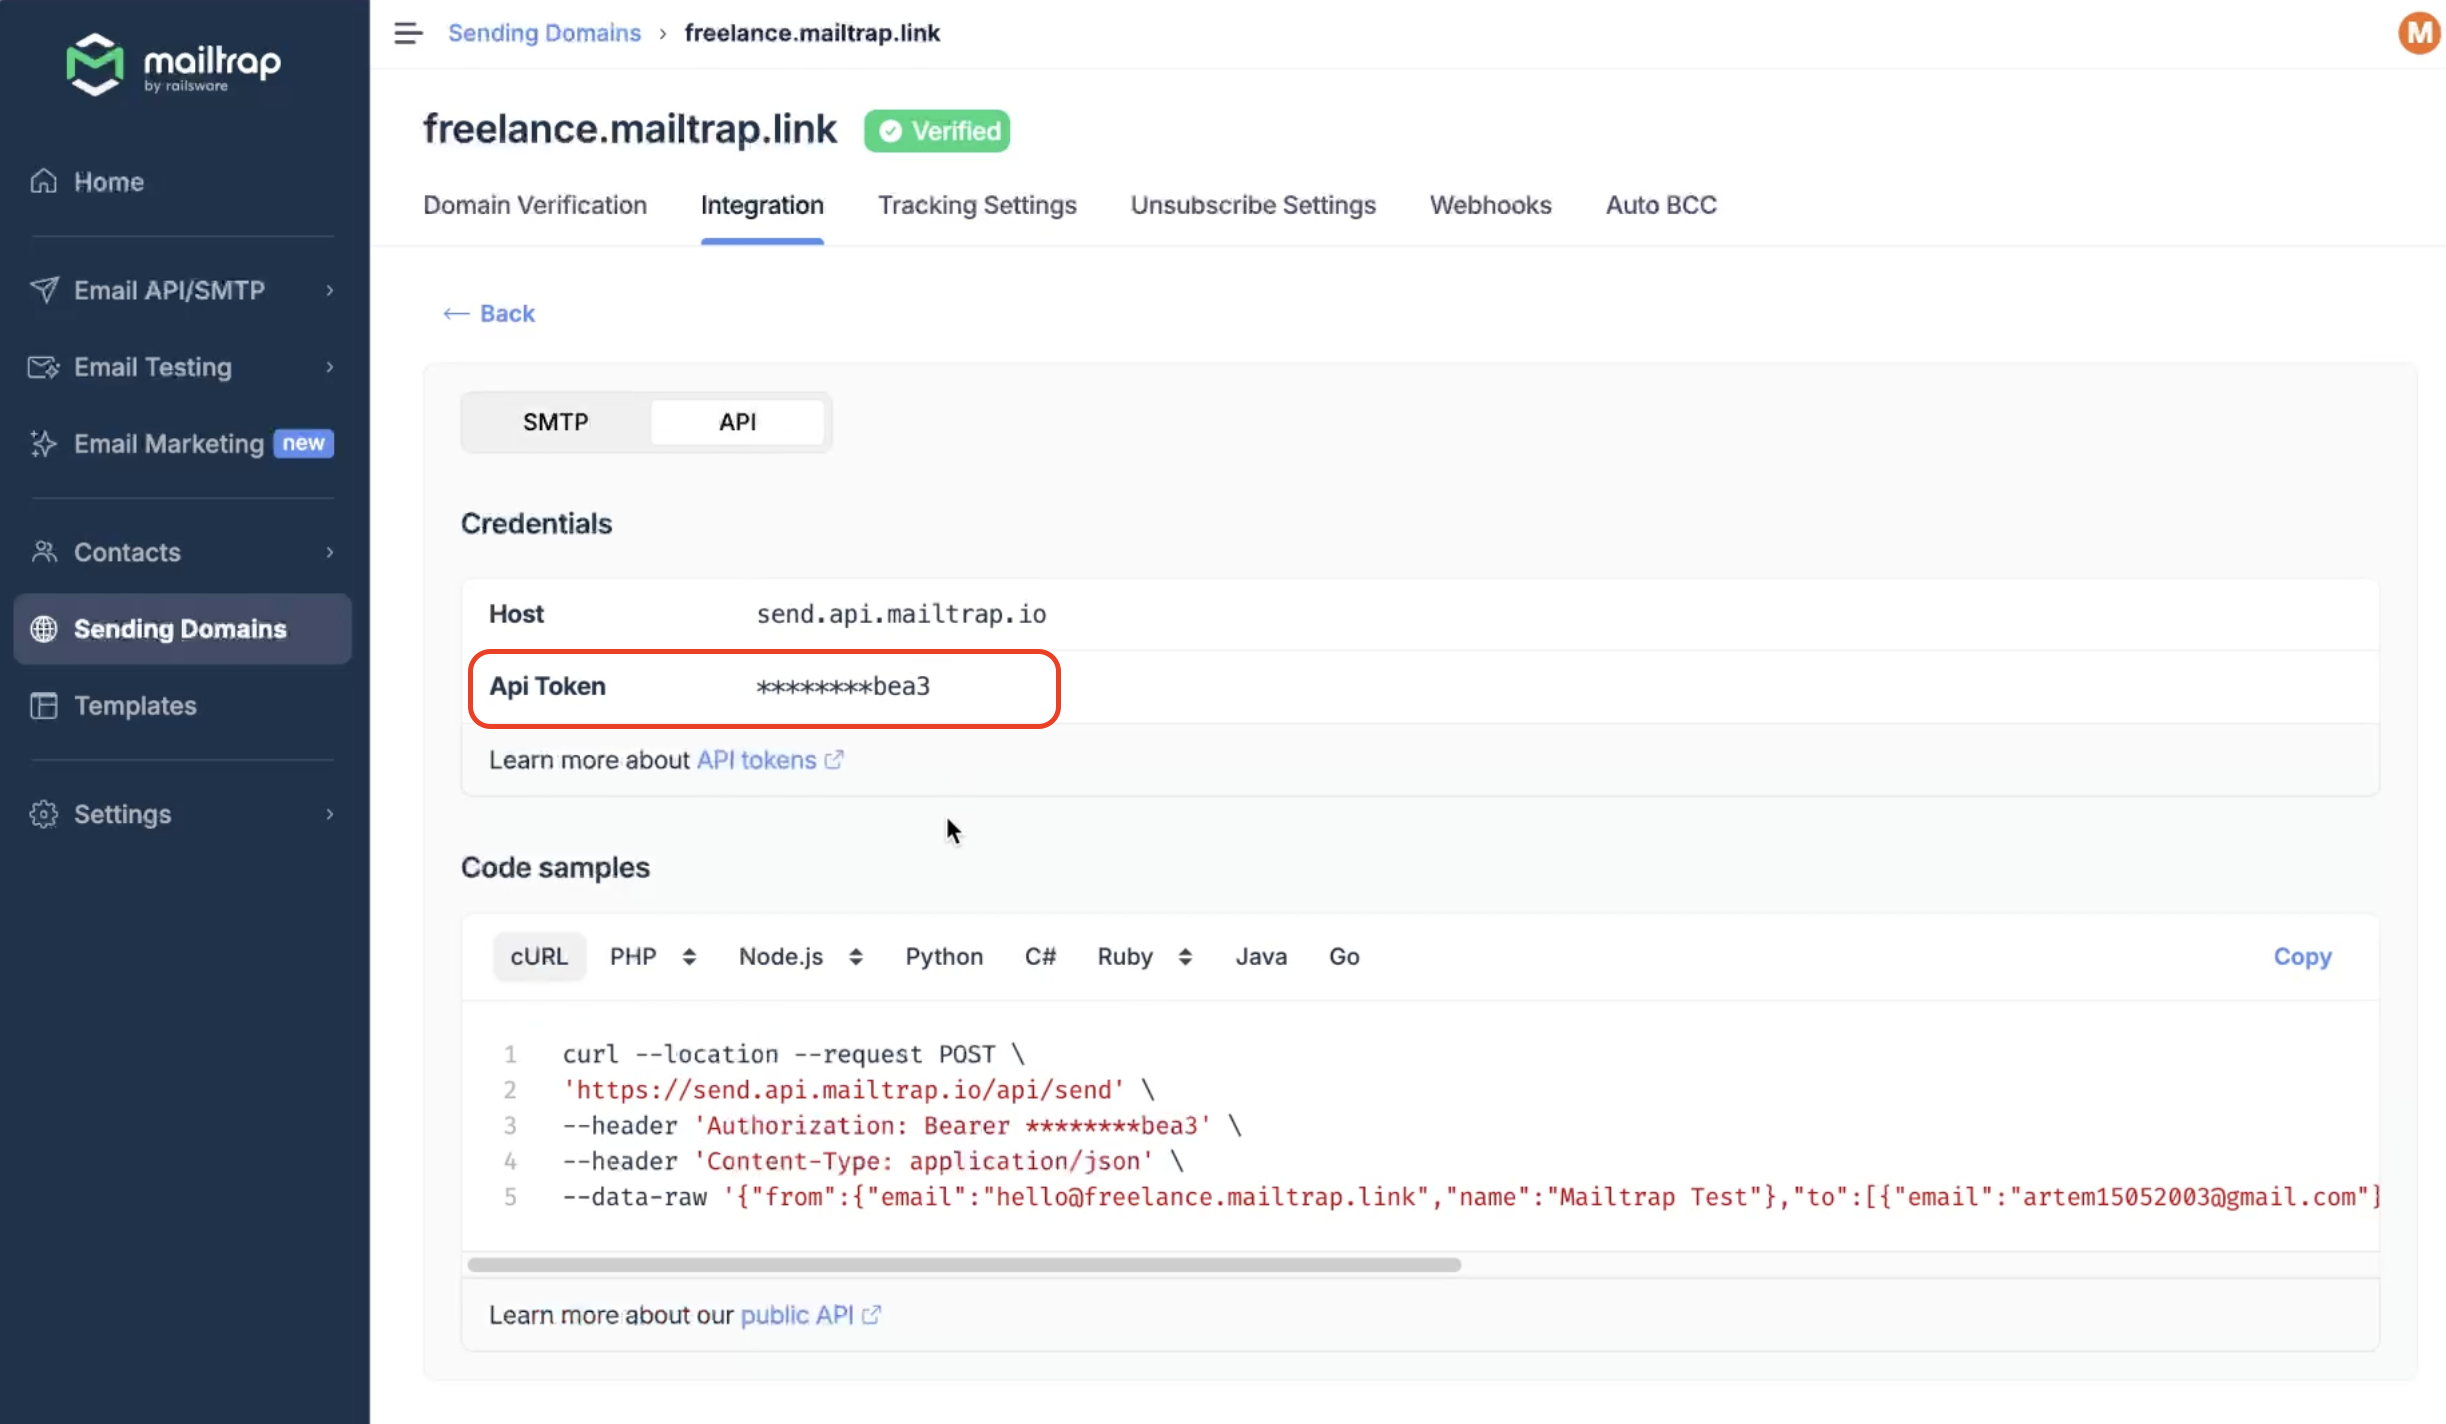
Your .env file configuration should then look something like this:
MAILTRAP_API_TOKEN=your_api_token_here3. Create a Mailtrap service in TypeScript
Moving on, let’s create a src folder, and inside it, a file called mailtrapService.ts, which will handle the email-sending logic. Inside the file, paste the following configuration:
import { MailtrapClient } from "mailtrap";
import dotenv from "dotenv";

dotenv.config();

const API_TOKEN = process.env.MAILTRAP_API_TOKEN;

if (!API_TOKEN) {
  throw new Error("Missing Mailtrap API token in .env file");
}

const client = new MailtrapClient({ token: API_TOKEN });

interface EmailOptions {
  to: string;
  subject: string;
  text?: string;
  html?: string;
}

export const sendEmail = async ({ to, subject, text, html }: EmailOptions) => {
  await client.send({
    from: { email: "your-email@example.com", name: "Your Name" },
    to: [{ email: to }],
    subject,
    ...(text ? { text } : {}),
    ...(html ? { html } : {}),
    category: "test",
  });
  console.log(`Email sent successfully`);
};
Code explanation:
- The dotenv library loads the environment variables.
- Mailtrap’s client handles email requests using the token.
<strong>sendEmail</strong>can accept both text and html properties, and dynamically assigns text and HTML properties based on provided values.- All the assigned properties are then used by Mailtrap’s SDK to send the email using
client.sendmethod.
Send a plain-text or HTML email
Finally, to send the email, feel free to use the example below, which will send both a plain-text and HTML email. All you need to do is copy/paste the code in an index.ts file located in src:
import { sendEmail } from "./mailtrapService";

const recipient = "recipient@example.com";
const subject = "Welcome to Mailtrap!";

sendEmail({ to: recipient, subject, text: "Hello! This is a test text email from Mailtrap." });
sendEmail({ to: recipient, subject, html: "<h1>Hello!</h1><p>This is a test HTML email from Mailtrap.</p>" });
To execute the script, you can use npx:
npx ts-node src/index.tsOr yarn:
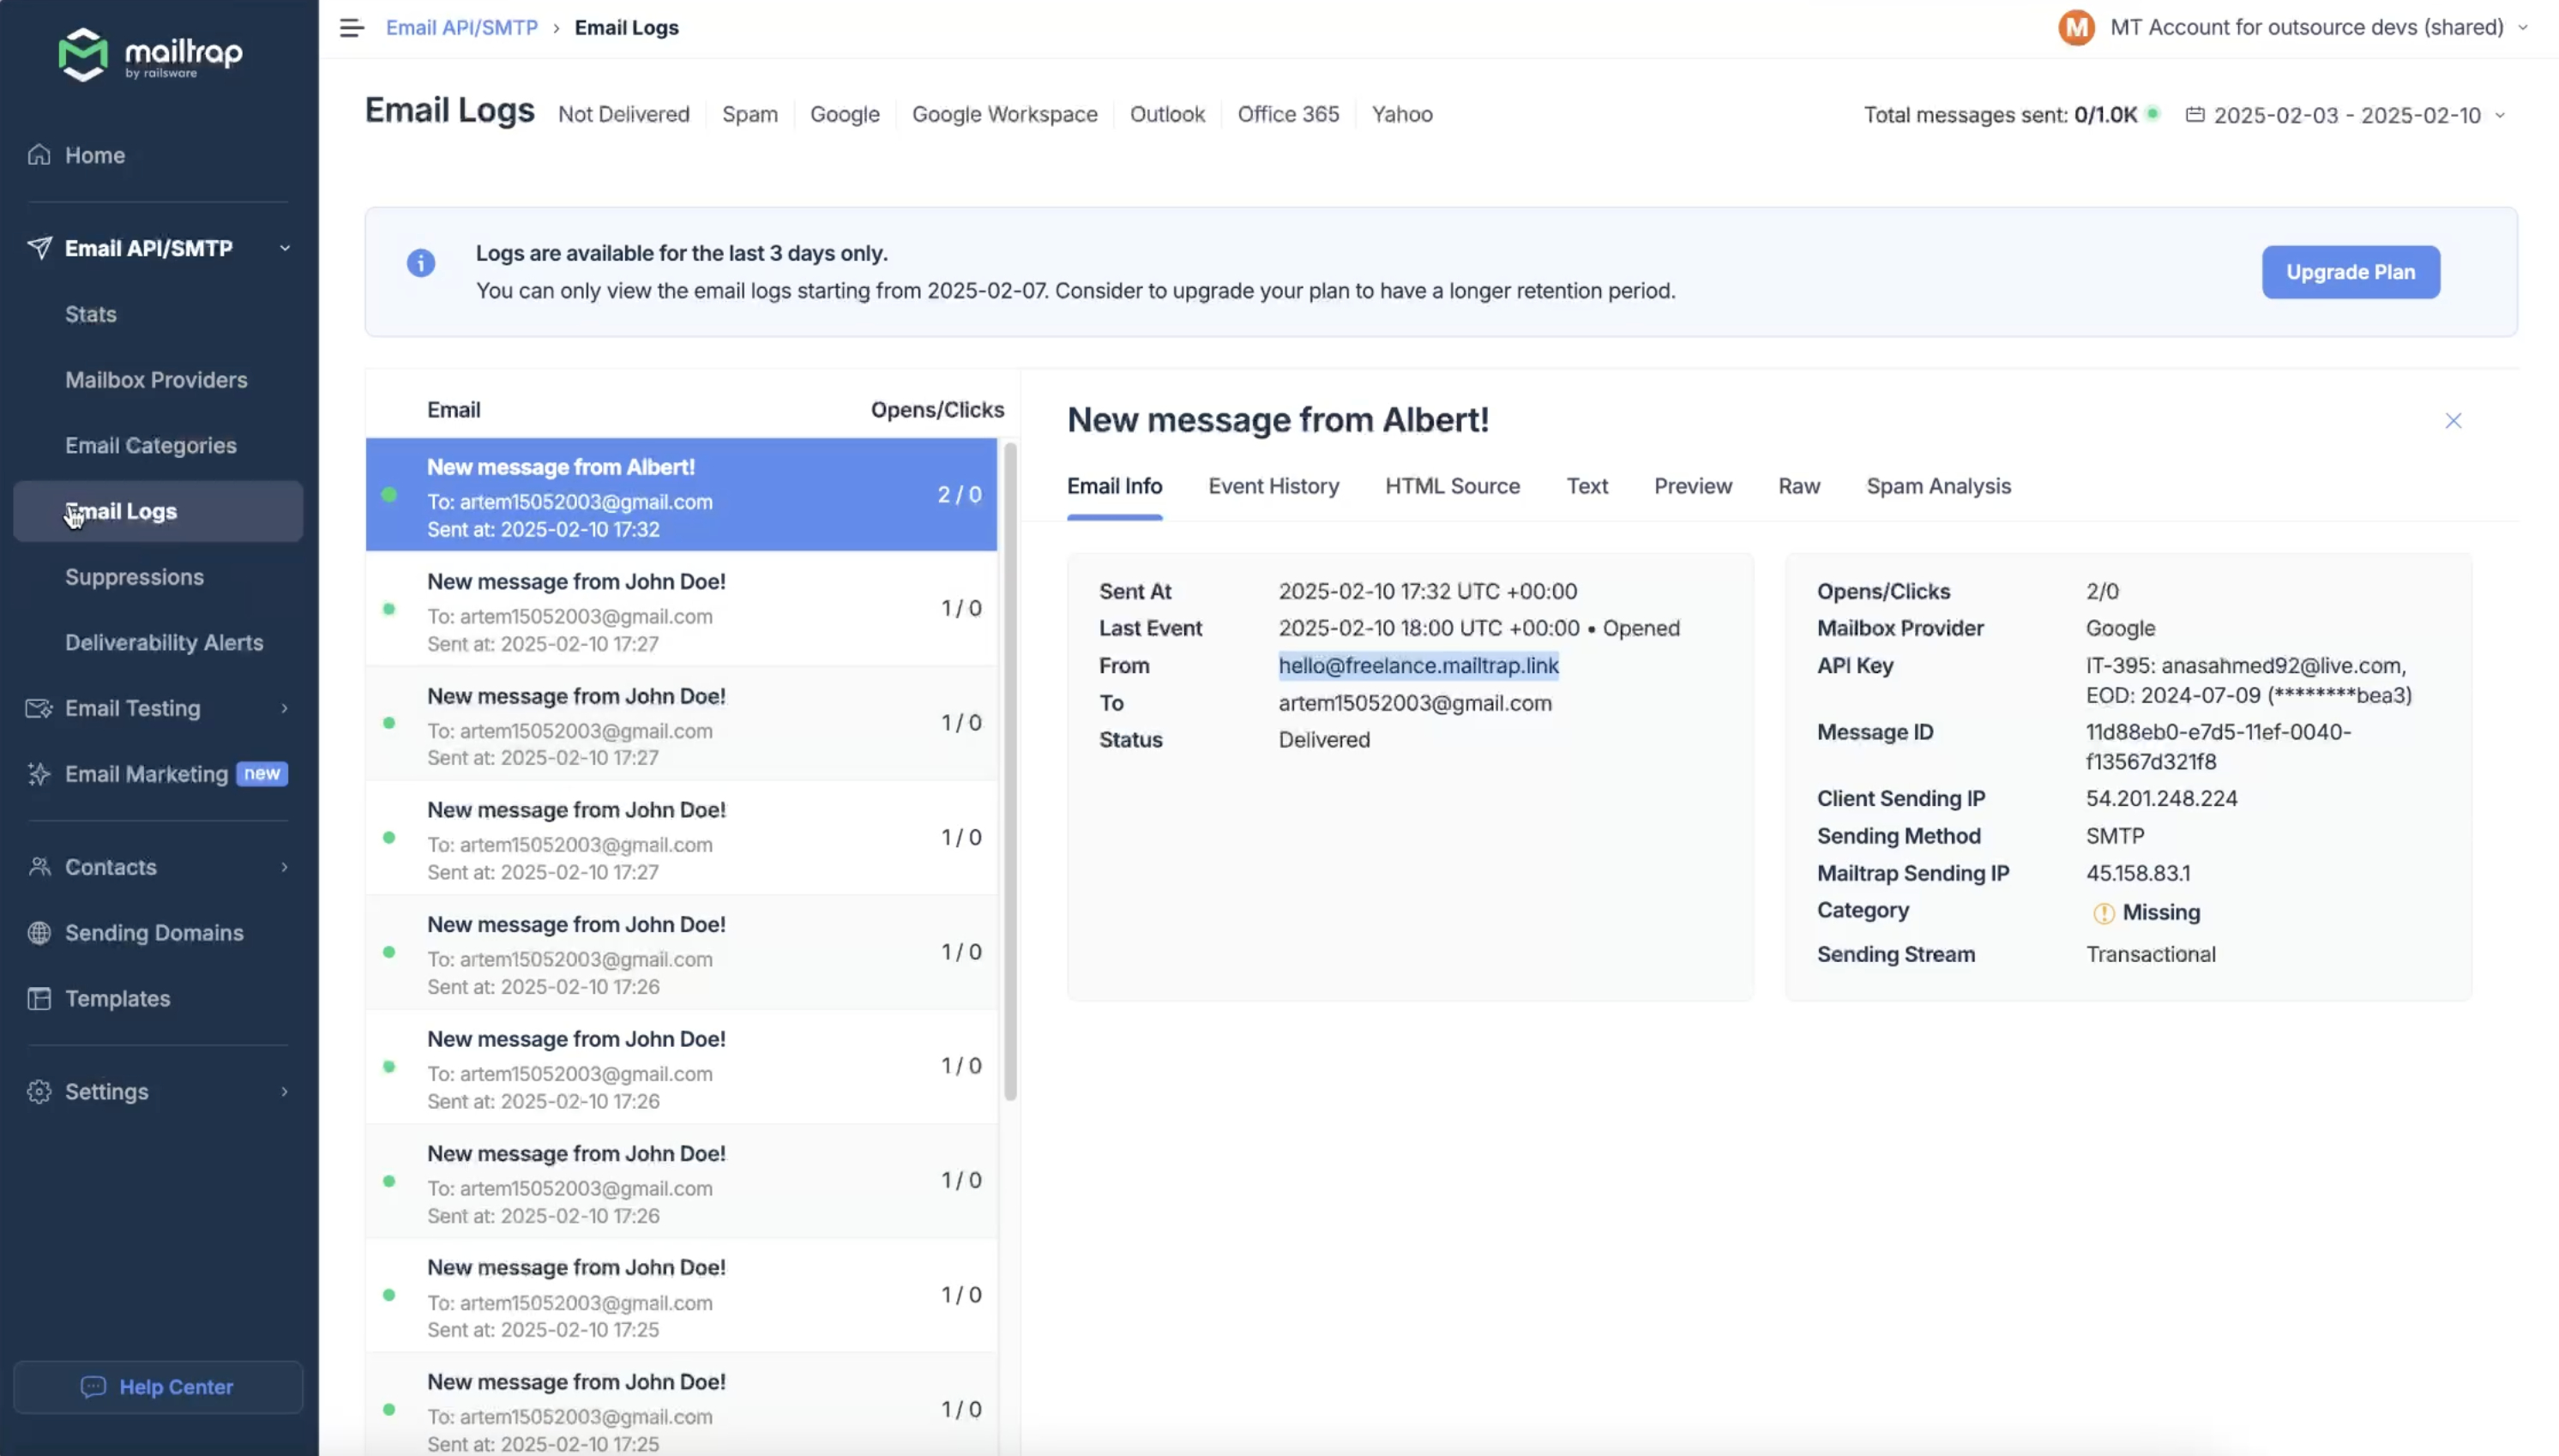
yarn ts-node src/index.tsIf everything is set up correctly, you should see “Email sent successfully” in your console, and the emails should appear in your Mailtrap Email Logs. If emails are not appearing in the Logs, double-check the API token.
Wrapping up
And that’s it, now you know how to use typescript to send email!
Although we went over many use cases, why not further expand your sending knowledge by checking out our blog, where you can find many other articles on the topic, such as:
- How to Send Emails in Express.JS
- Sending Emails with ReactJS
- Nodemailer: Tutorial with Code Snippets
- Send Emails with Nodemailer Using a Gmail Account

