Skip to Navigation

We’ve all heard it a million times “email is crucial for business success”. But how often do you hear “sending out emails takes significant time and effort”? Probably not as often, which is surprising considering how many marketers and non-marketers, such as sales reps struggle with sending emails to their leads, customers, and so on.
One way to overcome this obstacle and streamline email sending is to use email templates. And in this article, we’ll focus particularly on Salesforce email templates.
The content will be suitable for both tech and non-tech users of the CRM, so regardless of what category you put yourself into, make sure to keep reading this guide!
Types of email templates in Salesforce [with examples]
Available to users are two Salesforce interfaces – Classic and Lightning.
Salesforce Classic is the original interface used for many years before the introduction of Salesforce Lightning. The interface provides a comprehensive set of features and functionalities but is limited in terms of customization, mobile responsiveness, and user experience.
Salesforce Lightning, on the other hand, is known for its modern and intuitive look, allowing for a better user experience and more productivity in comparison to Salesforce Classic. Some of the notable features of this version include enhanced customization options, improved performance, on-the-go access through mobile devices, and so on.
Now that we have covered both of the interface versions, it’s time to cover their templates.
Classic Email Templates
This template category is available in both Salesforce Classic and Salesforce Lightning and is the more “basic” category.
When creating Classic email templates, you can choose among text, HTML with Classic Letterhead, custom HTML, and Visualforce template types. You can also add text, add attachments, and insert merge fields using Salesforce Merge Language.
Text templates – A template type in simple text format that doesn’t support HTML formatting or design elements.
HTML with Classic Letterhead templates – A template type consisting of HTML code that supports customization of the email layout, font, colors, and other design elements. The Classic Letterhead element of the template is used as a predefined header and footer design, and HTML templates can inherit the logo, color, and text settings from the element.
Custom HTML templates – A template type with the best design flexibility intended to create fully customized templates with HTML and CSS. Great for those wanting to use complex visual elements in emails.
Visualforce templates – A template type that supports the use of the Visualforce markup language specific to the Salesforce platform. The template can consist of highly customizable content, dynamic data from Salesforce records, and sophisticated email layouts. Great for those wanting to use merge data from multiple records or implement complex logic in the email content.
Lightning Email Templates
This template category is available only in Salesforce Lightning and is a “newer” iteration of email templates boasting an Enhanced Letterhead for standardizing the header and footer with advanced customization options, dynamic content, rich text, merge fields, links such as unsubscribe links, fonts, colors, styles, as well as images. For merge fields, these templates use Handlebars Merge Language, which offers more flexibility than Salesforce Merge Language.
A drag-and-drop editor, as well as the Enhanced Folders and Sharing option, are other notable features of this template category.
It’s important to note that all the Classic templates you create in Salesforce can be used in Salesforce Lightning, meaning your text, HTML with Classic Letterhead, Custom HTML, and Visualforce templates, as well as all the work you put into them, won’t go to waste if you make the switch to using strictly Lightning templates.
Salesforce email template limitations
Salesforce email templates are great, but they are not perfect. So, like most things, they come with certain limitations, which include:
Email template limit – Depending on your/your organization’s Salesforce.com account and platform version, you have a certain limit on the total number of email templates you can create.
File size limit – For email template attachments, and images, you have a maximum file size which also depends on the platform version and its configuration.
Merge field limit – Only a limited number of merge fields per email template are permitted, and the number again depends on the platform version.
Character limit – A template’s body, subject line, and other fields have a maximum character limit which varies based on template edition and type.
Formatting restrictions – Even for HTML templates which come with a decent amount of formatting options, limitations are present as Salesforce can restrict certain HTML and CSS elements to improve security and remove potential vulnerabilities.
Design limits – While customization options are available in Salesforce, they are not as advanced as what is offered in dedicated design tools needed for creating complex email template designs.
Dynamic content restrictions – While merge fields can be used to add an element of personalization, more advanced personalization is not available due to limitations when displaying dynamic content or conditional statements.
Salesforce Lightning email templates
Classic email templates
How to find email templates
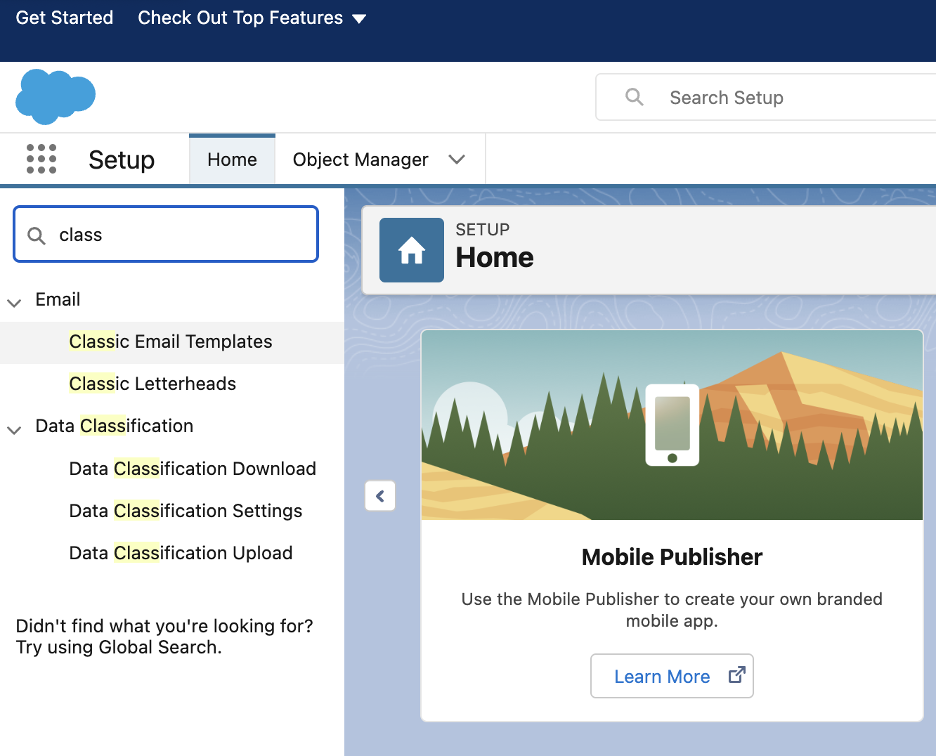
Classic email templates in Salesforce Lightning can be found by doing the following steps:
- Clicking the gear icon on the top right-hand side of your Salesforce account homepage and selecting Setup.
- Searching for “classic email templates” in the Quick Find search box. If the search doesn’t bring back any results, then this means that your Salesforce account does not have the right permissions to access them. The permissions can be added through Permission Sets -> System Permissions -> Manage Public Classic Email Templates.
How to edit existing templates
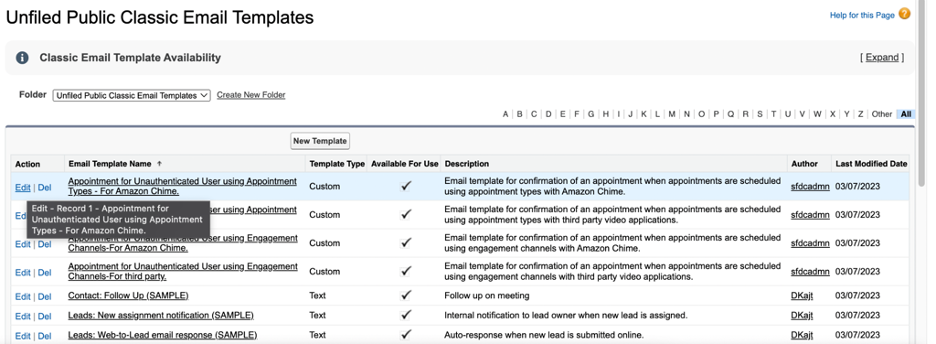
Once on the Classic Email Templates page, you’ll see all the existing templates that either came with your Salesforce account or were created by you or someone else on your marketing or sales team. All Salesforce users have their own private email templates and can access public email templates in public folders.
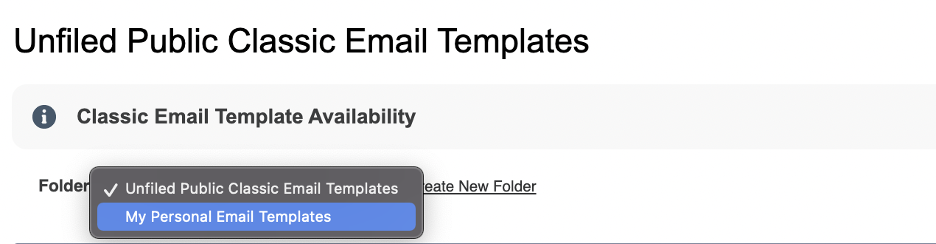
On the same page, you can also switch between email template folders as well as create a new folder if necessary and set which users (by territory, groups, roles, etc.) have/don’t have permission to view the folder, edit the templates within, and so on.
To edit any of the existing templates, click on the Edit option in the Action column.
As the process of editing email templates entails essentially the same steps as creating a template from scratch, please refer to the next section for more information.
How to create new templates
Note: Before proceeding to create email templates, make sure Enhanced Sharing is enabled (go to Setup → search for “email templates” in Quick Find → open Lightning Email Templates → toggle the Folders and Enhanced Sharing button) so users can create, edit, and delete nested template folders as well as share their folders and templates.
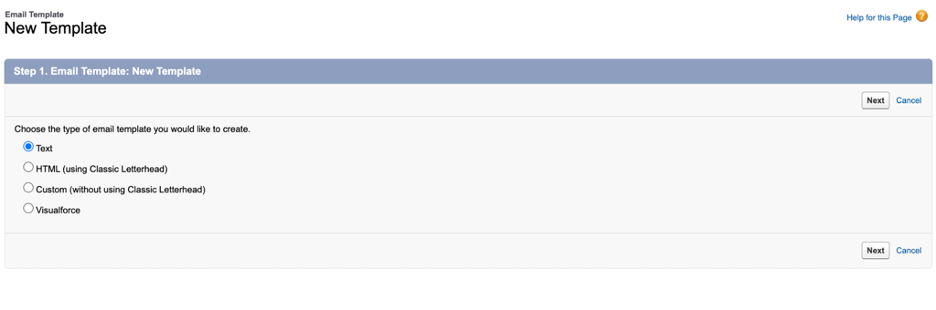
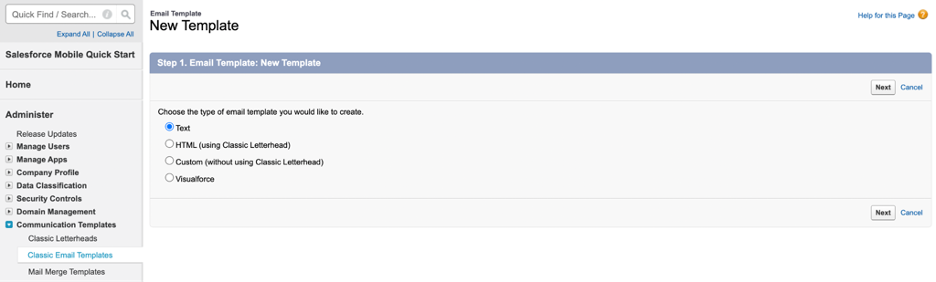
Regardless of what type of Classic email template you are creating, the first step is to click on the New Template button.
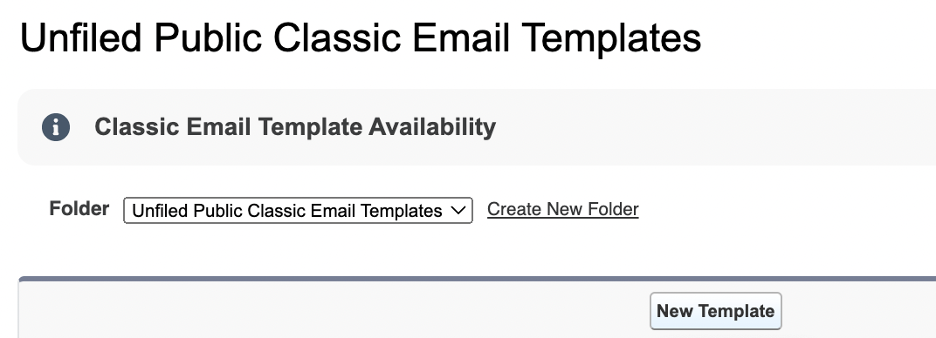
This should open a new page where you can pick one of the template types we discussed earlier:
- Text
- HTML (using Classic Letterhead)
- Custom (without using Classic Letterhead)
- Visualforce
Text
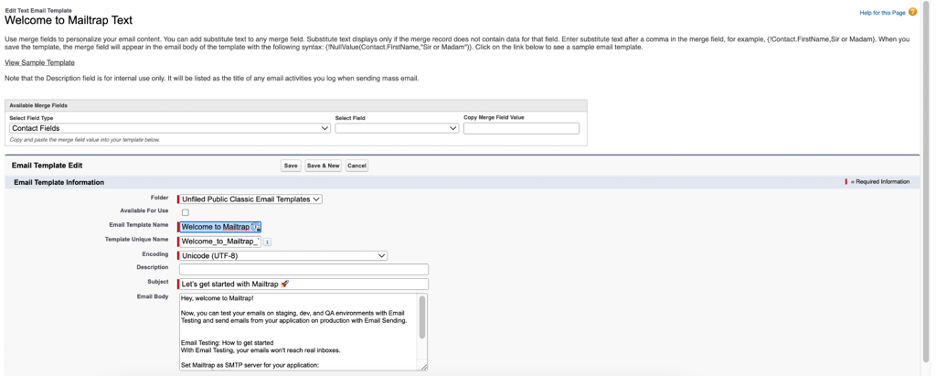
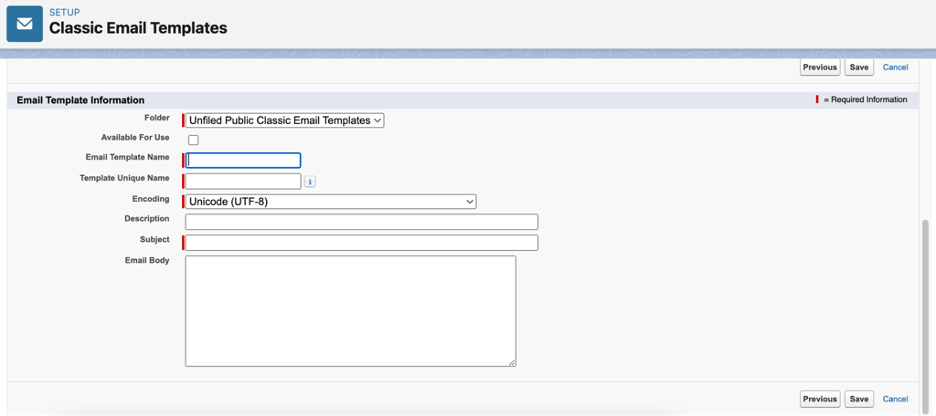
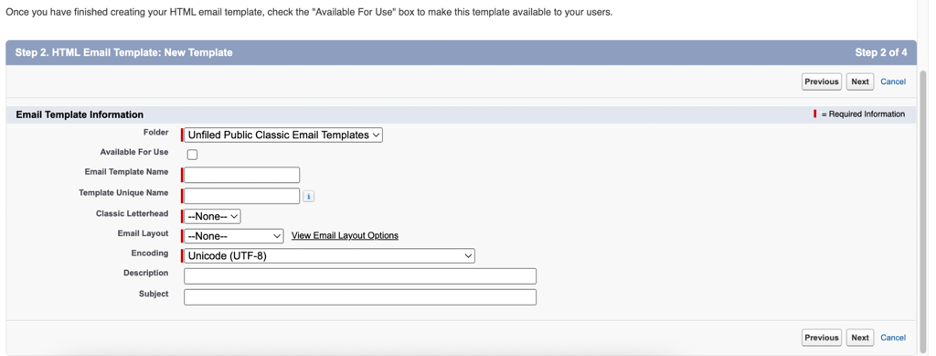
For text email templates, you have to define the following information before saving and using them to send messages:
- Folder
- Available For Use
- Email Template Name
- Template Unique Name
- Encoding
- Description
- Subject
- Email Body
In the email body, you can add merge fields that take data from Salesforce records and automatically insert them into your emails.
So, let’s say you are working on an email template that will be used for emails sent to your contacts; in that case, you’ll want to select Contact Fields under Available Merge Fields and then the specific field for the piece of information you need, for instance, the contact’s name. This will then generate a merge field value you can paste into the email body.
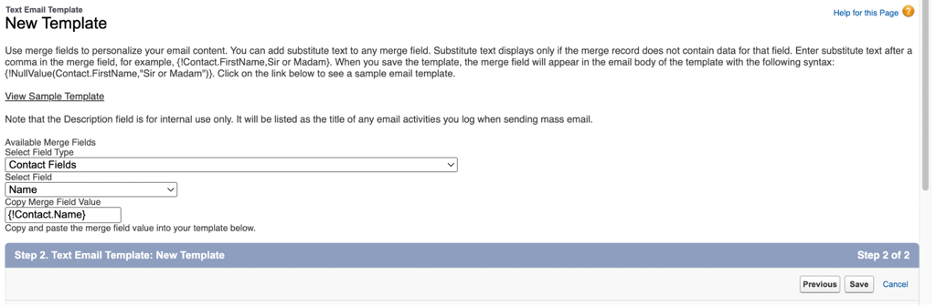
Once you’re done, simply save the template. And once it’s saved, you can verify if the merge fields are working by sending a test email.

HTML (using Classic Letterhead)
HTML templates (available to Salesforce accounts with the permission System Permissions -> Edit HTML Templates) in Salesforce set themselves apart from text templates by having the option to include a letterhead – a section where you include your company logo, address, contact information, and any other branding elements.
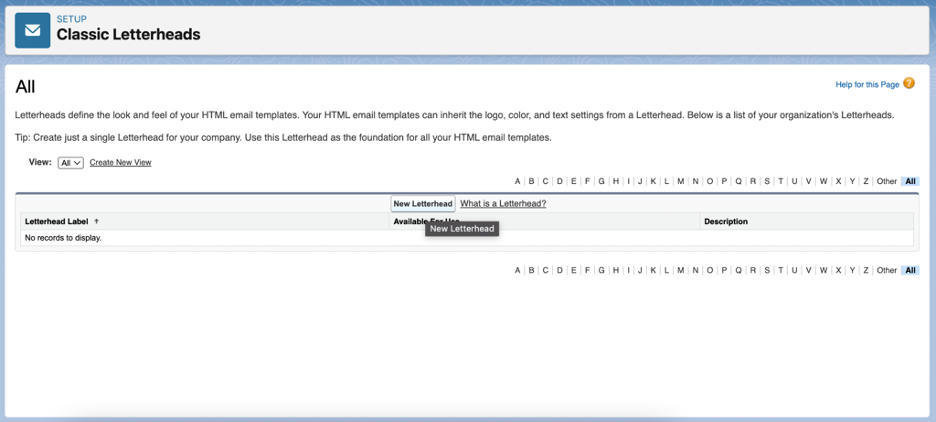
To create a letterhead for your HTML email, in Quick Find, search for “Classic Letterheads”.
Next, you should see a page with all the existing letterheads and an option to create a new one (available to Salesforce accounts with the permission System Permissions -> Manage Letterheads).
For the letterhead, you will need to define some basic information.
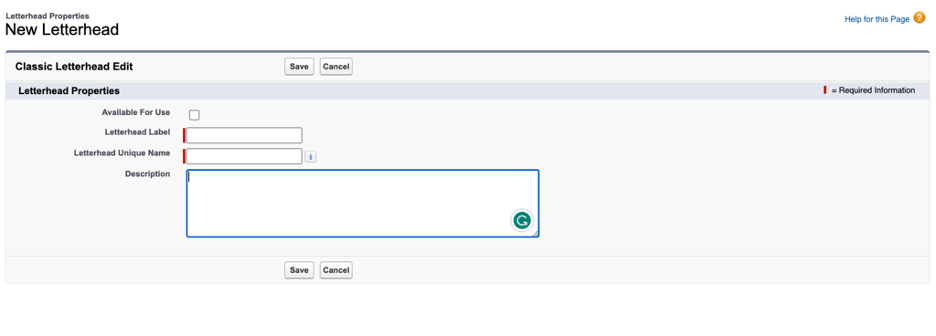
And after that, you can customize it by changing its background color, properties, adding a logo, and more.

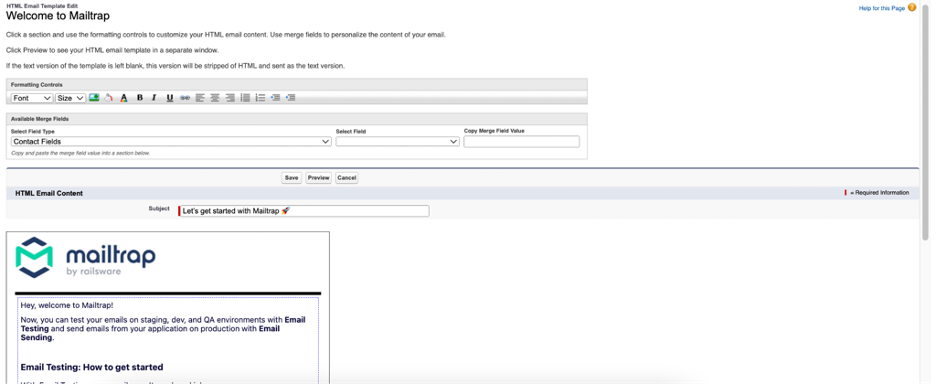
With letterhead creation out of the way, you can proceed with creating the rest of your HTML email template.
Again, you start off by defining the template’s basic information.
On the same page, you also decide on the letterhead and the layout.

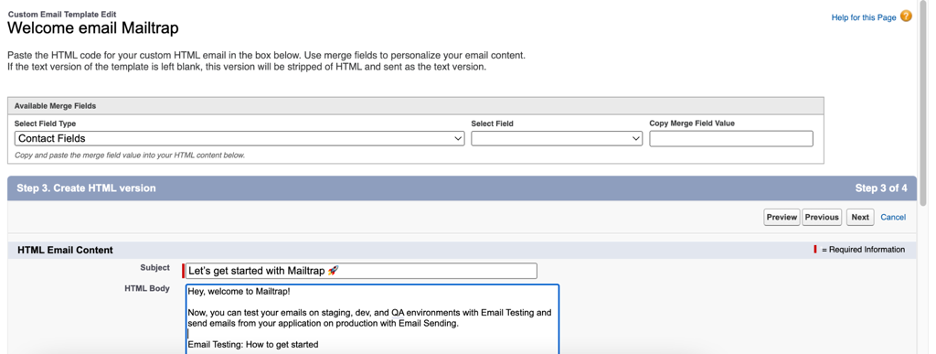
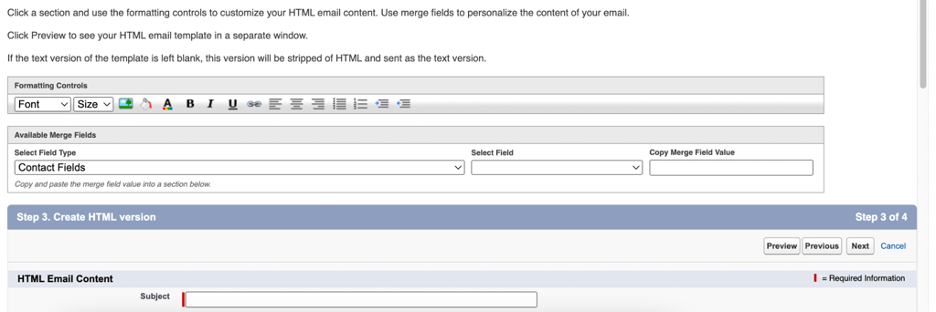
Next, you define the subject as well as the rest of the HTML email content.
Feel free to use any formatting option that you need, along with merge fields.
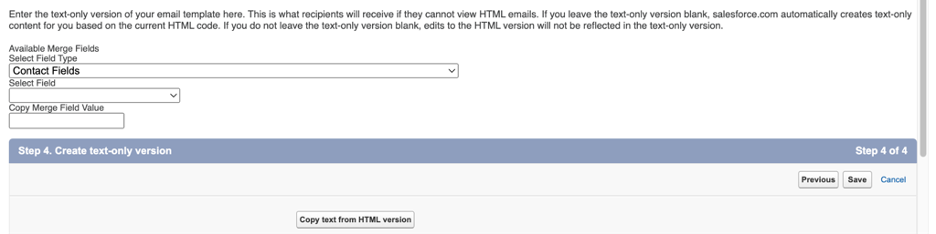
Lastly, enter the text-only version of your email template in case some recipients don’t have the option to view HTML emails.
This can be done by simply clicking on the Copy text from HTML version button.
Custom (without using Classic Letterhead)
Creating custom templates consists of pretty much the same steps as the process to create HTML email templates, but in this case, you lack the option to use letterheads and the formatting options mentioned earlier. Luckily, merge fields are still available.
Visualforce
Lastly, in terms of Classic templates, we have Visualforce email templates.
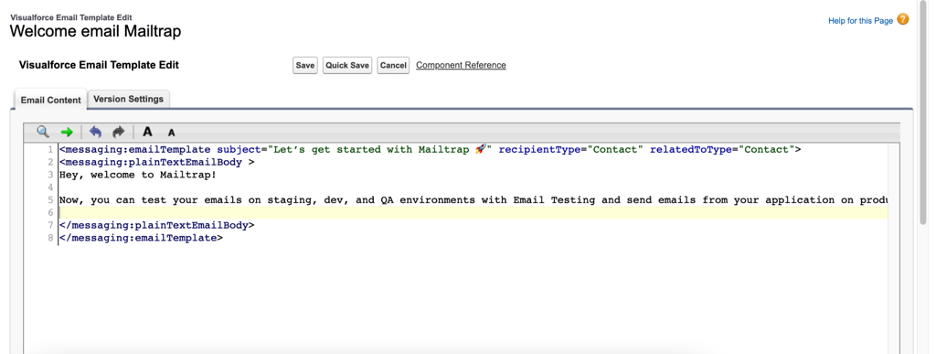
When creating this type of template, you again start off by defining the basic email template information.
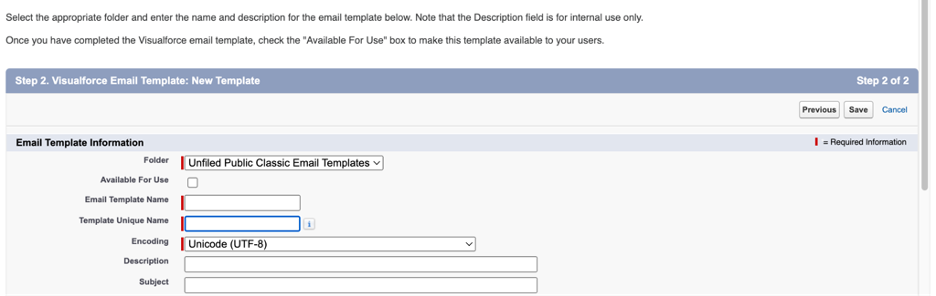
Once you’ve done that, you can define the Visualforce template attributes.
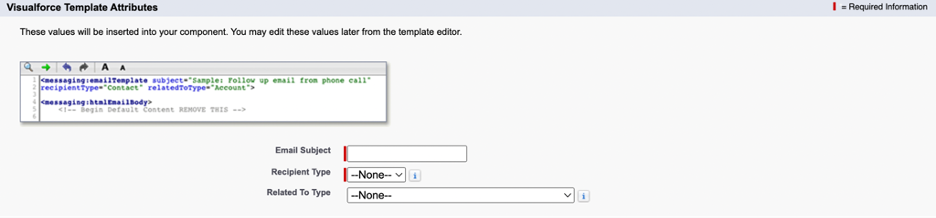
The Recipient Type represents the Salesforce object receiving the email, and the Related To Type is the Salesforce object the template will retrieve merge field data from.
After you define the attributes and click Save, you should see the following page.
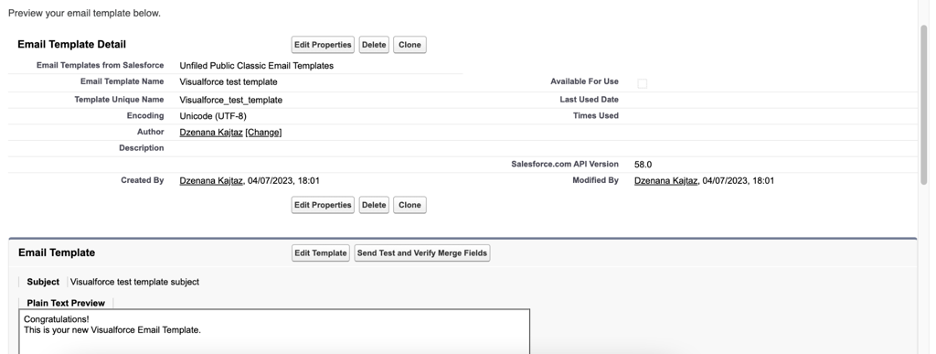
There, click on Edit Template to create the Visualforce component.
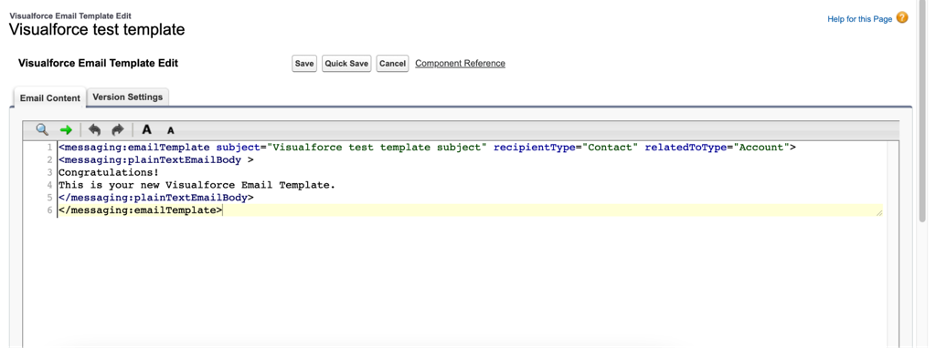
Next, what you will need to do is define the Visualforce code for your template. And when you’re happy with it, click Save.
Lightning email templates
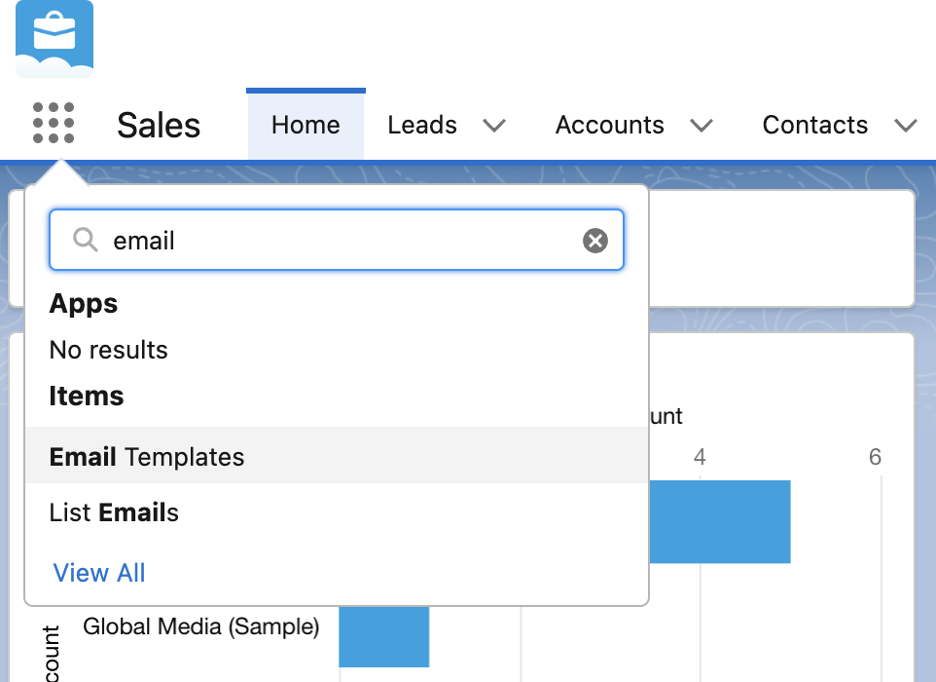
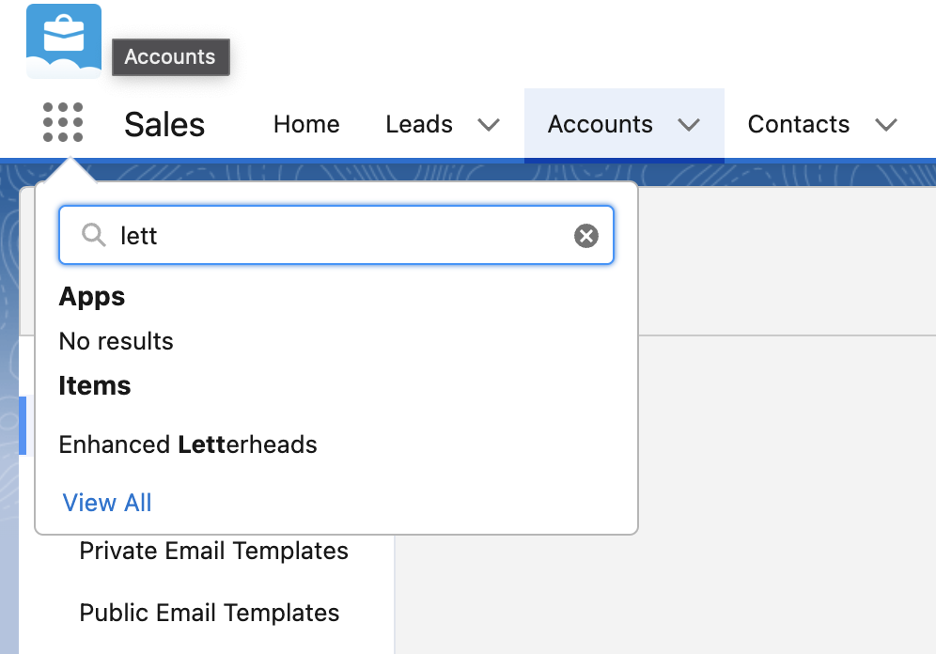
To access email templates of the Lightning category, you simply need to click on the app launcher icon and search for them, as shown in the image below:
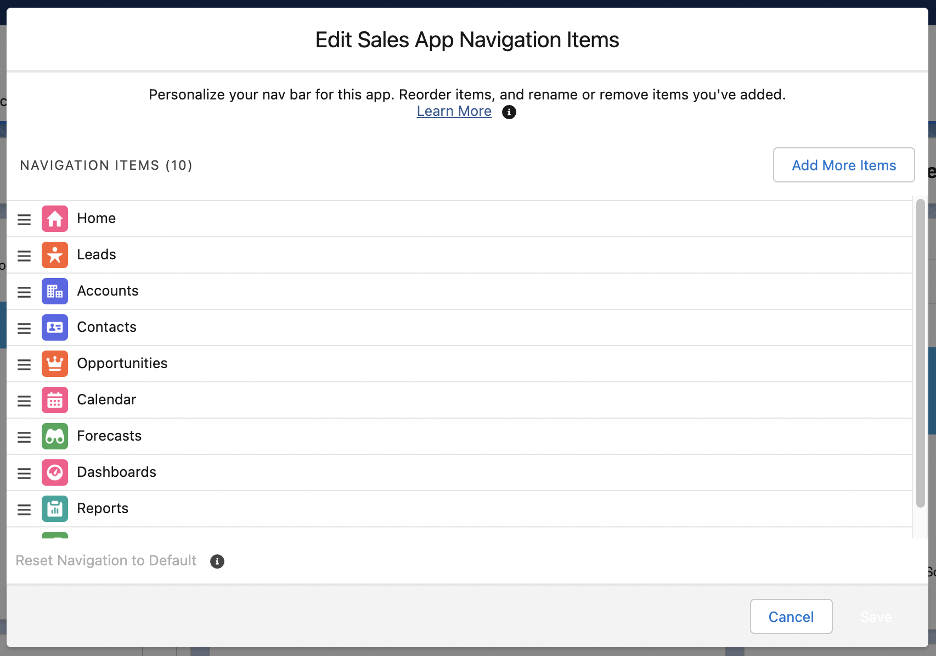
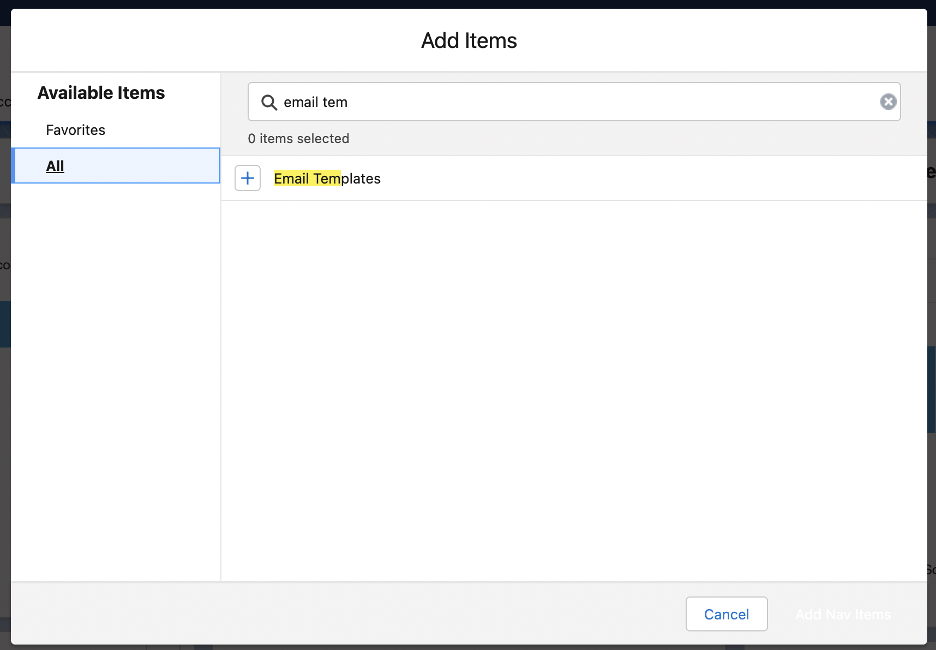
You can also put an email templates shortcut on your Salesforce home screen by clicking on the edit button and then adding a new navigation item.
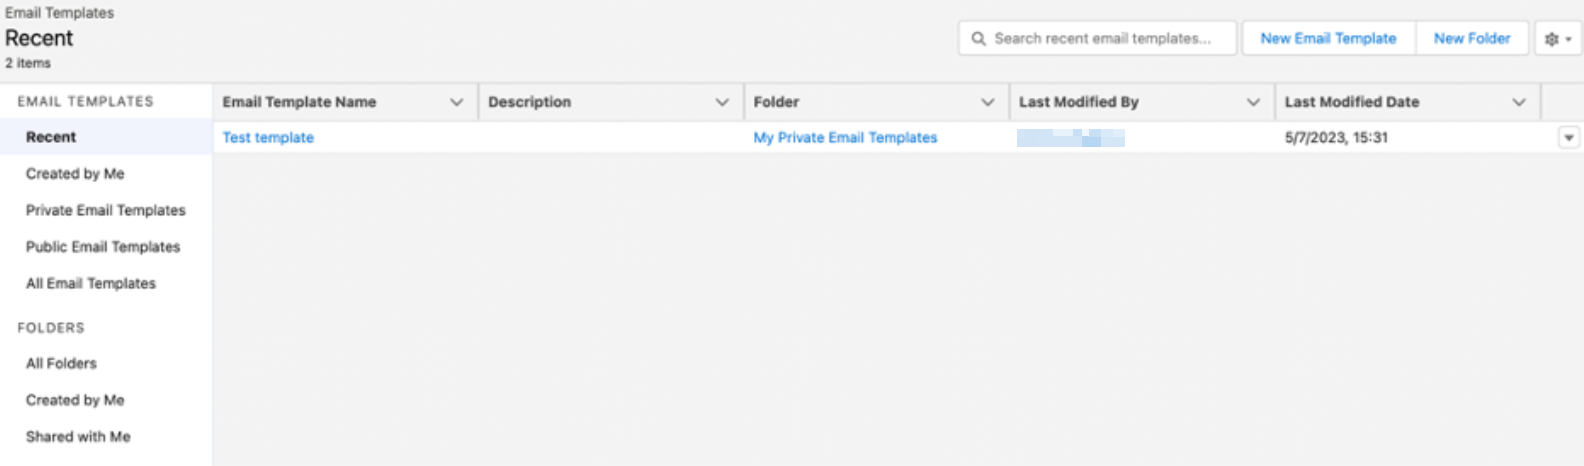
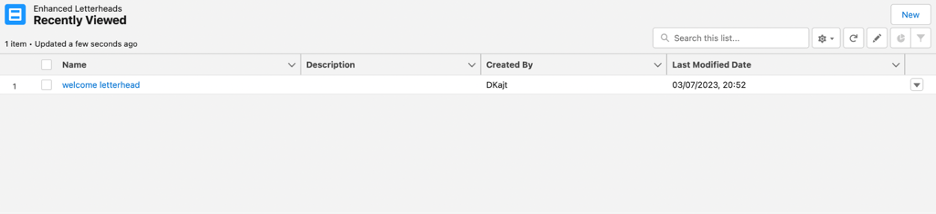
Once on the email templates page, you can view existing templates, edit or delete them, as well as create new ones.
You can also create an Enhanced Letterhead – a letterhead type that comes with better customization options and features such as dynamic content and is more advanced than its classic counterpart.
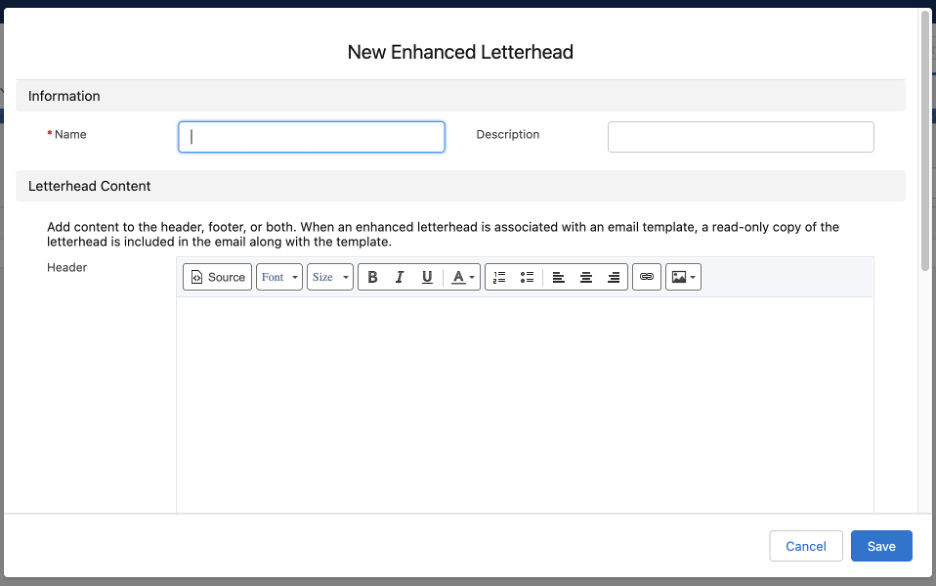
After creating a letterhead, you can go back to creating the email template itself.
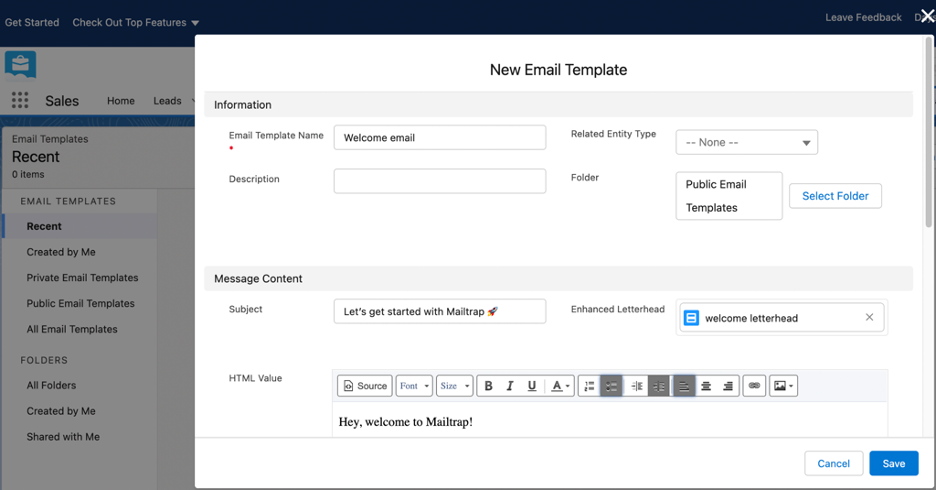
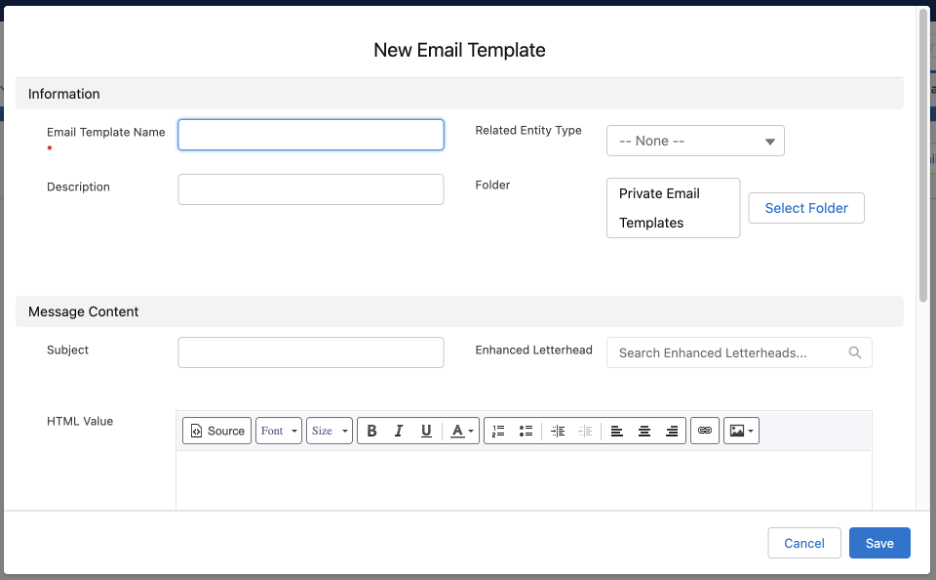
To do so, on the email templates page, simply click on New Email Template.

In the dialog box that appears, define all the necessary information for the template, pick a letterhead, and save everything to complete the template creation process.
Email template builder
In contrast to Salesforce Classic, Salesforce Lightning comes with an email template builder – a drag-and-drop tool built natively on the Salesforce platform – using this you can create a responsive email design without writing any code yourself. Insertion of images, buttons, merge fields, and more is, of course, also available in the builder.
To start using the builder, you first need to assign your user profile the right permissions, as they do not come assigned to you by default.
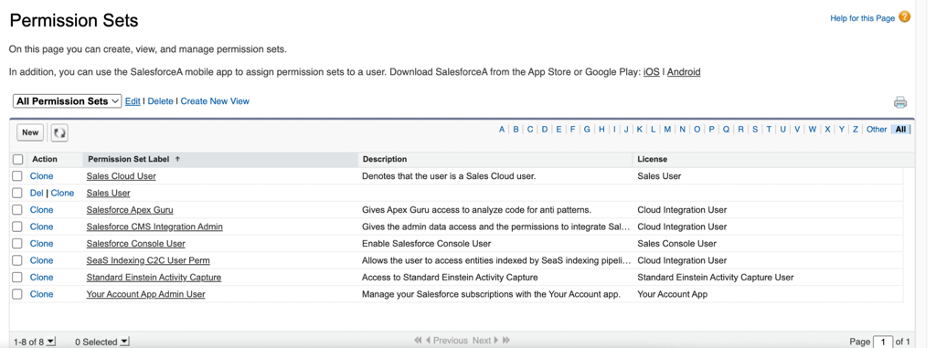
This is done by going into Setup and searching for “Permission Sets”.
On the Permission Sets page, click on New.
And then, define the Label and API Name.
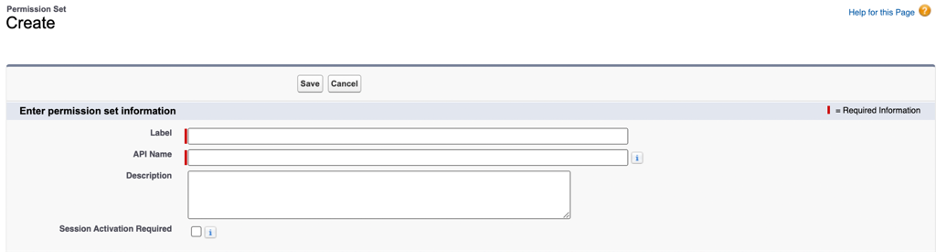
Click Save, and on the next page, go into System Permissions.
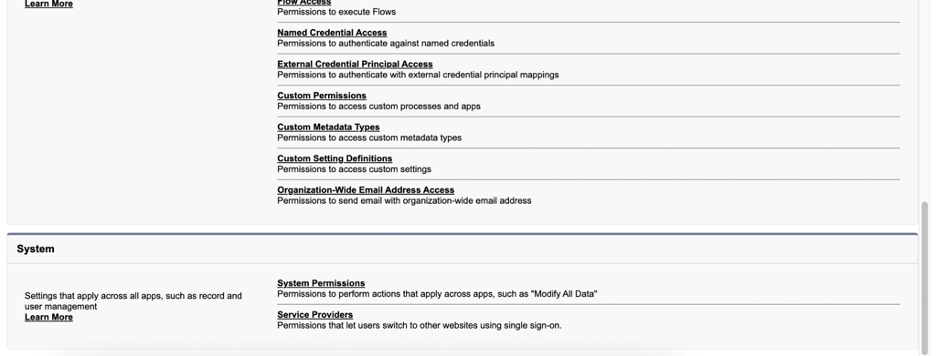
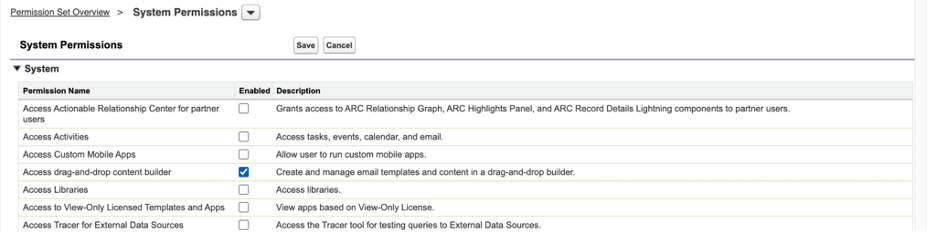
In System Permissions, click on Edit, enable Access drag-and-drop content builder, and then click Save.
The last steps you will need to complete to assign yourself the permissions are managing assignments by clicking on Manage Assignments → Add Assignment, selecting your username, and clicking Assign.

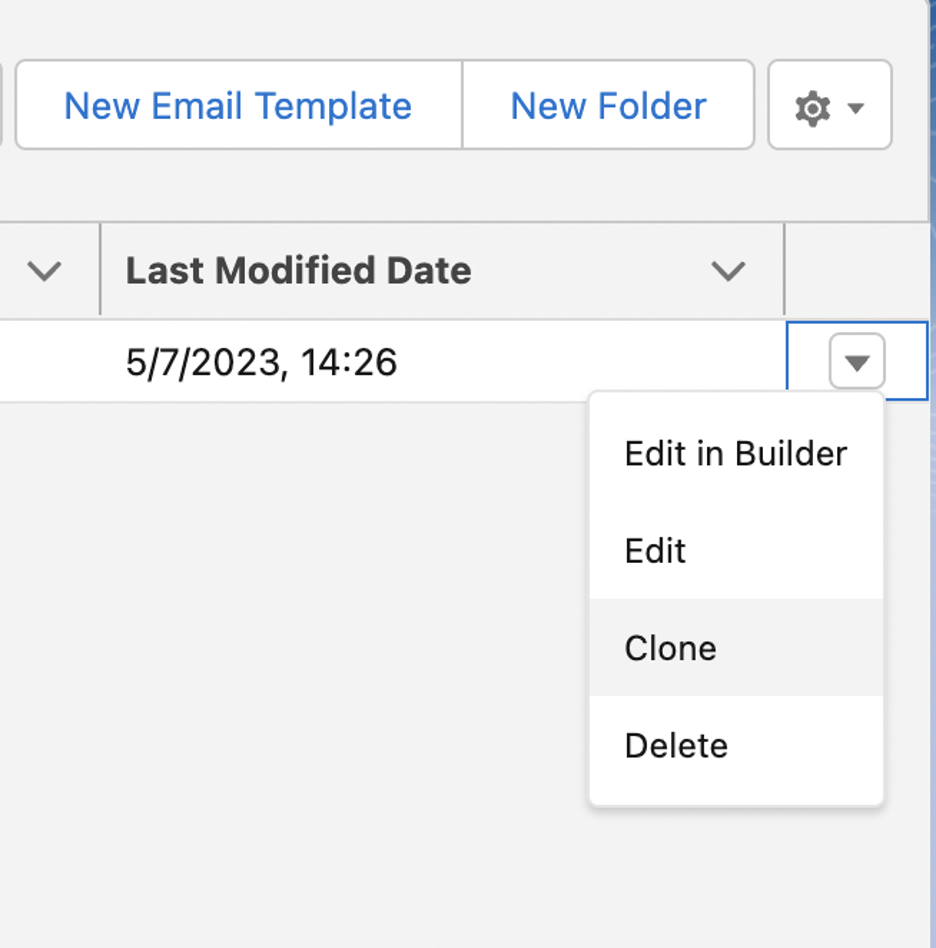
Now, when you go to view your Lightning templates list and want to edit one, you should also have an option labeled Edit in Builder.
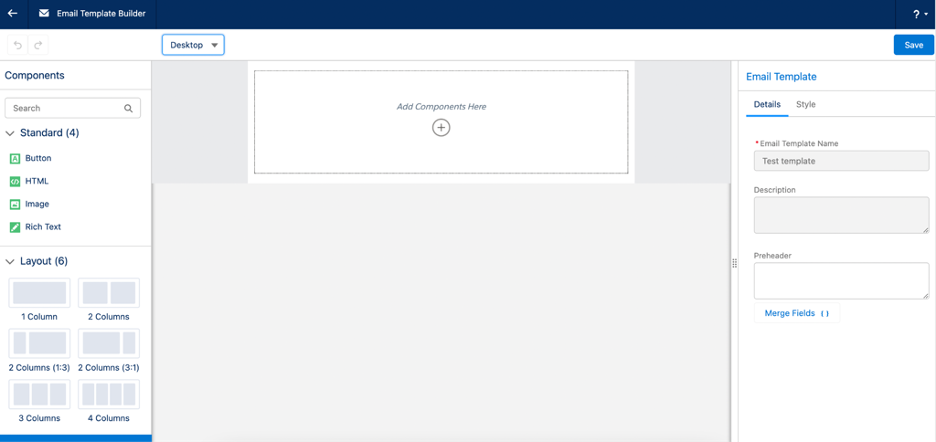
The builder interface should look like this.
Salesforce Classic email templates
As the processes of finding templates, editing existing ones, as well as creating new templates are essentially the same in both Salesforce Classic and Salesforce Lightning, we won’t go over each one in detail again.
Instead, we’ll quickly show you how to switch from one interface to another and locate the email templates section in Salesforce Classic.
How to switch between Salesforce Lightning and Salesforce Classic
Switching between Salesforce Lightning and Salesforce Classic is fairly simple and is done directly from the Salesforce home page.
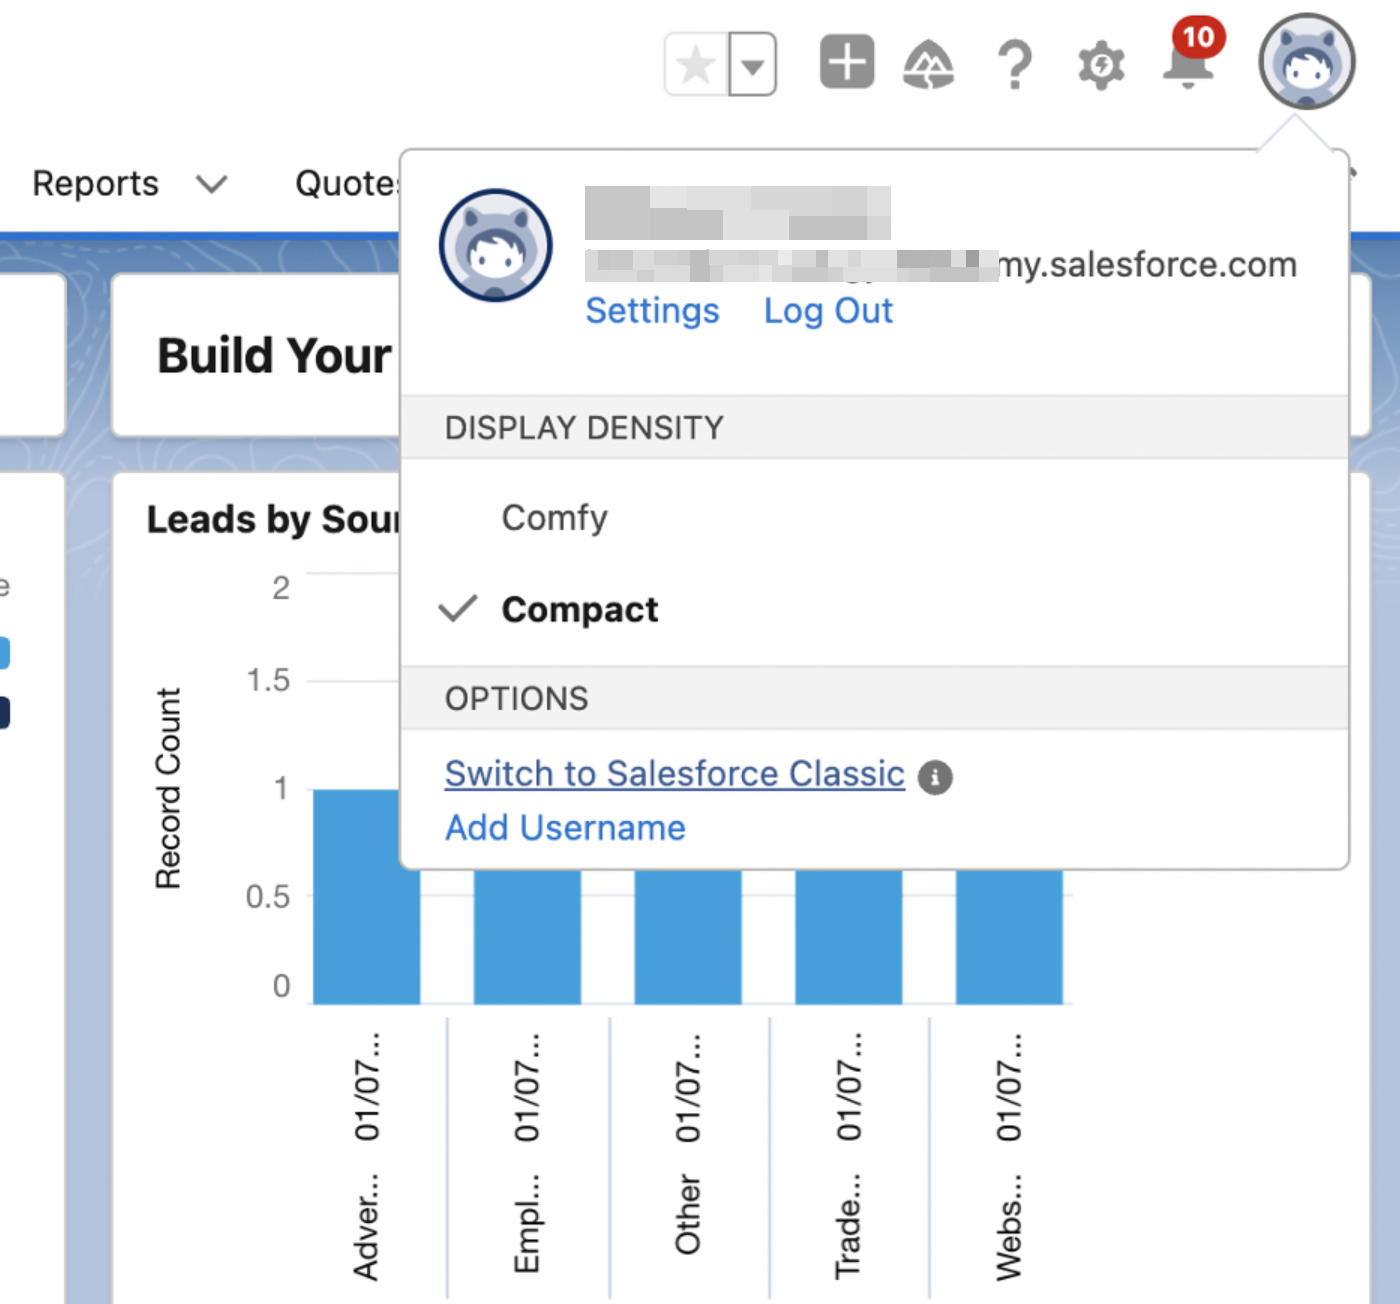
In Salesforce Lightning, you can find the option by clicking on your account icon and then on the Switch to Salesforce Classic button.
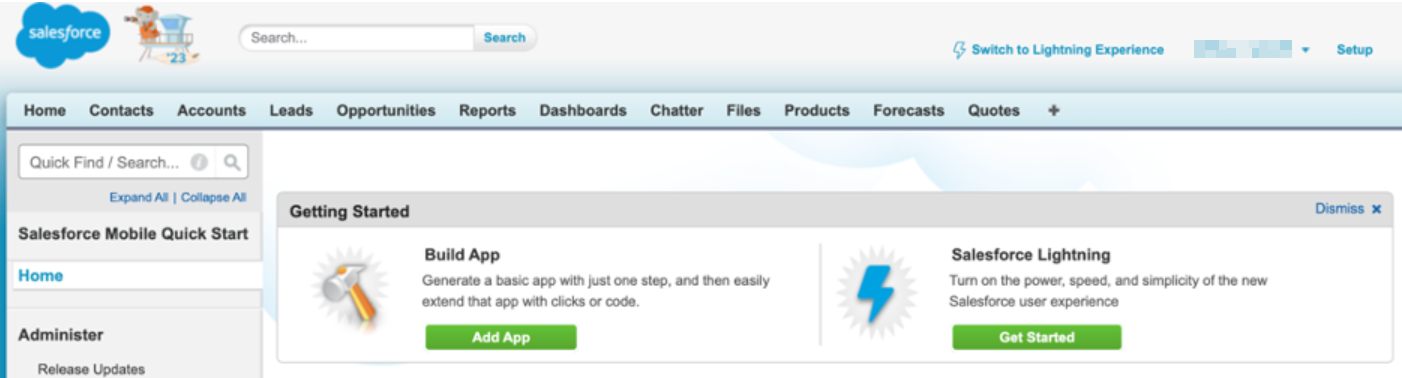
Once in Salesforce Classic, at the top-right of the home page you will see the Switch to Lightning Experience option, which will enable you to easily go back to using the more modern version of the Salesforce interface.

How to find the email templates section in Salesforce Classic
Navigating to the email templates section in Salesforce Classic is quite similar to the same process in Salesforce Lightning.
First, you click on Setup in the top-right of the home page.

This will open up a new page containing the Quick Find search box we mentioned earlier.
In the search box, type in “templates”, and Classic Email Templates will appear as one of the results.
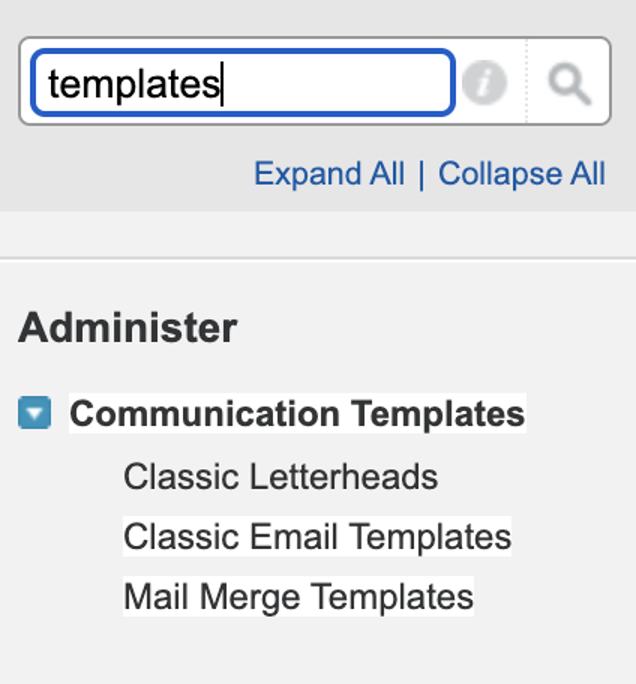
Clicking on Classic Email Templates will open up a new page, similar to what we’ve seen in Salesforce Lightning, where you can browse through all existing templates as well as edit and delete the same.
At the top of the templates list will be the New Template button, using which you can create any of the four different types of email templates we covered earlier using the same steps.
How to import email templates in Salesforce?
Salesforce, at the moment of writing, doesn’t have an option for importing email templates. Still, there are workarounds you can use to get existing templates into Salesforce.
To import a template, you can use the same steps we described when creating a Classic custom email template.
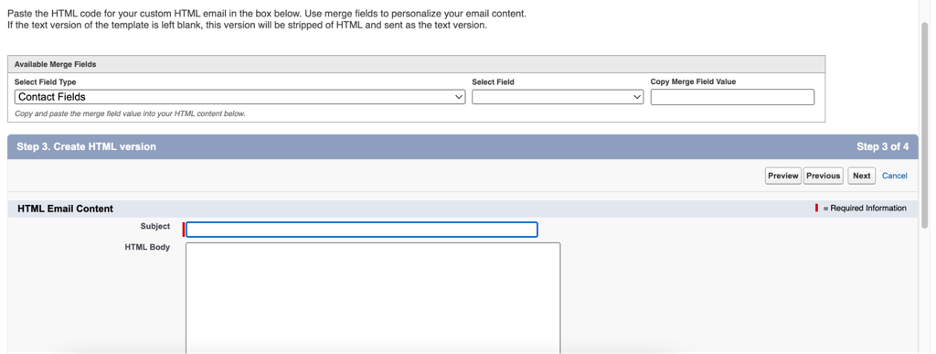
So, go into Setup, use Quick Find to find Classic templates, click on New Template, and then pick Custom (without using Classic Letterhead).
Once you fill in the template’s basic information and subject line, take the HTML code of the template you want to import and paste it into the HTML Body field.
If the template contains any images, make sure they are properly hosted either on Salesforce or a different platform and that the links within your code leading to the hosted images are correct.
How to create Salesforce email templates in Apex
Apex is an object-oriented programming language used to access the Salesforce platform’s back-end database and client-server interfaces. With it, many tasks can be performed, including sending emails/email notifications, creating email templates, and so on.
Apex code is written, tested, and debugged in the Salesforce Developer Console – a powerful integrated development environment (IDE).
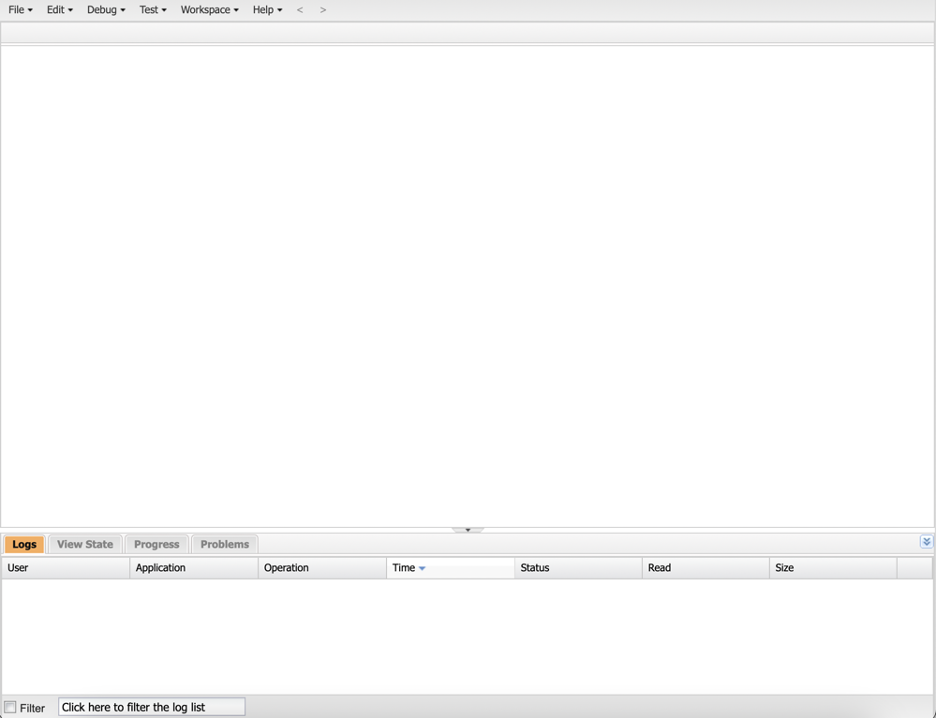
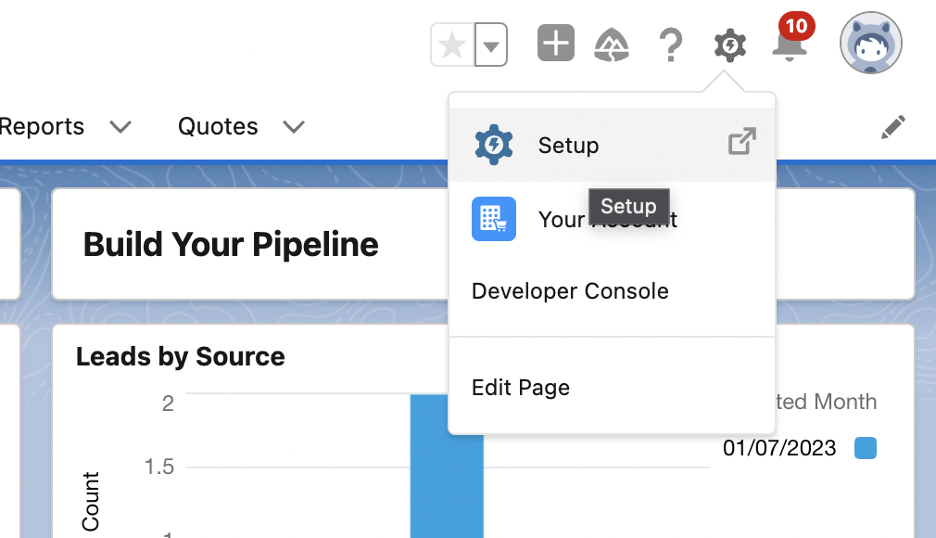
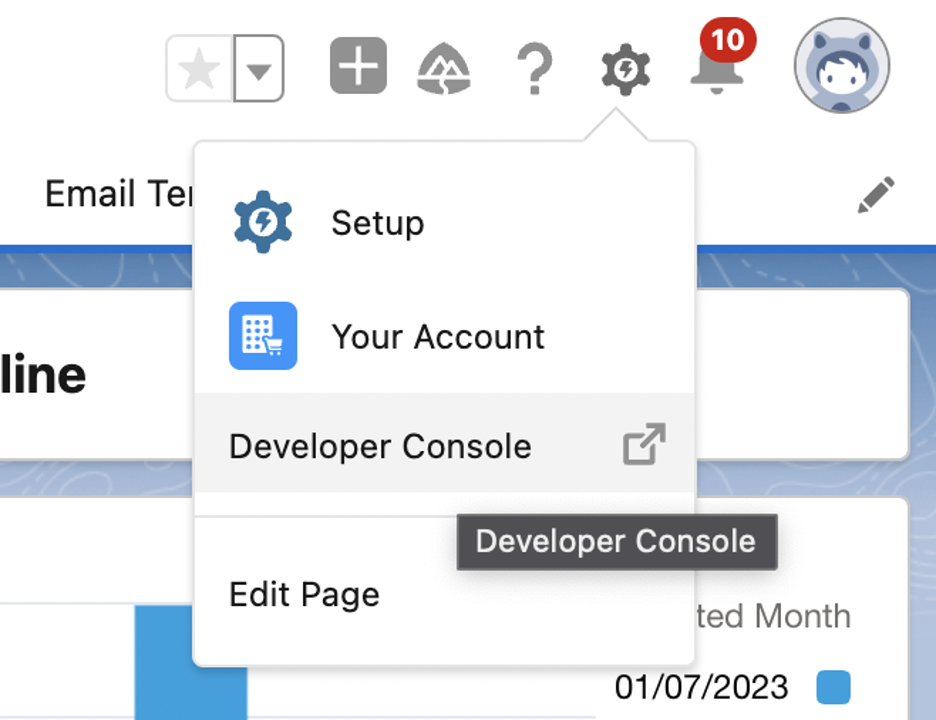
You can find the Salesforce Developer Console in your Salesforce account under the great icon.
To create an email template using Apex, you can follow this code example:
// Define the EmailTemplateCreator class
public class EmailTemplateCreator {
    // Method to create an email template
   public static void createEmailTemplate() {


       // Get folder by its Name. Replace My Awesome Folder with the Name of the folder you want
       Folder folder = [SELECT Id, Name FROM Folder WHERE Name = 'My Awesome Folder' LIMIT 1];


       // Create an EmailTemplate object
       EmailTemplate emailTemplate = new EmailTemplate();

       // Set the necessary fields for the email template
       emailTemplate.FolderId = folder.Id; // Specify the folder ID where you want to save the template
       emailTemplate.Name = 'My Email Template'; // Set the name of the template
       // Set the developer name of the template. Pay attention - this name can only contain underscores and alphanumeric characters. It must be unique, begin with a letter, not include spaces, not end with an underscore, and not contain two consecutive underscores
       emailTemplate.DeveloperName = 'My_Email_Template';
       emailTemplate.Subject = 'Hello {!relatedTo.Name}'; // Set the email subject with merge fields
       emailTemplate.Body = '<html><body>Hello {!relatedTo.Name} <br/><br/>This is the body of the email template.</body></html>';
       emailTemplate.TemplateType = 'text'; // Set the template type ('text', 'html', or 'custom')


       // Save the email template
       try {
           insert emailTemplate;
           System.debug('Email template created successfully.');
       } catch (Exception ex) {
           System.debug('Error creating email template: ' + ex.getMessage());
       }
   }
}
Do keep in mind that, in the code above, you need to replace ’00Xxxxxxxxxxxxx’ with the ID of the template folder in which you want to save the Apex email template. And if you need to, you can also modify within the code the name, subject, and body of the email template according to your requirements.
How to test Salesforce email templates
The email templates you create in Salesforce might look great at first glance in the text or drag-and-drop editor, but to make sure they look perfect when delivered to recipients, you have to put them through some testing.
The Mailtrap Email Delivery Platform offers a solution for debugging and inspecting emails with no risk of spamming recipients in the process called Mailtrap Email Testing.
Using the solution, you can check the support offered by the most popular mailbox providers for a template’s HTML and CSS, preview an email and test its responsiveness, analyze an email’s spam score, see if your sender IP/domain appears on any blacklists, enable testing flows automation with an API, and do a lot more.
So, how do you get to testing with this email sandbox?
For new users, the process starts with setting up a Mailtrap account. So, if you’ve already done this, you can skip the first step.
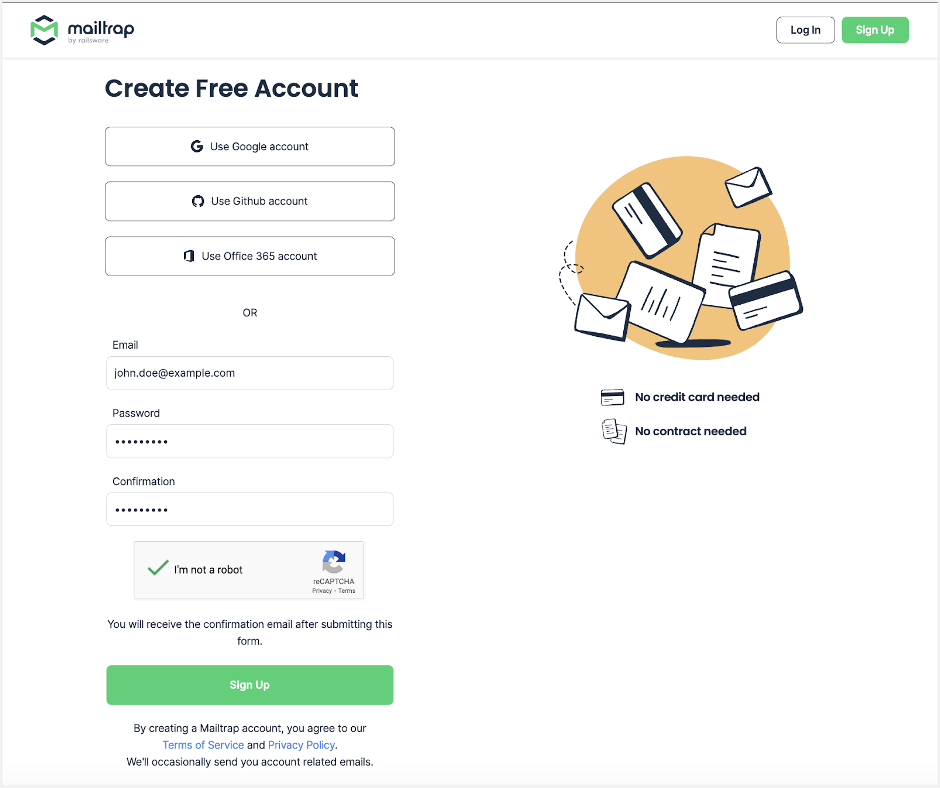
- Visit the Mailtrap account creation page, and use your email or an existing Google, Github, or Office 365 account to sign up.
- Navigate to Email Testing → Inboxes to find your first virtual inbox called “My Inbox”.
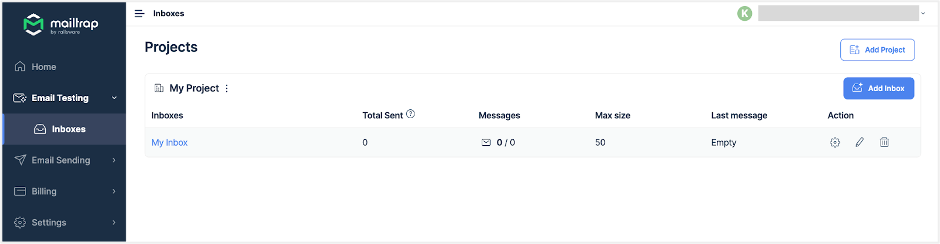
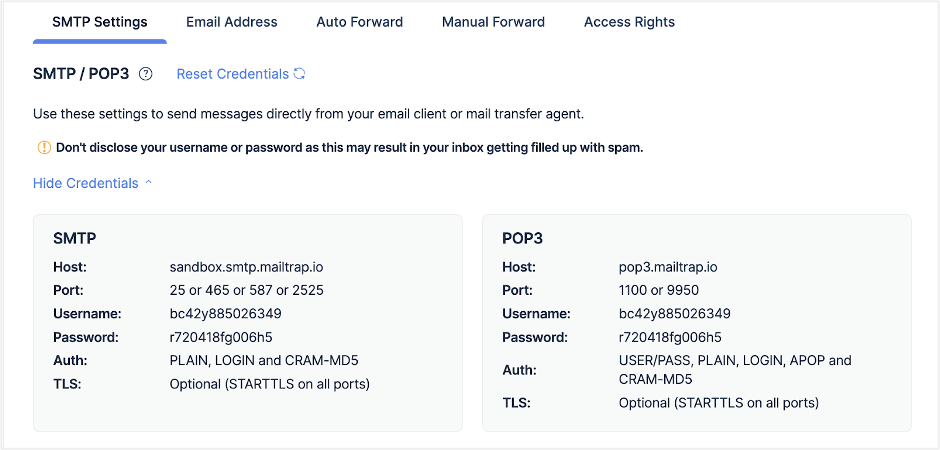
- Click on the inbox and find Show Credentials. This will reveal the credentials for the fake SMTP server used to send testing emails from an email client or mail transfer agent to your Mailtrap virtual inbox.
- Go to your Salesforce account and navigate to Setup → Email (under Administration) → Email Relays.
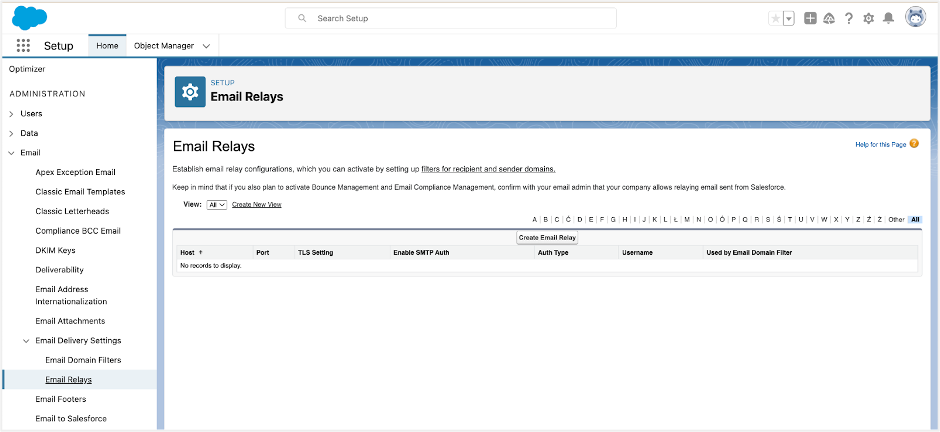
- Click on Create Email Relay and fill out the form with Mailtrap Email Testing’s SMTP credentials you retrieved earlier, as shown in the example below:
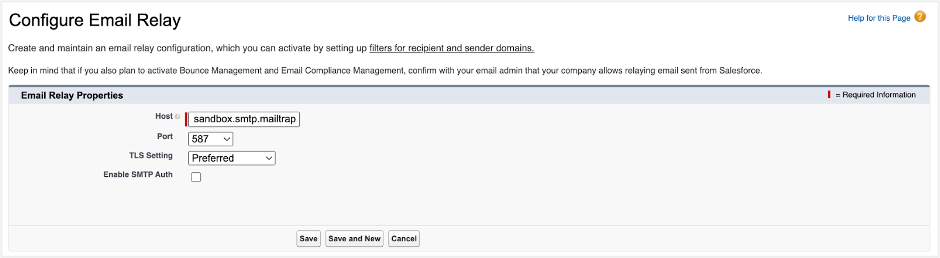
- Click Enable SMTP Auth to connect to the SMTP server with authentication. After that, enter your SMTP username and password.
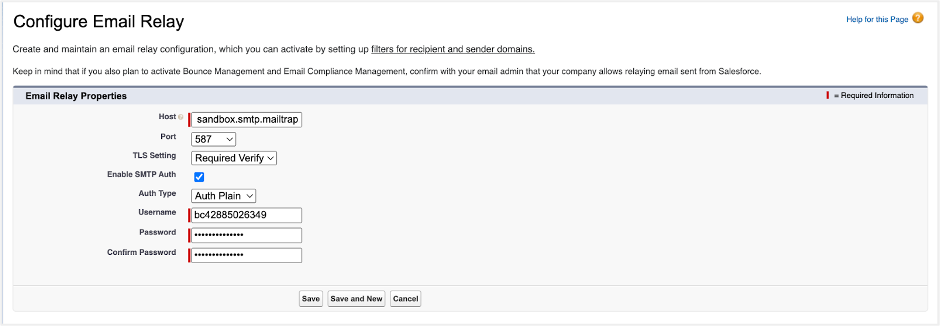
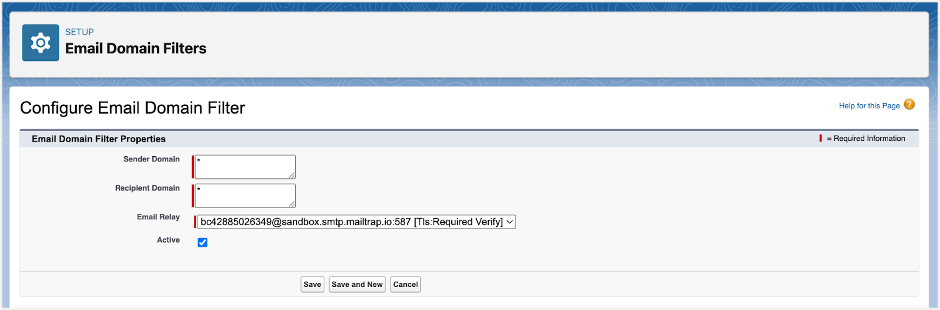
- Click Save and head to Email Domain Filters, where you need to click Create Email Domain Filter.

- On the Configure Email Domain Filter page, enter “*” as the default wildcard for Sender Domain and Recipient Domain. After that, mark the Active checkbox and click Save.
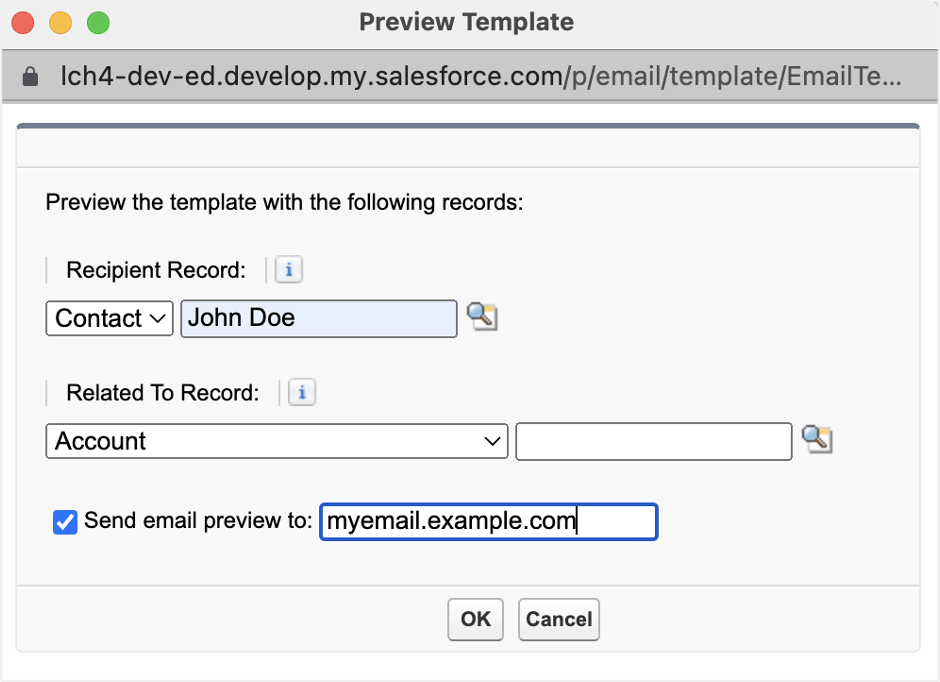
- With configuration out of the way, find the template you want to test and click Send Test and Verify Merge Fields.
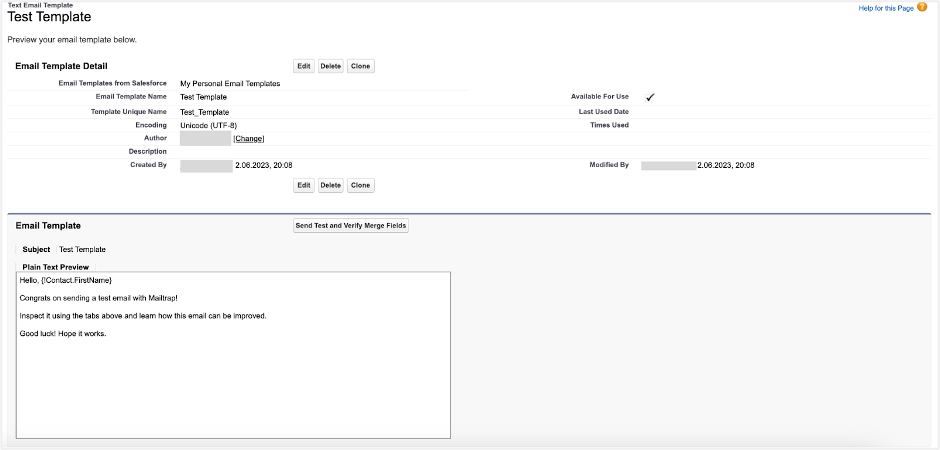
- In the pop-up window, choose the contact you want to test the template with, tick Send email preview to, enter your email address, and click OK.
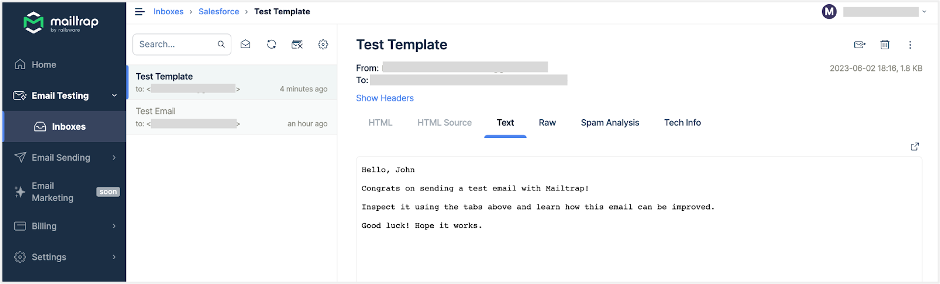
As the final step, check your Mailtrap Email Testing inbox, and the test email containing the template will be right there. Do keep in mind that you won’t find the same email in your real inbox since it was sent through a fake SMTP server.
How to send emails containing Salesforce email templates
When you decide that it’s time to send emails using email templates you have in Salesforce, there are a few routes you can take:
Using the Salesforce Classic and Lightning interface
In Salesforce Classic, you can initiate the email-sending process from the account, contact, lead, opportunity, case, campaign, or custom object pages.
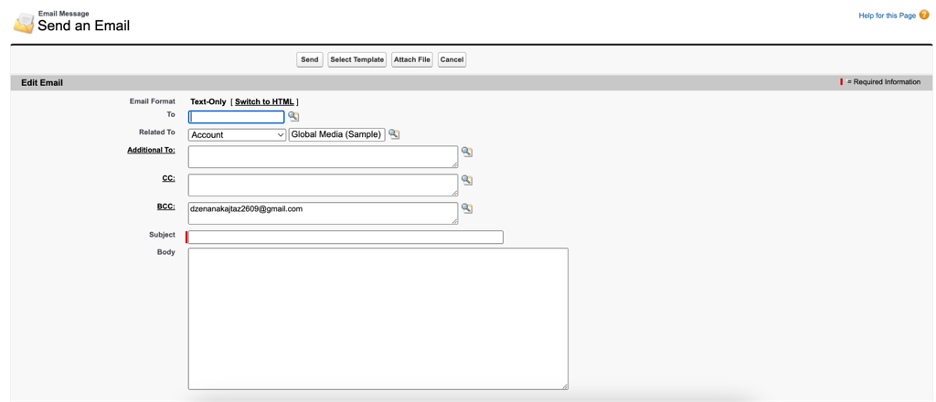
On any of these pages, find the Activity History section and click on Send an Email.

This should open up a new page where you can craft a new email and, when doing so, select a template.
The Select Template button will open the following pop-up showing all your existing templates.
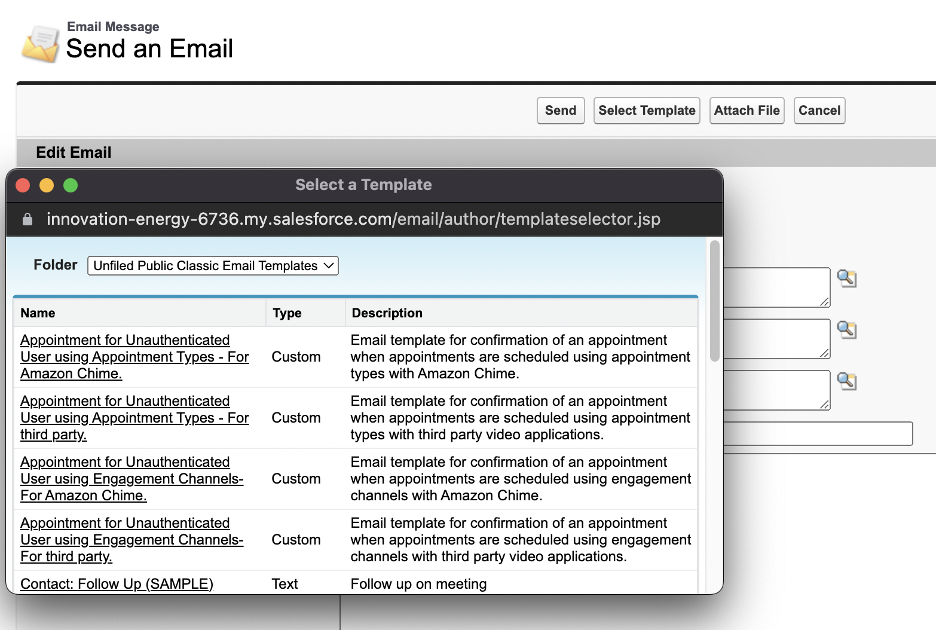
Select one, and if you’ve entered all the necessary information, send off your email.
When it comes to Salesforce Lightning, you can send emails from lead, contact, person account, opportunity, case, and custom object pages, more specifically, from the Activity section on these pages.
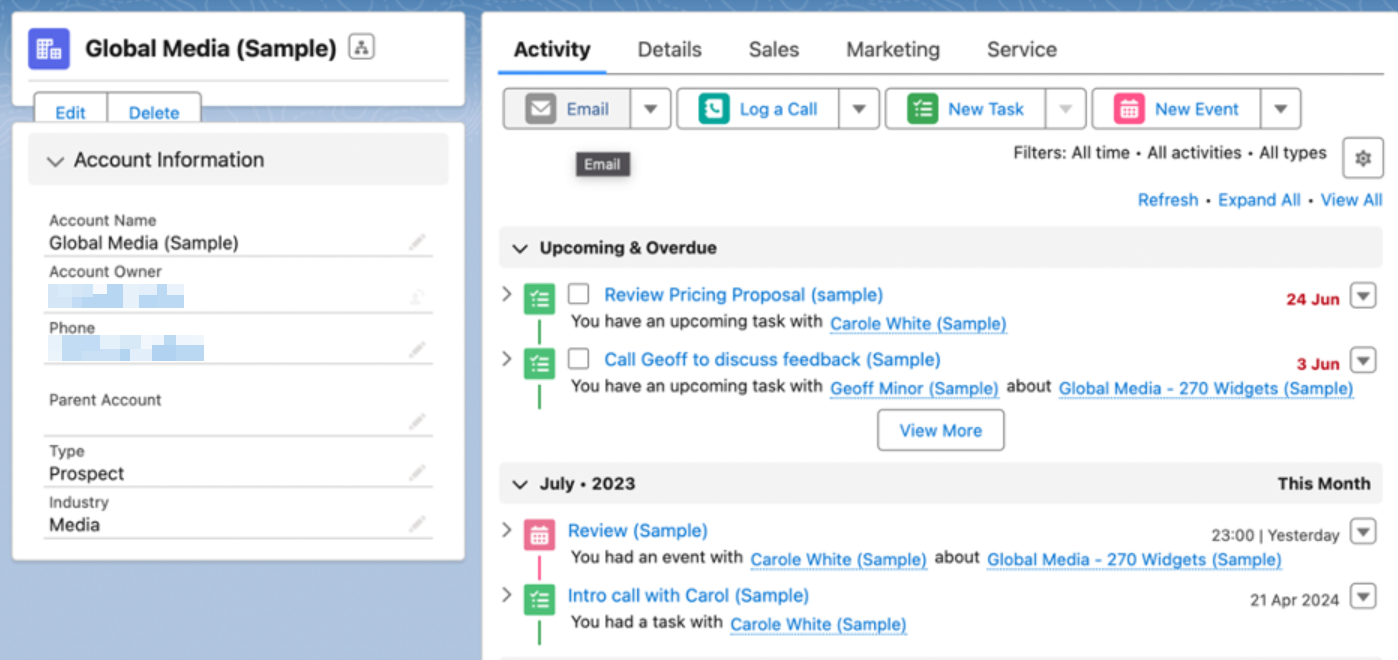
After clicking on the Email button in the Activity section, you will see a pop-up using which you can craft an email.
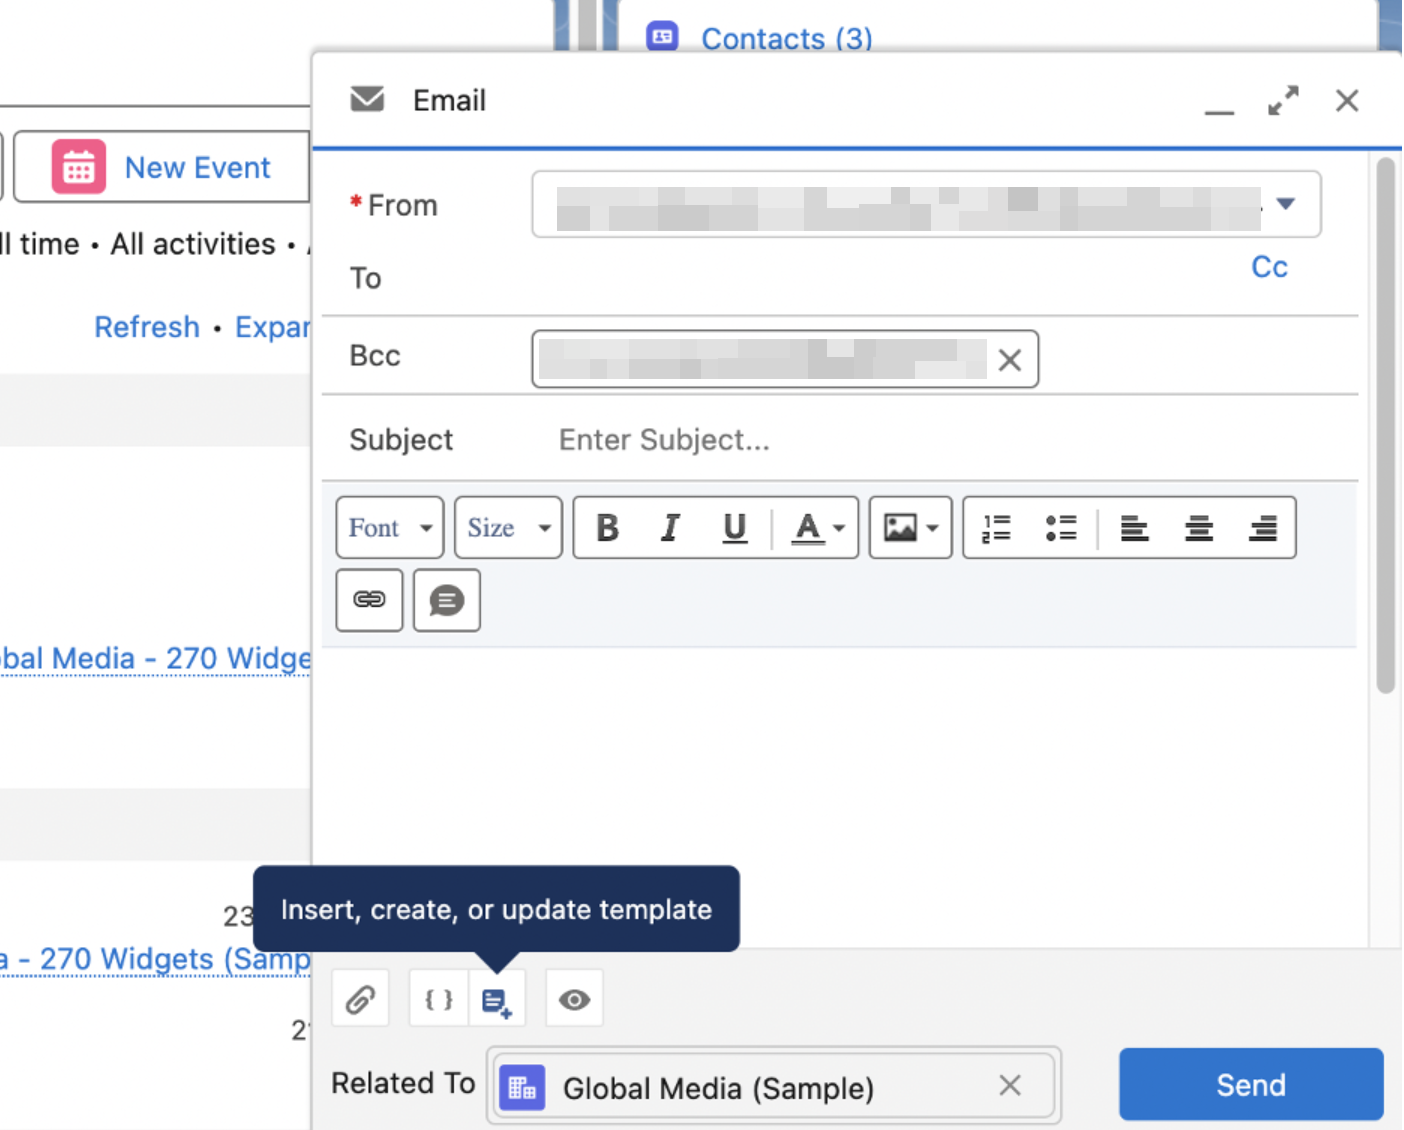
At the bottom of this pop-up, you will see a document icon through which you can select a template for your email.
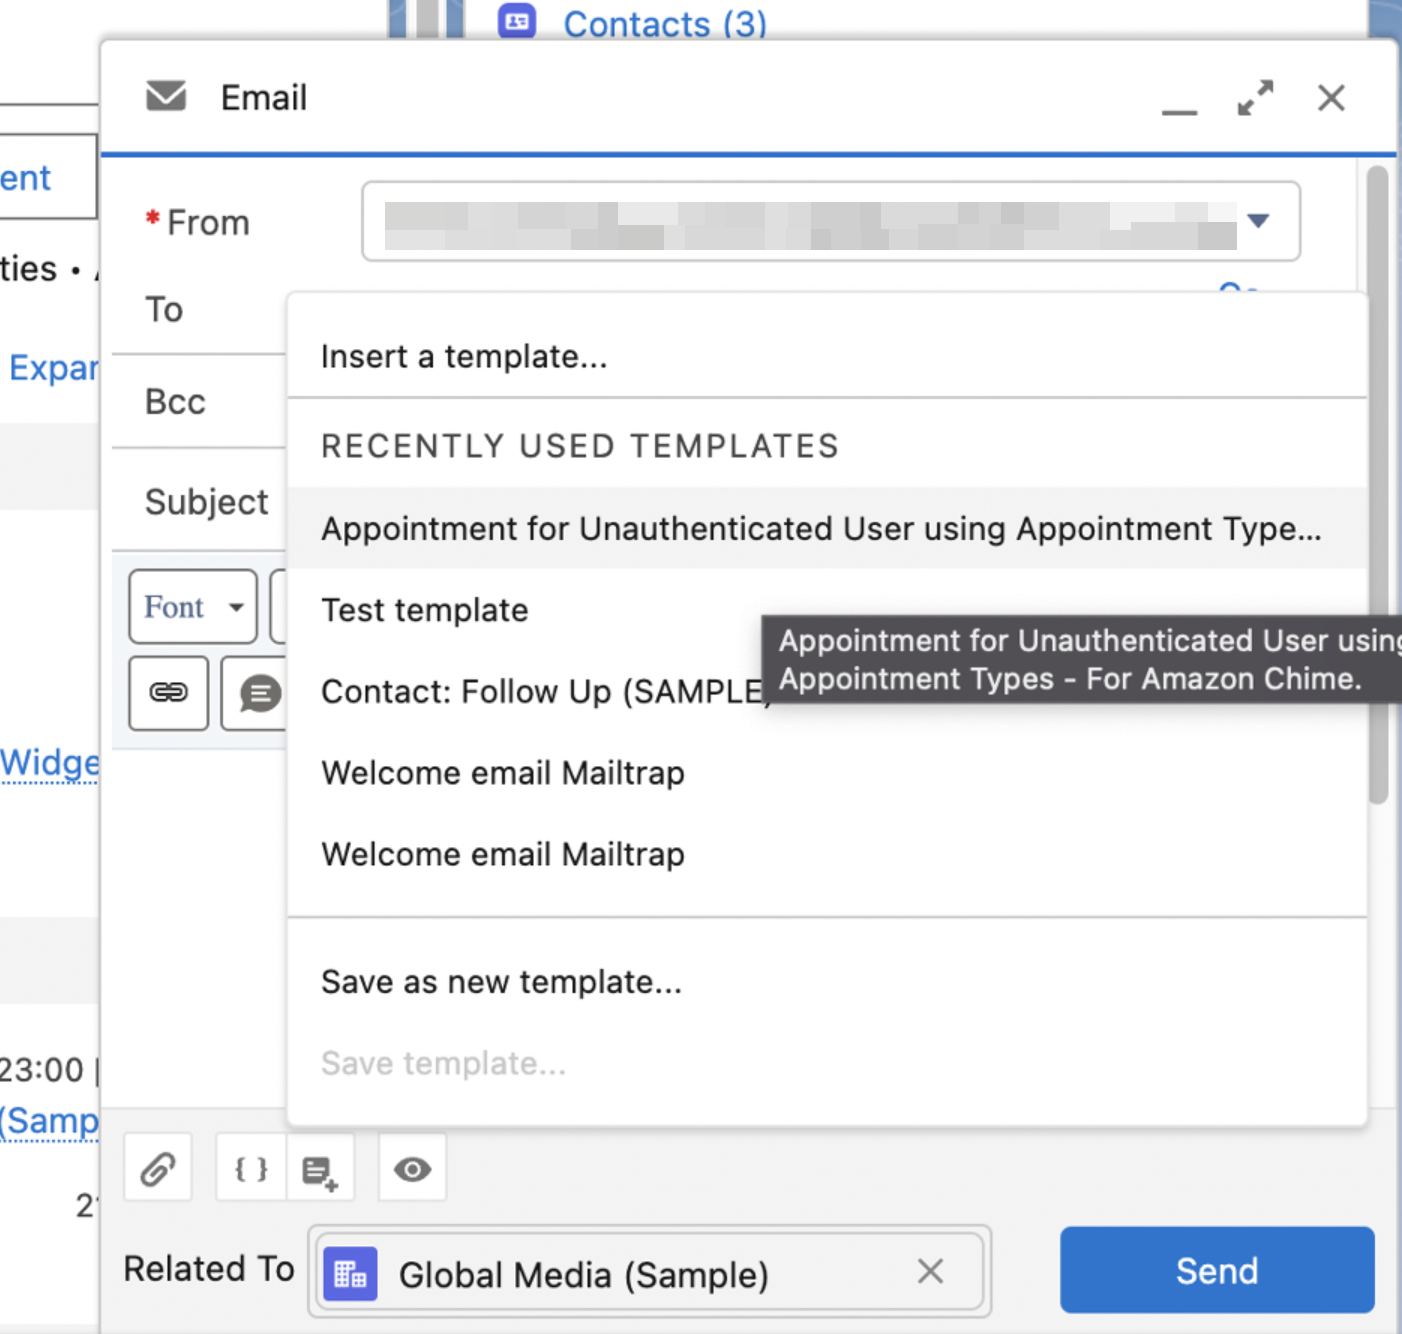
With the template selected and your email finalized, simply click Send.
Using Apex
Besides creating templates, Apex can, of course, also be used to send emails containing existing templates.
This can be achieved using the following code when modified to your needs:
public class SendEmailTemplate {


   public static void sendEmailTemplateWithTemplate() {


       // replace ApexEmailTemplateMessage with the Name of the template you want to use
       EmailTemplate et = [SELECT Id, Subject, Body FROM EmailTemplate WHERE Name ='My Email Template' LIMIT 1];


       List<String> toAddress = new List<String>();
       // replace example@gmail.com with your email
       toAddress.add('example@gmail.com');


       // replace LastName = 'Eze' with "your criteria" (ex: Email = 'your_email@test.com')
       Contact con = [SELECT Id, Email, Name, AccountId FROM Contact WHERE LastName = 'Young' LIMIT 1];


       Messaging.SingleEmailMessage mail = new Messaging.SingleEmailMessage();


       String emailBody = et.Body.replace('{!relatedTo.Name}', con.Name);
       String emailSobject = et.Subject.replace('{!relatedTo.Name}', con.Name);


       mail.setTemplateId(et.Id);
       mail.setToAddresses(toAddress);
       mail.setSubject(emailSobject);
       mail.setHTMLBody(emailBody);
       mail.setTargetObjectId(con.Id);
       mail.setWhatId(con.AccountId);
       mail.setSaveAsActivity(false);
       mail.setUseSignature(false);


       List<Messaging.SingleEmailMessage> allmsg = new List<Messaging.SingleEmailMessage>();
       allmsg.add(mail);


       try {
           Messaging.sendEmail(allmsg, false);
           return;
       } catch (Exception e) {
           System.debug(e.getMessage());
       }
   }
}
Using Mailtrap Email API/SMTP
Mailtrap Email API/SMTP is part of the Mailtrap Email Delivery Platform, which is designed for high deliverability, with growth-focused features and industry-best analytics.
In addition to Email API/SMTP, which we’ll use here, Mailtrap also offers:
- Email Marketing – the service to create, schedule, and send marketing campaigns.
- Email Testing – the email sandbox to inspect and debug emails in staging, dev, and QA environments before sending them to recipients.
Before we move on to the steps for using Mailtrap Email API/SMTP for your Salesforce emails, check some of the features that make the platform a smart choice.
- High deliverability by design
- Industry best analytics
- Human 24/7 support
- SDKs for major programming languages
- Drag and drop email builder
- Email templates editor
- Email template testing mode
- Intuitive contacts management
- AI content assistance
Tip: You can design and create a template in Mailtraps’ HTML editor or drag-and-drop builder, test it, and then copy-paste it to Salesforce, knowing there’s little to worry about deliverability.
Now, to start sending with Mailtrap Email API/SMTP, you need to add and verify a domain. Here, we assume you already did this.
After that, simply proceed to add an email relay and send a test email message.
1. Adding an email relay
For Mailtrap Email API/SMTP, this step is pretty much the same as we described in the Mailtrap Email Testing section. Having said that, we won’t go into much detail here.
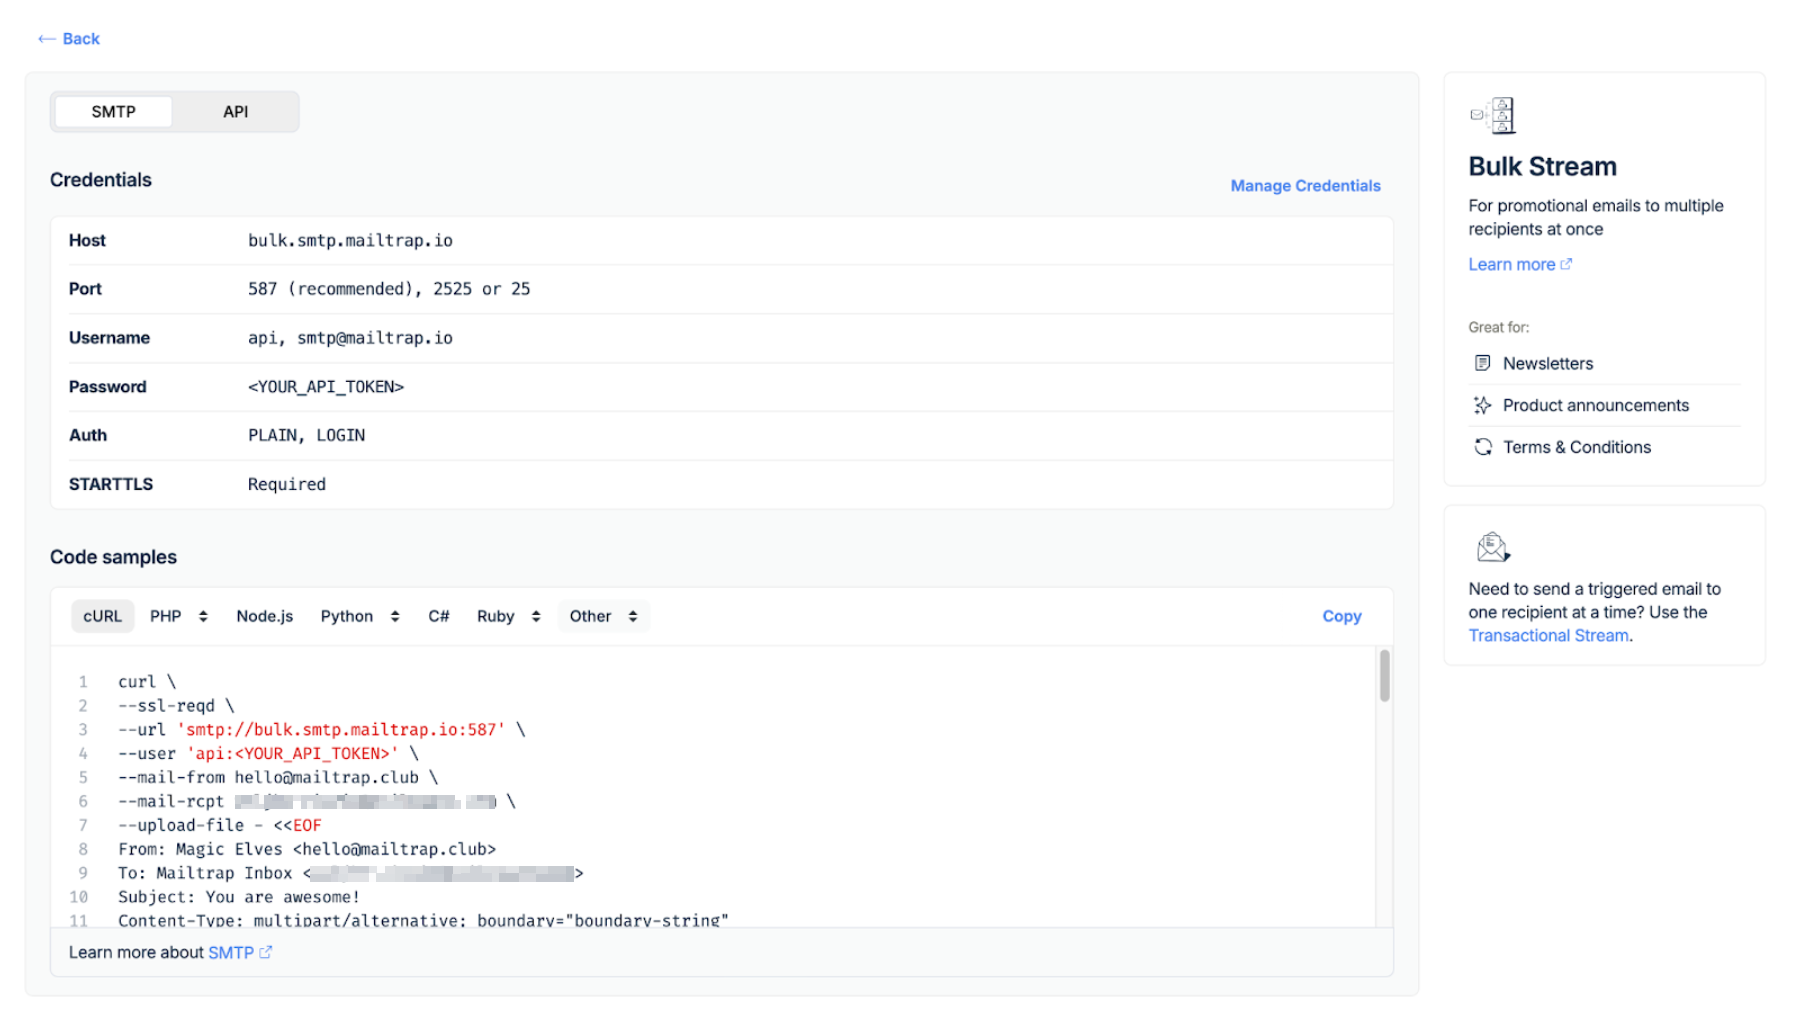
You can find the necessary credentials for adding the relay by navigating to Sending Domains → Integration, select the sending stream you’d like to use – Transactional or Bulk.

Then, use the credentials as given to set up the integration. The example below is for Mailtrap’s bulk stream.
2. Sending the test email
To confirm that you have successfully configured everything, you can send a test email. This test email, by default, gets sent to the email address you use to sign in to Mailtrap.
Here is the Apex code for the test email sending:
public class MailTrapEmailAPI {
  public static void sendMail(){
      String body = '{"from":{"email":"mailtrap@example-mailtrap.com","name":"Mailtrap Test"},"to":[{"email":"example@email.com"}],"subject":"You are awesome!","text":"Congrats for sending test email with Mailtrap!","category":"Integration Test"}';
      Http http = new Http();
      HttpRequest request = new HttpRequest();
      request.setEndpoint('https://send.api.mailtrap.io/api/send');
      request.setMethod('POST');
      request.setHeader('Authorization', 'Bearer <Your API token>');
      request.setHeader('Content-Type', 'application/json;charset=UTF-8');
      request.setBody(body);
      System.debug('1 ' + request);
      HttpResponse response = http.send(request);
      System.debug('2 ' + response);
  }
}Cut the email-sending efforts with templates
Creating good email templates might take some effort at the start but will, without a doubt, come with great benefits, such as an enhanced customer experience, higher team productivity, more brand consistency, and so on.
Luckily, with our in-depth Salesforce email template guide, you should be in for a smooth process, even if you’re just getting the hang of things. And if it does take you some time to master the more complex aspects of advanced features such as the drag-and-drop builder, consider it time well spent as it will enable you to craft engaging and visually appealing templates for your campaigns!
Looking for more Salesforce content? Check out these articles: