 Skip to Navigation


In this tutorial, I will explain how to send emails using smtplib, a popular Python package that allows you to easily interact with and leverage an SMTP server.
I’ll provide code snippets for:
- Plain-text emails
- HTML emails
- Emails to multiple recipients
- Emails with attachments
- Emails with embedded images
- Asynchronous sending
- Bulk sending
To finish it off, I’ll show you how to debug the smtplib module.
Send email using smtplib and SMTP
First things first, if you haven’t already, make sure to download Python 3.7 or above. Here’s the link to the official download page.
Then, we’ll need to:
- Import smtplib
- Set up an SMTP server
- Create the email message
- Connect to the SMTP server
- Send the email
1. Importing smtplib
Since smtplib is a built-in Python module, we don’t need to install it separately, however, we need to import it alongside MIMEText, which formats the email correctly.
import smtplib
from email.mime.text import MIMEText
2. Setting up SMTP server
Then, you’ll need to define the SMTP server details, like so:
SMTP_SERVER = "live.smtp.mailtrap.io"  # Replace with your SMTP server
SMTP_PORT = 587  # Use 465 for SSL or 587 for TLS
USERNAME = "your_email@example.com"  # Your email login
PASSWORD = "your_password"  # Your email password
As you can see, I use Mailtrap SMTP, however, you can use any SMTP provider you prefer (e.g., Gmail, Outlook, Office 365, etc.). Personally, I prefer Mailtrap’s SMTP since it’s a reliable mail server with robust sending capabilities that ensures my emails reach recipients’ inboxes. Besides the high sending throughput, it comes with in-depth analytics, dedicated IPs, and other features that make it easy to optimize my email infrastructure.
Mailtrap also offers a free plan for you to try out all of its features, so be sure to check it out!
3. Creating the email message
Next, we need to specify the details of our email message, such as the sender, recipient, subject, body, etc. Here’s a code snippet you can tweak according to your liking:
sender_email = "your_email@example.com"
receiver_email = "recipient@example.com"
subject = "Test Email from Python"
body = "Hello, this is a test email sent using Python!"

# Create the email object
message = MIMEText(body, "plain")  # "plain" means text-only email
message["Subject"] = subject
message["From"] = sender_email
message["To"] = receiver_emailNotes:
- If you want to get the full description of smtplib classes and arguments and ensure you’ve imported it properly, run the following command:
help(smtplib)- For the rest of the SMTP objects like SMTP.ehlo, please refer to the official smtplib documentation.
4. Connecting to the SMTP server and sending the email
Finally, to establish a connection to the SMTP server and send the email, add the following code snippet to your main project file (e.g., send-email.py):
# Create an SMTP session
with smtplib.SMTP(SMTP_SERVER, SMTP_PORT) as server:
    server.starttls()  # Secure the connection
    server.login(USERNAME, PASSWORD)  # Log in to SMTP server
    server.sendmail(sender_email, receiver_email, message.as_string())  # Send email
You can also create an email manually without MIME headers with from_addr, to_addrs, and msg, like so:
server.sendmail(from_addr, to_addrs, msg)And for your convenience, here’s the full code snippet you can copy/paste and edit according to your liking:
import smtplib
from email.mime.text import MIMEText

# SMTP Configuration
SMTP_SERVER = "smtp.example.com"  # Replace with actual SMTP server
SMTP_PORT = 587  # 465 for SSL, 587 for TLS
USERNAME = "your_email@example.com"
PASSWORD = "your_password"

# Email Details
sender_email = "your_email@example.com"
receiver_email = "recipient@example.com"
subject = "Test Email from Python"
body = "Hello, this is a test email sent using Python!"

# Create the email
message = MIMEText(body, "plain")
message["Subject"] = subject
message["From"] = sender_email
message["To"] = receiver_email

# Send the email
with smtplib.SMTP(SMTP_SERVER, SMTP_PORT) as server:
    server.starttls()  # Secure connection
    server.login(USERNAME, PASSWORD)
    server.sendmail(sender_email, receiver_email, message.as_string())

print("Email sent successfully!")
To run the script, execute one of the following commands:
- Windows:
python send_email.pyIf you’re getting python’ is not recognized as internal or external command error, try running python3 send_email.py.
- macOS & Linux (Python 3 required)
python3 send_email.pyFacing any errors? For more debugging info, click here.
Send HTML email
To send an HTML email, specify your HTML message in html_body and replace plain with html in MIMEText. Check it out:
import smtplib
from email.mime.text import MIMEText

# SMTP Configuration
SMTP_SERVER = "smtp.example.com"  # Replace with actual SMTP server
SMTP_PORT = 587  # 465 for SSL, 587 for TLS
USERNAME = "your_email@example.com"
PASSWORD = "your_password"

# Email Details
sender_email = "your_email@example.com"
receiver_email = "recipient@example.com"
subject = "HTML Email from Python"
html_body = """\
<html>
  <body>
    <h2>Hello,</h2>
    <p>This is an <b>HTML</b> email sent using <a href="https://python.org">Python</a>.</p>
  </body>
</html>
"""

# Create the email
message = MIMEText(html_body, "html")  # Change "plain" to "html"
message["Subject"] = subject
message["From"] = sender_email
message["To"] = receiver_email

# Send the email
with smtplib.SMTP(SMTP_SERVER, SMTP_PORT) as server:
    server.starttls()  # Secure connection
    server.login(USERNAME, PASSWORD)
    server.sendmail(sender_email, receiver_email, message.as_string())

print("HTML email sent successfully!")
Send email to multiple recipients
If you want to forward your HTML email to multiple recipients, you can simply pass a list of email addresses in sendmail() and format the To field correctly for display:
import smtplib
from email.mime.text import MIMEText

# SMTP Configuration
SMTP_SERVER = "smtp.example.com"  # Replace with actual SMTP server
SMTP_PORT = 587  # 465 for SSL, 587 for TLS
USERNAME = "your_email@example.com"
PASSWORD = "your_password"

# Email Details
sender_email = "your_email@example.com"
receiver_emails = ["recipient1@example.com", "recipient2@example.com"]  # List of recipients
subject = "HTML Email to Multiple Recipients"
html_body = """\
<html>
  <body>
    <h2>Hello,</h2>
    <p>This is an <b>HTML</b> email sent to multiple recipients using <a href="https://python.org">Python</a>.</p>
  </body>
</html>
"""

# Create the email
message = MIMEText(html_body, "html")
message["Subject"] = subject
message["From"] = sender_email
message["To"] = ", ".join(receiver_emails)  # Display multiple recipients

# Send the email
with smtplib.SMTP(SMTP_SERVER, SMTP_PORT) as server:
    server.starttls()
    server.login(USERNAME, PASSWORD)
    server.sendmail(sender_email, receiver_emails, message.as_string())  # Send to multiple recipients

print("HTML email sent successfully to multiple recipients!")
Note: With the code above, you will send one email to all recipients at once. However, if you want to send separate emails to each recipient and avoid exposing recipients to each other, you can place the following loop inside the with smtplib.SMTP(...) block:
for recipient in receiver_emails:
    server.sendmail(sender_email, recipient, message.as_string())  # Send individually
Keep in mind that although sending your emails in a loop allows you to track deliveries separately per each recipient, it also slows down bulk sending as the SMTP gets multiple requests. But, more on bulk email sending a bit later in the article.
Send email with attachments
The most efficient (and easiest) way to send attachments with smtplib is to use MIMEMultipart, which allows us to create a, you’ve guessed it, multi-part email.
Then, we’ll attach the file with MIMEBase.
Lastly, we’ll encode and attach the file by specifying the path, and that’s it! Here’s the full script:
import smtplib
from email.mime.multipart import MIMEMultipart
from email.mime.text import MIMEText
from email.mime.base import MIMEBase
from email import encoders

# SMTP Configuration
SMTP_SERVER = "smtp.example.com"  # Replace with actual SMTP server
SMTP_PORT = 587  # Use 465 for SSL or 587 for TLS
USERNAME = "your_email@example.com"
PASSWORD = "your_password"

# Email Details
sender_email = "your_email@example.com"
receiver_email = "recipient@example.com"
subject = "Email with Attachment"
body = "Hello, please find the attached file."

# File to attach
file_name = "file.pdf" # Manually define the file name
file_path = f"path/to/your/{file_name}" # Change this to your actual file path


# Create a multipart message
message = MIMEMultipart()
message["From"] = sender_email
message["To"] = receiver_email
message["Subject"] = subject

# Attach email body
message.attach(MIMEText(body, "plain"))

# Attach file
with open(file_path, "rb") as attachment:
    part = MIMEBase("application", "octet-stream")
    part.set_payload(attachment.read())

encoders.encode_base64(part)  # Encode to base64
part.add_header("Content-Disposition", f"attachment; filename={file_name}")  # Manually set file name
message.attach(part)  # Attach the file to the email

# Send email
with smtplib.SMTP(SMTP_SERVER, SMTP_PORT) as server:
    server.starttls()
    server.login(USERNAME, PASSWORD)
    server.sendmail(sender_email, receiver_email, message.as_string())

print("Email with attachment sent successfully!")
Extra: If your file is dynamic or user-provided and you think you need to validate its path before sending, you can use the os module. Simply add import os after import smtplib and insert if os.path.exists(file_path): before with open(...) as attachment: to check if the file exists before opening it:
# Attach file
if os.path.exists(file_path):  # Ensure file exists
    with open(file_path, "rb") as attachment:
        part = MIMEBase("application", "octet-stream")
        part.set_payload(attachment.read())
Send email with embedded image
For sending emails with embedded images, we will use:
MIMEMultipartfor handling different parts of the email (HTML + image).MIMEImagefor including the embedded image.Content-IDfor referencing the image inside the HTML body.
import smtplib
from email.mime.multipart import MIMEMultipart
from email.mime.text import MIMEText
from email.mime.image import MIMEImage
import os

# Configuration
port = 587
smtp_server = "live.smtp.mailtrap.io"
login = "api"  # Your login generated by Mailtrap
password = "1a2b3c4d5e6f7g"  # Your password generated by Mailtrap

sender_email = "mailtrap@example.com"
receiver_email = "new1@example.com"

# HTML content with an embedded image
html = """\
<html>
  <body>
    <p>Hi,<br>
    This is a <b>test</b> email with an embedded image.<br>
    Here is an image: <img src="cid:image1"></p>
  </body>
</html>
"""

# Create a multipart message and set headers
message = MIMEMultipart()
message["From"] = sender_email
message["To"] = receiver_email
message["Subject"] = "HTML Email with Embedded Image"

# Attach the HTML part
message.attach(MIMEText(html, "html"))

# Specify the path to your embedded image
image_path = "path/to/your/image.jpg"  # Change this to the correct path
if os.path.exists(image_path):  # Check if the file exists
    with open(image_path, "rb") as img:
        msg_img = MIMEImage(img.read(), name=os.path.basename(image_path))
        msg_img.add_header("Content-ID", "<image1>")  # Matches HTML img src="cid:image1"
        msg_img.add_header("Content-Disposition", "inline")  # Ensures inline display
        message.attach(msg_img)
else:
    print(f"Warning: Image file not found at {image_path}. The email will be sent without an embedded image.")

# Send email
with smtplib.SMTP(SMTP_SERVER, SMTP_PORT) as server:
    server.starttls()
    server.login(USERNAME, PASSWORD)
    server.sendmail(sender_email, receiver_email, message.as_string())

print("Email with an embedded image sent successfully!")Notes:
- As you can notice for yourself from the code, I’ve added the os module again since images are often dynamically named. With os, the code will extract the filename from the full path before attaching it to the email.
- I’ve also added
msg_img.add_header("Content-Disposition", "inline")to ensure the image is displayed inline across different email clients.
Asynchronous email sending
Since smtplib doesn’t natively support asynchronous sending, we’ll have to import Python’s asyncio library. Additionally, we’ll install aiosmtplib:
pip install aiosmtplibOnce installed, copy/paste the following script into your send-email.py and adjust it accordingly:
import asyncio
from email.mime.text import MIMEText
from email.mime.multipart import MIMEMultipart
from aiosmtplib import SMTP

async def send_email_async(sender_email, receiver_email, smtp_server, port, login, password, subject, html_body):
    # Create a multipart email message (for HTML content)
    message = MIMEMultipart()
    message["From"] = sender_email
    message["To"] = receiver_email
    message["Subject"] = subject

    # Attach the HTML content
    message.attach(MIMEText(html_body, "html"))

    # Async SMTP session (no need for explicit connect)
    async with SMTP(hostname=smtp_server, port=port) as smtp
        await smtp.login(login, password)
        await smtp.send_message(message)

async def main():
    # Email configuration
    smtp_server = "live.smtp.mailtrap.io"
    port = 587
    sender_email = "mailtrap@example.com"
    receiver_email = "new@example.com"  # Single recipient
    login = "api"  # Your login generated by Mailtrap
    password = "1a2b3c4d5e6f7g"  # Your password generated by Mailtrap
    subject = "Test Async HTML Email"

    # HTML email content
    html_body = """\
    <html>
      <body>
        <h2>Hello,</h2>
        <p>This is an <b>HTML</b> email sent asynchronously using Python.</p>
      </body>
    </html>
    """

    await send_email_async(sender_email, receiver_email, smtp_server, port, login, password, subject, html_body)
    print("HTML email sent asynchronously.")

if __name__ == "__main__":
    asyncio.run(main())
Send bulk email
As sending bulk emails comes with a few challenges, we’ll need to implement:
- Batching to group emails into smaller sets (batches) and avoid being flagged as spam.
- Throttling to add delays between batches and prevent SMTP overload.
- Parallel threading to send multiple batches at once and speed up delivery.
- Async (aiosmtplib) to process emails more efficiently and avoid blocking.
And here’s the full code snippet you can use:
import asyncio
import threading
import time
from email.mime.text import MIMEText
from email.mime.multipart import MIMEMultipart
import aiosmtplib
# Configuration
SMTP_SERVER = "smtp.example.com"
SMTP_PORT = 587
USERNAME = "your_username"
PASSWORD = "your_password"
SENDER_EMAIL = "your_email@example.com"
RECIPIENT_LIST = ["user1@example.com", "user2@example.com", "user3@example.com", "user4@example.com", "user5@example.com"]
# Batching & Throttling Configuration
BATCH_SIZE = 2 # Number of emails per batch
DELAY = 10 # Delay between batches (in seconds)
# Async function to send an email using an existing SMTP connection
async def send_email_async(recipient, smtp):
message = MIMEMultipart()
message["From"] = SENDER_EMAIL
message["To"] = recipient
message["Subject"] = "Async Bulk Email"
html_body = f"""\
<html>
<body>
<p>Hello {recipient},<br>
This is an <b>async bulk email</b> with batching and threading.</p>
</body>
</html>
"""
message.attach(MIMEText(html_body, "html"))
try:
await smtp.send_message(message)
print(f" Email sent to {recipient}")
except Exception as e:
print(f" Failed to send email to {recipient}: {e}")
# Function to process a batch asynchronously (with one SMTP connection per batch)
async def process_batch(batch):
try:
smtp = aiosmtplib.SMTP(hostname=SMTP_SERVER, port=SMTP_PORT)
await smtp.connect()
await smtp.login(USERNAME, PASSWORD)
await asyncio.gather(*(send_email_async(recipient, smtp) for recipient in batch))
await smtp.quit()
except Exception as e:
print(f" Failed to process batch: {e}")
# Thread-safe wrapper to run async function inside a thread
def run_async_task(batch):
loop = asyncio.new_event_loop()
asyncio.set_event_loop(loop)
loop.run_until_complete(process_batch(batch))
# Function to handle batching & threading
def send_emails_in_batches():
for i in range(0, len(RECIPIENT_LIST), BATCH_SIZE):
batch = RECIPIENT_LIST[i : i + BATCH_SIZE]
# Create a new thread for each batch
thread = threading.Thread(target=run_async_task, args=(batch,))
thread.start()
print(f" Batch {i // BATCH_SIZE + 1} started.")
time.sleep(DELAY) # Prevent hitting SMTP rate limits
# Start sending emails
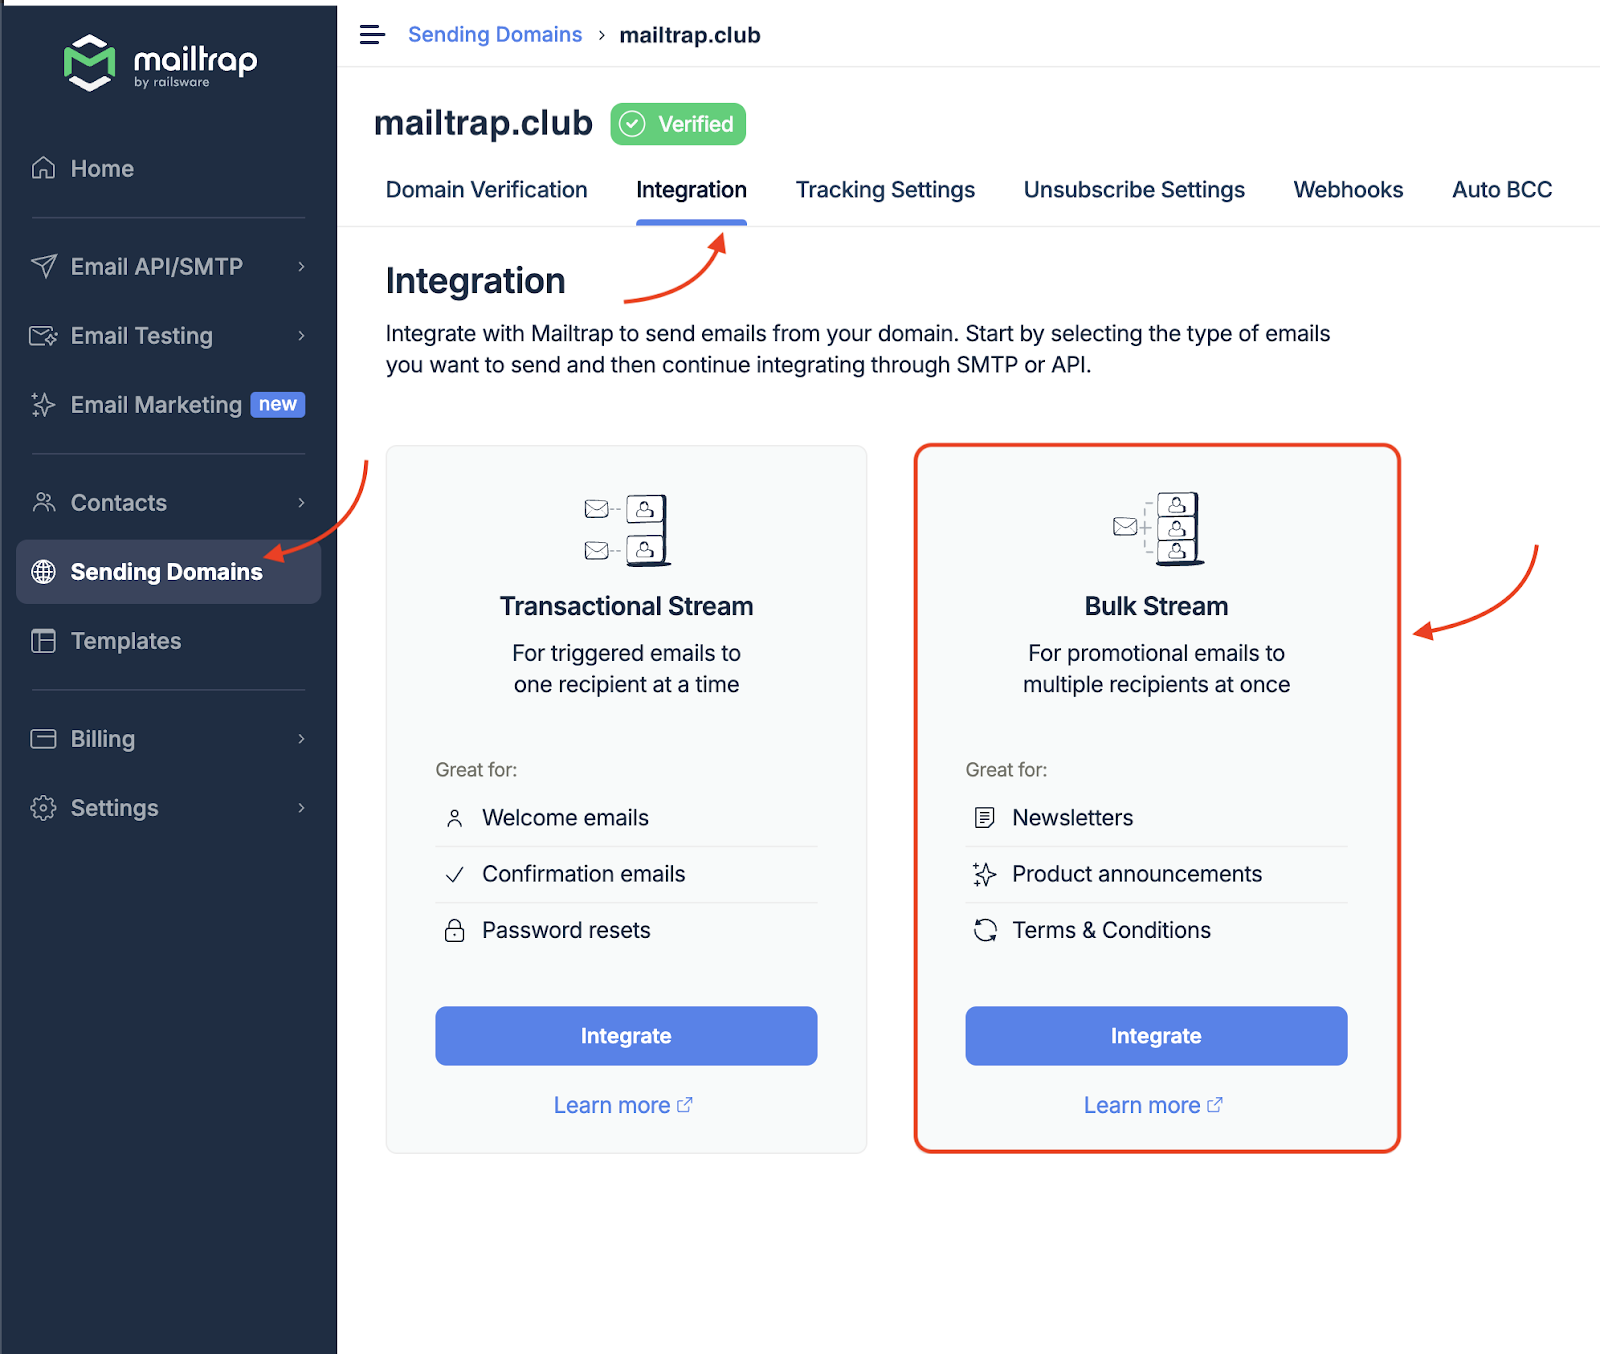
send_emails_in_batches()Important: If you plan on sending large amounts of email, I recommend using the dedicated Mailtrap Bulk Stream, which is designed to handle high volumes of email sending while keeping your deliverability high.
You can also use the bulk-aware email API, with which you can send customized HTML emails to 1,000,000 recipients with a single API call. Moreover, the API will compile the information into emails itself.
Debug smtplib
Here’s how you can identify SMTP errors (authentication, connection, formatting issues) or other non-SMTP-related issues and troubleshoot any email-sending failures:
SMTP errors
SMTP errors include authentication, connection, and formatting issues.
- Enable debugging
First things first, to see the full ‘conversation’ between your client and the SMTP server, or communication logs, you can use the built-in debug mode set_debuglevel(1).
import smtplib

server = smtplib.SMTP("smtp.example.com", 587)
server.set_debuglevel(1)  # Enable debugging (0 = off, 1 = basic, 2 = verbose)
server.starttls()
server.login("your_email@example.com", "your_password")
server.sendmail("your_email@example.com", "recipient@example.com", "Subject: Test\n\nHello!")
server.quit()
You can also use local_hostname if your preferred SMTP server requires it to properly identify the client or if you’re encountering connection issues:
import smtplib

server = smtplib.SMTP("smtp.example.com", 587, local_hostname="your-hostname.com")  # Specify local hostname
server.set_debuglevel(1)  # Enable debugging (0 = off, 1 = basic, 2 = verbose)
server.starttls()
server.login("your_email@example.com", "your_password")
server.sendmail("your_email@example.com", "recipient@example.com", "Subject: Test\n\nHello!")
server.quit()Note: Like the rest of the code snippets in this chapter, you can simply copy them into your main Python email-sending file (e.g., send-email.py)
- Error handling
To log errors for debugging, add the following error handling logic at the end of your email-sending script:
try:
    with smtplib.SMTP(smtp_server, port) as server:
        server.starttls()
        server.login(login, password)
        server.sendmail(sender_email, receiver_email, message.as_string())
    print("Email sent successfully!")
except smtplib.SMTPException as e:
    print(f"Failed to send email: {e}")
This logic will also prevent the script from crashing in case authentication, connection, or the sending itself fails.
- Handling SMTP exceptions
To catch the most common SMTP errors and get messages that can help you diagnose problems, simply wrap your code in try-except blocks:
import smtplib

try:
    server = smtplib.SMTP("smtp.example.com", 587)
    server.starttls()
    server.login("your_email@example.com", "your_password")
    server.sendmail("your_email@example.com", "recipient@example.com", "Subject: Test\n\nHello!")
    print("Email sent successfully!")
except smtplib.SMTPAuthenticationError:
    print("Error: Authentication failed. Check username/password.")
except smtplib.SMTPConnectError:
    print("Error: Unable to connect to the SMTP server.")
except smtplib.SMTPRecipientsRefused:
    print("Error: The recipient address was rejected.")
except smtplib.SMTPException as e:
    print(f"SMTP error occurred: {e}")
finally:
server.quit()- Common smtplib errors, causes, and solutions
| Errors | Possible causes | Solutions |
| SMTPAuthenticationError | Wrong username/password, SMTP authentication required | Use App Passwords if you’re using popular SMTPs (Gmail, Outlook, etc.)Check credentials |
| SMTPConnectError | Server unreachable | Check SMTP server address and network settings |
| SMTPRecipientsRefused | Recipient email is invalid or blocked | Verify the recipient email address |
| SMTPDataError | Email content is rejected by the server | Check for formatting issues in the email |
| SMTPSenderRefused | Sender email is not allowed | Ensure the “From” address matches the authenticated account |
Other issues
Besides SMTP errors, you can face other issues that are related to network connectivity, server response handling, or even simple syntax typos.
- Network and firewall issues
| Errors | Possible causes | Solutions |
| socket.gaierror: [Errno -2] Name or service not known | Wrong SMTP server address | Double-check the hostname |
| OSError: [Errno 101] Network is unreachable | Network/firewall blocking SMTP | Try telnet smtp.example.com 587 to test connectivity. |
| TimeoutError: [Errno 110] Connection timed out | ISP blocking SMTP ports | Use port 587 (STARTTLS) or 465 (SSL).Use a VPN |
- Authentication issues
For ssl.SSLError: [SSL: CERTIFICATE_VERIFY_FAILED] or smtplib.SMTPServerDisconnected: Connection unexpectedly closed errors, starttls() is probably missing for port 587. To fix it, simply call:
server.starttls()If the problem still persists, disable verification and try again (this is only recommended for testing environments):
import ssl
context = ssl.create_default_context()
context.check_hostname = False
context.verify_mode = ssl.CERT_NONE
server.starttls(context=context)- Email formatting errors
| Errors | Possible causes | Fixes |
| SMTPDataError: 554 Message rejected for spam or policy reasons | Missing headersIncorrect MIME formattingEmail body is too short | Include Subject, From, and To.Use MIMETextAdd more content |
- Rate limiting and spam filters
| Errors | Possible causes | Fixes |
| SMTPDataError: 450 Too many emails sent | Sending too fast | Use batching and throttling with time.sleep() |
| SMTPDataError: 421 Too many concurrent connections | Incorrectly setup email authentication or lack there of | Set up SPF/DKIM/DMARC records correctly |
- Infinite hanging (deadlock)
| Errors | Possible causes | Fixes |
| Script running forever without ever completing | SMTP session is left open without closure | Call server.quit() at the end of your script |
| No errors are displayed | Server is waiting for input | Enable debug logs with server.set_debuglevel(2) |
Local debugging
Lastly, if you want to test your smtplib configuration without a real SMTP server, that is, on localhost, you can use the aiosmtpd module, which has a DebuggingServer feature that discards outgoing messages and prints them to stdout.
To use the module, install it with the following command:
pip install aiosmtpdThen, start a local SMTP server on port 1025:
python -m aiosmtpd -n -c aiosmtpd.controllers.Debugging In some versions the path to the Debugging controller can be different. If the above command doesn’t work for you, try this one:
python -m aiosmtpd -n -c aiosmtpd.handlers.DebuggingHowever, if you want to run it on port 25 for testing, you’ll need root permissions:
sudo python -m aiosmtpd -n -c aiosmtpd.controllers.Debugging --port 25Although this will tell you whether your code is working correctly or not, aiosmtpd module won’t tell you whether your HTML emails are rendered correctly or whether you’re passing spam filters. However, I’ll show you how to handle this in a minute.
Up for more reads? Learn how to:
