
Selenium is a popular open-source tool for automating software testing. With the Selenium WebDriver, you can test web applications across diverse platforms and browsers. Selenium tests can be written in various programming languages, including Java, JavaScript, PHP, Python, and Ruby.
The Selenium WebDriver allows you to verify the performance of web applications; that is, to test if they work as expected. Instead of testing the functionalities manually, you can use the tool to enhance the efficiency of the process.
In this tutorial, we’re going to see how to automate email verification in Selenium using the Java programming language. We’ll aim to validate if an email has been received by using Selenium to extract some text from the delivered message, automatically.
We’ll also show you how to run the automation with Sandbox API. When advanced protection is enabled for Mailtrap’s sign-in page (reCAPTCHA), we block bots, so UI testing with Selenium WebDriver won’t work. But if you set it up via API, there won’t be any problems, even with the advanced protection.
So, let’s get going…
Prerequisites
Here are the resources we’ll need in this project:
- Email Sandbox – If you haven’t yet, you’ll need to register to access our pre-production testing environment. There, you’ll get your SMTP credentials, which you can use in your development environment to test emails.
- Java Development Kit (JDK) – You can download and install it from here.
- IntelliJ IDEA Community – You can download and install it from here. Remember that you can also use any other Java IDE of your choice.
Setting Up Our Project
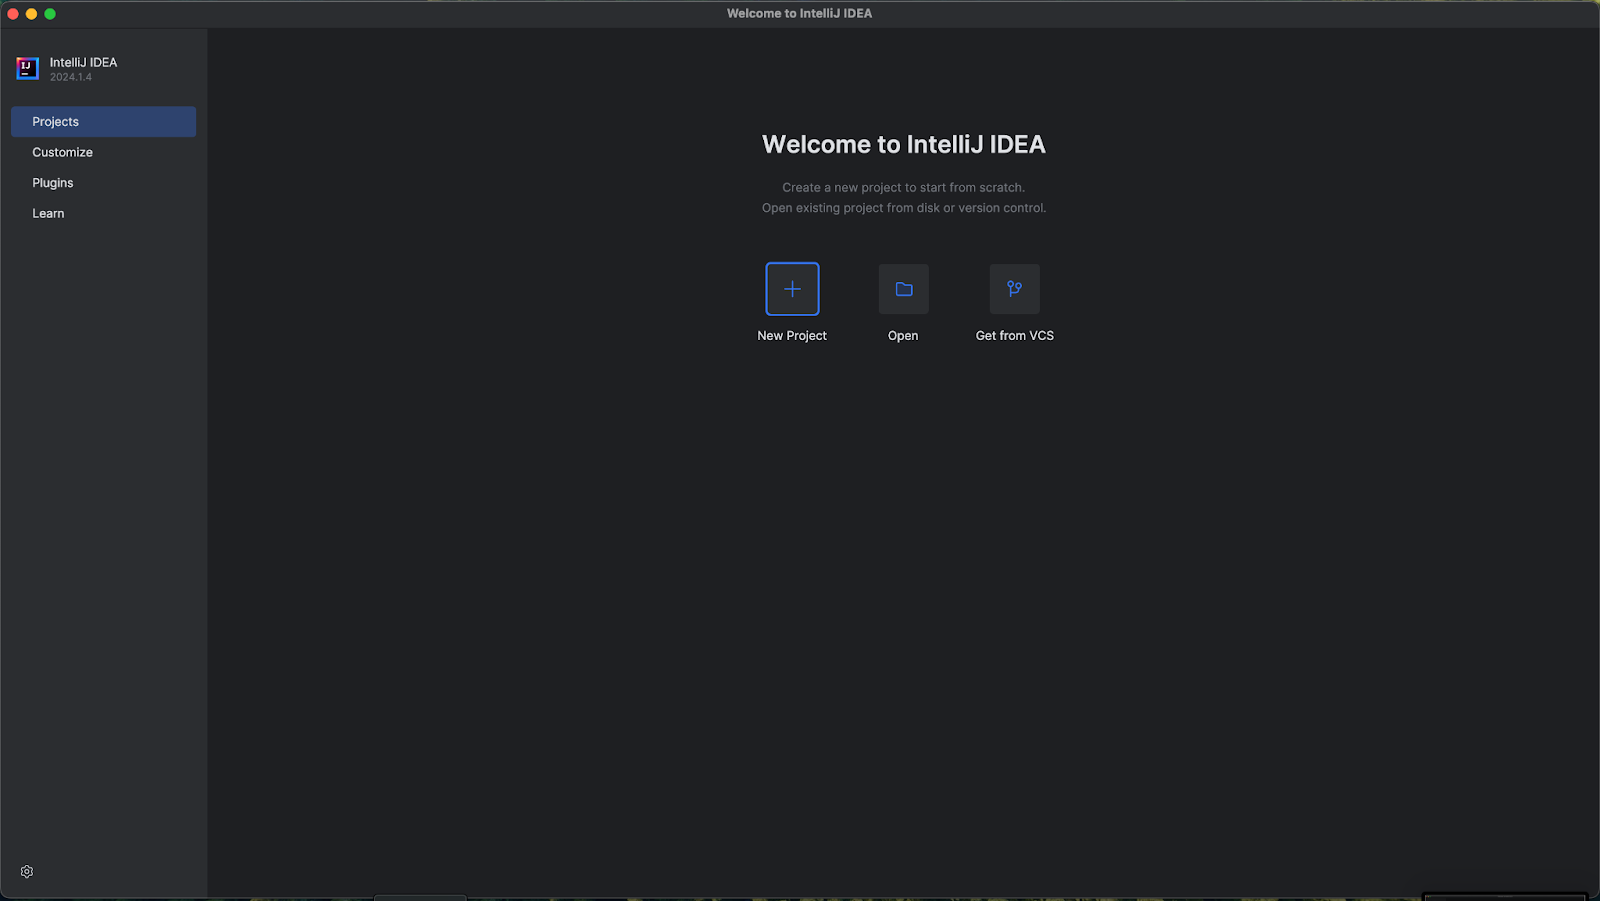
Let’s start by opening IntelliJ IDEA and pressing ‘New Project’:
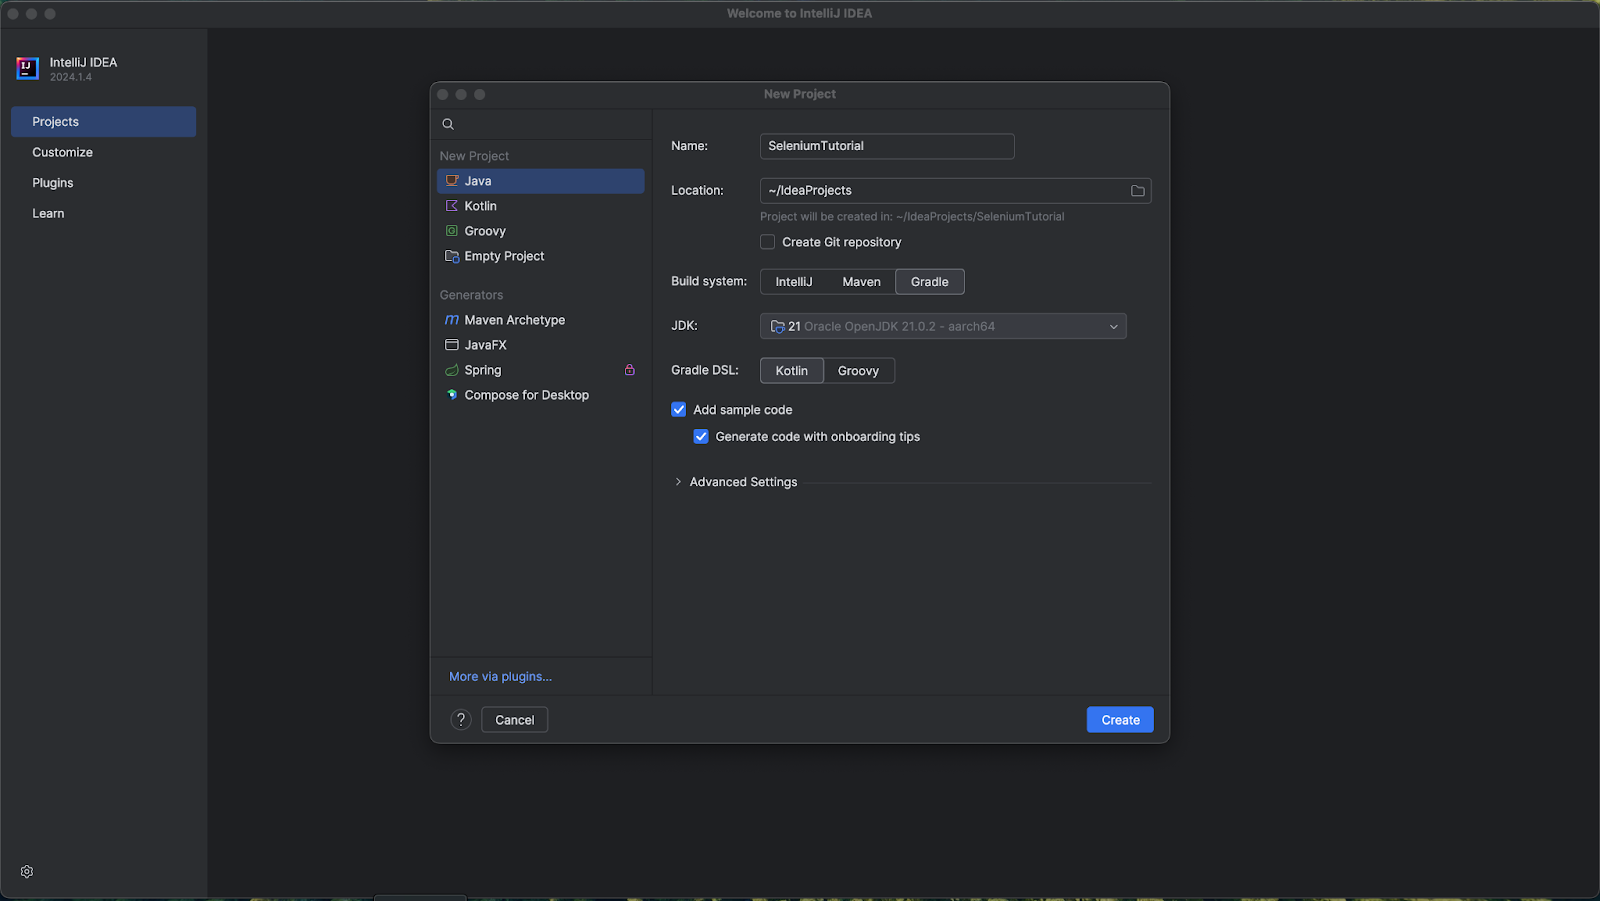
Then:
- Select Java
- Name your project
- Choose your preferred build system (I’ll use Gradle in this tutorial)
- Select the Java version
- Press ‘Create’
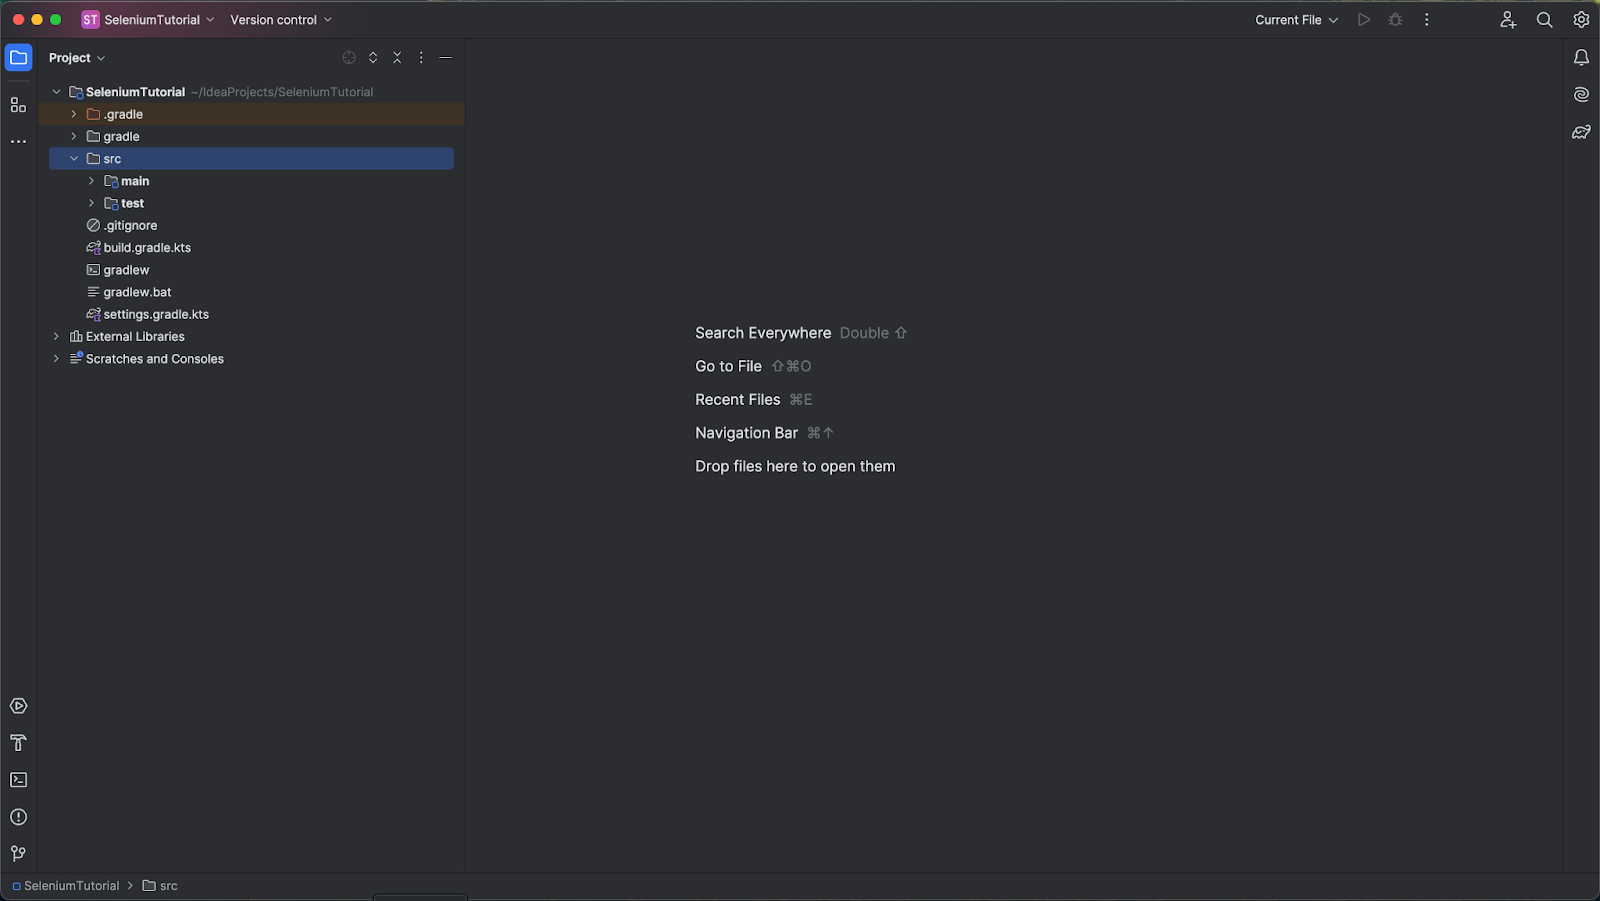
And here’s how your project layout should look like:
Next, we need to create a new Class file, which we can do by right-clicking on the java folder inside the test directory. As we’re using Selenium for testing, let’s select New > Java Class, and name it TestEmail. This class will contain the coding logic for using Selenium for email validation.

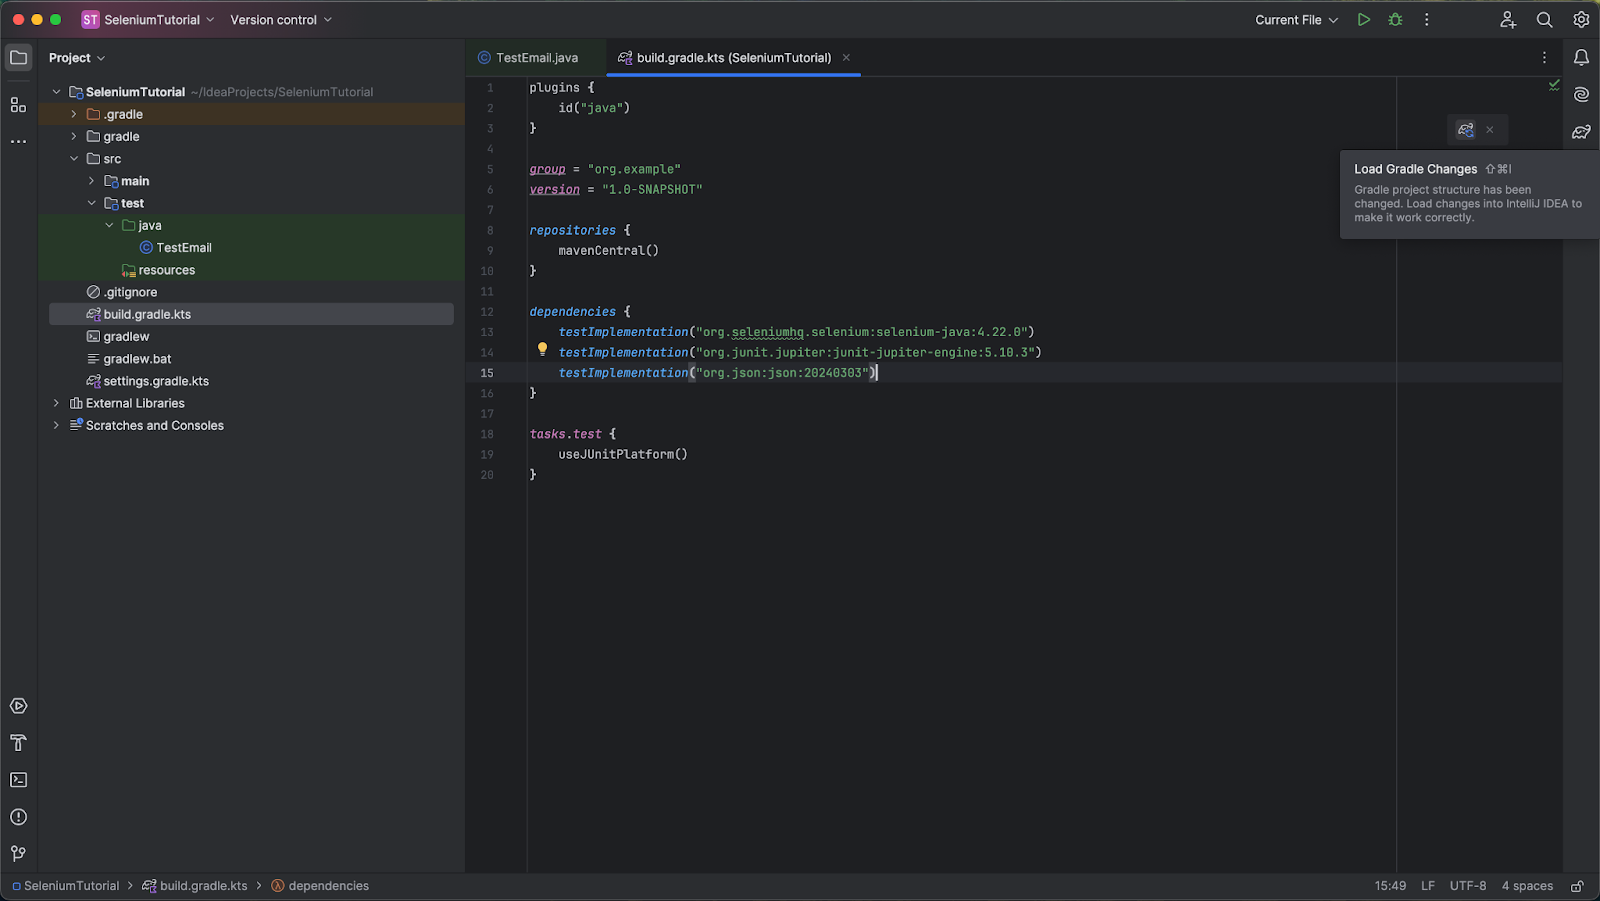
Then, let’s add the Selenium dependencies for our project by opening the build.gradle file and adding the following dependencies:
testImplementation("org.seleniumhq.selenium:selenium-java:4.22.0")
testImplementation("org.junit.jupiter:junit-jupiter-engine:5.10.3")
testImplementation("org.json:json:20240303")
Once you add the dependencies, simply press ‘Load Gradle Changes’.
After successfully setting up our project, we can now start getting our hands dirty by writing a script that can verify email using Selenium.
Test Emails With Sandbox and Selenium
Reminder: UI testing with Selenium WebDriver doesn’t work with advanced sign-up protection. Please use our API instead.
On that note, we’re going to demonstrate how you can use Selenium to verify if a user has received an email message, assuming the advanced protection is off. So, we’ll use the tool to log into our Sandbox account automatically and check if the message has been delivered.
To begin with, let’s import the following packages that we’ll need in this project:
- org.junit.jupiter.api.Assertions – A JUnit 5 class that provides a collection of static methods to support various assertion functionalities used in unit testing.
- org.junit.jupiter.api.Test – iA JUnit 5 annotation that denotes a method as a test method, which can be run by the test runner to execute unit tests.
- org.openqa.selenium.* – A package that allows us to access the Selenium capabilities for automating web tests.
- org.openqa.selenium.chrome.ChromeDriver – This package has the ChromeDriver class required to initialize a Chrome-focused driver onto the browser that the WebDriver class has instantiated. If you’re using another web browser, which is not Chrome, you can import its driver server according to the instructions on the Selenium official website referenced previously.
- java.util.List – Since the email messages in the Sandbox are contained within an unordered list element, we’ll use this Java interface to access them.
- java.time.Duration – A class in the Java Date and Time API that represents a time-based amount of time.
After importing the necessary packages, let’s add a new test method and create an instance of the Selenium WebDriver and set it to our desired browser.
@Test
public void checkEmailWithUI() {
    WebDriver driver = new ChromeDriver();
}
Next, let’s launch a new browser session and provide the Mailtrap’s login URL as its parameter. This way, Chrome will navigate to the specified URL automatically.
driver.get("https://mailtrap.io/signin");Then let’s apply an implicit wait method that enables us to delay the execution by 10 seconds before any exceptions are thrown.
driver.manage().timeouts().implicitlyWait(Duration.ofSeconds(10));Note that if we right-click on the Mailtrap’s login form and select the inspect option, we notice that the Email field is created using the <input id=”user_email”> element.
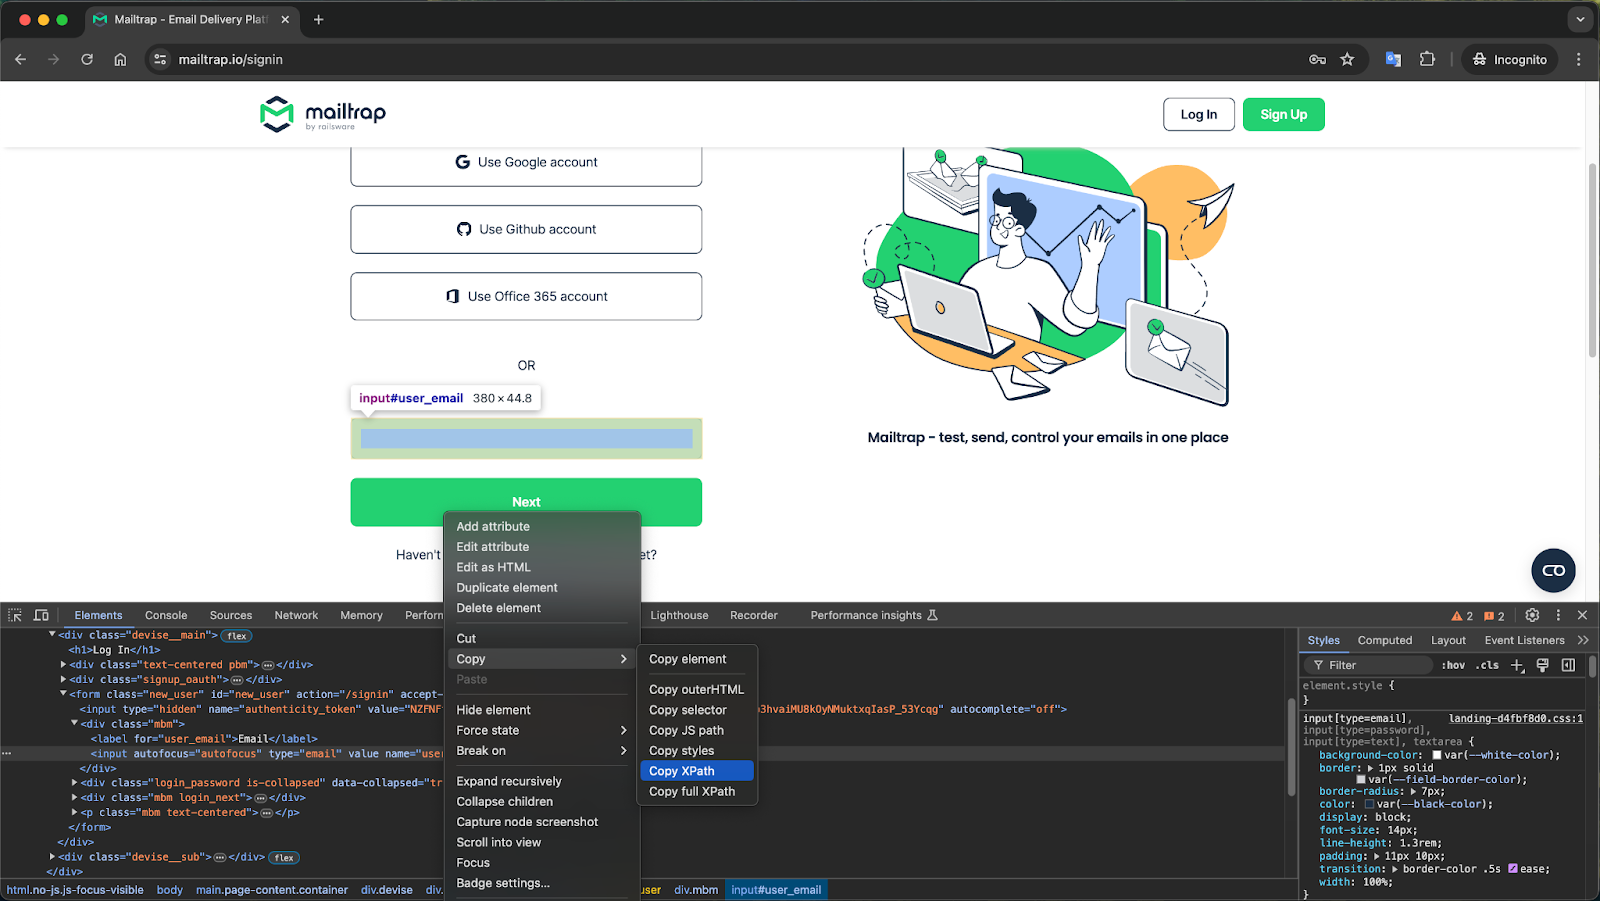
Therefore, to locate this HTML element using a Selenium command, we’ll use the Selenium’s WebElement interface. Basically, the WebElement represents an HTML element; it allows us to carry out various operations associated with web page interactions.
So, to identify the HTML element, we’ll call the WebDriver’s findElement() method, which returns the element as a WebElement object. Furthermore, we’ll use an XPath expression to specify the element’s location on the web page.
Here is the code:
WebElement email = driver.findElement(By.xpath("//*[@id=\"user_email\"]"));Then, to set the value of the email field, we’ll call the sendKeys() method and specify our email address as its parameter.
email.sendKeys("example@gmail.com");Now we should press the Next button. To do this, we should find it by className.
driver.findElement(By.className("login_next_button")).click();After clicking on the Next button the password field appears.
Similarly, since the password field is created using the <input id=”user_password”> element, we’ll invoke Selenium’s WebElement interface and call the sendKeys() method to set its value.
WebElement password = driver.findElement(By.xpath("//*[@id=\"user_password\"]"));
password.sendKeys("<yourPassword>");
To complete the logging in process, we’ll locate the Log in button and use the click() method to click it.
driver.findElement(By.xpath("//input[@type=\"submit\"]")).click();Once we’ve successfully logged to our Sandbox account, we’ll select Sandboxes and click on a sandbox so that we can access the email messages in our inbox, like so:
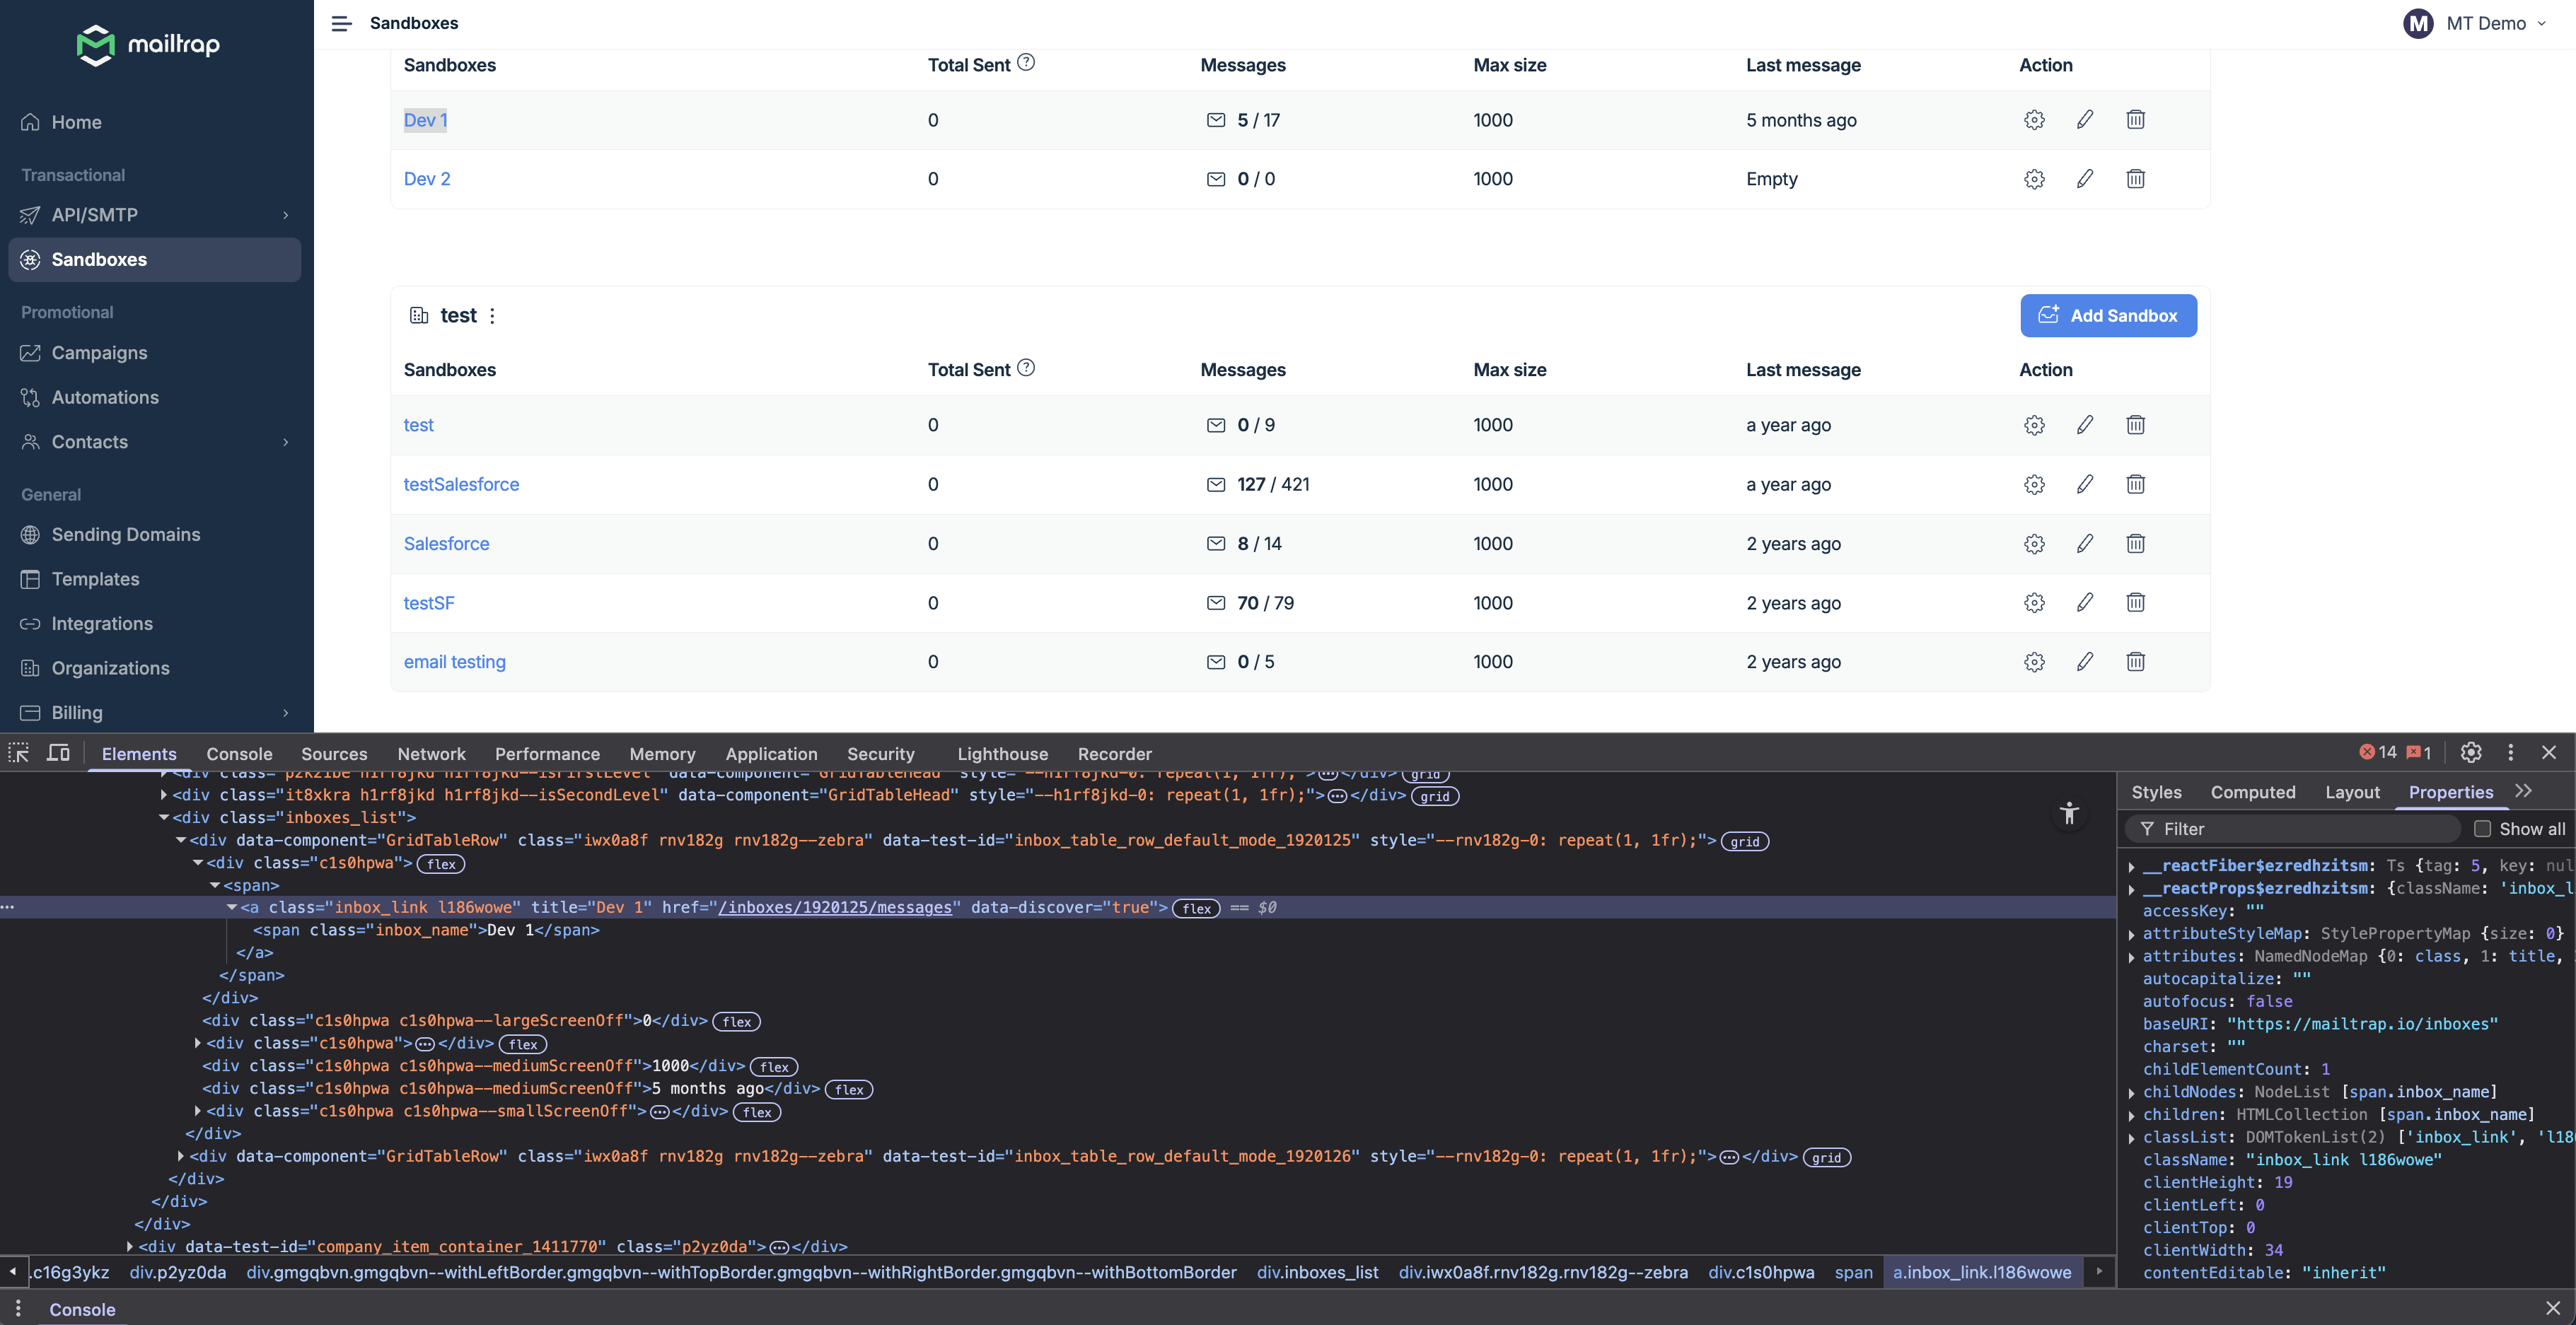
If we inspect the element’s code, we notice that it’s encapsulated in an <a> tag with a title attribute of “My Inbox”. So, we’ll pick this value and refer to it. By href for Email Testing menu and by title for specified inbox.
Here’s the code:
driver.findElement(By.xpath("//a[@href=\"/inboxes\"]")).click();
driver.findElement(By.xpath("//a[@title=\"My Inbox\"]")).click();
Next, if we inspect the messages in our inbox, we notice that they are contained within an <ul> list tag.
Here is a screenshot:
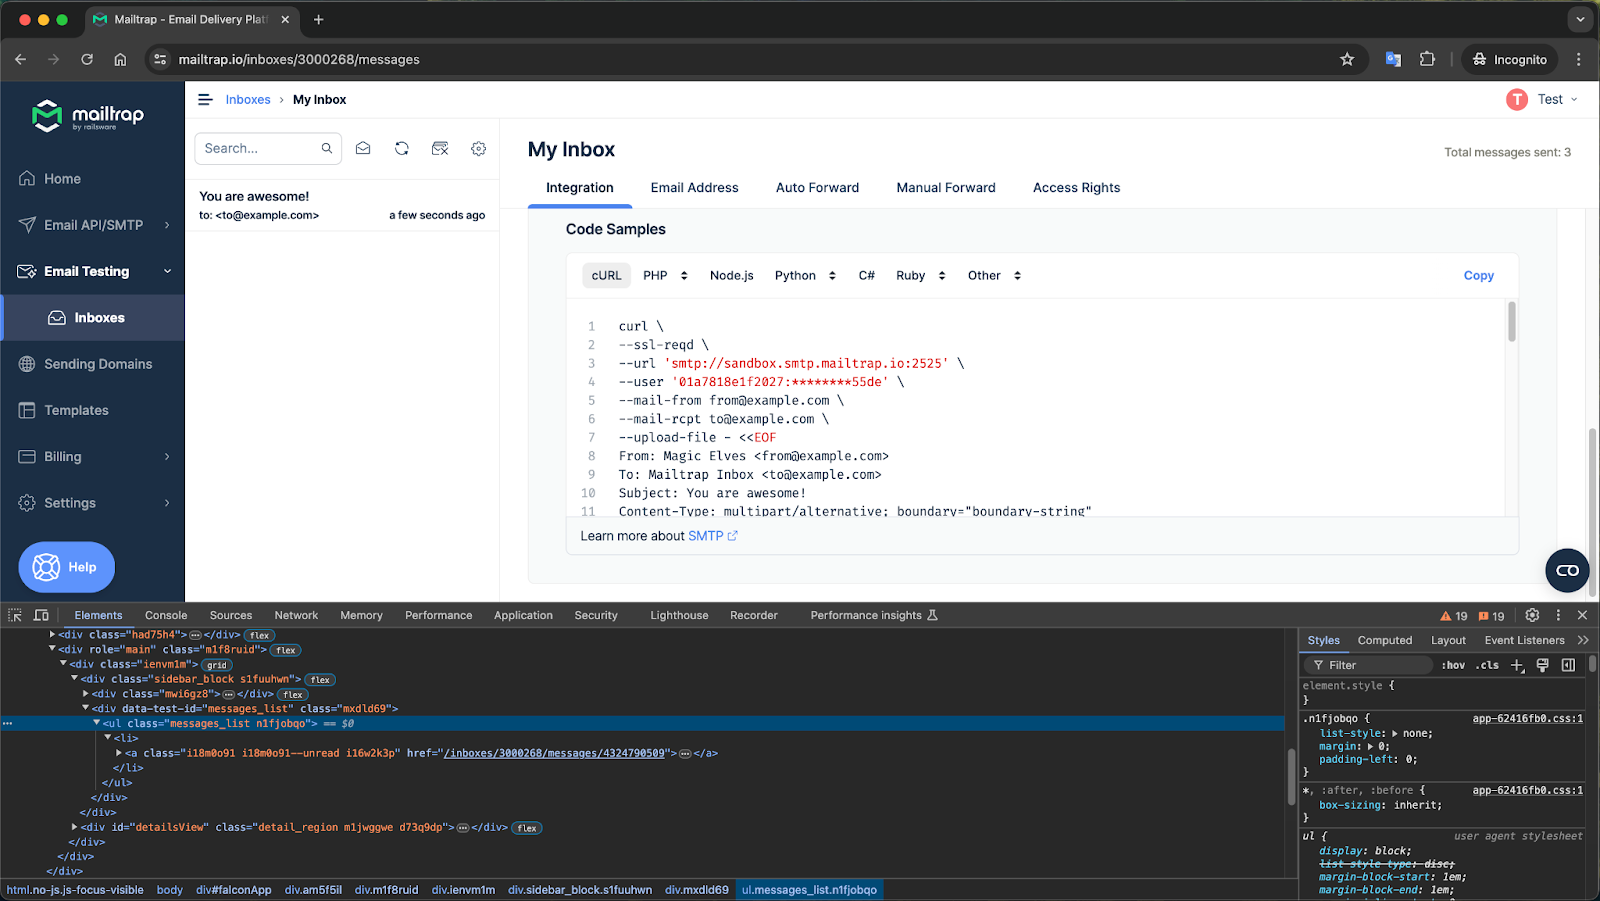
So, we’ll use the contains() method to look for the list of web elements that contain the text we want. In this case, we want to verify if any of our email messages contain the words “You are awesome!”.
Furthermore, we’ll use the isEmpty() method to validate whether the text has been found or not. In other words, this method will return true if no matching text is found in the email addresses; otherwise, it returns false.
Consequently, we’ll use JUnit Assertions to validate the results of the Selenium script for email validation. Before Assertions we’ll close the Chrome browser associated with the WebDriver.
Here is the code:
List<WebElement> allMessages = driver.findElements(By.xpath("//*[contains(text(), 'You are awesome!')]"));
driver.quit();

Assertions.assertFalse(allMessages.isEmpty(), "There is no message in inbox. Test failed");Testing Automation with Sandbox API
As mentioned earlier in this tutorial, using Sandbox API for this automation is the way to go with advanced protection. Because modern security measures like reCAPTCHA are designed to block everything from basic scripts to advanced AI browser automation, bypassing the UI entirely is the most reliable testing method. Below are the references for API calls, and we’ll show you how to render a specific email in HTML.
Sign in with Sandbox API token
Grab the API token and use it for calls. You can find or create your token under Settings > API Tokens, as shown in the image below. You’ll also need the Account ID, located under Settings > Account Settings.
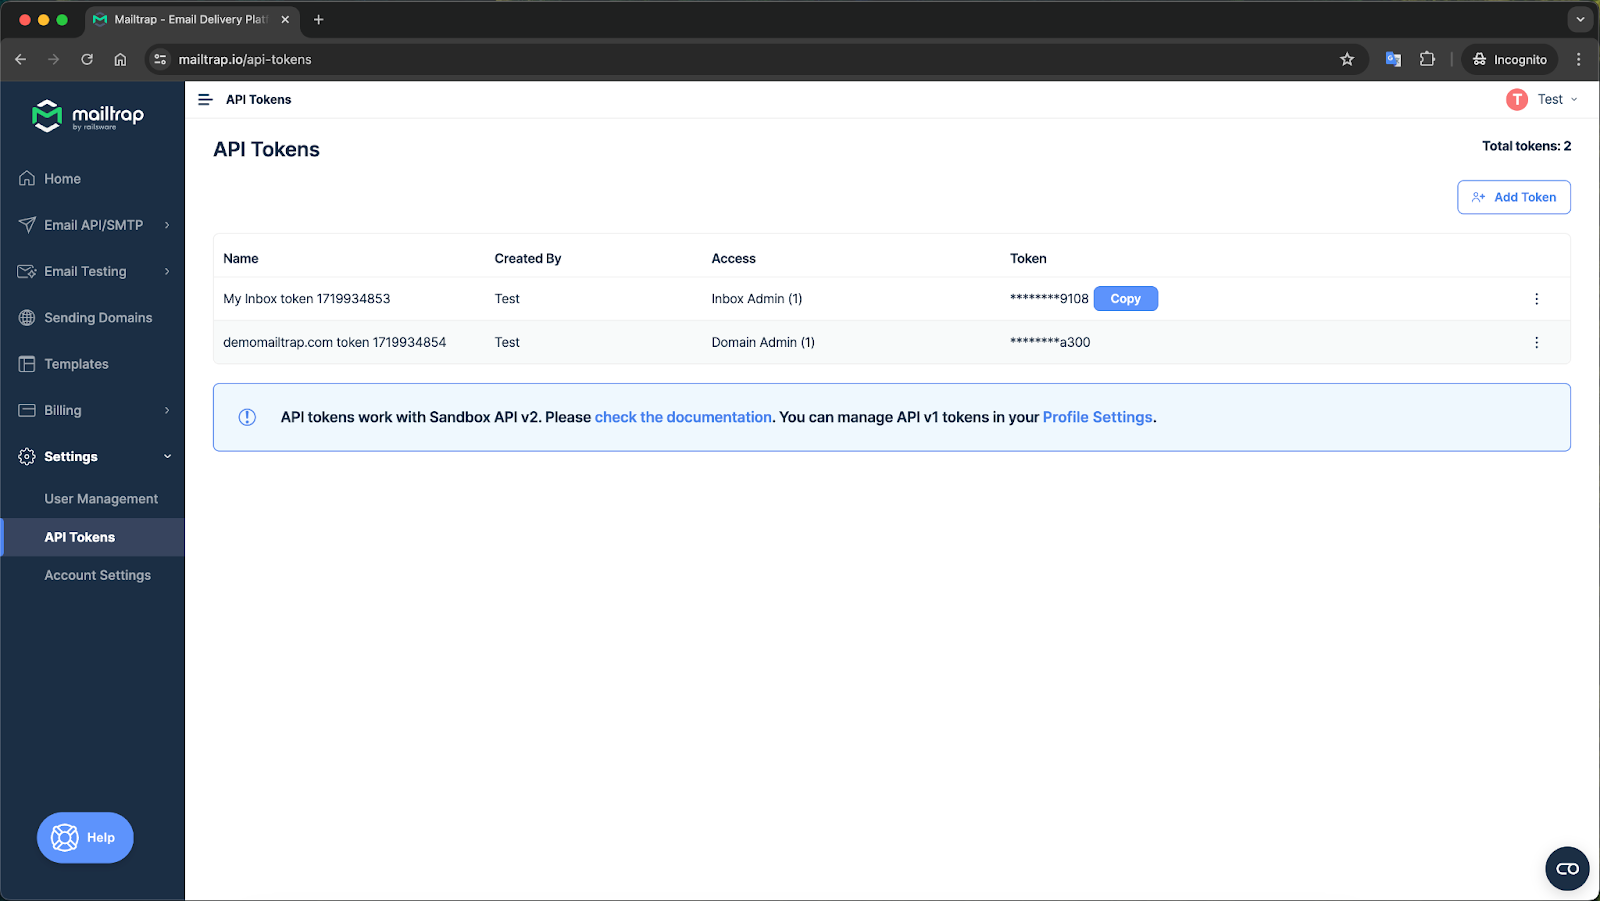
With that, you’ll need to copy your API Token to the Selenium WebDriver to run automated testing. Keep in mind that the token needs an Inbox Viewer or higher permissions. In this example, we’re using Inbox Admin permission.
Check all messages
The API call below allows you to get all messages for a certain inbox.
/api/accounts/{account_id}/inboxes/{inbox_id}Check one message
Grab the message ID and make the API call below to get information for a specific message. Aside from verifying an email, you can get other information with this call – SMTP info, for example.
/api/accounts/{account_id}/inboxes/{inbox_id}/messages/{message_id}Render the message in a browser
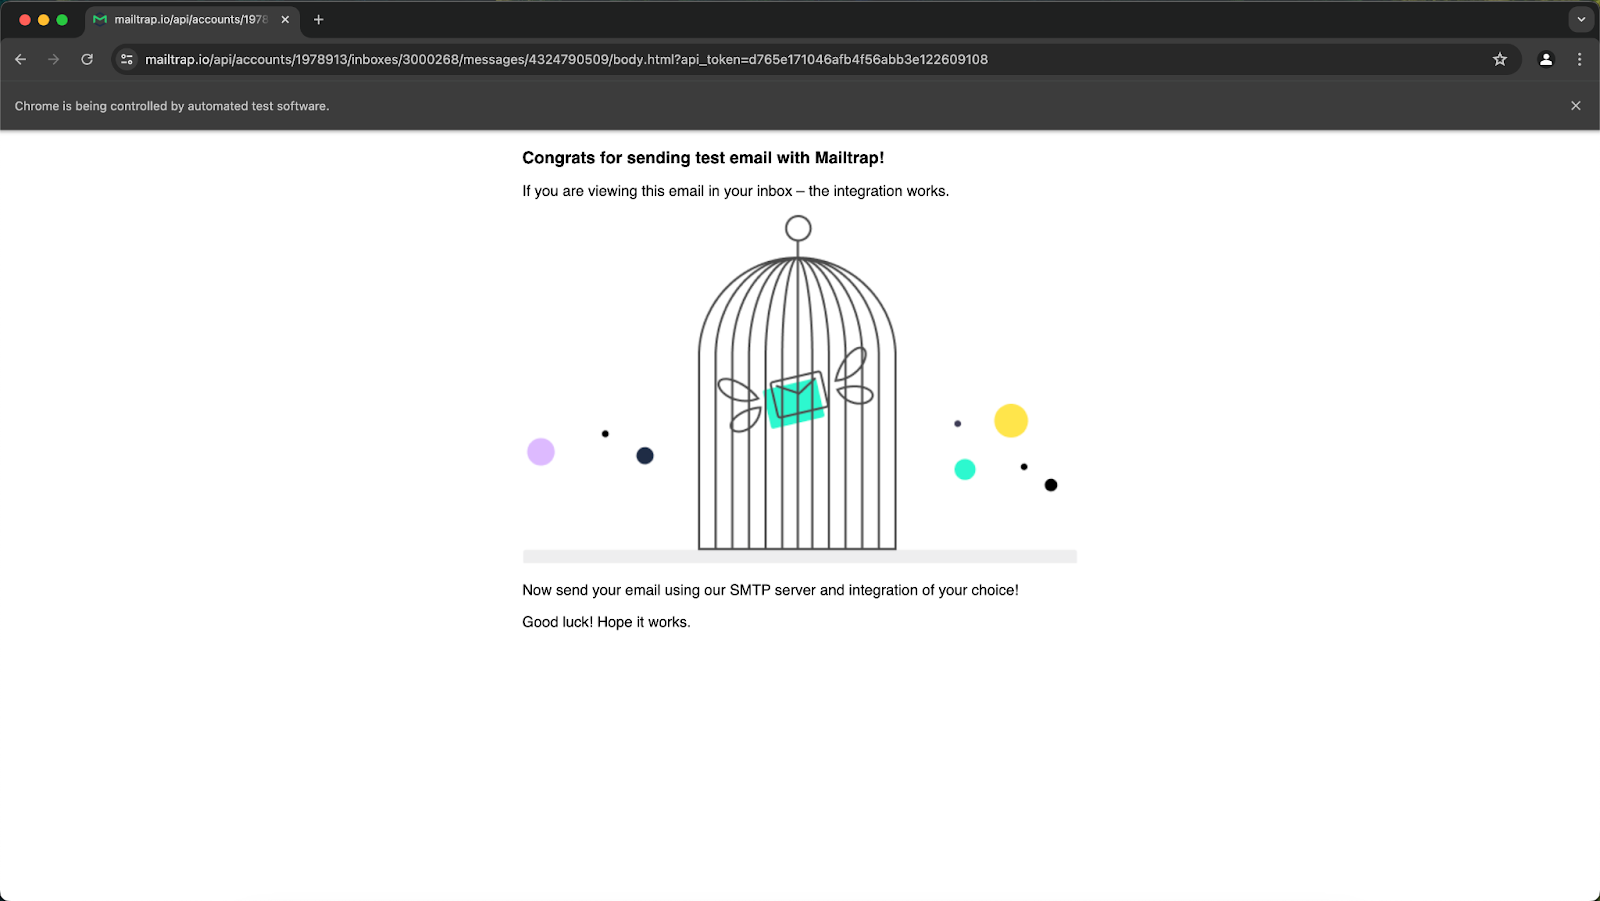
From the response of the API call above, there is an HTML path. Check the snippet below as an example, and here’s the link to this call:
/api/accounts/{account_id}/inboxes/{inbox_id}/messages/{message_id}/body.htmlIf you use the link in the response, you’ll be able to see the HTML version of the email for this instance. Aside from that, you could also inspect other email formats, e.g. HTML source, Text, and EML.
Wrapping Up
Here is the entire code for this tutorial on how to verify email using Selenium:
UI Method
@Test
public void checkEmailWithUI() {
   //create a Selenium WebDriver instance
   WebDriver driver = new ChromeDriver();
   //launch the Chrome browser and navigate to the website
   driver.get("https://mailtrap.io/signin");
   //puts an implicit wait for 10 seconds before throwing exceptions
   driver.manage().timeouts().implicitlyWait(Duration.ofSeconds(10));

   //locate the email field
   WebElement email = driver.findElement(By.xpath("//*[@id=\"user_email\"]"));
   //set the field's value
   email.sendKeys("example@gmail.com");

   //locate and click the `Next` button
   driver.findElement(By.className("login_next_button")).click();

   //locate the password field
   WebElement password = driver.findElement(By.xpath("//*[@id=\"user_password\"]"));
   //set the password's value
   password.sendKeys("<password>");

   //locate and click the `Log In` button
   driver.findElement(By.xpath("//input[@type=\"submit\"]")).click();

   //locate Inboxes and click it
   driver.findElement(By.xpath("//a[@href=\"/inboxes\"]")).click();
   //locate My Inbox and click it
   driver.findElement(By.xpath("//a[@title=\"My Inbox\"]")).click();

   //look for the given text in the list of web elements
   List<WebElement> allMessages = driver.findElements(By.xpath("//*[contains(text(), 'You are awesome!')]"));
   //close the Chrome browser.
   driver.quit();
   //check if text has been found or not
   Assertions.assertFalse(allMessages.isEmpty(), "There is no message in inbox. Test failed");
}
If we run the above code, this is what we get on the console:
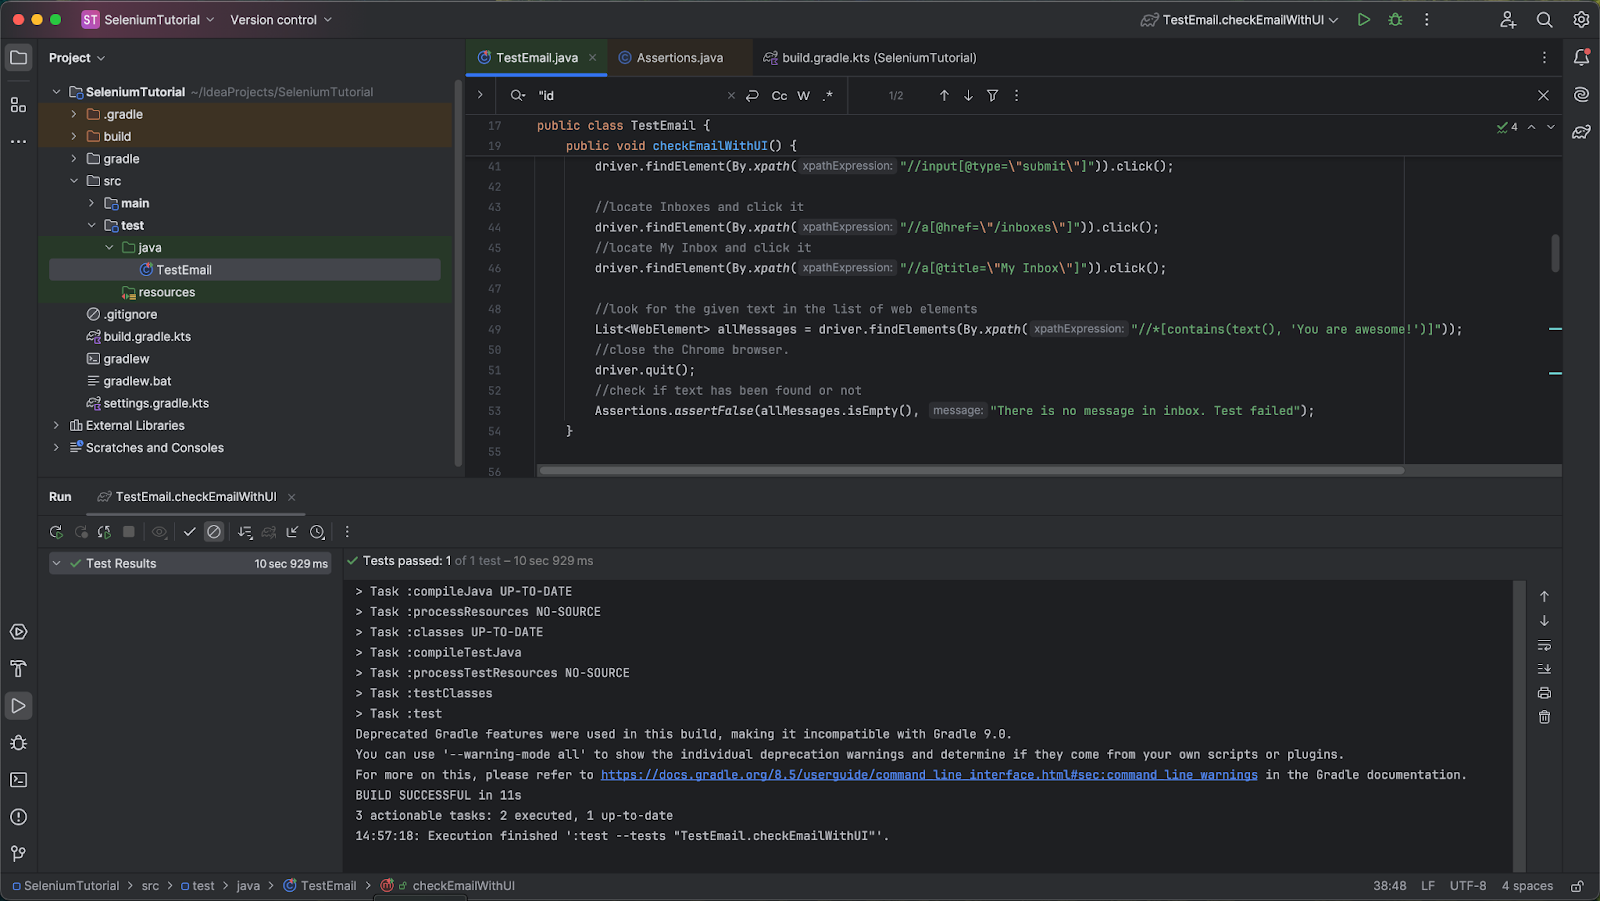
Tests passed!
API Method
To stress, the code above works without advanced protection. If the advanced protection is on (e.g. reCAPTCHA), please use Sandbox API as shown above. And here’s the entire code for the API method:
@Test
public void checkEmailWithAPI() throws URISyntaxException, IOException, InterruptedException, JSONException {
    // Define the API token for authentication
    final String apiToken = "<your-api-token>";
    // Define the account ID for Mailtrap
    final String accountId = "<your-account-id>";
    // Define the base URL for Mailtrap
    final String mailtrapUrl = "https://mailtrap.io";

    // Initialize the HTTP client for making API calls
    HttpClient client = HttpClient.newHttpClient();
    // Build the request to get inboxes for the account
    HttpRequest inboxesReq = HttpRequest.newBuilder()
            .uri(new URI(mailtrapUrl + "/api/accounts/" + accountId + "/inboxes/"))
            .header("Api-Token", apiToken)
            .header("Content-Type", "application/json")
            .GET()
            .build();

    // Send the request and get the response
    HttpResponse<String> inboxesRes = client.send(inboxesReq, HttpResponse.BodyHandlers.ofString());
    // Assert that the response status code is 200 (OK)
    Assertions.assertEquals(200, inboxesRes.statusCode(), "Cannot find inboxes for the account. Test failed");

    // Get the response body as a string
    String inboxesResponseBody = inboxesRes.body();
    // Parse the response body as a JSON array
    JSONArray inboxes = new JSONArray(inboxesResponseBody);

    // Get the first inbox ID from the array
    String inboxId = inboxes.getJSONObject(0).getBigDecimal("id").toString();

    // Build the request to get messages from the first inbox
    HttpRequest inboxMessagesReq = HttpRequest.newBuilder()
            .uri(new URI(mailtrapUrl + "/api/accounts/" + accountId + "/inboxes/" + inboxId + "/messages/"))
            .header("Api-Token", apiToken)
            .header("Content-Type", "application/json")
            .GET()
            .build();

    // Send the request and get the response
    HttpResponse<String> inboxMessagesRes = client.send(inboxMessagesReq, HttpResponse.BodyHandlers.ofString());
    // Assert that the response status code is 200 (OK)
    Assertions.assertEquals(200, inboxMessagesRes.statusCode(), "Cannot find inbox " + inboxId + ". Test failed");

    // Get the response body as a string
    String inboxMessagesResponseBody = inboxMessagesRes.body();
    // Parse the response body as a JSON array
    JSONArray messages = new JSONArray(inboxMessagesResponseBody);

    // Get the first message ID and HTML path from the array
    String messageId = messages.getJSONObject(0).getBigDecimal("id").toString();
    String messageHtmlPath = messages.getJSONObject(0).getString("html_path");

    // Build the request to get the HTML content of the first message
    HttpRequest messagesReq = HttpRequest.newBuilder()
            .uri(new URI(mailtrapUrl + messageHtmlPath))
            .header("Api-Token", apiToken)
            .header("Content-Type", "application/json")
            .GET()
            .build();

    // Send the request and get the response
    HttpResponse<String> messagesRes = client.send(messagesReq, HttpResponse.BodyHandlers.ofString());
    // Assert that the response status code is 200 (OK)
    Assertions.assertEquals(200, messagesRes.statusCode(), "Cannot find message " + messageId + ". Test failed");

    // Close the HTTP client
    client.close();

    // Create a Selenium WebDriver instance for Chrome
    WebDriver driver = new ChromeDriver();
    // Launch the browser and navigate to the HTML version of the email
    driver.get(mailtrapUrl + messageHtmlPath + "?api_token=" + apiToken);
    // Implicitly wait for 10 seconds before throwing exceptions
    driver.manage().timeouts().implicitlyWait(Duration.ofSeconds(10));

    // Check if the specific text is displayed in the email HTML content
    boolean htmlDisplayed = driver.findElement(By.xpath("//*[contains(text(), 'Congrats for sending test email with Mailtrap!')]")).isDisplayed();
    // Assert that the HTML content is displayed
    Assertions.assertTrue(htmlDisplayed, "HTML of email is not displayed. Test failed");

    // Wait for 10 seconds and close the browser
    Thread.sleep(10000);
    driver.quit();
}
If you run the code above, this is the response you get.
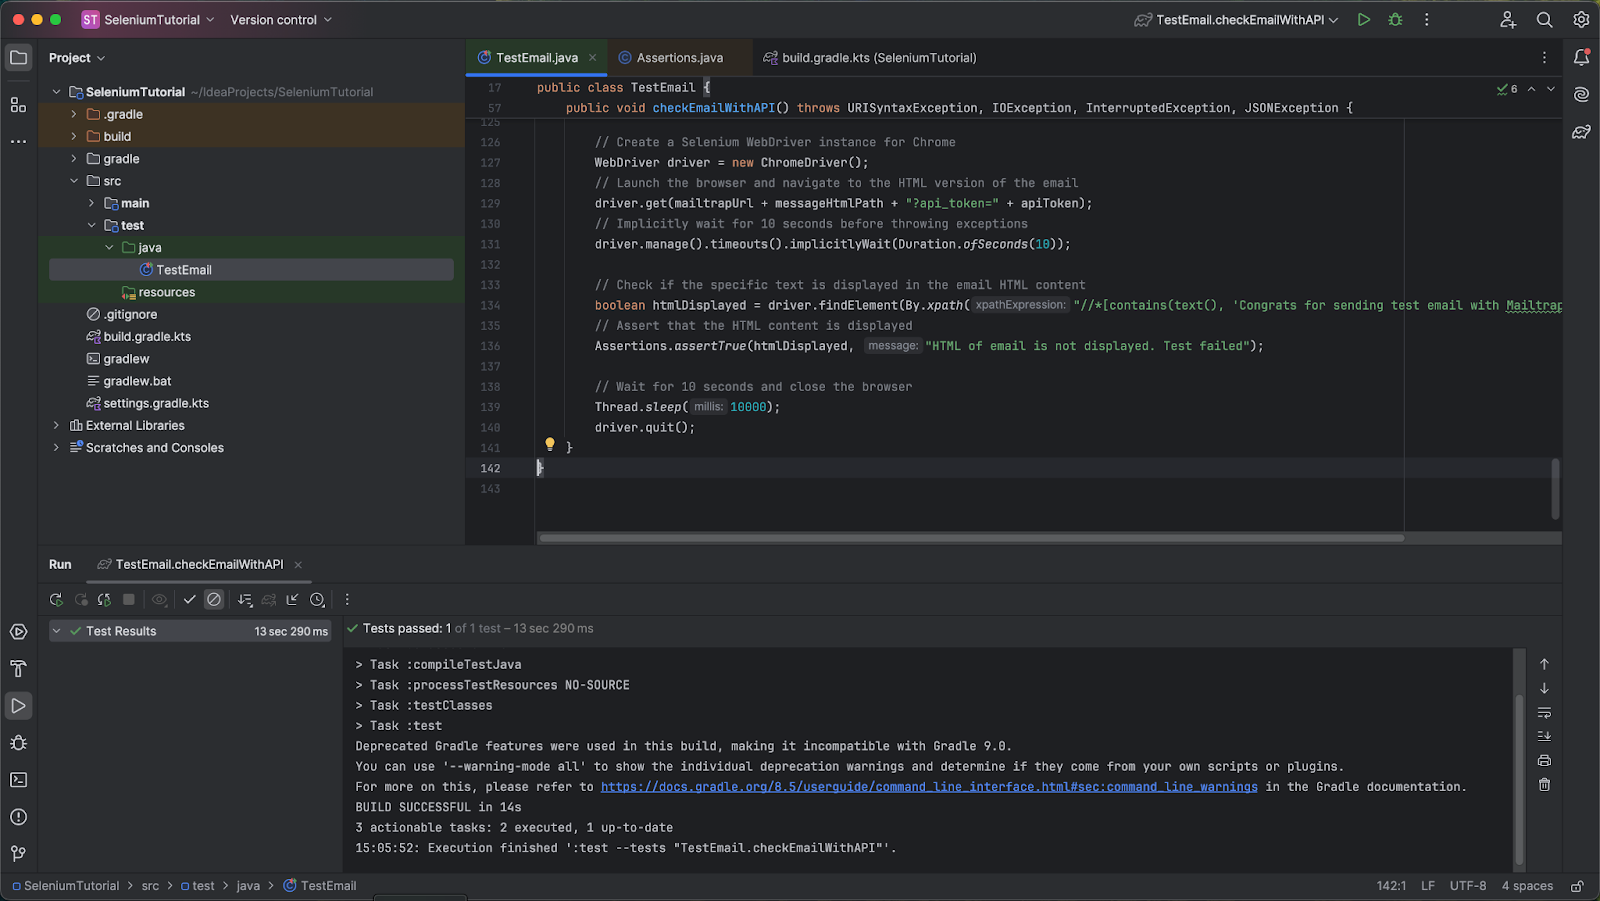
Again, it worked!
Conclusion
That’s how to automate email verification in Selenium. With Selenium, you can access the contents of the delivered messages and extract some texts automatically, which lets you know whether your email application is functioning as desired.
If you want to learn more about how to use Selenium to automate web tests, you can check its official documentation on its website.
Alternatively, learn how you can easily test various user scenarios with a ready to use integration of Kakunin (E2E testing framework) + Sandbox from our case study with The Software House.
Notably, Sandbox offers you a robust testing solution for verifying the functionalities of your emails before distributing them to real users. You should give it a try today!
All the best with your emails.


Comments
2 replies