Setting up email workflows for your app might be difficult. The framework you use might not necessarily be built with emails in mind (think, ReactJS, for example). Even when you figure that out, how do you ensure the right emails are sent to the right recipients? How do you make them look beautiful on all screen sizes? How do you avoid random spam waves triggered accidentally when using production data in a pre-production environment? Some of these questions can be, to some extent, answered with a tool called MailCatcher.
What’s MailCatcher?
MailCatcher is a free tool that can intercept emails sent from any web or mobile app. It works as a fake SMTP server to which you redirect your messages instead of sending them to a real SMTP server. Emails sent this way arrive at a local server only and can be viewed in a web interface. Or maybe they don’t arrive at all. If the latter is the case, you probably have some work to do here.
Each message that is received by MailCatcher can be opened and analyzed. You can look into its body, headers, attachments, and HTML code.
MailCatcher works with any framework that supports SMTP and localhost, so the list of available options is very long. The tool can also be initiated over API.
How to set up MailCatcher?
MailCatcher runs on Ruby, so you’ll need to have a development environment set up. Here’s how you can do this for the following OSs:
Many other versions of Ubuntu and Mac OS are also covered under the links above. For each, solely the “Installing Ruby” part will be sufficient to set up the environment for installing MailCatcher.
When you’re done, install MailCatcher with the following:
gem install mailcatcherOr use Bundler to do it.
First, install Bundler:
$ gem install bundlerThen, specify the dependencies in a Gemfile:
source 'https://rubygems.org'
gem 'mailcatcher’
Whichever approach you choose, MailCatcher should be installed once you complete all the steps.
After that, feel free to start it with:
mailcatcher --ip 0.0.0.0or just with:
mailcatcherNOTE: Skipping the zeros is fine for most cases. But if you wish to use a docker for installation or simply want to share your MailCatcher view with other machines, add “0.0.0.0” at the end.
Once you start MailCatcher, you should see the following:
root@install:~# mailcatcher --ip 0.0.0.0
Starting MailCatcher
==> smtp://0.0.0.0:1025
==> http://0.0.0.0:1080
*** MailCatcher runs as a daemon by default. Go to the web interface to quit.
Speaking of a docker, instead of installing a gem as in the example above, you can use a dedicated docker image.
First of all, add it to your docker-compose.yml file.
mail:
  image: schickling/mailcatcher
  ports:
     - 1080:1080
Make sure this container is linked to your app container, and use the following SMTP settings:
STMP:
  server: mail
  port: 1025
Now, you can set the workflows you were planning to test to be sent through smtp://[0.0.0.0]:1025 and access them at http://[0.0.0.0]:1080/
For the list of framework-specific instructions for installing MailCatcher, check the list on their homepage.
When in doubt, also check the list of available commands by typing:
mailcatcher --helpwhich will return:
mailcatcher --help
Usage: mailcatcher [options]
       --ip IP                      Set the ip address of both servers
       --smtp-ip IP                 Set the ip address of the smtp server
       --smtp-port PORT             Set the port of the smtp server
       --http-ip IP                 Set the ip address of the http server
       --http-port PORT             Set the port address of the http server
       --http-path PATH             Add a prefix to all HTTP paths
       --no-quit                    Don't allow quitting the process
       --[no-]growl
   -f, --foreground                 Run in the foreground
   -b, --browse                     Open web browser
   -v, --verbose                    Be more verbose
   -h, --help                       Display this help information
A particularly useful option is to launch MailCatcher in the foreground, so others can connect to your local SMTP. You can do this with:
mailcatcher --foreground --ip=0.0.0.0Why use MailCatcher?
Despite its basic functionalities, MailCatcher can effectively prevent you from spamming real users of your app. Since all the workflows you’re testing will be redirected to a local address, no message will ever be delivered to an actual SMTP server and then pushed to users’ inboxes (assuming you configured everything correctly).
With this tool, you can also easily see what really works and what doesn’t. In other words, you can see if a message that was supposed to be triggered was really sent. You can also be notified when a flood of emails is released after a simple action by a user and fix it before pushing it to production.
MailCatcher can help you perform a basic inspection of the content and headers of your emails. You can access the HTML version of an email and check if the headers, including Return-Path address, are set correctly. You can also try out the links, preview the attachments, and diagnose what needs to be improved before an email is sent.
Finally, MailCatcher is free to use, which might be appealing to those of you on a very low budget. The developer of this tool can be supported with donations, but other than that, all of the features listed above are free of charge.
This is all great, but are there any disadvantages to using this tool?
MailCatcher cons
Yes, MailCatcher also has various limitations and drawbacks.
Not developed further for years
The last release (0.6.4) was made available back in February 2016. Although there have been some minor updates to the repository since then, there’s little sign of new upcoming features. If you’re willing to pay for adding new functionalities, you’re encouraged to get in touch with the author.
Very basic web client

What you see at http://0.0.0.0:1080/ is a basic tool for verifying if emails are received or not and if headers were set up as expected. By all means, it can be enough for some tests, but if you need more, you’ll need to look somewhere else. MailCatcher will preview each message and might give some (visual) hints when something doesn’t render as expected. It’s important to keep in mind, though, that a thing or two might have been changed in the world of browsers since the last update to MailCatcher. For example, at the time of the last release, Google Chrome was just celebrating the launch of version 48.0.2564, Adobe Flash Player was in full swing, and HTML5 was just optional. At the time of writing, Chrome is in its 76th version, with new versions lurking right behind the horizon.
Takes time and effort to set up
Since MailCatcher is not a web service, you need to take care of hosting it somewhere. For that, you’ll need to set up a server and then install MailCatcher using the instructions we mentioned above. MailCatcher is built with Ruby and is usually deployed with Ubuntu. If this is not your field of expertise, it might take a bit of extra effort to get things going.
Both local and cloud-based testing environments have certain benefits, with the latter one being usually a preferred option for developers and QAs. Either way, we’ve covered the differences in another article.
No use for teams
MailCatcher’s SMTP server works only on localhost, which might be perfectly fine if you’re the only person tasked with testing email workflows. If you, however, want to have some help, share your progress with a remote manager, or need to keep a client in the loop, MailCatcher won’t be any good. As such, it’s good only for small, stationary teams and individuals.
Easy to get lost in
If you try to test just a few emails, you’re fine with a basic inbox. If you, however, have a complex project to work on which involves numerous workflows, as well as different user permissions and teams, your inbox will quickly be flooded and almost impossible to navigate. This might cause delays and make it difficult to spot something important as you progress.
MailCatcher alternatives
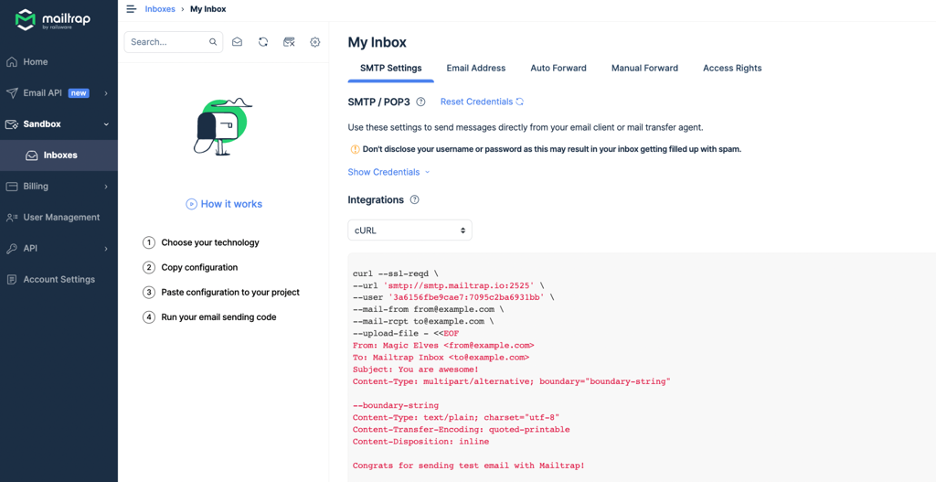
If any of the listed cons is a deal-breaker for you, you’ll be happy to know that there are some great MailCatcher alternatives. One of these alternatives is Email Sandbox.
With Email Sandbox, devs get a safe environment to test emails without the risk of spamming recipients in the process. Also, as it’s quite an advanced testing solution, Email Sandbox doesn’t come with the same limitations as MailCatcher, and here is how:
- Email Sandbox is actively developed and maintained by a team committed to delivering exceptional service through guidance and support. The solution features are easily accessible through a user-friendly interface allowing for a simplified testing process.

- Within Email Sandbox, users get features for solving various email testing challenges. The most notable ones are:
- HTML/CSS analysis – get an estimation of how supported your email code is by popular email clients and be alerted about any problematic elements
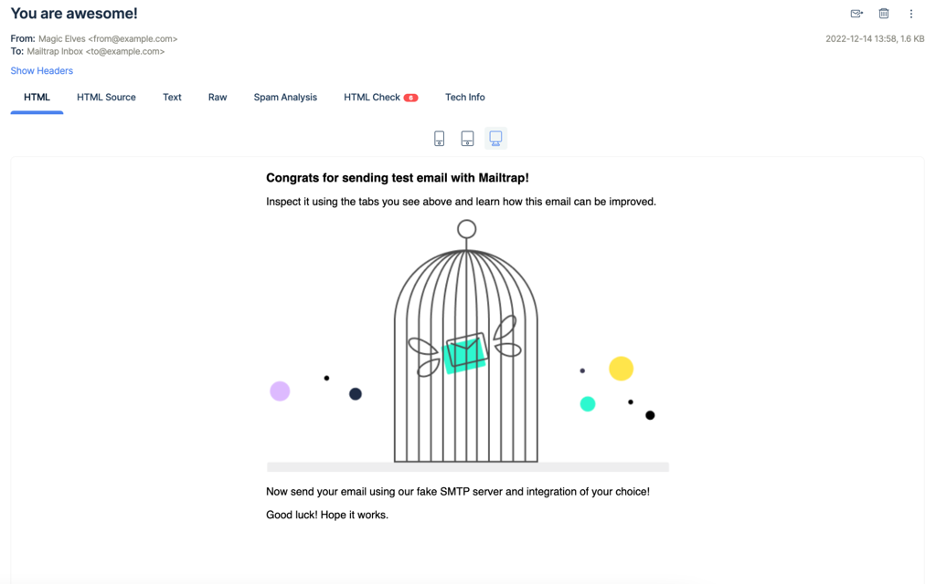
- Email preview – see how your email gets rendered by popular email clients and check its responsiveness
- Spam analysis – get an overall spam score for your email and be alerted about any rules that might be seen as suspicious
- Email forwarding – whitelist recipients and automatically or manually forward emails to them
- Blacklist reporting – look for your sender IP/domain on common blacklists
- Detailed tech info – see the original values of headers and SMTP transaction details
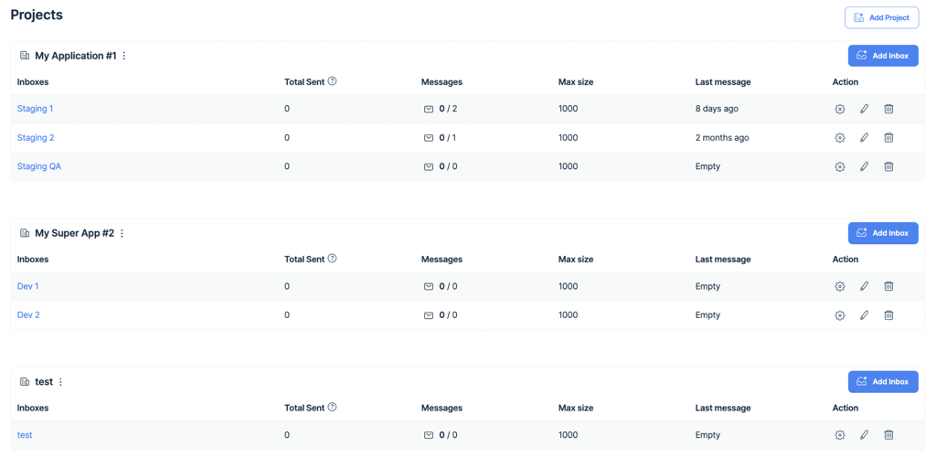
- Multiple inboxes – create a virtual inbox for each of your projects and even project stages

- It is cloud-based! Email Sandbox is technology-agnostic and compatible with any app or framework that supports SMTP. It also allows anyone you grant permission to access your inboxes, thus enabling better collaboration.

- It has an easy setup process that takes only about 5 minutes. Plus, you have the option to choose between using an email-sending configuration code, SMTP credentials, or a dedicated email address for sending your testing emails.
To start using Email Sandbox, all you need to do is create an account and follow the setup instructions, as described in the knowledge base.
Oh, and yes, a forever-free plan is available for this testing solution, as well as five higher plans. This way, you can test things out and then pick what fits your needs best!


