Ever received an email that felt like it was written just for you? Believe it or not, it probably took only a few clicks to create thanks to mail merge.
In this article, we’ll explain the workings of mail merge and show you how to implement it using Microsoft Excel and other software so you can save time and skip doing repetitive tasks when creating personalized documents.
What is mail merge in Excel
In our mail merge explained blog post, we defined mail merge as the method of creating personalized letters, mailing labels, documents or emails using a bit of automation.
Now, when it comes to mail merge in Excel, this process entails using an Excel spreadsheet as a data source to make the personalization happen.
So, for instance, when personalizing emails with mail merge and Excel, each row in an Excel spreadsheet will contain details belonging to one recipient, such as the recipient’s name, email, city, and so on. These details are then taken from the sheet and inserted into a predesigned email template that is sent to multiple recipients at once, be it part of a bulk email campaign or some sort of mass communication.
Before mail merge: Creating the Excel spreadsheet
As a populated Excel spreadsheet is crucial for the mail merge process we’re demonstrating today, the first step in the process will be preparing the spreadsheet.
Note: Those of you who have the Outlook contact data needed for the mail merge already available in an Excel document, you can simply open the document and then format the data. .csv or .txt file formats can also be used by going into Excel, finding the Open option, and clicking Open files from this device.
So, to kick things off, open Excel and then create a new spreadsheet or open an existing one.
Then, give a recognizable label to each column that will hold your mail merge data. For example, “Email” for column A, “First Name” for column B, and so on. Do keep in mind that the column names in the spreadsheet will need to match the mail merge placeholder names, also known as mail merge field names, used in your document template (more on that a bit later).
Once the column headers have been labeled, starting with the first row of the first sheet of your workbook, enter the personalized information belonging to each recipient.
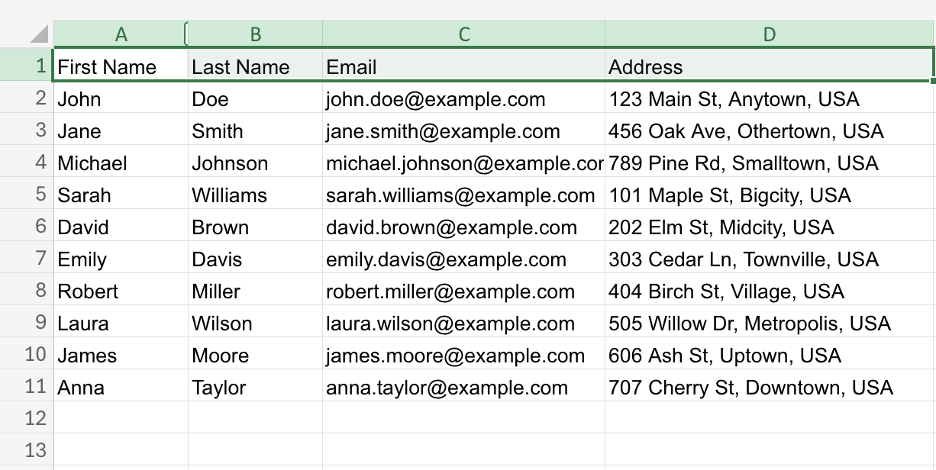
Of course, don’t forget to correctly format each data entry, so things like emails, percentages, currencies, postal codes, etc., don’t end up causing any issues.
For numerical values, this is done using this option in the Home tab.

With all of that out of the way, name the Excel file appropriately and save it in .xlsx format on your local machine.
Then, simply close the data file before proceeding to do any mail merging.
Mail merge from Excel to Word
Creating the document template
Earlier we mentioned the usage of mail merge placeholder names in document templates and now it’s time we create that template.
This task is quite simple and starts with opening a new Microsoft Word document.
With the document open, navigate to the Mailings tab and then click on Start Mail Merge.
This will present you with a dropdown list of all the document formats supported by mail merge.
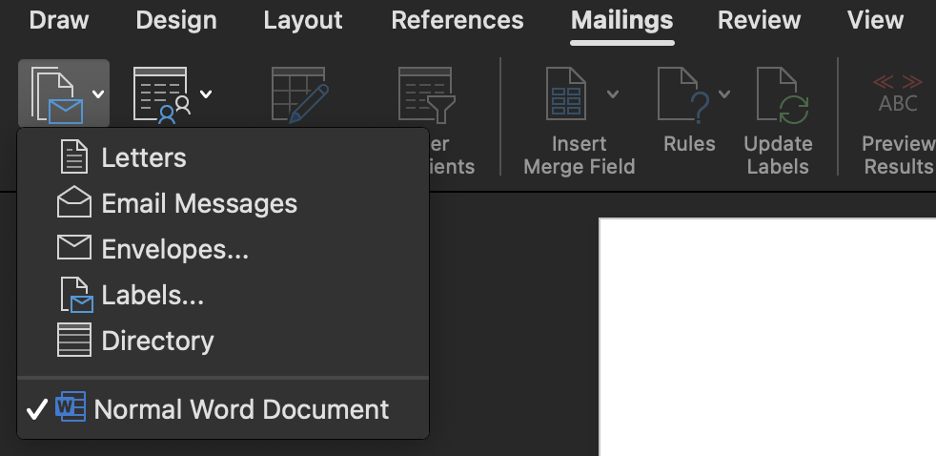
For demonstration purposes, we went with email.
In our dedicated mail merge from Excel to Word blog post, we guide you step by step through the process of creating personalized letters, envelopes, labels, and directories, so make sure to check it out.
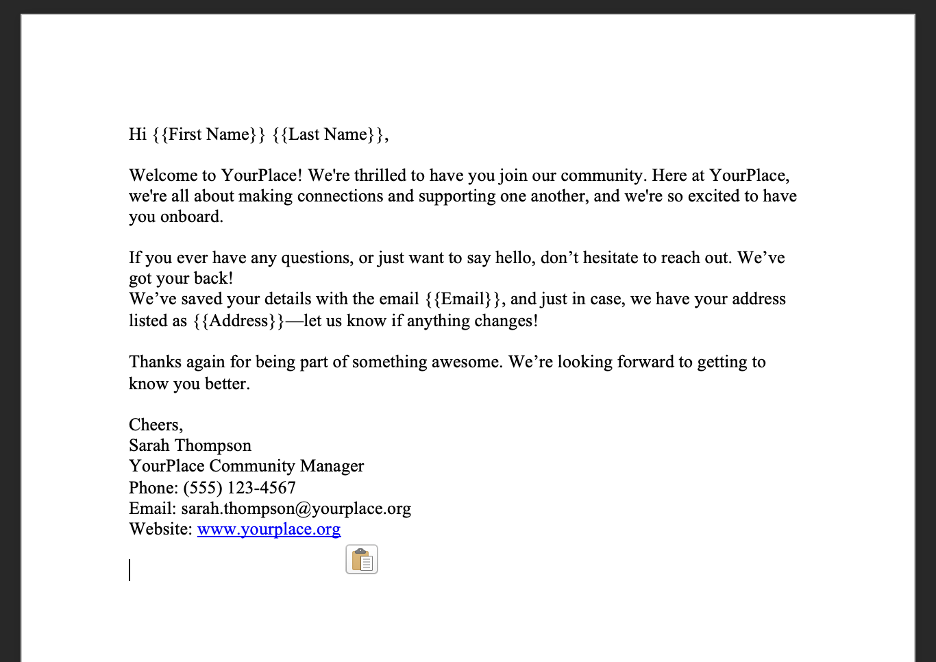
In the newly-opened window, compose your email template and make sure to match field names for mail merge with your spreadsheet column labels.
Here’s what our template looks like with a personalized greeting line and email body:
Linking the spreadsheet and the Word document template
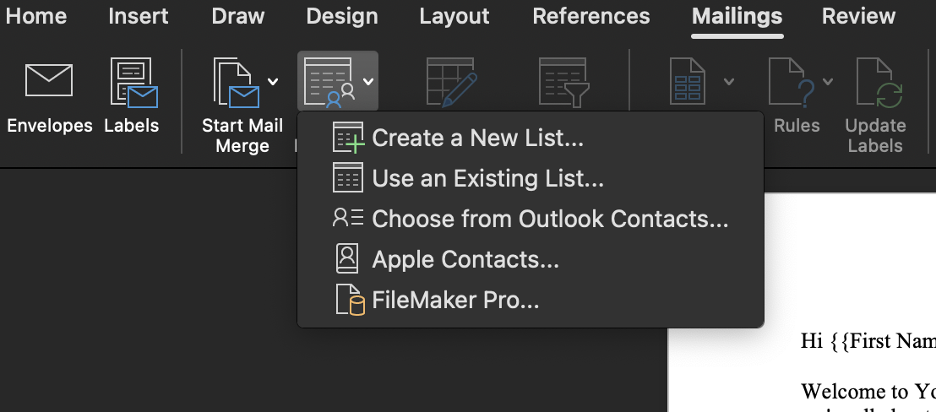
Now, to glue all the parts of this mail merge together, you need to create a link between the Excel worksheet created earlier and the mail merge document template.
This is done by clicking on the Select Recipients option and then on Use an Existing list.
Implementing the mail merge
As the spreadsheet and template are now linked, the last thing left to do before clicking send is implementing the mail merge.
To do this, click on Insert Merge Field and proceed to replace all the mail merge placeholder names with the appropriate merge fields like so:
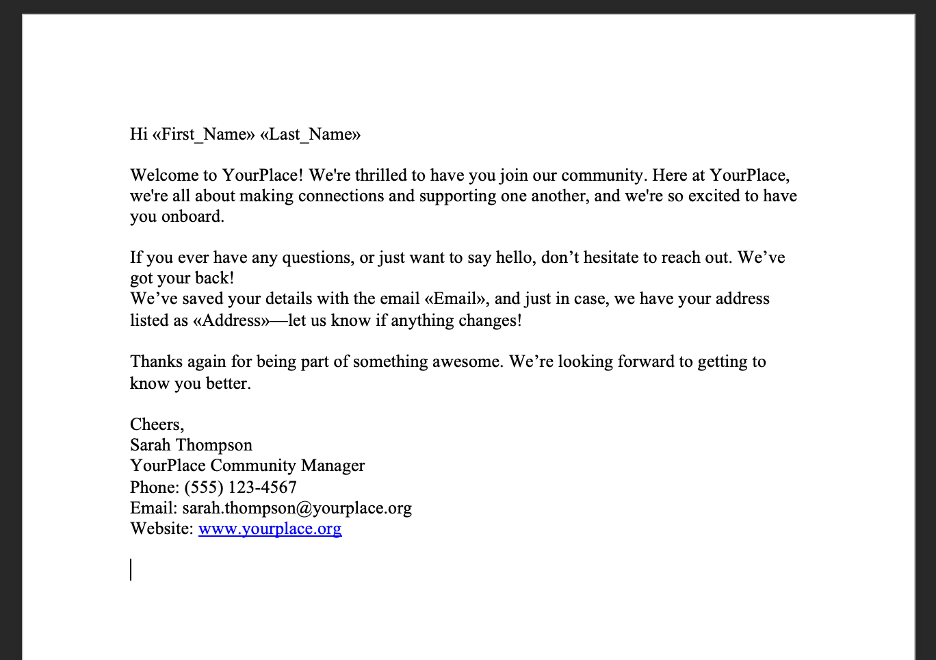
At your disposal, you will have a preview option to see what the mail merge results will look like.
This option does allow you to browse through the result for each recipient using the Previous and Next arrows which can come in really handy if you want to be extra detailed in your reviews.

If everything looks good, you can click on Finish & Merge and then on Merge to Email.
This will cause a dialog box to appear where you need to define the recipient, subject, and type of message you are sending.
When doing this, be sure to insert in the To field the name of the column in your Excel spreadsheet holding recipient emails.
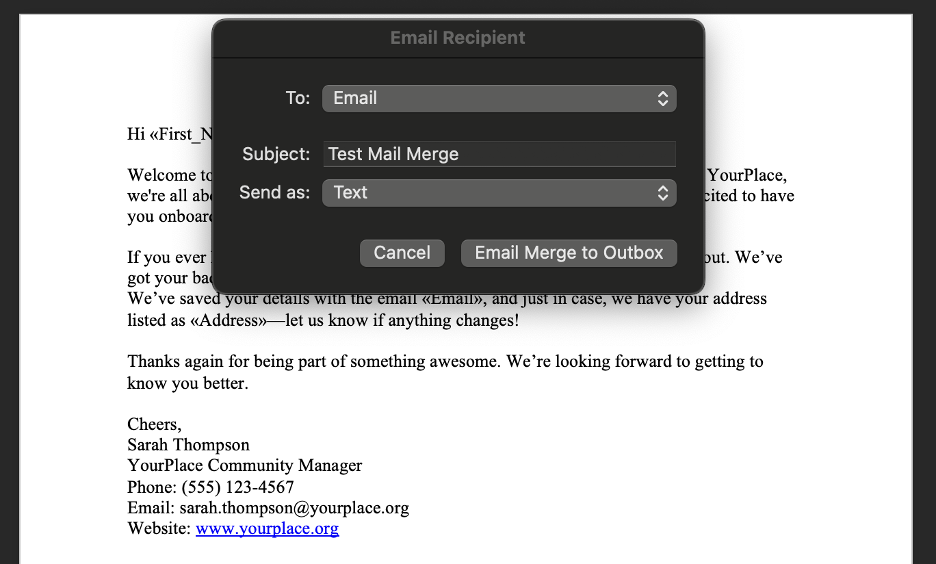
Lastly, click on Merge to Outbox to complete the process.
Can you automate Excel to Word mail merge?
As you saw in our instructions, mail merge from Excel to Word consists of just a few simple steps. Still, if you don’t feel like completing each step manually, you can automate the mail merge process using a VBA (Visual Basic for Applications) script.
VBA allows users to write macros or scripts that can perform repetitive tasks, manipulate data, and interact with other Office applications and even external files. So, for instance, instead of manually starting the mail merge in Word, VBA scripts can run the merge with specific instructions, saving time and reducing errors, especially when handling large datasets.
To learn more about how to use VBA for mail merging, check out our other post.
Mail merge from Excel to Outlook
In the previous section of this article, we covered mail merging from Excel to Word. Now, if you’re curious about how to mail merge from Excel to Outlook, we’ve got a secret to tell you – the steps are exactly the same!
You see, Word’s built-in mail merge functionality for sending email messages is specifically designed to work with Outlook as the email client. This is because Word and Outlook are both part of Microsoft Office, and they work together seamlessly for email merges.
So, in a nutshell, Word’s native mail merge feature is tied to Outlook for sending emails.
Now, does this mean that if you don’t use Outlook or want to use a different email client, you won’t be able to mail merge from Excel? Technically, yes, but there are alternatives:
- Export the mail merge results – You can perform the mail merge in Word to create individual new documents (e.g., letters or emails) and then manually copy the content into another email client or platform.
- Use third-party tools – There are third-party tools and add-ons available that allow you to use mail merge with other email services (like Gmail, Yahoo, etc.). Some tools, such as mail merge add-ons for Google Sheets and Gmail, provide similar functionality without relying on Outlook.
- Mail merge with other software – Tools like Excel and Word are not the only options for mail merge. Platforms like Google Docs and Google Sheets can be used with Google’s mail merge add-ons, and there are standalone email marketing platforms that allow for merging data into personalized emails as well.
In the next section of this article, we’ll go into detail on how to mail merge from Excel to Gmail, so if you want to see how one of these alternative methods works in action, keep on reading.
Mail merge from Excel to Gmail
As Gmail doesn’t natively support mail merge like Outlook does with Word, the use of third-party tools in this process is a must. One such tool is Google Sheets and this is how it can help you.
Importing data into Google Sheets
If you’re starting off with your Excel data, transferring that data to Google Sheets will be necessary to create mail merge with Gmail.
To do that, go into Google Sheets, open a blank document, navigate to File ->Open ->Upload, and select the .xlsx document containing your contact data.
An alternative to this route is simply copying and pasting the data from Excel into Google Sheets, but with this, you’ll need to be very careful in checking if you’ve selected all the data.
Installing a mail merge add-on
To install the add-on, in Google Sheets, under Extensions, navigate to Add-ons and then to Get Add-ons.
There, search for a mail merge add-on that fits your needs, such as Yet Another Mail Merge (YAMM), Mail Merge with Attachments, or Gmass.
For this tutorial, we went with the first option.
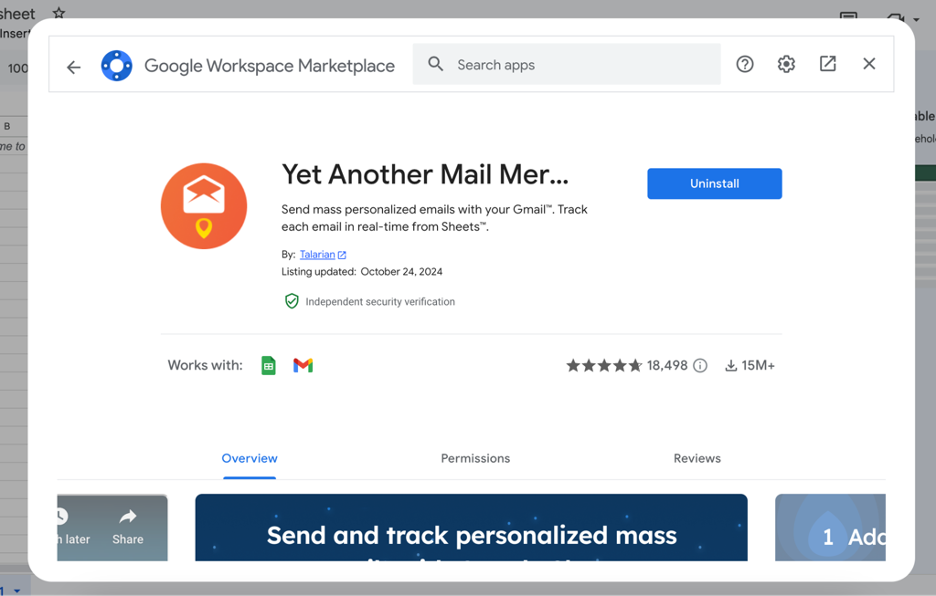
Finally, install the addon and give any necessary permissions to proceed.
Drafting the email template
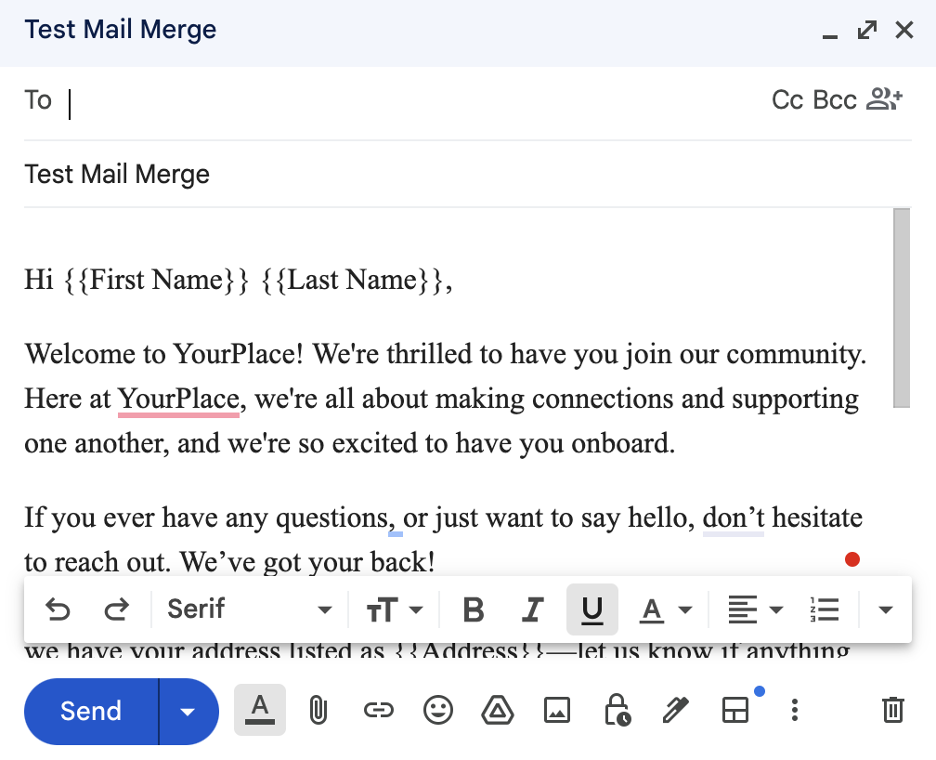
As you did in Word, in Gmail, you’ll also need to draft an email template and use mail merge placeholder names that match the column names from your Google Sheets spreadsheet.
Here is an example of what your email template should look like with the mail merge placeholder names inserted.
As you can see, we did reuse the template created in Word.
Linking the spreadsheet and the Gmail draft
Now, when it comes to connecting the spreadsheet and the draft, this is where the add-on mentioned earlier comes in.
So, first go into Google Sheets, then open the add-on using the Extensions tab.
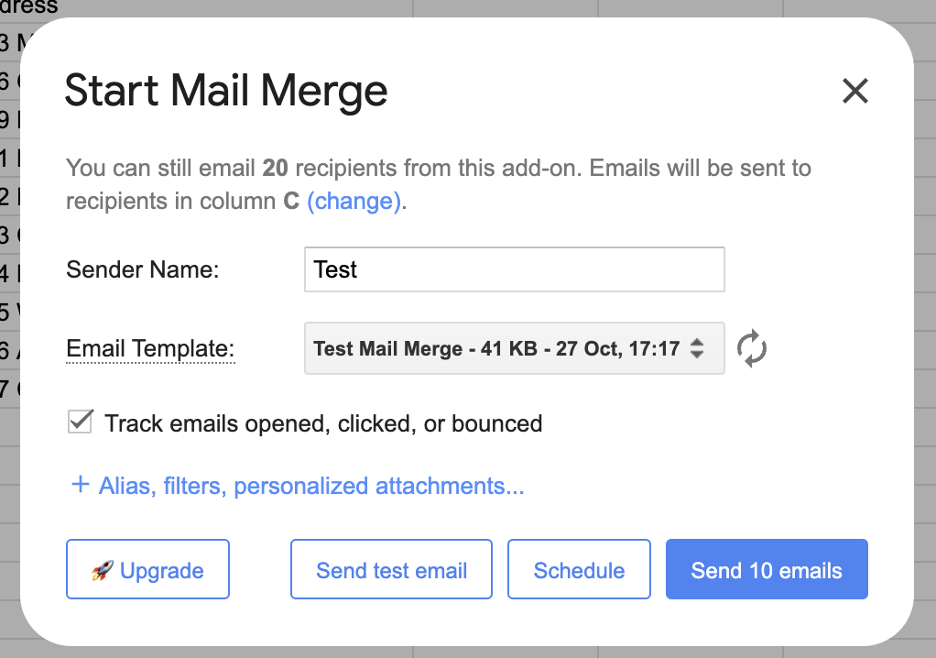
The add-on will ask you to select the template, define the sender name, and enable tracking by clicking a checkbox.
If you’re using the YAMM add-on, it will automatically detect what column holds mail merge recipient emails.
Sending off the emails
Once you have your mail merge ready, users of the YAMM add-on will have the option to send a test email. This email will land in the inbox of the Google account used for Google Sheets, and in it, you’ll be able to see if all the placeholders have been replaced by personalized data.
If all looks good, you can then proceed to schedule or send the mail merge emails.

A convenient alternative to mail merge with Excel
Besides Excel and Word, mail merge can be completed using Google Sheets and Google Docs, Microsoft Word and Microsoft Access, and other combinations of appropriate tools. But what if you want to use just one piece of software to generate personalized emails? In that case, you’ll have to go with a platform like Mailtrap.
Within Mailtrap, users can access a feature called Contacts intended for uploading and storing contact details on the platform. The contacts can also be organized into different email lists to send targeted campaigns.
Now how does this relate to mail merge? Well, you see, before you’ve uploaded any contacts into Mailtrap, you can identify variables, such as first and last name, date of birth, address, etc., and create custom fields for those variables.

Later, with the help of the custom fields you can create personalized emails and send them to recipients all within Mailtrap.
For each custom field, you’ll need to enter a name, select a type, and assign a merge tag.

This way, making use of the field in the mail merge process will be possible, and delivering personalized emails to your contacts will require far fewer steps than when using Excel + Word, Google Sheets + Google Docs, or another alternative.
Wrapping up
Whether it’s sending personalized emails or other types of documents, mail merge can be your best buddy as it removes the time-wasting hassle of doing everything “by hand”.
With mail merge and with a few quick steps, you can pull data straight from an Excel sheet (or Google Sheets, if Gmail’s your thing) and zap it into a ready-made template. Just don’t forget to give those emails or digital or print documents a good inspection before sending. Happy merging!
Want to learn how to mail merge in Python? Our YouTube tutorial will take you through all the steps:


