
Linux operating system powers a huge portion of the world’s servers and supercomputers!
In fact, ~96% of web servers (out of the top 1M) and the 500 fastest supercomputers worldwide use Linux. Fun trivia – SpaceX used Linux-based systems to successfully complete 65 space missions.
Does Linux send email?
Oh yes, system administrators can easily send emails with the Linux command line using various tools available in the ecosystem. In this article, we’ll walk you through the steps to send emails with Linux using some popular command-line tools.
Send Emails in Linux with Command Line
The following sections list the most popular commands, you’ll learn how to send with Mailtrap email API.
Note that some of the typical command options you can use to send emails with a Linux command line interface include:
-a– to denote an attachment-b– (BCC) the blind copy-c– (CC) the email address copy-s– to denote email subject
We included the installation steps on Debian and RedHat-based distributions for the commands that might not be on Linux by default. Note that some may require installing an additional package manager. But if you already have them installed, feel free to skip these steps.
Pro tip: If you’re using Raspberry Pi, make sure your device is properly configured to handle Linux commands.
The curl command
The curl command is a versatile tool for transferring data between servers and applications. It can also be used to send emails from the command line in Linux.
Use this basic syntax to send an email with the curl command:
curl \
--ssl-reqd \
--url 'smtp://live.smtp.mailtrap.io:587' \
--user 'username:password' \
--mail-from from@example.com \
--mail-rcpt to@example.com \
--upload-file - <<EOF
From: User Name <username@example.com>
To: John Doe <john@example.com>
Subject: You are awesome!
Content-Type: text/plain; charset="utf-8"
Content-Transfer-Encoding: quoted-printable
Content-Disposition: inline

Congrats for sending test email with Mailtrap on Linux!
EOF
The mail command
Aptly named, the mail command does exactly that – sends emails from the command line. It’s a good option to programmatically generate emails from web apps or Shell scripts, particularly in systems sans a GUI.
Step 1: Install mail
If you’re running a Debian-based distribution like Ubuntu, use the following commands to update and install it:
sudo apt-get updateThen, run the following command to install mailutils:
sudo apt install -y mailutilsIf you’re running a Red Hat-based distribution like CentOS, you can use the following command:
sudo yum install mailxImportant Notes:
- When installing
mailutilson Debian-based distributions, the action automatically installs Postfix. Follow the Postfix Configuration wizard to connect it to your website. - If the postfix doesn’t get automatically installed, it may signal server or installation error.
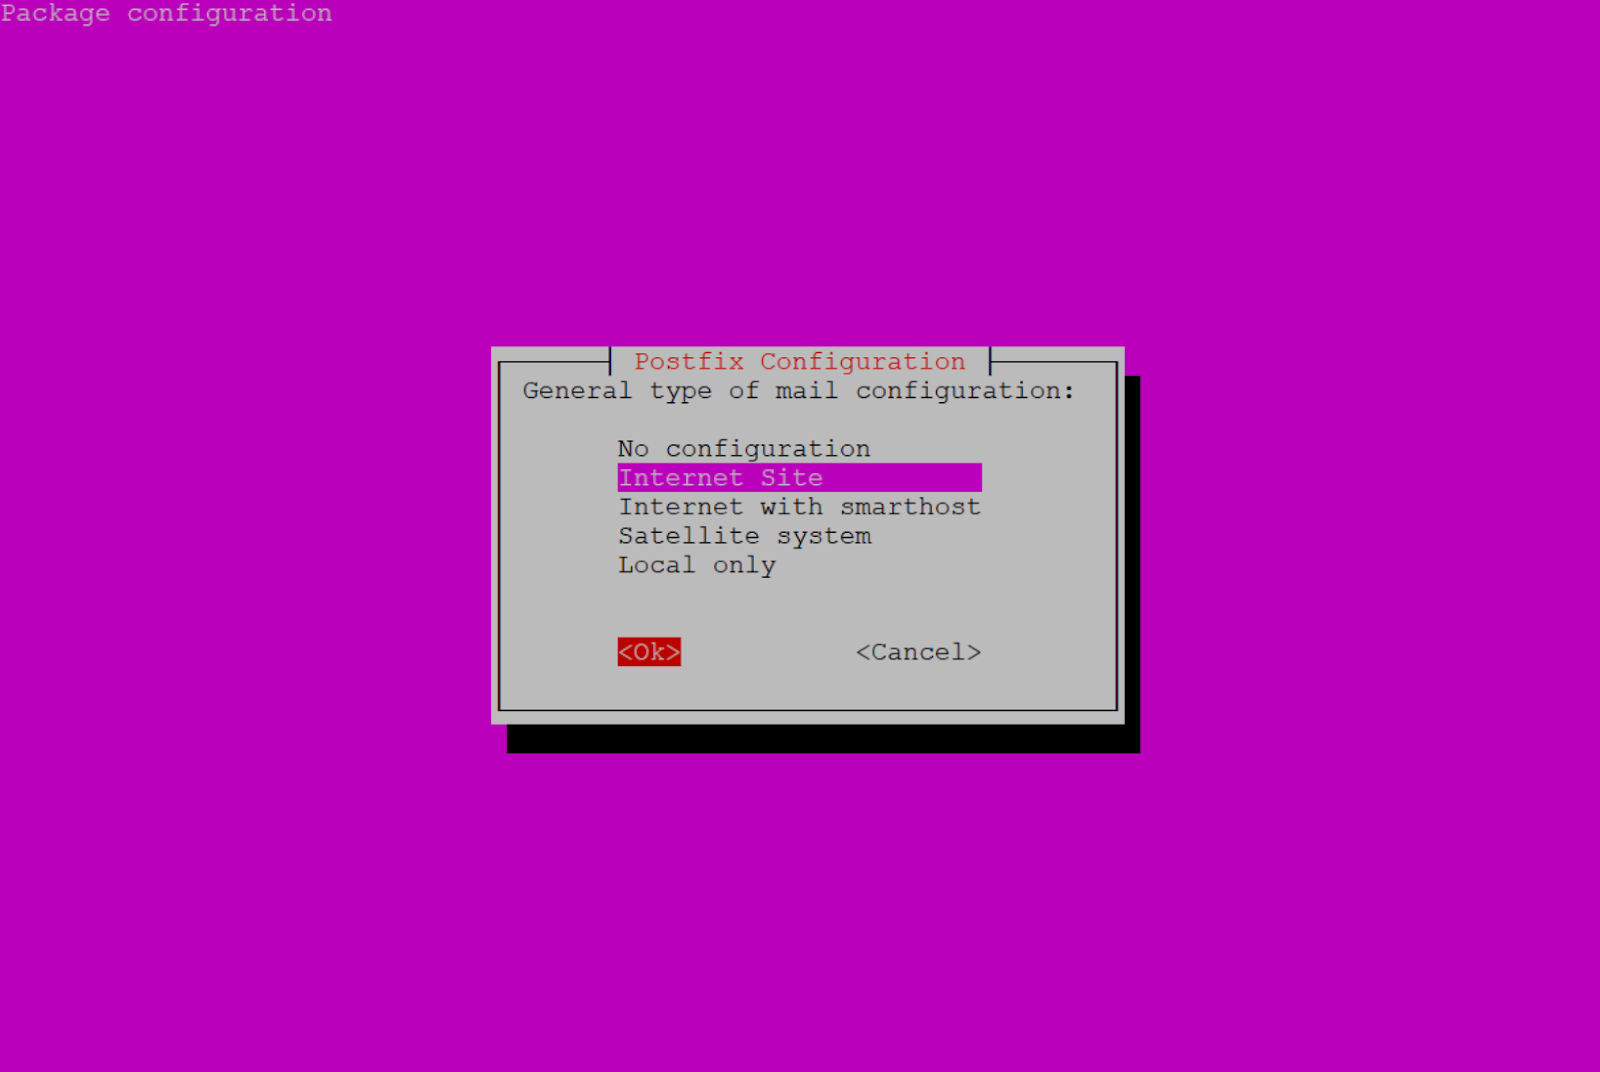
Step 2: Postfix Configuration
Continue configuring Postfix so it works with your email provider. To do that, first, navigate to the configuration file below and edit it.
sudo nano /etc/postfix/main.cfTowards the end of the file, you’ll find relayhost =. Delete the line and add the following in its place:
relayhost = [live.smtp.mailtrap.io]:587
smtp_sasl_auth_enable = yes
smtp_sasl_password_maps = hash:/etc/postfix/sasl_passwd
smtp_sasl_security_options = noanonymous
smtp_tls_CAfile = /etc/postfix/cacert.pem
smtp_use_tls = yes
Save the file, then exit.
Step 3: DB Files and Password
To keep your credentials safe, create a file using the snippet below:
sudo nano /etc/postfix/sasl_passwdThen, populate the file with your credentials.
[live.smtp.mailtrap.io]:587 username@example.com:passwordIf you aren’t a Mailtrap user, list your credentials, then save and exit.
Next, use the postmap command to make a hash database.
sudo postmap /etc/postfix/sasl_passwd Now, navigate to the <strong>/etc/postfix/</strong> directory, and you should be able to find the <strong>sasl_passwd.db</strong> file.
Step 4: Certification
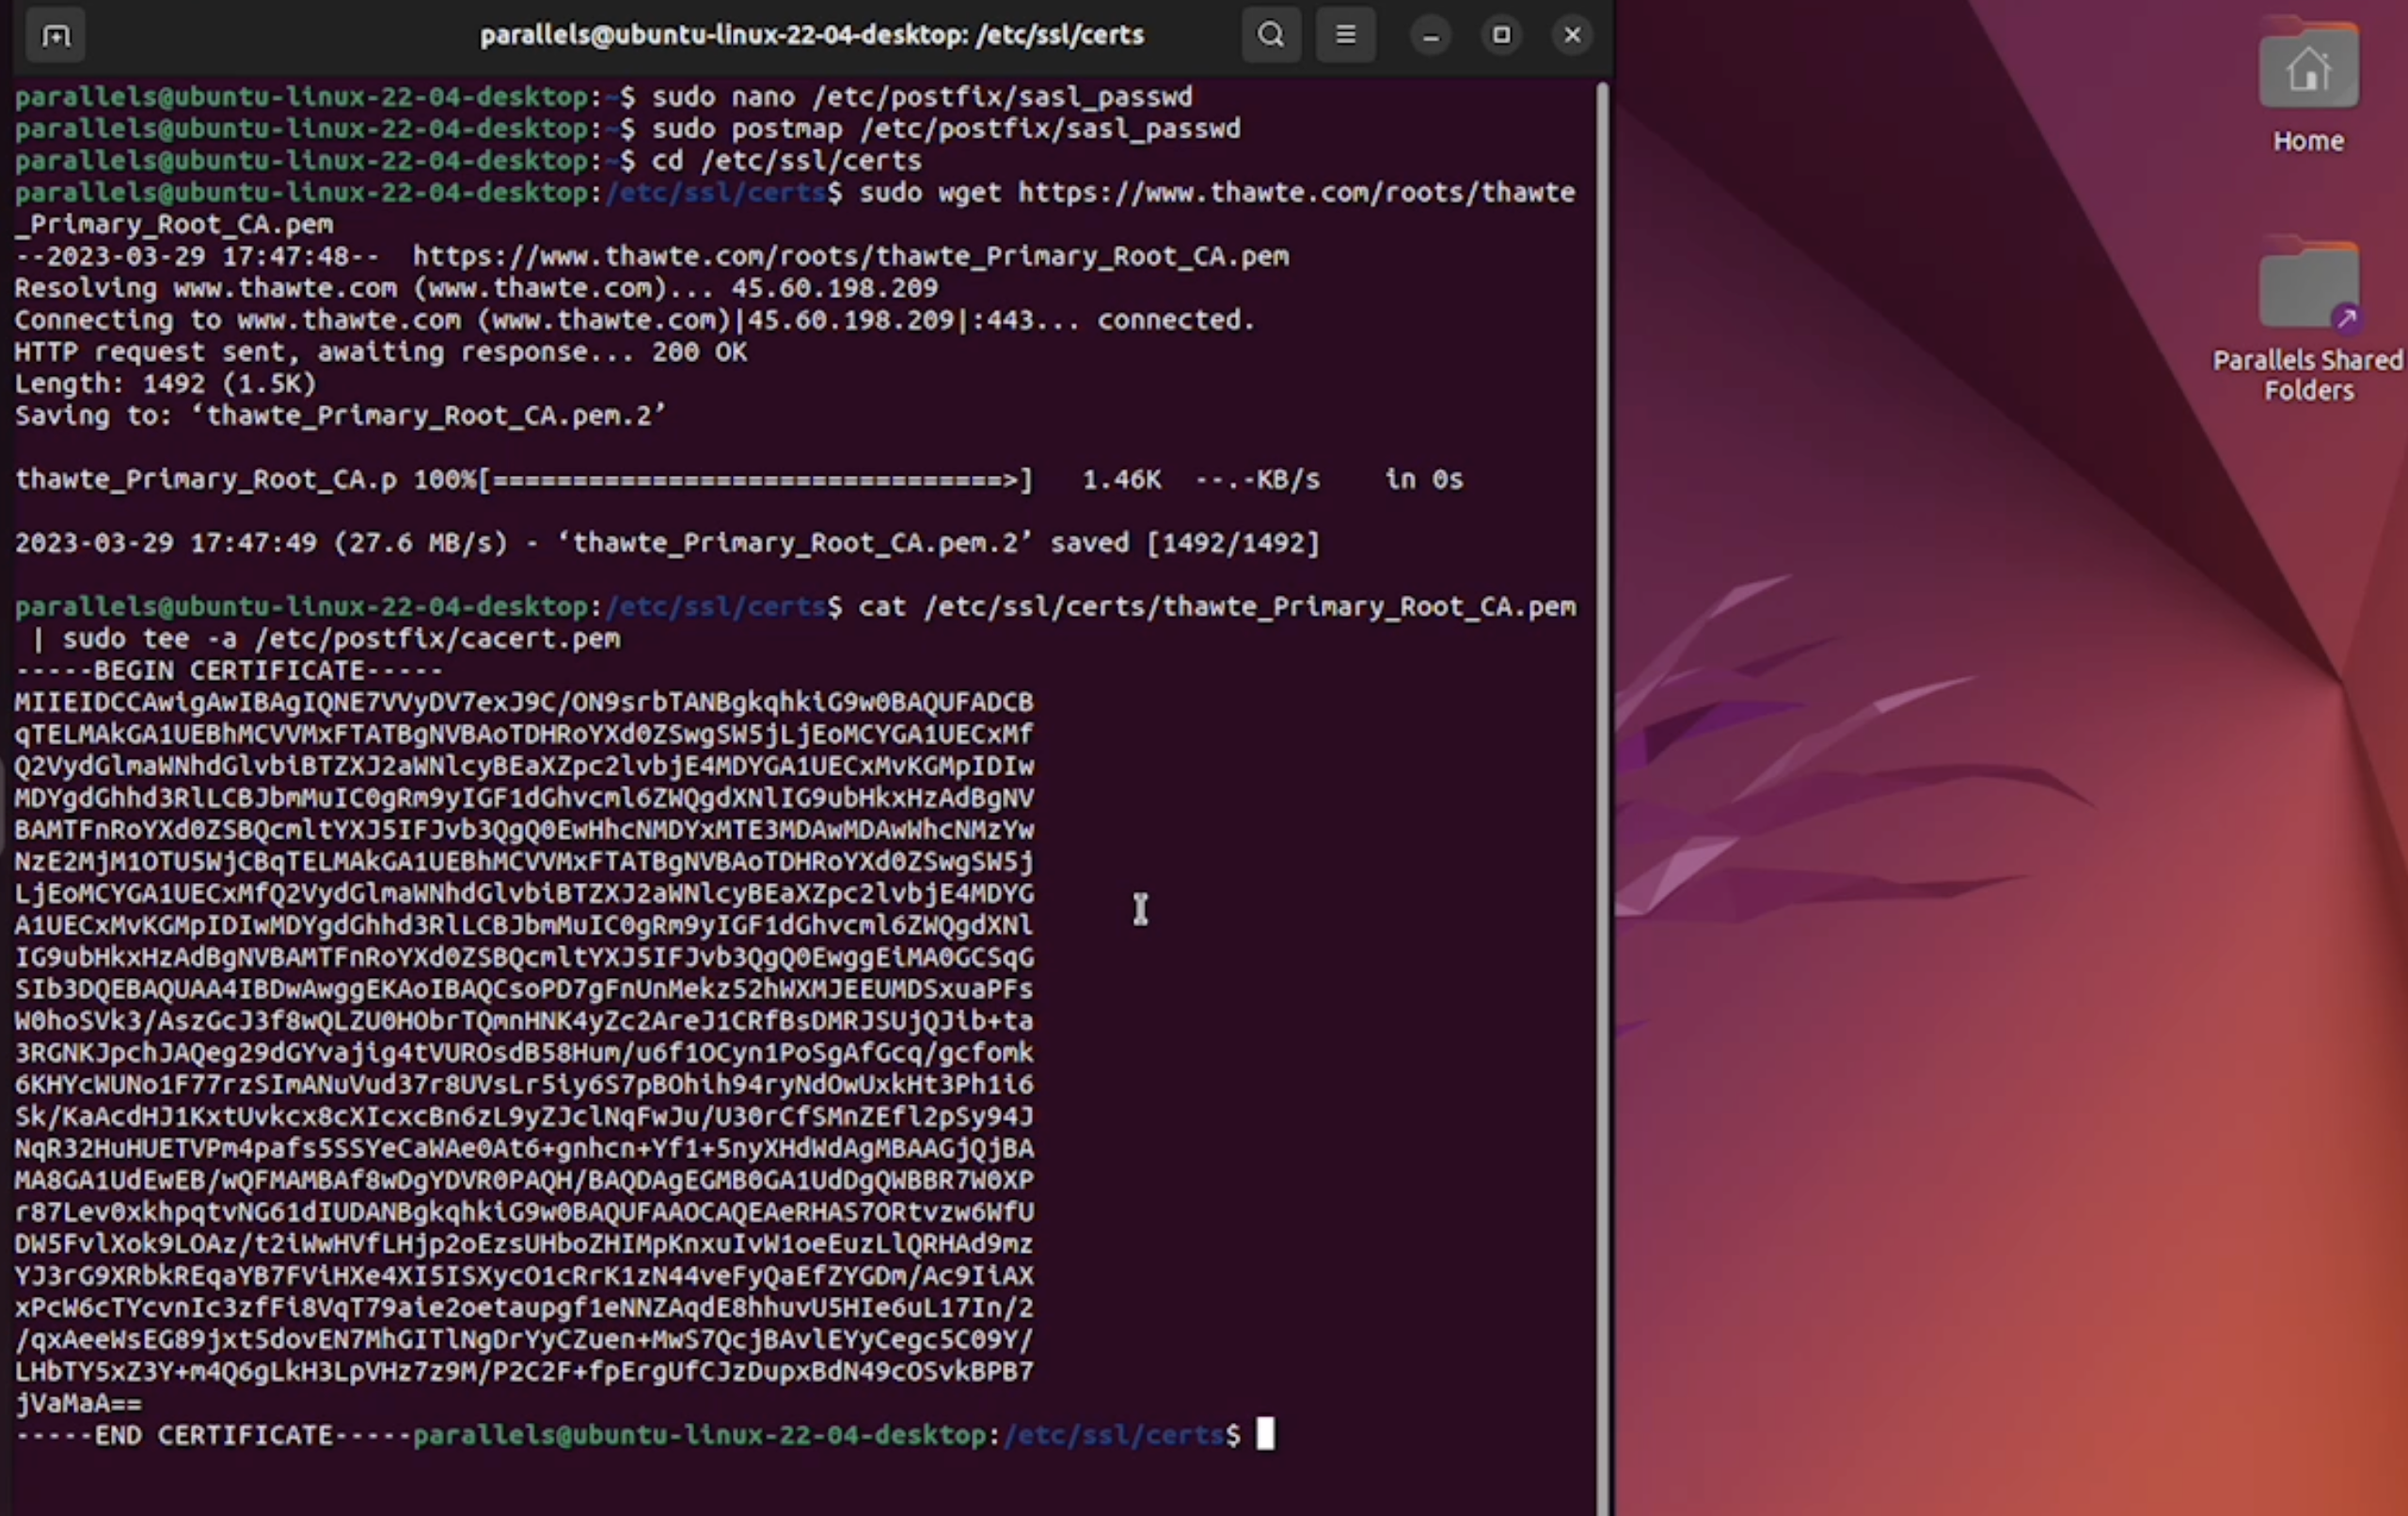
Use the snippet below to change the certs directory.
cd /etc/ssl/certsGet the Thwate cert.
sudo wget https://www.thawte.com/roots/thawte_Primary_Root_CA.pemCreate certificate.
cat /etc/ssl/certs/thawte_Primary_Root_CA.pem | sudo tee -a /etc/postfix/cacert.pemInspect the configuration by locating the cacert.pem under /etc/postfix directory.
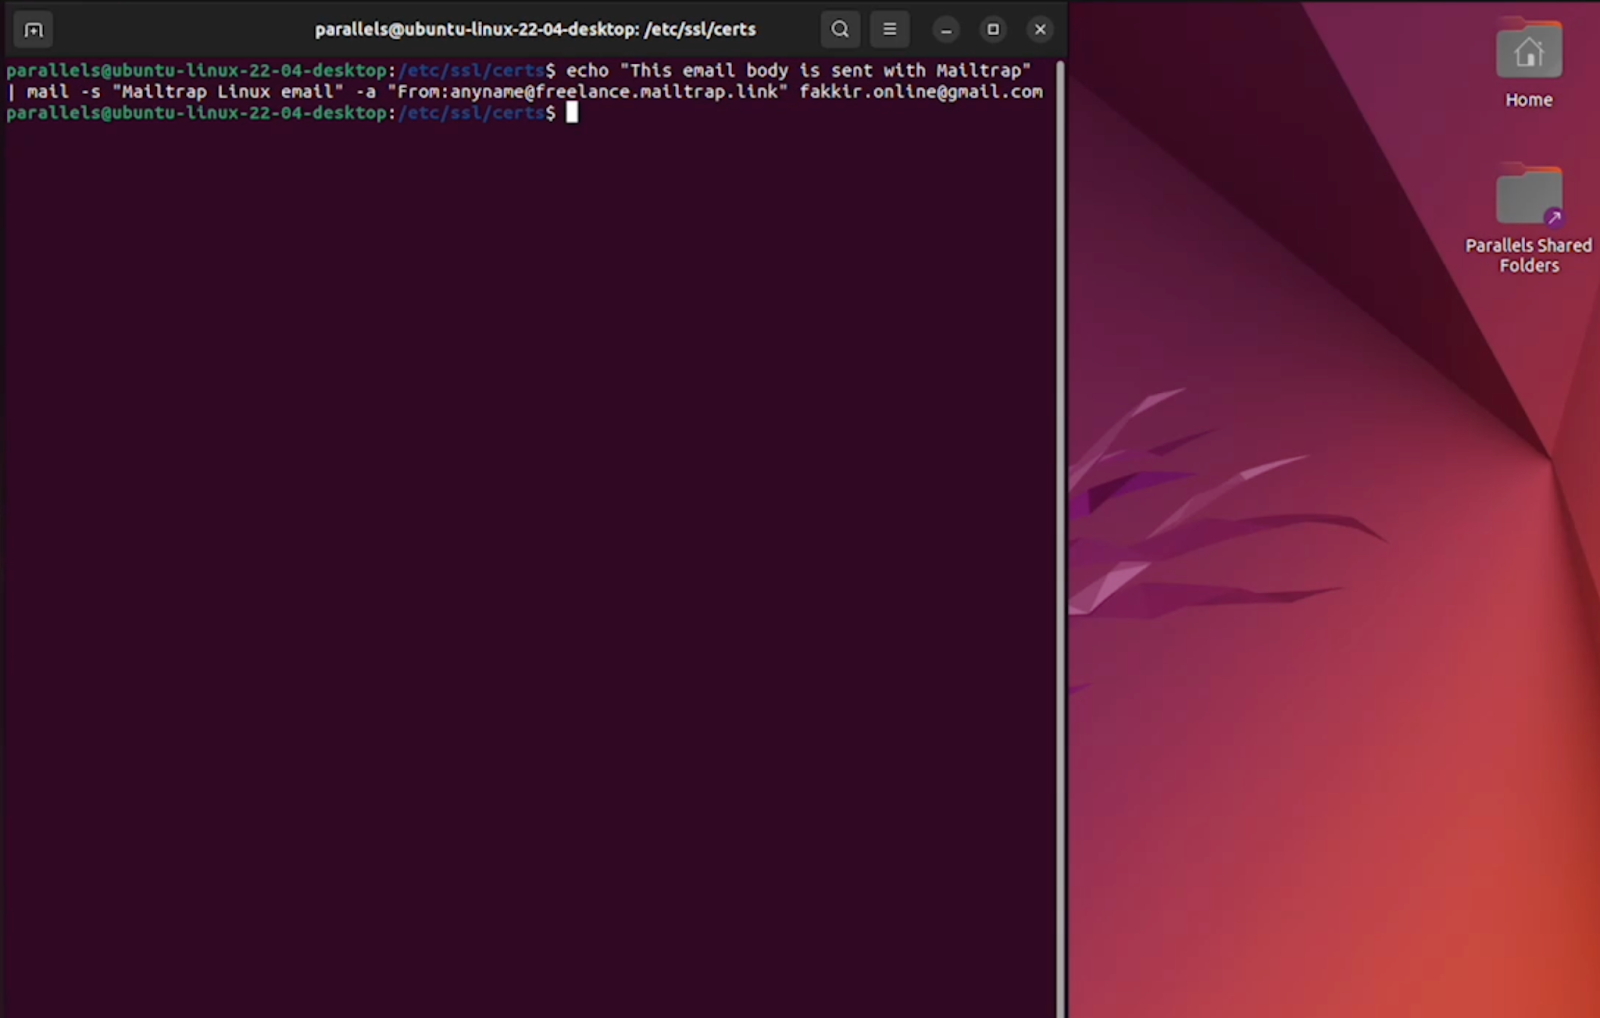
Step 5: Send an email
Now that mail is installed and configured, you can send an email using the following command:
echo "This email body is sent with Mailtrap" | mail -s "Mailtrap Linux email" recipient@example.comYou can change the body and the subject in the echo command, and the recipient, of course.
The mpack command
The mpack command enables you to encode a file into MIME format, then email the message to one or more recipients. Of course, the command can also decode a message. And it allows you to post directly to multiple newsgroups.
But why is this command useful?
Aside from what’s already mentioned, mpack supports character sets other than ASCII. Plus, you can include attachments such as application programs, audio, images, and videos. On that note, the useful command options include:
c– allows you to label the type of content to be used – audio, image, video, etc. If unspecified,mpackautomatically analyzes the message content type.n– represents the command option to post to newsgroups. Should you use the option, make sure to separate the newsgroups with commas.m– allows you to set the maximal number of characters if you need to split a large message into smaller chunks. By default, thempackcommand has a character limit equal to the SPLITSIZE variable. If you specify the maxsize to 0, there’s no limit to the message you generate.
Here’s how to use it:
Step 1: Install mpack
If you’re running a Debian-based distribution like Ubuntu, you can use the following:
sudo apt-get install mpackIf you’re running a Red Hat-based distribution like CentOS, you can use the following:
sudo yum install mpackStep 2: Create your email
Create the email you want to send in a text editor and save it as a plain text file with a .txt extension. Be sure to include the recipient’s email address, subject, and body text.
For example, create a file called email.txt with the following content:
To: recipient@example.com
Subject: You are awesome!

This is the body of the email sent with Mailtrap.
Step 3: Attach files
If you want to attach files to your email, you can use the following command:
mpack -s "You are awesome!" /path/to/file recipient@example.comReplace <strong>/path/to/file</strong> with the path to the file you want to attach, and recipient@example.com with the email address of the recipient.
Important Note: The mpack command doesn’t support sending multiple attachments.
Step 4: Send your email
Now, that you have created your email and attached a file, you can send it using the following command:
mpack -s "You are awesome" email.txt recipient@example.com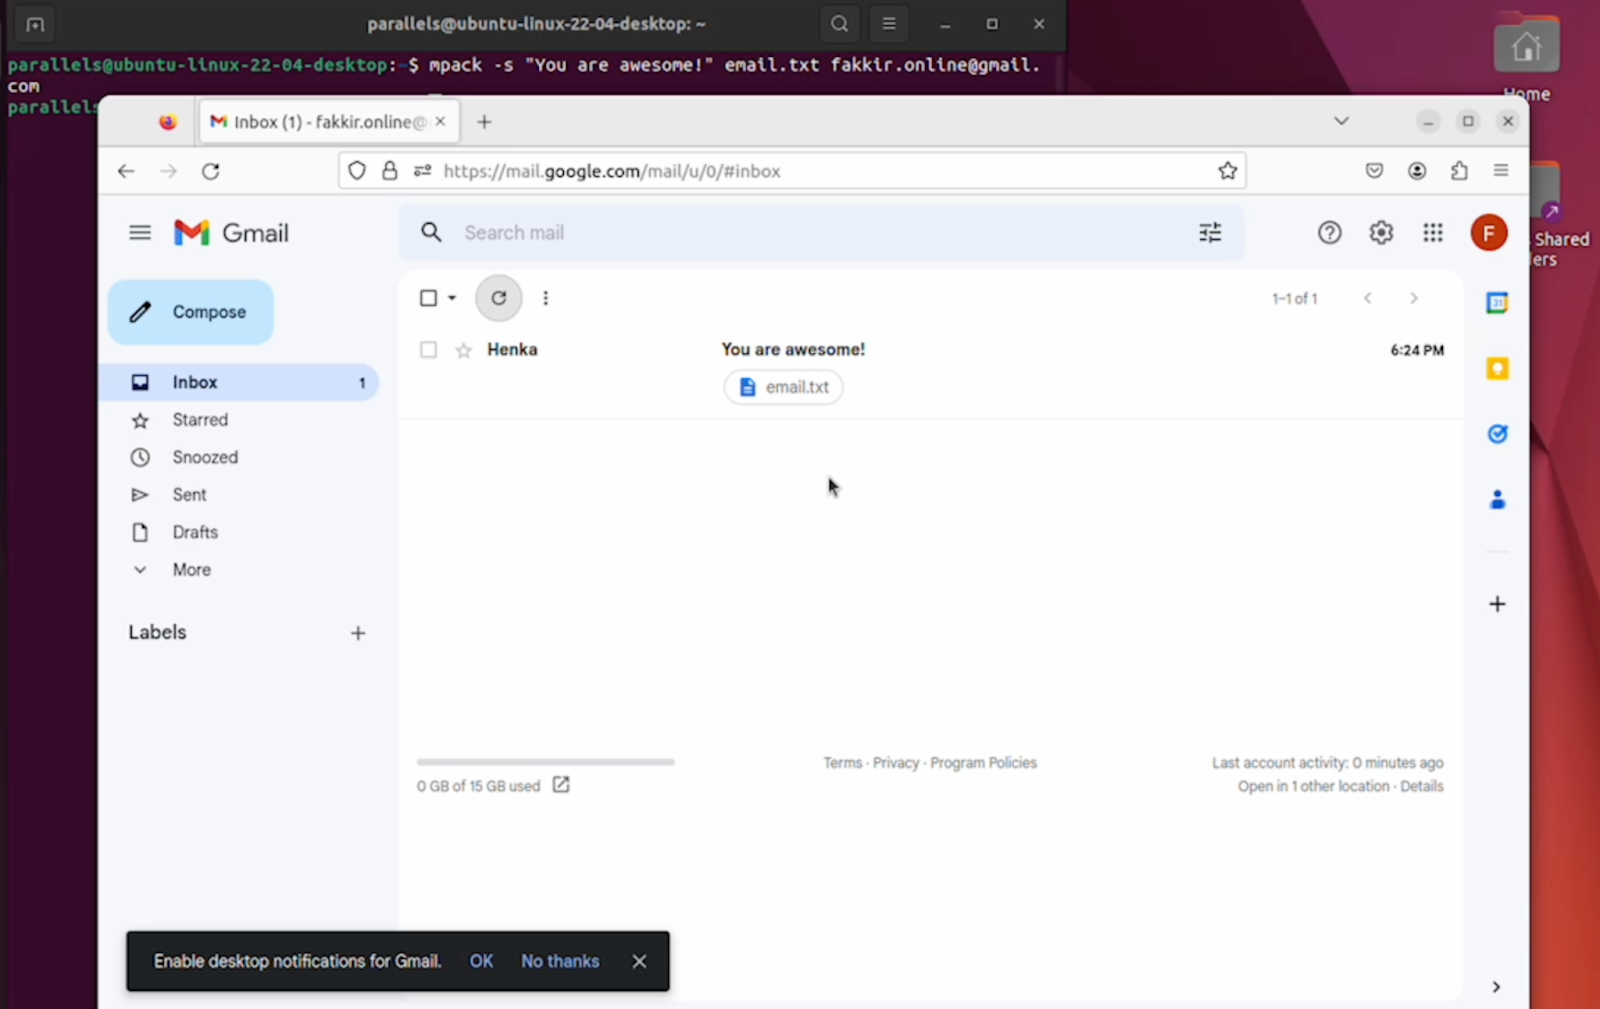
The mutt command
The mutt command is a more advanced command-line email client that can be used to send emails from the command line in Linux. It supports MIME, color terminals, and threaded sorting. Other pros of using mutt include:
- It can facilitate mailing lists
- Supports about ~20 programming languages
- Features DNS support
- Multiple mailbox format support – MMDF, maildir, MH, mbox, etc.
Now, here’s how to use it:
Step 1: Install mutt
On Debian-based distribution like Ubuntu, use the following command to install it:
sudo apt-get install muttOn Red Hat-based distribution like CentOS, use the following command:
sudo yum install muttStep 2: Compose and send an email
Now that mutt is installed, you can compose and send an email using the following command:
echo "This is a test emails sent from Mailtrap" | mutt -s "You are awesome!" -- recipient@example.comYou can replace the body, subject, and, of course, email recipient.
You can also attach files to your email using the -a option:
echo "This is the body of the email" | mutt -s "Email subject" -a /path/to/attachment -- recipient@example.comMake sure to replace /path/to/attachment with the path to the file you want to attach.
The ‘mutt’ command also supports adding multiple attachments, check the snippet below.
echo "This is the body of the email" | mutt -s "Email subject" -a file1/path.txt -a file2/path.txt -a file3/path.txt -a file4/path.txt -- recipient@example.com
Send emails using Mailtrap Email Sending API
The following sections tell you how to create a Mailtrap account and get your Email Sending API token. Note that the API method uses the curl command to send emails with Linux using a Bash script.
Step 1: Create a Mailtrap Account and verify a domain
Go to the Mailtrap website and sign up for an account. Then navigate to Sending Domains, add your domain, and verify it.
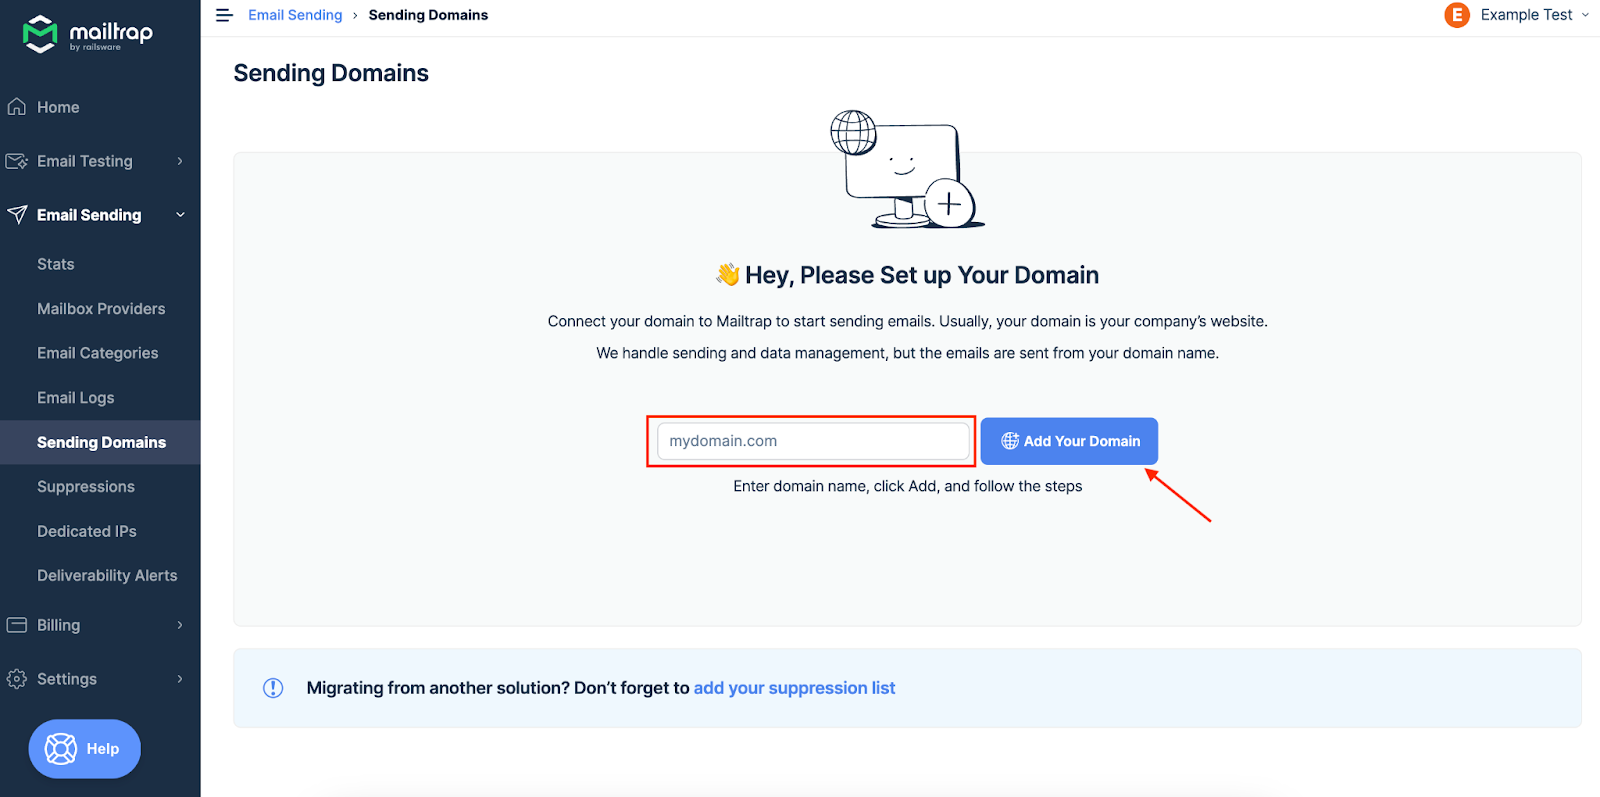
If you need a tutorial for that, check our Knowledge Base article – Sending Domain Setup or watch the video we prepared for you if you’re a visual learner.
Important Notes:
- Domain verification may take up to 72 hours. If you want to get your domain verified faster, please contact support@mailtrap.io.
- The steps assume you have
curlcommand installed.
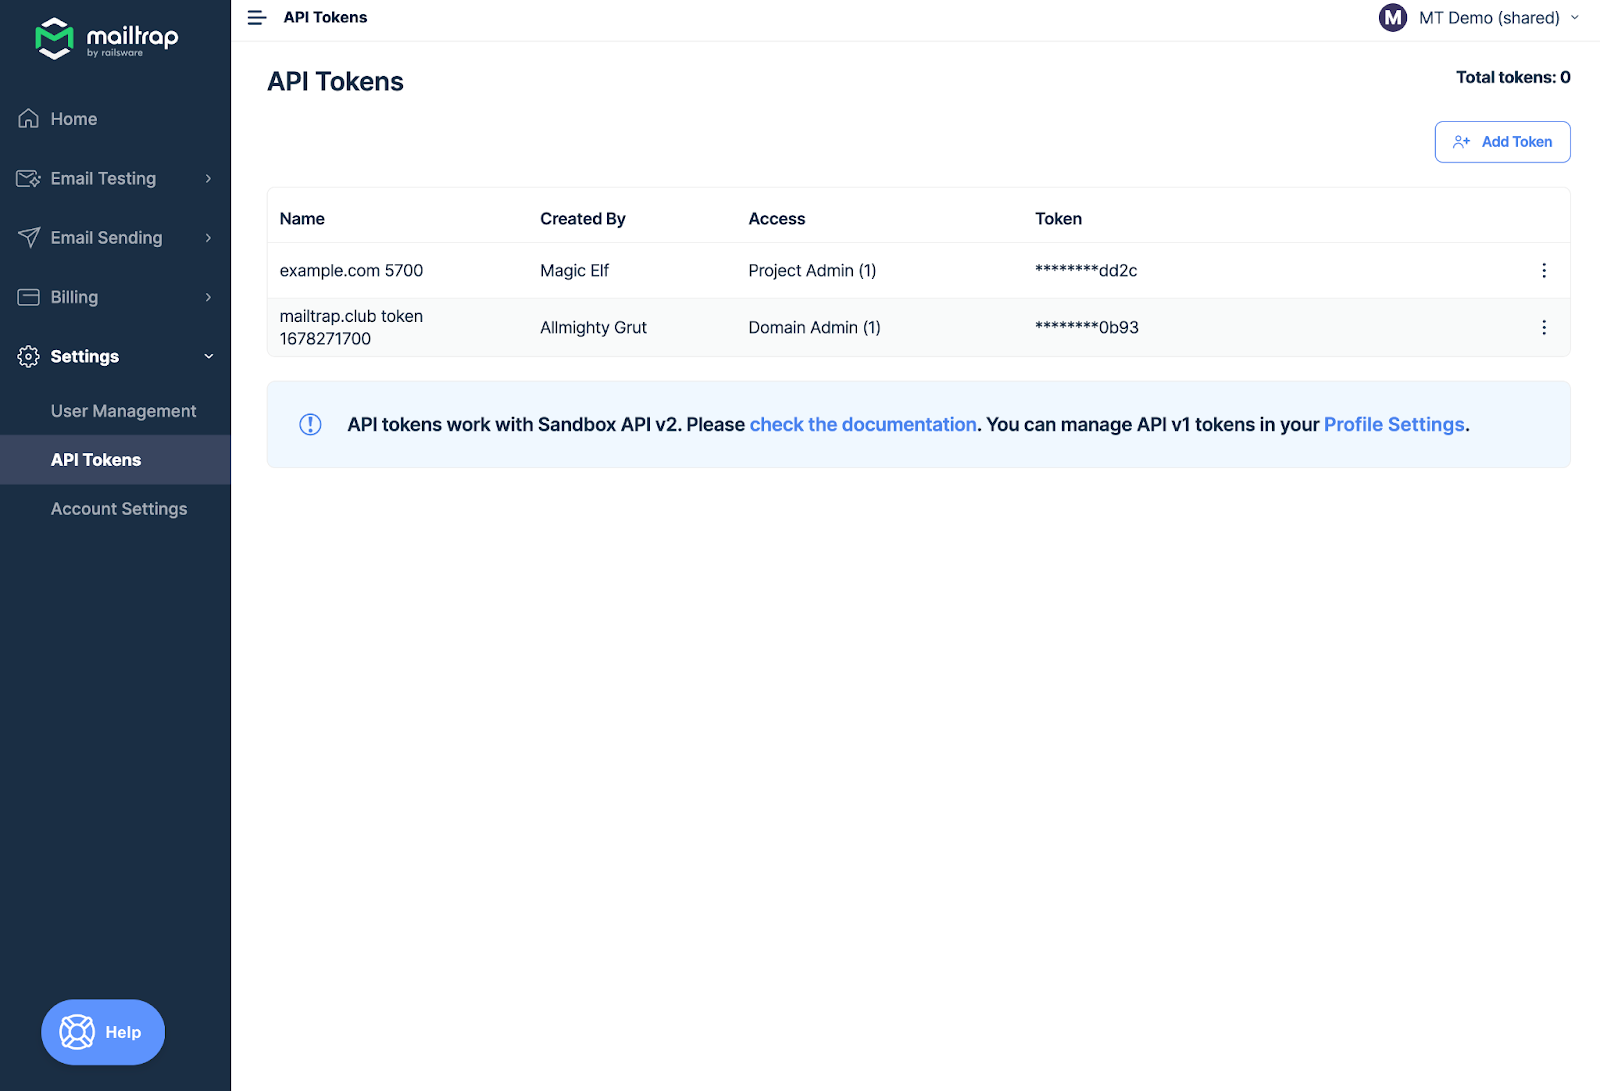
Step 2: Get Your Mailtrap API Token
You can find your API token under Settings > API Tokens.
Step 3: Inspect your configuration (Bash script)
To send an email using the Mailtrap Sending API, you will need to make a POST request to the Mailtrap API. Here’s an example Bash script that sends an email using the Mailtrap Sending API:
#!/bin/bash
api_key="your_Mailtrap_api_token"
curl -X POST "https://send.api.mailtrap.io/api/send" \--header "Authorization: Bearer $api_key" \--header 'Content-Type: application/json' \--data-raw '{"from":{"email":"youremail@example.com","name":"Mailtrap Test"},"to":[{"email":"fix"}],"subject":"You are awesome!","text":"Congrats for sending a test email with Mailtrap!","category":"Integration Test"}'
In this script, the curl command is used to make a POST request to the Mailtrap API. The API key, sender and recipient email addresses, subject, and body of the email are all passed as data in the request.
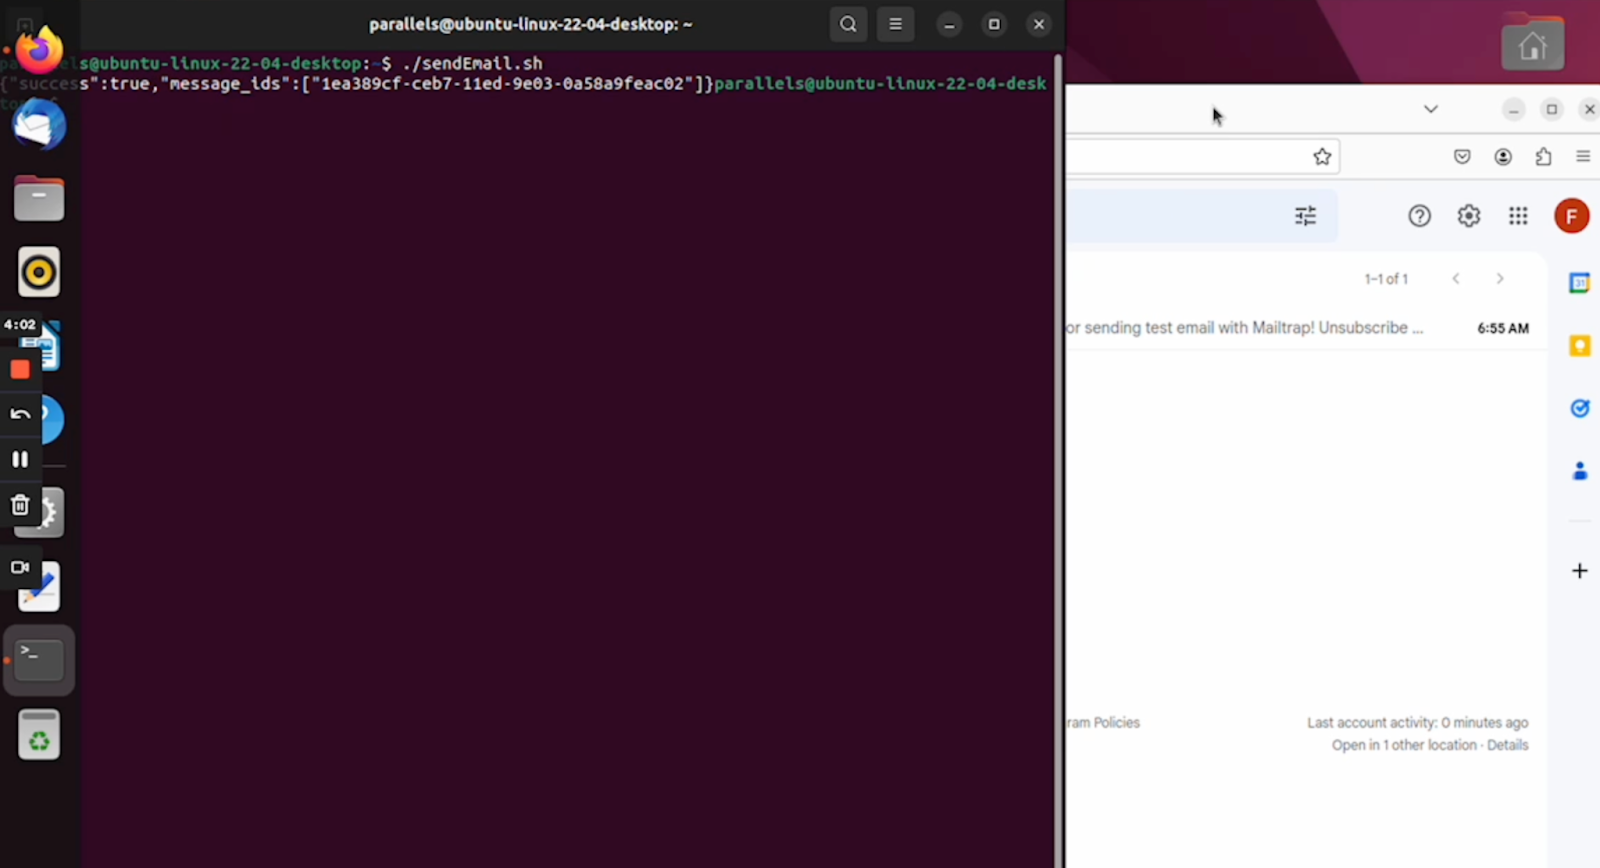
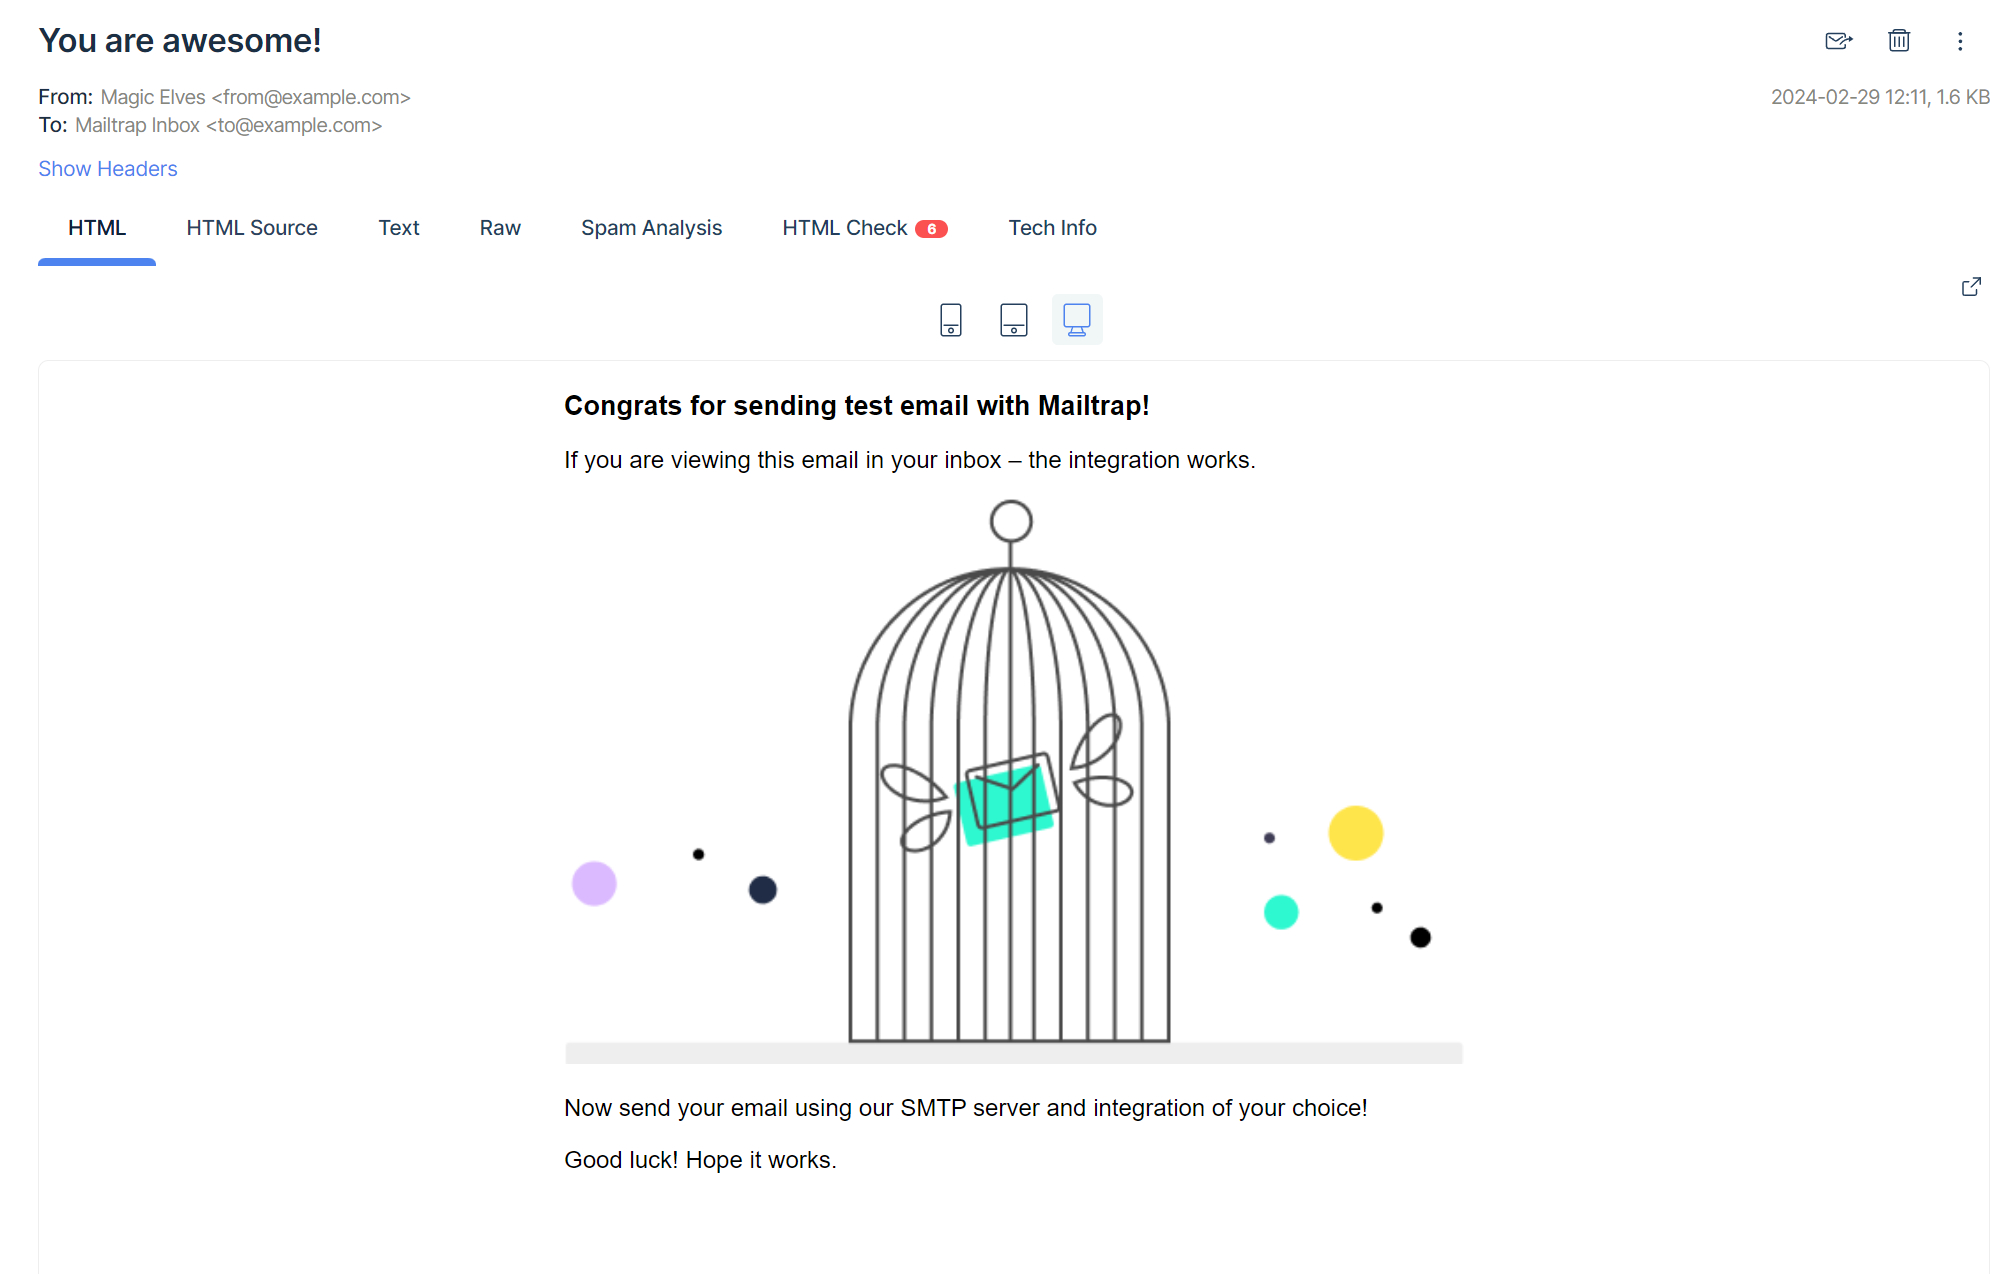
Step 4: Check Mailtrap Email Logs
After running the script, you can check your Mailtrap Email Logs to see if the email was sent successfully.
More commands to send emails in Linux
The swaks command
The swaks command is called the SMTP Swiss army knife for a number of reasons.
It’s among the most flexible, feature-rich tools for testing SMTP connections and sending emails from the command line in Linux. Yes, it’s fully scriptable, and there’s more.
swaks also handles:
- Pipelining
- Authentication
- TLS
- LMTP and ESMTP versions of the SMTP protocol
- Multi-transport method (internet and Unix domain sockets, plus spawned processes piping)
- Maximum command-line configurability
We won’t go into further details and configuration options, as swaks is among the commands that may merit their own article. Anyhow, the beauty’s that it facilitates a pretty straightforward email sending.
Here’s the snippet:
swaks --to recipient@example.com --from youremail@example.com --server live.smtp.mailtrap.io:587 --auth-user <api> --auth-password <Mailtrappassword> --tlsReplace the recipient and sender addresses with your credentials, and you can also change the email subject and body.
The ssmtp command
Note that ssmtp is a very simple command – it’s only an MTA with its own set of limitations. To be more specific, you can’t do the following:
- Expand aliases
- Receive emails
- Manage queues
Nonetheless, there’s a use case for ssmtp. It’s very good at automatically relaying emails to external addresses. For instance, you can use ssmtp to send automatic system alerts from your app. These may include sending to multiple addresses as well as attachments.
Step 1: Install ssmtp
Use the following command to run the installation:
sudo apt-get install ssmtpStep 2: Configure ssmtp
With ssmtp installed, you’ll need to configure it to work with your email provider. You can do this by editing the /etc/ssmtp/ssmtp.conf file.
Open the file in your favorite text editor, and find the following lines:
root=yourusername@gmail.com
mailhub=mail
hostname=yourcomputer.local
FromLineOverride=YES
Replace the credentials so that they align with your email provider. If you’re using Mailtrap, you would replace it with:
root=youremail@example.com
mailhub=live.smtp.mailtrap.io:587
hostname=yourcomputer.local
FromLineOverride=YES
AuthUser=youremail@example.com
AuthPass=yourMailtrapSMTPpassword
UseSTARTTLS=YES
Save and close the file.
Important note: If you’re a Mailtrap user, the hostname= parameter needs to list a domain verified with us. Otherwise, the method won’t work.
Step 3: Send an email
Now that ssmtp is installed and configured, you can send an email using the following command:
echo "This is the body of the email sent with Mailtrap" | sudo ssmtp recipient@example.com -s "You are awesome!"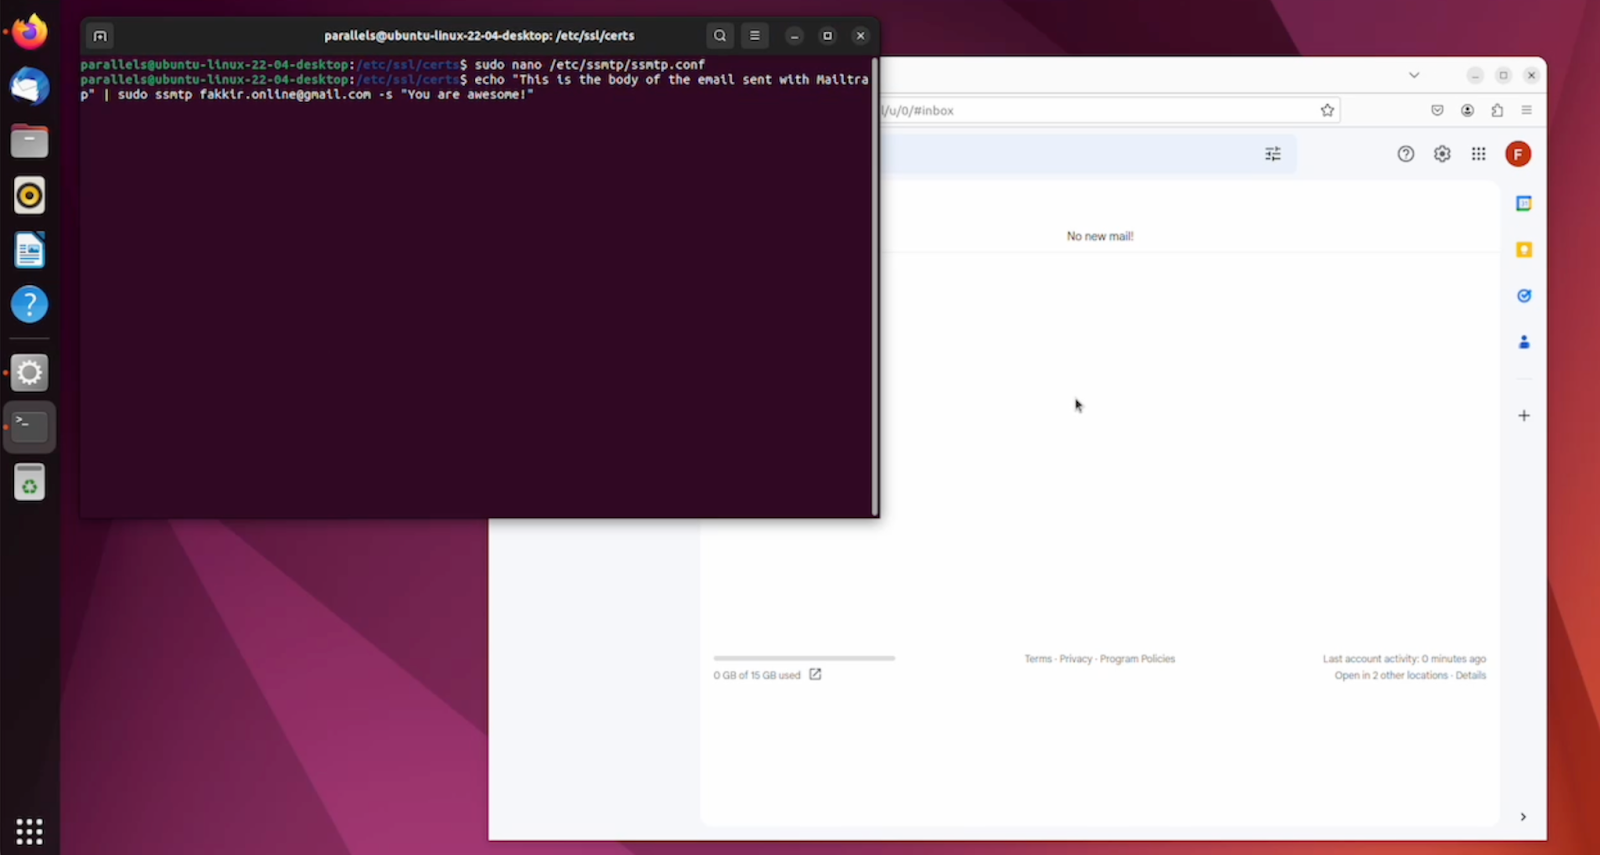
And if you want to send an email with an attachment, you can use the following command:
echo "This is the body of the email" | sudo ssmtp recipient@example.com -s "Subject" -A /path/to/attachmentJust replace /path/to/attachment with the path to the file you want to attach to your email.
Important Notes:
- The support for ssmtp command got stopped, so you may want to use msmtp or OpenSMTP instead. However, at the time of writing it worked on our side, and sent a test email.
- If ssmtp command fails, try curl.
The openssl command
Generally, openssl is more of a cryptography toolkit to make network communication more secure. It’s typically used for SSL and TSL, but you can also do the following:
- Check a certificate expiry date/time
- Inspect certificate extensions
- Check the certificate itself
- Generate random data
- Send emails
- Etc.
That said, it’s safe to assume that openssl is among the most secure, layered methods (PLAIN, LOGIN) out there. Here’s how to use it.
Step 1: Connecting to a port
To send emails via openssl you first need to connect to port 587, using the TSL protocol.
openssl s_client -starttls smtp -connect live.smtp.mailtrap.io:587If you want to use a different port, just specify what it is at the end of the command.
Note:
Upon connecting to the server, there’ll be some output regarding the SSL certificates and session. That’s expected, and you’ll then get a confirmation message, similar to the one below.
220 SG ESMTP service ready at ismtpd0002p1lon1.mailtrap.ioStep 2: Starting the conversation
Before sending emails, you need to start the SMTP conversation, using the EHLO command, and identify yourself. Use the command below to pass your domain or IP address as an argument.
EHLO yourdomain.comThen, the EHLO command typically outputs the following.
250-live.smtp.mailtrap.io
250-8BITMIME
250-PIPELINING
250-SIZE 31457280
250-AUTH PLAIN LOGIN
250 AUTH=PLAIN LOGIN
Step 3: Authentications
As you can see from the previous snippets, the authentication mechanisms include LOGIN and PLAIN, and here are the details.
PLAIN
The important thing is that PLAIN requires you to pass a base64 string with a password and username. Note that each line demands a NULL byte prefix.
Run the command below to create the given string with base64 binary.
echo -ne "\0username\0password" | base64
FEBzWXJmUQ7KARMmc8R2c9El
Note: For Mailtrap users, the default username is ‘api’ and the passcode is actually your API key.
Next, pass the base64 string to the AUTH command.
AUTH PLAIN FEBzWXJmUQ7KARMmc8R2c9ElIf successful, the output is as follows.
235 Authentication successfulLOGIN
You’ll also need to use base64 encoding, but this time you encode each variable separately. Here are the snippets to generate the strings:
echo -ne "username" | base64
bMlWdn7kdPE=
echo -ne "password" | base64
uLPsv9hqlpM=
Proceed to authenticate the SMTP server.
AUTH LOGINThe system first prompts you for the username and the password, before confirming the authentication.
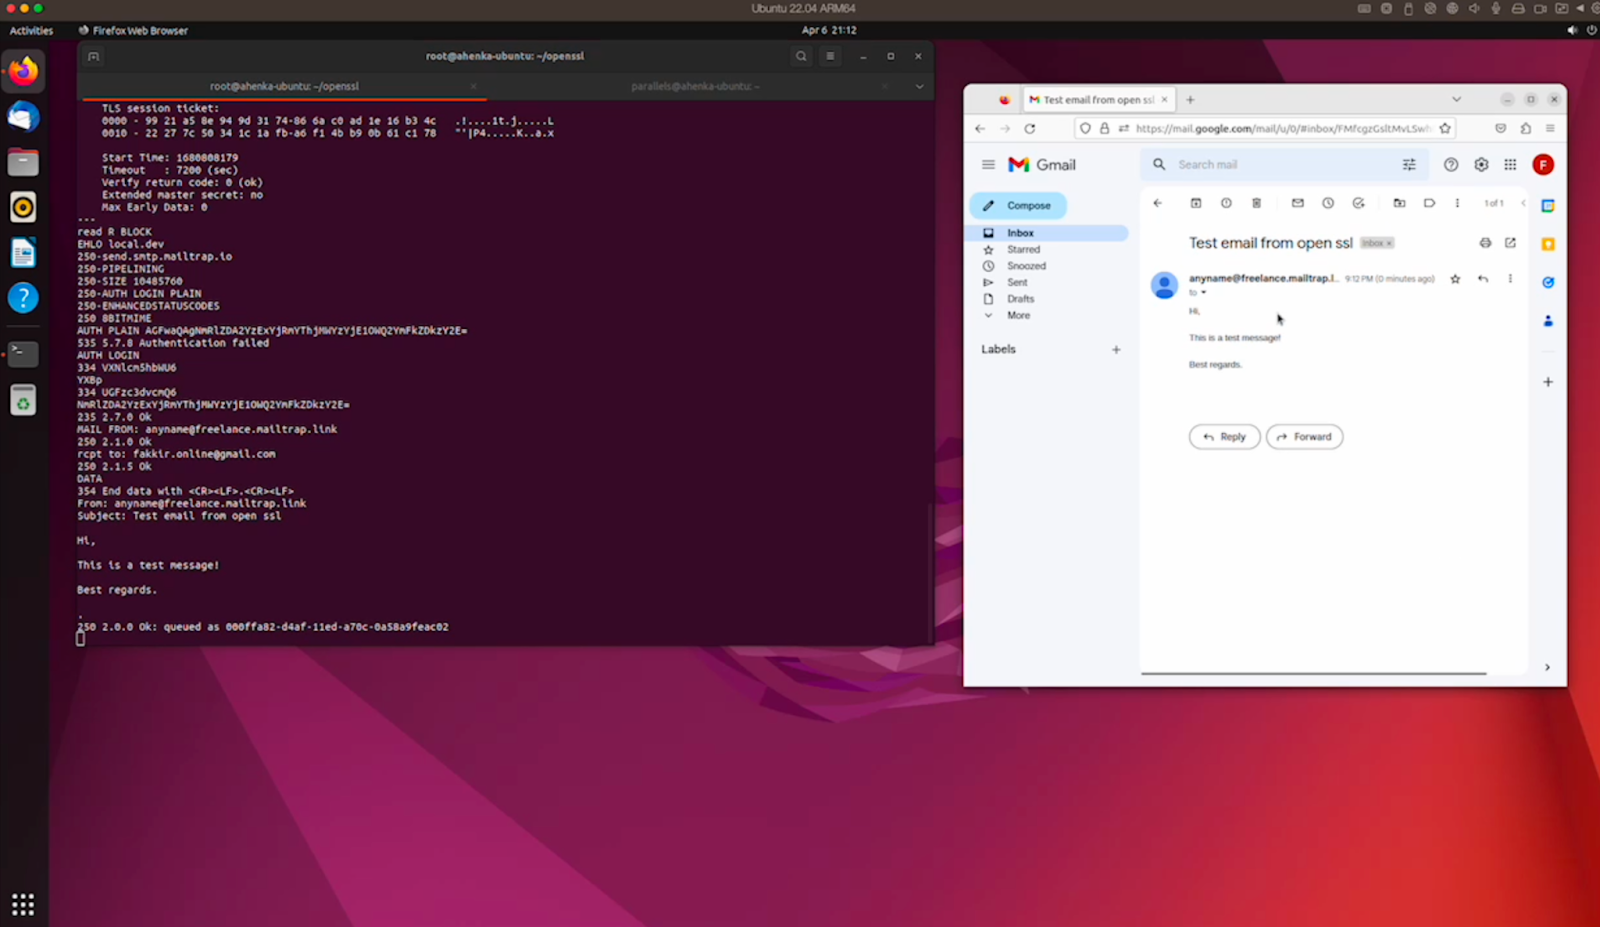
Step 4: Sending an email
Since you have everything ready, it’s time to send the email, check the basic snippet below.
MAIL FROM: sender@example.com
250 Sender address accepted
rcpt to: john.doe@example.com
250 Recipient address accepted
DATA
354 Continue
From: sender@example.com
Subject: Test message!

Hi,

This is a test message!
.
250 Ok: queued as cakMUL5FSTjT37cM8oKpEq
Running the snippet sends the message and you get the 250 Ok response as a confirmation.
To end the session, just type QUIT.
Important Notes:
- You have to begin with
MAIL FROM– the command instructs your SMTP that it’s a new email transaction. DATAcommand is used to pass both the email body and the header.- End your message with a dot (
.) at the end. - When using
openssl, thercpt tohas to be lowercase.
How to send different types of emails?
HTML
To send an HTML email in Linux, you can use the ‘mail’ command and pipe the HTML content to it. Here’s an example Bash script:
#!/bin/bash
recipient="example@example.com"
subject="HTML Email"
body="<html><body><h1>Hello!</h1><p>This is an HTML email.</p></body></html>"
echo "$body" | mail -a "Content-Type: text/html" -s "$subject" "$recipient"
In this script, the mail command is used to send the email, with the HTML content passed to it using the echo command. The -a option is used to specify the content type as HTML.
With Attachments
Previously, we covered how to add attachments to most of the commands. But there’s also the uuencode method, which encodes the attachment, then sends it with the mail command.
Here’s an example Bash script:
#!/bin/bash
recipient="example@example.com"
subject="Attachment Email"
body="This email has an attachment."
attachment="/path/to/file.txt"
encoded_attachment=$(uuencode "$attachment" "$(basename "$attachment")")
echo "$body" | mail -s "$subject" -a "$encoded_attachment" "$recipient"
In this script, the uuencode encodes the attachment, and the encoded attachment is then passed to the mail command using the -a option.
To Multiple Recipients
To send an email to multiple recipients in Linux, you can simply separate the email addresses with commas. Here’s an example Bash script:
#!/bin/bash
recipients="example1@example.com,example2@example.com"
subject="Multiple Recipients Email"
body="This email is being sent to multiple recipients."
echo "$body" | mail -s "$subject" "$recipients"
In this script, the email addresses of the recipients are separated by commas in the recipients= variable, and then passed to the mail command as an argument.
Cute penguins rule!
Linux send email? But, of course 🙂
With commands like mail, curl, swaks, mutt, and openssl, you can send emails with Linux from the comfort of your terminal, without needing to switch to a graphical email client.
Moreover, with the ever-increasing popularity of Linux (in 2027, its market size is expected to reach ~ $16 billion), more and more developers are leveraging its capabilities to build robust systems that cater to their specific needs.
Whether you’re a beginner or a seasoned developer, learning how to send emails via the Linux command line can be a valuable skill that can come in handy at any time. So give it a try and see how it can enhance your workflow.
If you’re hungry for more Linux-related content, make sure to check out our blog and YouTube channel featuring tutorials such as: