Skip to Navigation


Microsoft Outlook is one of the most well-known and reputable email clients, with an estimated 400 million users. However, despite its great popularity, many email marketers have a conflicted relationship with Outlook, largely due to its intricate rendering standards.
These rendering standards can make both creating and testing emails difficult. And this is exactly why many Outlook users opt for using email templates, as once perfected, email templates can be used over and over again to create similar emails, thus avoiding rendering issues.
In this tutorial, we will provide a guide on how to create an email template in Outlook, along with some Outlook tips. So, if you are interested in learning more, keep on reading!
What is a Microsoft Outlook email template?
Just like in Microsoft Word and Excel, templates in Outlook are documents that come with specific details like the message body and/or formatting already included, which don’t need to change from message to message and are available in any version of Outlook.
Templates help save time and effort, which you can then put into more important tasks, such as devising a great email marketing strategy.
How so? Well, with templates, you can create emails using the same ones repeatedly, with minor or even major modifications, of course. Therefore, you don’t have to create new emails from scratch.
They are also quite helpful for beginners who aren’t very familiar with Outlook as a software.
When saved on your device (“File” -> “Save As” -> “Outlook Template (*.oft)”), Outlook templates have the .oft file extension. And by default, the templates folder will be C:\Users\UserName\AppData\Roaming\Microsoft\Templates.
You should write the name of this folder down somewhere so you don’t have trouble knowing where to find Outlook templates later along the line.
With that out of the way, let’s now go through how to set up email templates.
How to create an email template in Outlook
Whether you want to send appreciation emails, a business proposal, a newsletter, a professional email informing customers about new terms and conditions, or something completely different more than once, you can use Outlook email templates.
A template will come with the same email content each time, meaning you will only have to change a few details for each new email sent to a different email list recipient. So how to add a template in Outlook?
The build email template process consists of the following steps:
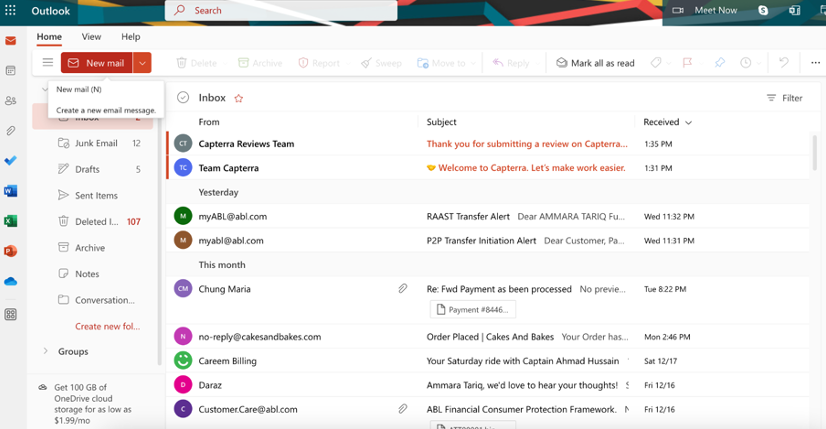
- Open Outlook desktop or the Outlook 365 web app and click on the Home tab in the top menu bar. Then select the “New Email” option from the displayed dropdown menu. As an alternative to this, you can simply press “Ctrl + N” on your keyboard.
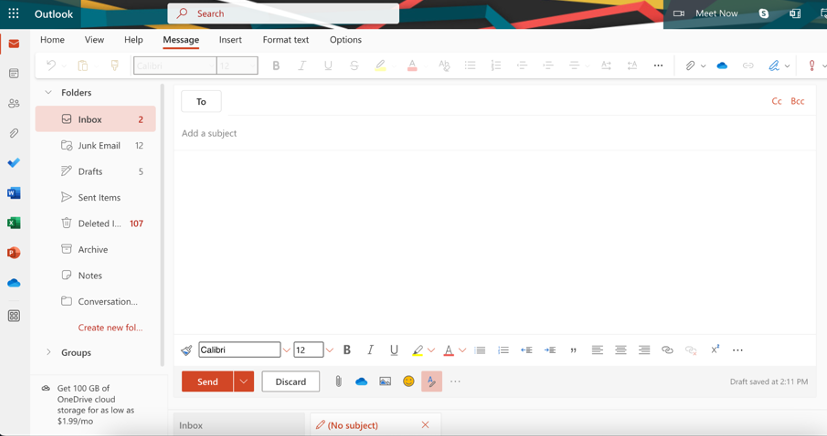
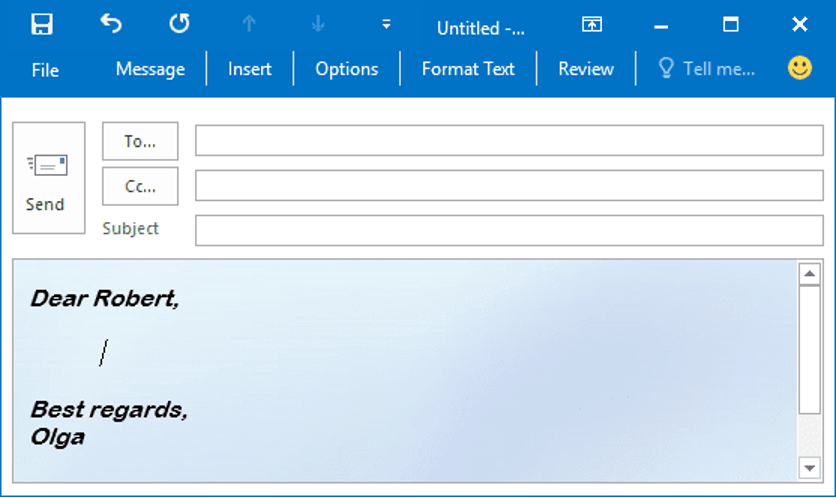
- After initiating the creation of a new message, a blank message window will appear, as shown in the image below.
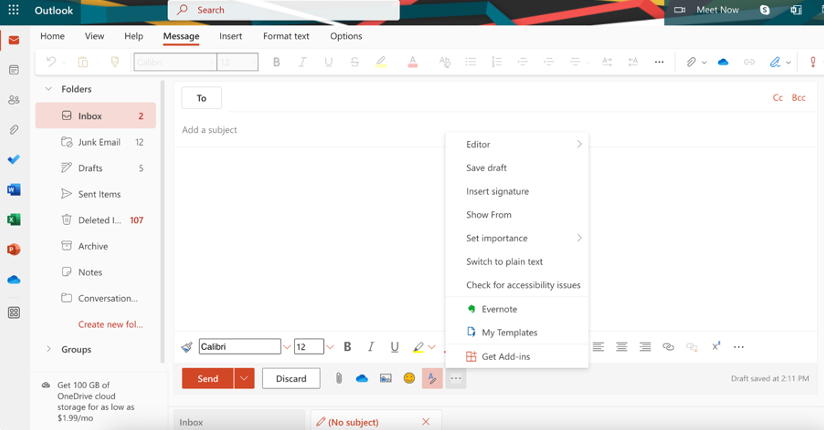
- To now switch from working with messages to working with email message templates, click on the three dots at the bottom of the message window. This will open a menu containing the My Templates add-in as an option. Select this option.
- After you select “My Templates”, a new dialog box will pop up on the right side of your Outlook dashboard. There, you will see the default Outlook templates such as “I’ll reply later”, “I’m running late”, and “Lunch?”
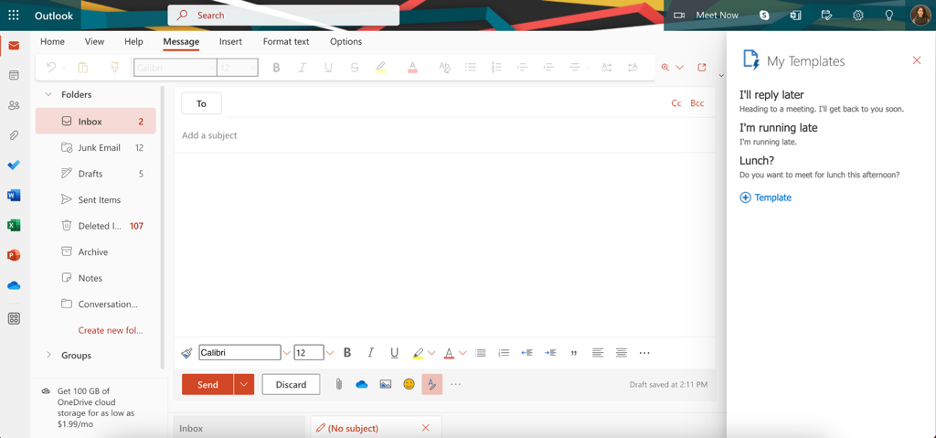
- Next, you need to decide whether you want to use any of the default templates and customize them according to your needs or create a new one by clicking the “+Template” button in the My Templates window.

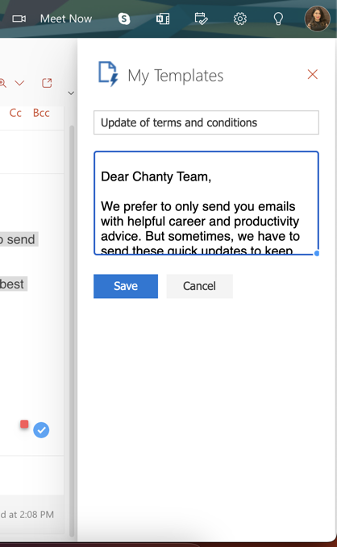
- If you decide to create a new template, a form will appear using which you need to fill in details for the template – the title and the content. Once all details have been filled in, click the “Save” button in blue.
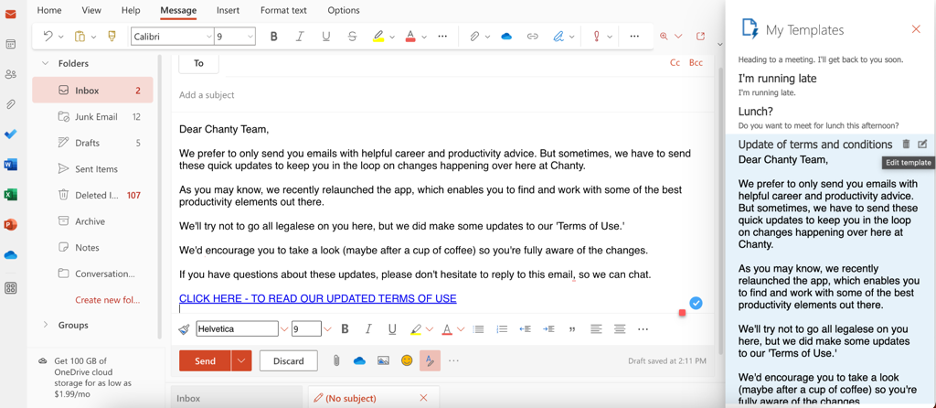
- At this point, your template is ready for use. But you also need to know how to delete a template or edit it. Both actions are completed using the options displayed in the My Templates window, with the editing option being intended only for when you what to change email template slightly. We will cover more advanced editing in the next section of the article.
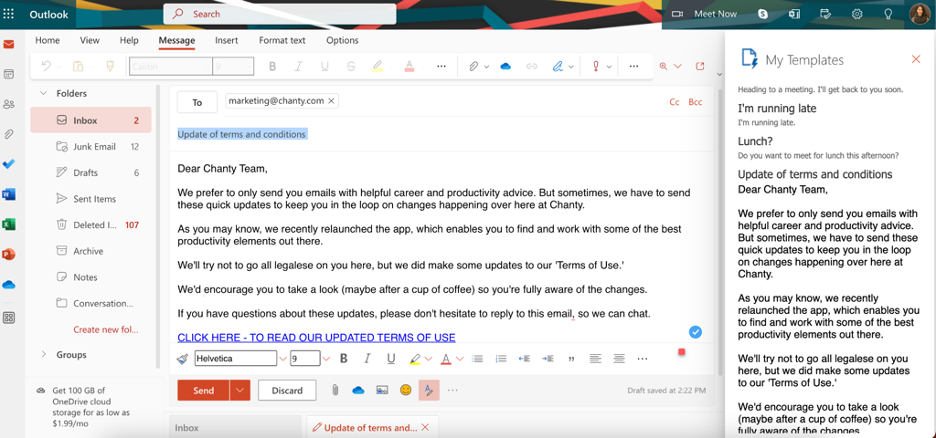
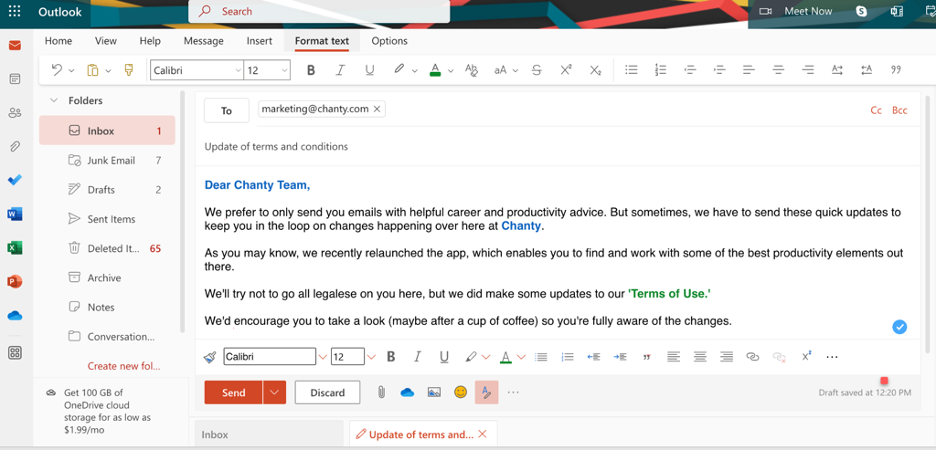
- If you now select your template, its content will show up in the Outlook message window, where you can further enhance it with additional text, attachments, audio, or images.
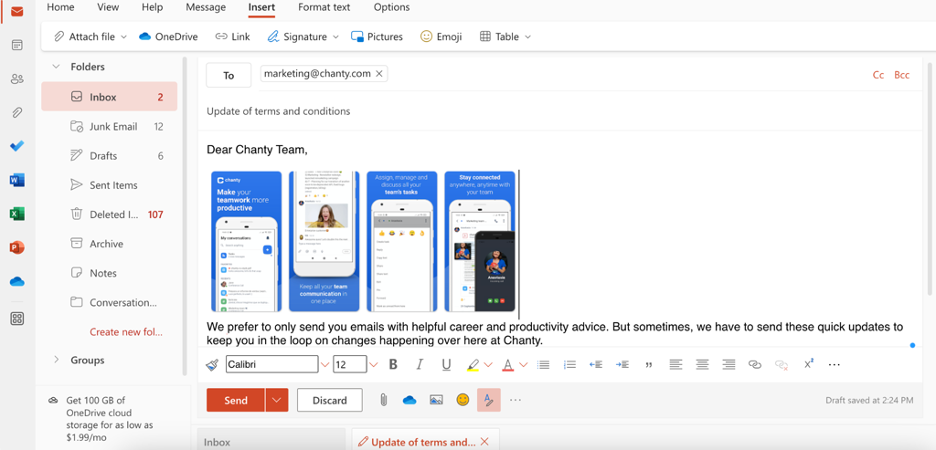
- Lastly, before sending an email created with the template, remember to add the desired subject line and the recipients you want the email to be sent to.
How to edit Outlook email template content
Suppose you want to change the font, color, or spacing to improve or further customize Outlook email template.
To do that, first, choose the template you want to edit so its content loads in the message window.
Then, select the “Format Text” option in the top menu bar, which will provide you with a range of different editing tools. Using those, you can change things such as font size and style, text color, spacing, indentation, etc.
Once you are happy with the edits, feel free to proceed with sending the email.
How to use Outlook features to effectively respond to repetitive emails
Using templates to save time while responding to repetitive emails is the entire point of creating email templates. But besides template creation, Outlook also offers a range of other features that facilitate providing quick and easy responses.
Quick Parts
Quick Parts is an Outlook feature quite similar to AutoText used to save and insert reusable pieces of content. These pieces of content are usually phrases or blocks of text but can also include tables, images, and custom formatting.
So, how do you create a new Quick Parts item? It is quite simple!
Let’s say you want to save some text that you wrote in Outlook as a Quick Parts item.
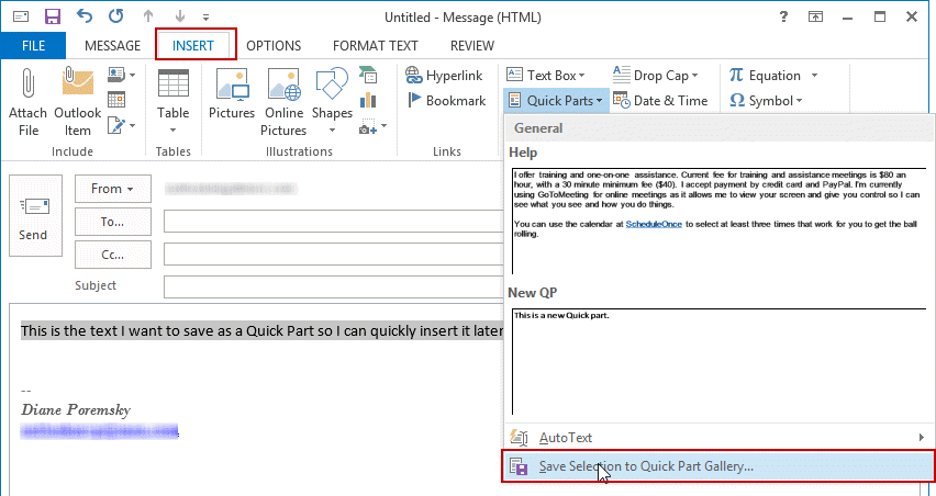
You start off by selecting the text. Then, in the Outlook menu bar, click on “Insert”. This should open up a sub-menu on which you need to click the “Text” option.
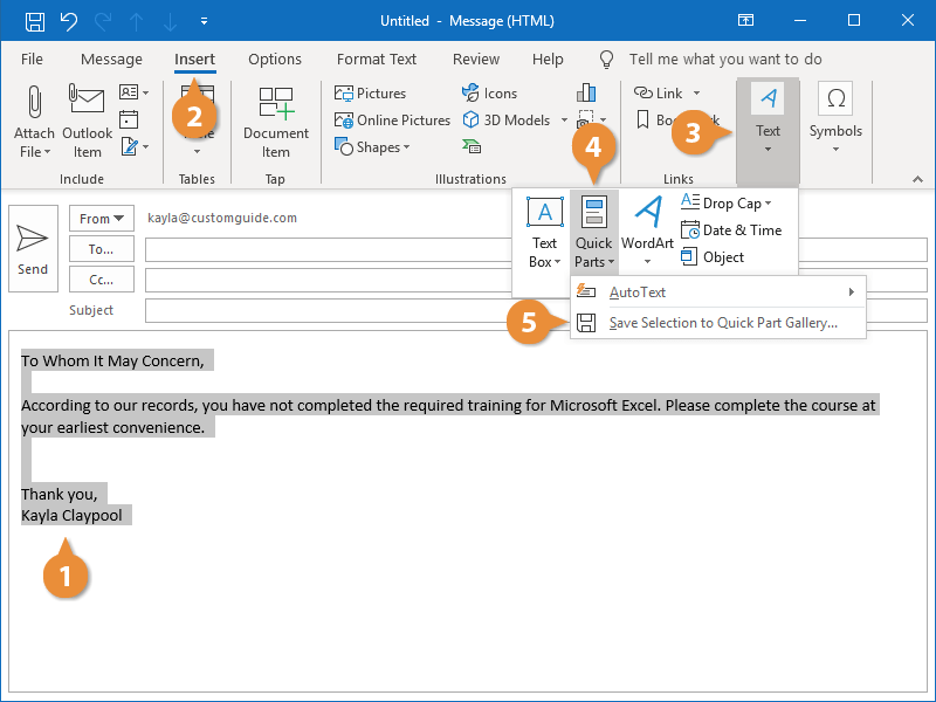
The “Text” option itself will open a new sub-menu with a “Quick Parts” option. Click on this option and then on “Save Selections To Quick Part Gallery”. By doing this, you have successfully saved your text as a Quick Parts item.
Now, to use a saved Quick Parts item, you simply need to type in its file name and press F3 for the file name to be replaced with the full content.
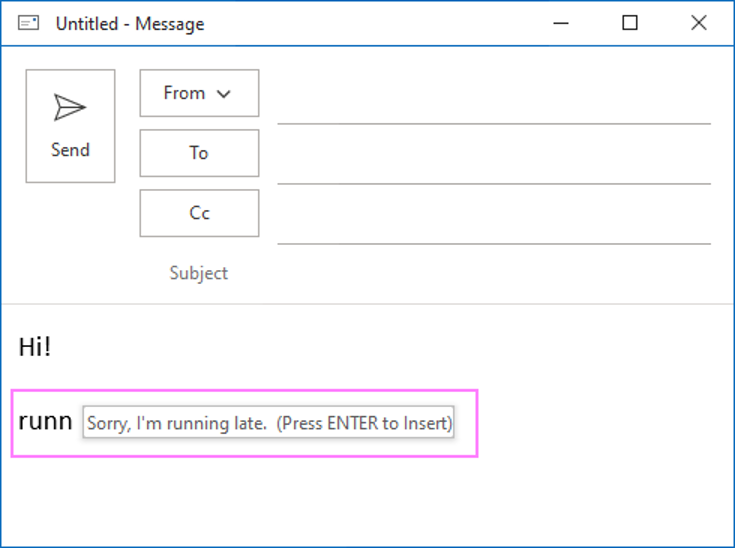
As an alternative, you can also type in part of the Quick Parts item content. This should lead to a suggestion popping up, which you can then use by pressing the Enter key.
Thus far, we have seen that Quick Parts items are very simple to use, but they do come with some downsides.
For starters, the Quick Parts Gallery lacks a search function. Meaning that if there are numerous Quick Part entries, you will have to search through all of them to find the one you need.
On top of that, a Quick Parts item cannot be edited, so you won’t be able to change anything in your previous entries, not even a letter or a word.
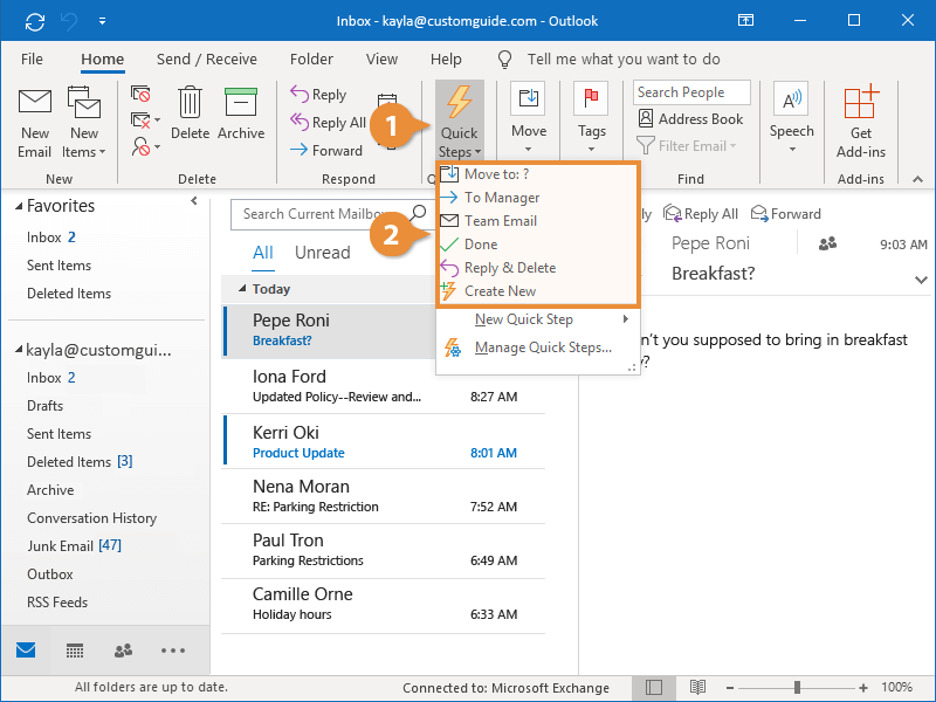
Quick Steps
Quick Steps are shortcuts that let you carry out a sequence of actions in one click. Examples include using an existing template to create a new email, moving emails to a specific folder and marking them as unread, sending a reply and then deleting the original message, and so on. In addition to this, with Quick Steps, you can also prefill the subject, To, Bcc, and Cc fields.
To create a Quick Steps shortcut, click on “Quick Steps” on the menu bar of the “Home” tab. Then select the “New Quick Step” option from the dropdown menu that appears.
Once you have done that, you’ll need to name your Quick Step and select the actions this shortcut should perform.
Existing Quick Steps can be changed by again clicking on “Quick Steps” and then selecting the “Manage Quick Steps” option.
This should open a window containing all your Quick Steps, where you should select the one you want to change and then click on “Edit” to swap the actions, keyboard shortcut, icon, and other details assigned to the Quick Steps.
Lastly, if you want to create a Quick Step email template and send it, the template content will need to be inserted in the “Text” field of the “Edit Quick Step” window when creating the shortcut. But do keep in mind that with Quick Steps, you can only use plain text templates, which might not be suitable for every purpose.
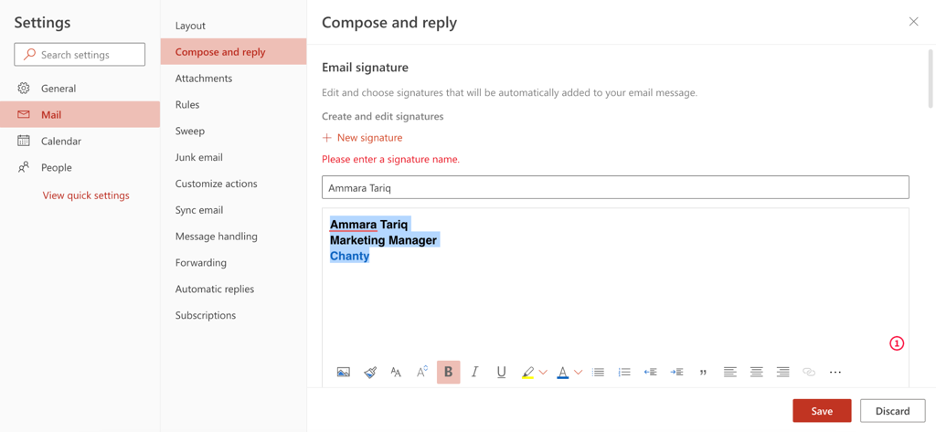
Outlook signature templates
Email signatures are an essential component of official communication since they help build brand recognition.
All Outlook users can use signatures in their emails.
To create one, click on “Signature” in the “Insert” tab.
Next, a window will appear in which you can add and customize your email signature. And if you so wish, you can set a different signature for new emails and replies/forwards.
Outlook Stationery tool
Stationery in Outlook is a tool that provides you with different backgrounds and patterns as well as unified design elements, such as fonts, bullets, colors, and effects for creating customized HTML emails.
Within the tool, there is also a predefined list of Outlook stationery and themes.
To begin using Outlook Stationery, you first need to change the format of your message to HTML by going to “File” – >“Options” – >“Mail” -> “Compose messages” and selecting “HTML” from the “Compose messages in this message format” list.
Then, go to “File” – >“Options” – >“Mail” -> “Stationery and Fonts” – > “Personal Stationery” – > “Theme”. There, you should be able to choose the theme or stationery you want to use, as well as the font options.
It’s important to note that your selection will be applied to all messages.
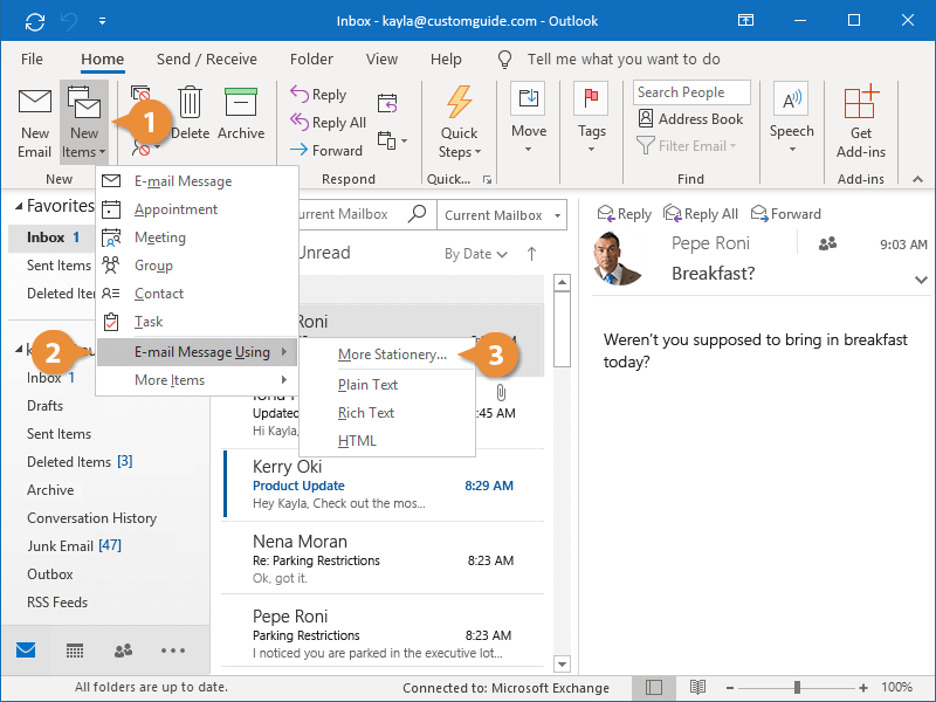
If you want to use a theme or stationery on just one message, go to “Home” – >“New” – >“New Items” -> “Email Message Using” – > “More Stationery” – > “Choose a Theme” and then make your theme or stationery selection.
Finally, compose your new HTML-formatted message and send it off.
To save your message, click on “File” -> “Save As”, and your message should be added to the following location as a .html file or, in other words, an HTML email template:
C:\Users\UserName\AppData\Roaming\Microsoft\Stationery\
How to test your email templates with Mailtrap Email Testing
While Outlook can be great for creating simple email templates quickly and easily, it’s not the best choice for testing those same templates.
Why? Well, for two reasons:
- When testing with Outlook, you can only see how it renders your email template. So, if your template doesn’t look great in, let’s say, Gmail, Apple Mail, or some other popular email client, you will have no way of knowing.
- Using your personal inbox for email testing not only leads to clutter but can also deteriorate your domain reputation.
To avoid dealing with either of the two issues, you should opt for using a proper testing solution such as Mailtrap Email Testing.
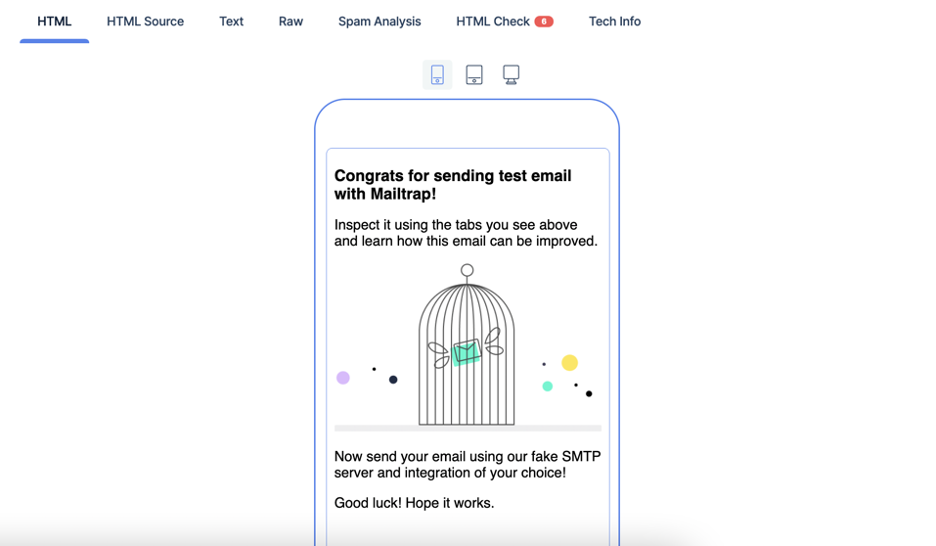
With Mailtrap Email Testing, you will be able to preview emails created with your transactional or email marketing template, analyze the email’s HTML/CSS code, check the support for the code across popular email clients, check the spam score, validate headers, and do much more. And since Mailtrap Email Testing allows you to create and use virtual inboxes to which you then send your testing emails, you have no risk of spamming anyone in the process.
To start testing with Mailtrap Email Testing, first, create a Mailtrap account.
Then, simply use the dedicated email address of your virtual inbox (available for users of the Business and higher plans) to send your first test email from within Outlook.
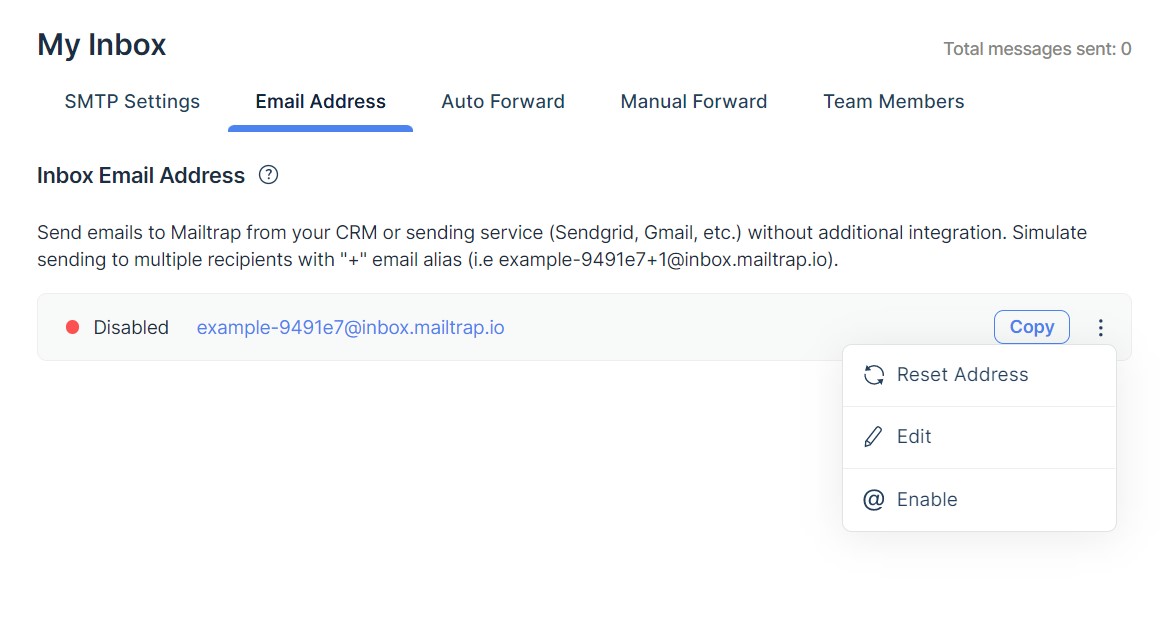
The email should arrive shortly, and you will be able to find it under “Email Testing” – > “Inboxes” in Mailtrap, where you can start with the inspecting and debugging.
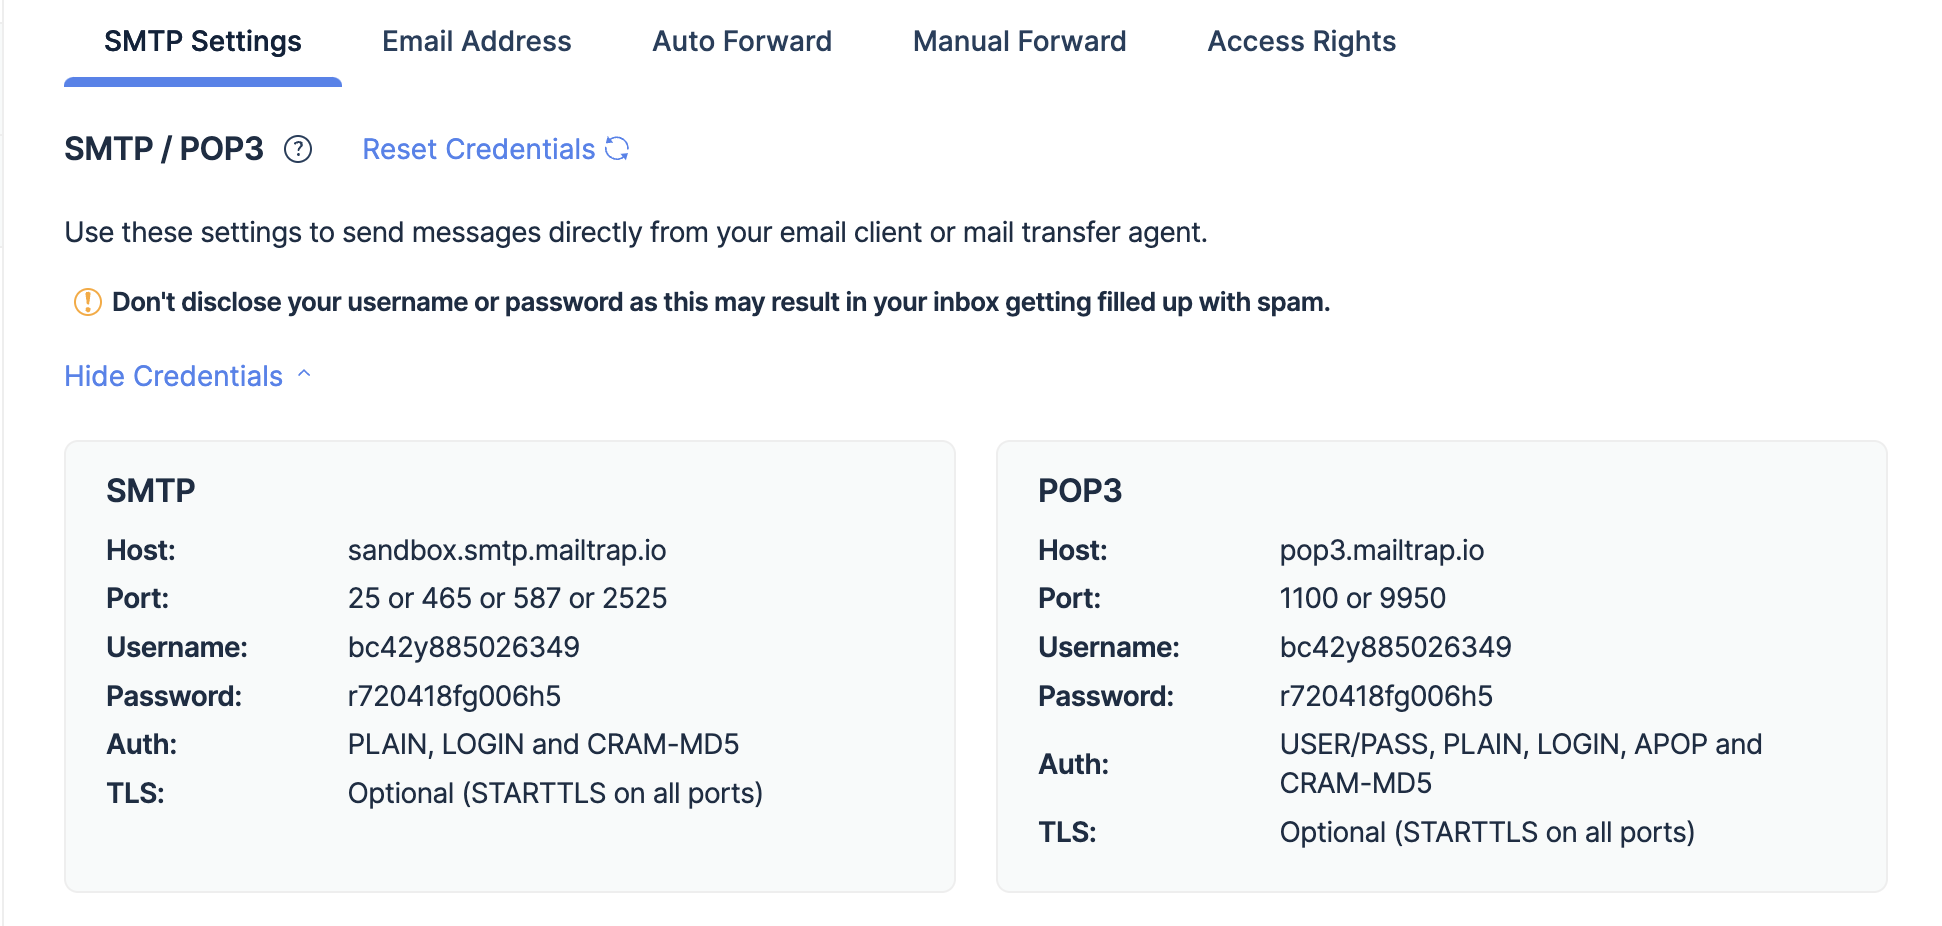
If, on the other hand, you want to send the test email from an email-sending script, MTA, email client, or some other system using SMTP credentials, Mailtrap Email Testing will provide you with the credentials for each of your virtual inboxes.
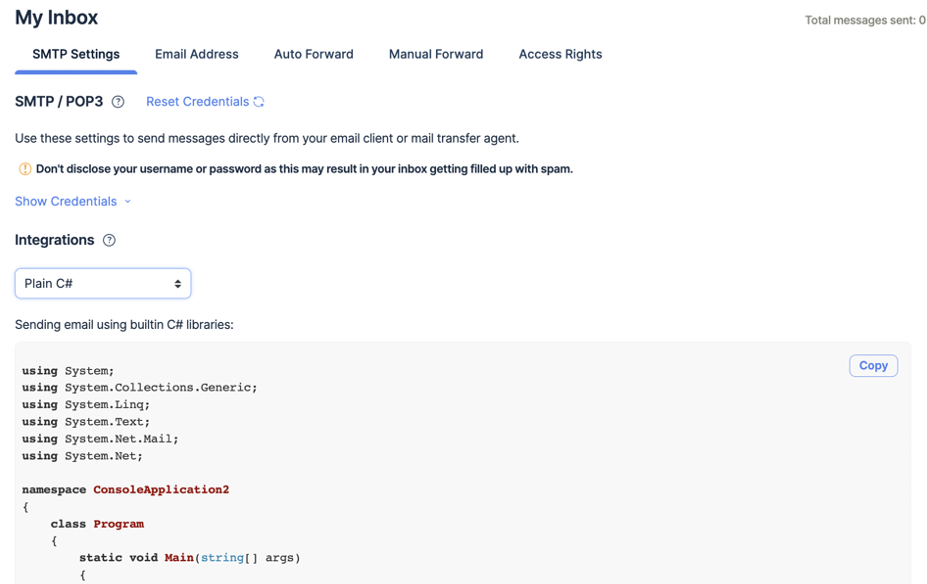
Besides the dedicated email addresses and the SMTP credentials, you also have a third option of sending the test email using a configuration code available in 20+ different frameworks. Pretty convenient, right?
To learn more about the Mailtrap Email Testing setup process, as well as all the features of the solution, please refer to the Mailtrap knowledgebase.
Wrapping up
There are a number of methods for how to create an email template in Outlook.
The best approach to understanding these methods is to become accustomed to the Outlook environment, as you may end up figuring out a dozen more workarounds other than the simple template usage we described in this article. And trust us when we say the more workarounds you know, the better!
For more email-related content, explore our blog, where we cover general topics like email marketing, and email infrastructure, as well as more niche ones like cold email marketing, sending emails using different frameworks, and so on.
Thanks for reading!