Webhooks are a popular API concept to automatically send information (or messages) from one app (endpoint) to another.
More specifically, a webhook is a web callback (also known as Reverse API or HTTP push API) to gather critical information in real time. That is – a webhook relays data to a designated endpoint as soon as an event occurs, meaning you can get and analyze the data output immediately.
Here’s a simple example.
Say your business uses PayPal to receive payments. If so, you can set up a webhook between an accounting application and PayPal to log a payment or an invoice immediately.
With Mailtrap you can recieve events into your app or analytics system to know:
- which emails bounced and were not delivered
- which recipients clicked links or opened your emails
- recipients who unsubscribe from your email or marked them as Spam
- something else you can think about 🙂
Don’t have time or resources to add an endpoint to your app? That’s not a problem – you can try different 3rd party solutions. E.g. use Zapier (and send events to wherever you need: Slack, Spreadsheets, etc), or some cloud functions to track needed events.
This article focuses on how to use webhooks in email infrastructure and the benefits of doing that.
How the webhooks work
Conceptually, there are three steps to webhooks workings, be it email infrastructure or other applications. But note that you might encounter some differences depending on security and use case.
Step One – Public-Web-Accessible URL
You need to have a URL (the endpoint / destination of the webhook data output) and set it up with your webhook provider. Typically, you just set a receiving endpoint on your end.. At Mailtrap, you can do it from our UI.
Most webhooks use the POST command to share data either in XML or JSON format – the latter being more common. Webhooks may also POST information as form data, be it multipart/form-data or form-urlencoded.
The POST method is usually explicitly given by the webhook provider, and you can sometimes choose your preferred method. With Mailtrap, you get a JSON object, regardless of whether you’re using Email API or SMTP service.
Step Two – Protection
Since webhooks transfer data to a public URL, there’s a risk for someone to intercept the URL and abuse the information. Let’s say you’re linking a Paypal fee calculator directly to your PayPal profile and accounts payable software using webhooks. There’s a possibility of exposing some vital and personal payment details. The first action to prevent that is forcing TLS (https) connection, and you shouldn’t start using webhooks prior to that.
When managing sensitive financial data or automating payroll processes, accuracy and security are equally important. Using a W2 form online can help businesses safely generate and distribute wage forms without compromising data integrity.
After forcing TLS, there are a few additional methods to make your webhooks bulletproof.
Basic Auth, for example, is supported by most services and webhook providers (Mailtrap included), and it’s relatively easy to set up.

Adding unique identification tokens to your URL is also an option. But keep in mind that this method sends the authentication/identification token together with the webhook (data) request.
Step Three – Testing
Webhooks can be tricky to test and debug as they’re asynchronous. In other words, you may set up a webhook, wait for an event to trigger data transfer, only to realize something’s broken.
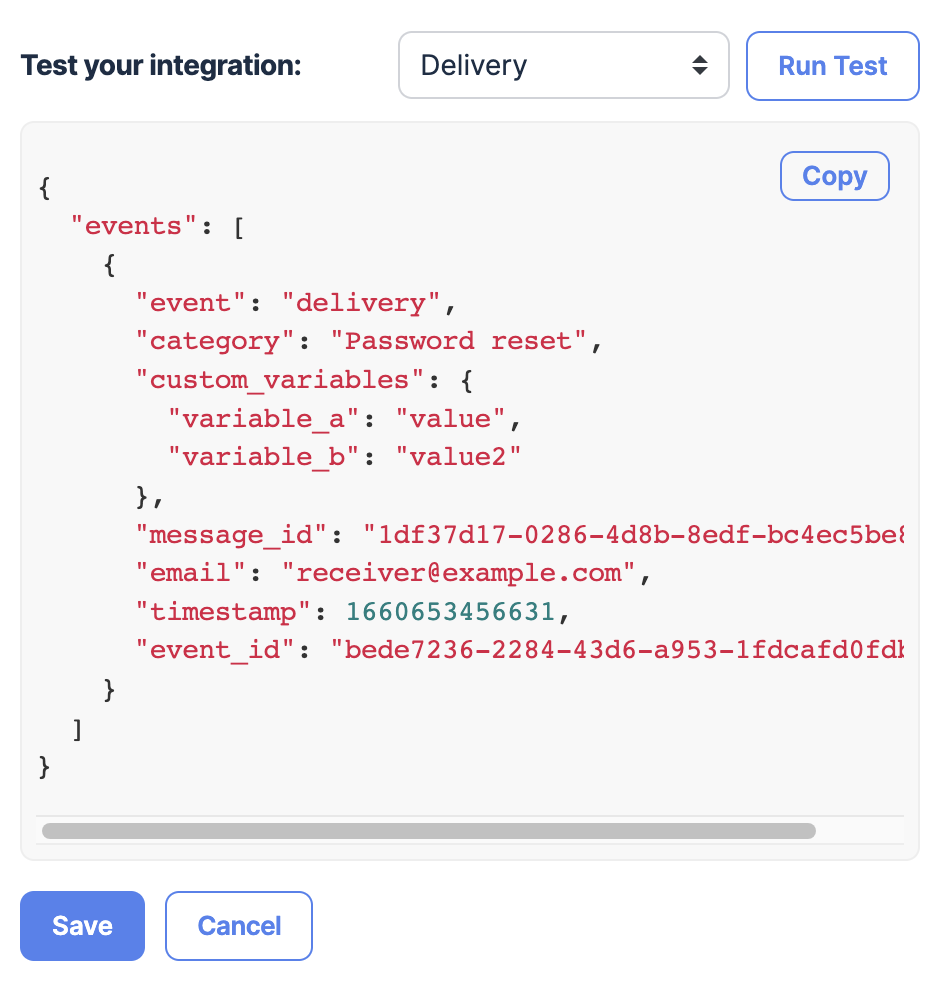
But Mailtrap saves you the trouble by providing a code snipped with a dummy payload within the webhook structure. Run the test, check the in-app notification, and inspect the webhook on your website (endpoint).
Other than that, you can use https://webhook.site/ to test the setup. And we recommend you do it in staging before your webhooks are in production.
A simple guide to connecting domains with Mailtrap webhooks
The following steps assume that you’ve already signed up for Mailtrap and added and verified a domain. Beyond that, here’s what to do:
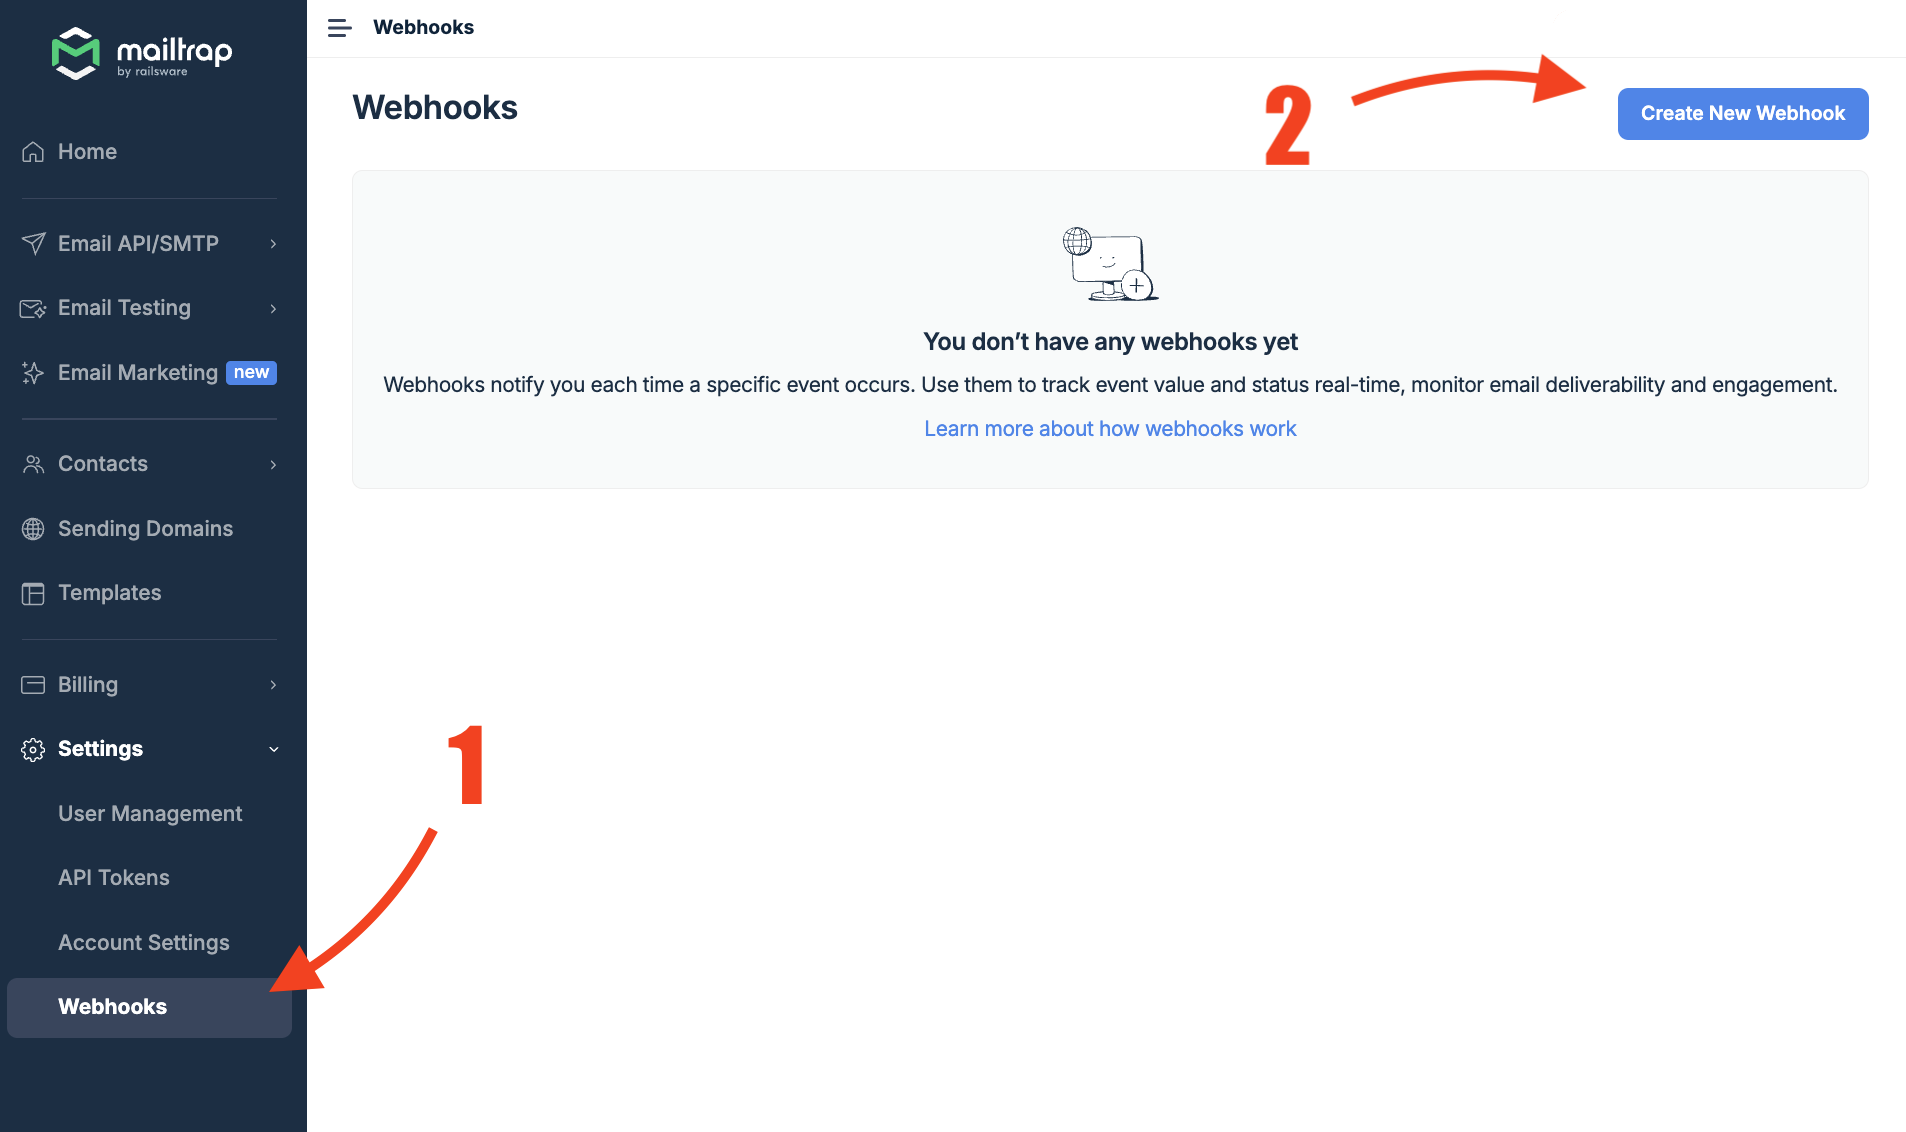
- Go to Settings > Webhooks, on the left-side menu.
- Click the Create New Webhook button.
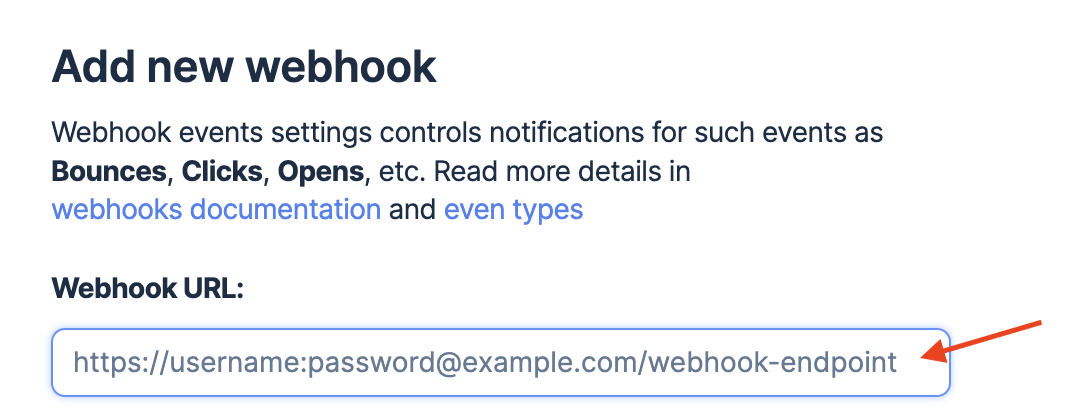
- Put in a valid public-web-accessible URL and make sure to use Basic Auth.
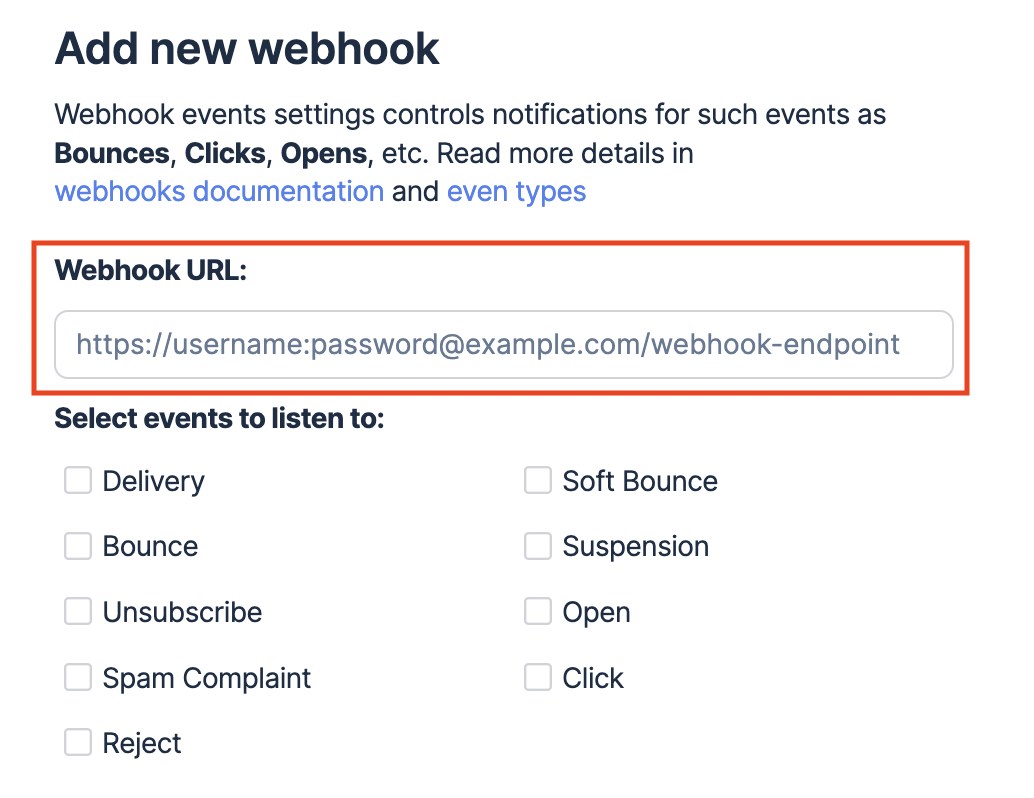
- Choose the events to listen to and run the test code to inspect your webhook setup.
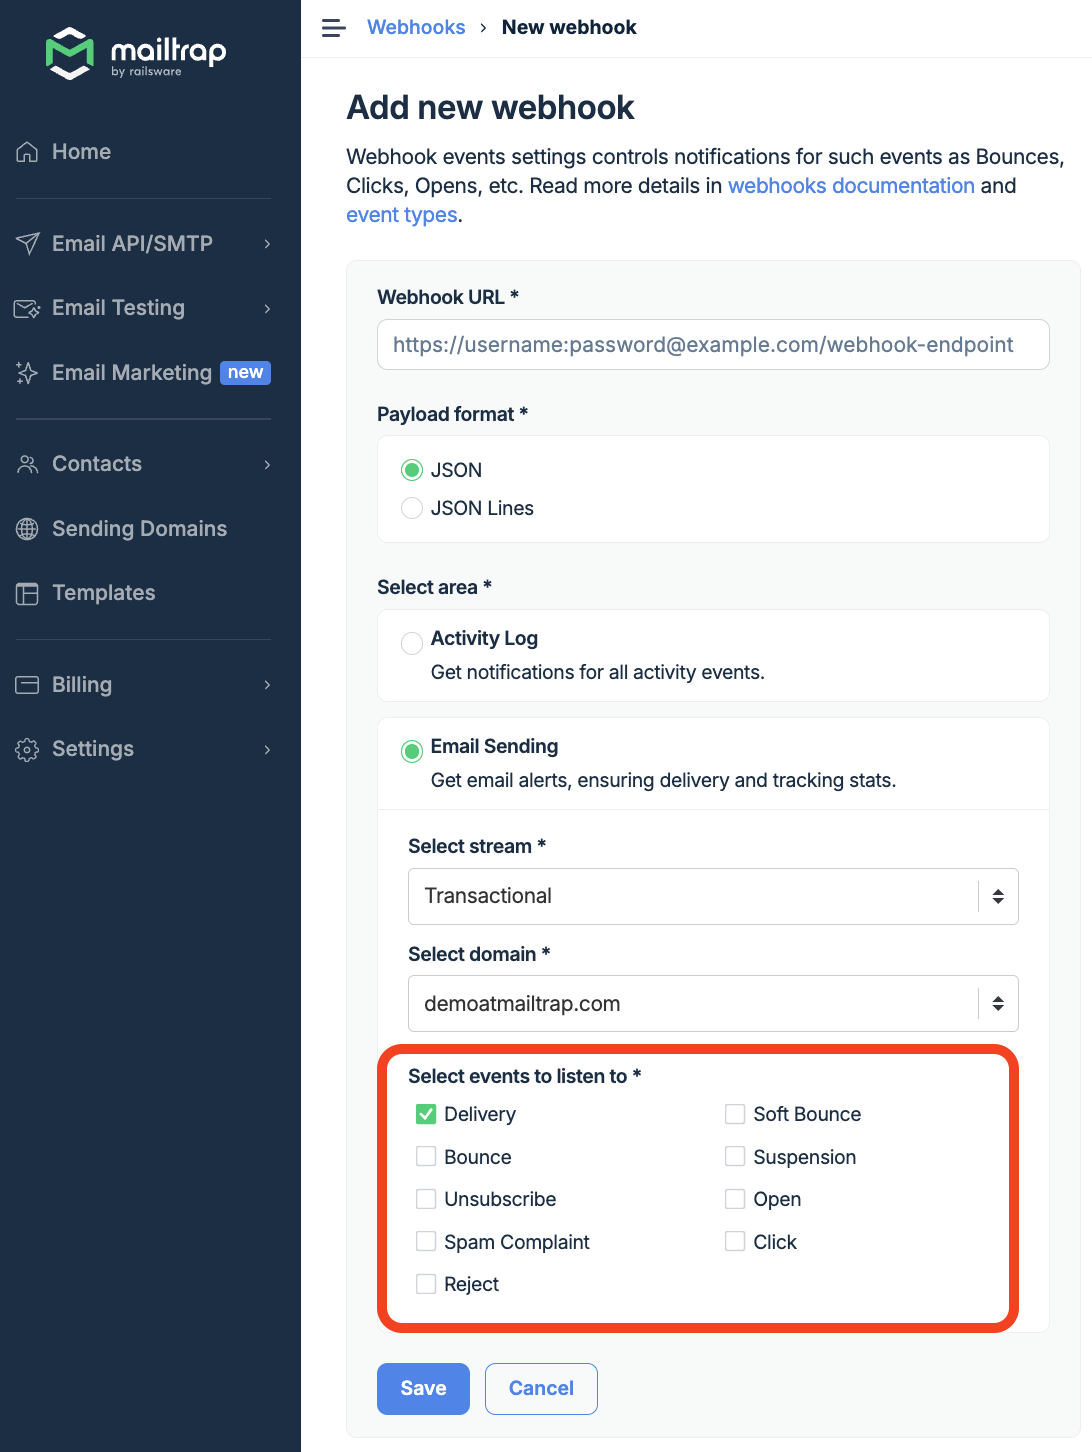
- Hit Save after getting test confirmation notification.
If you need more information about how to set up Mailtrap webhooks, their event structure, and message ID – check our Knowledge Base article on the topic.
Webhooks offer lightweight data sharing
Webhooks are among the least resource-intensive ways to keep a close eye on your deliverability metrics. Even more so if you send emails at high volume and tiny differences in delivery, bounce, or unsubscribe rates may result in poor user experience or even loss of customers. Therefore, take the time to leverage the immediate access to your deliverability data with Mailtrap webhooks.