
HTML is a client-side scripting language and, because of that, it can’t send emails. Naturally, it’s also impossible to send emails directly from an HTML form.
However, you can use an HTML form to collect data and send it to the server-side script or service. The server-side script will then process the data and send an email.
In this tutorial, we’ll go through all the steps needed to write server-side and HTML form scripts, validate the emails, and send the emails securely.
Why is it impossible to send emails directly from an HTML form?
If you’re aware of the security vulnerabilities of client-side languages, feel free to skip this section and start reading how to create an HTML form.
As a client-side scripting language, HTML code is displayed on the end-user device and interpreted by the browsers.
If HTML form were to send emails directly without any server-side encryption, it would reveal the email addresses and other form data to anyone viewing the page’s source code. This information could be abused by malicious actors, posing significant security issues. They often crawl public source code looking for unsecured form structures and exposed endpoints; to discover how data collection infrastructure secures and monitors public web data ethically, you can learn more about advanced web scraping solutions.
Other reasons for HTML’s inability to send emails include:
- Non-existent email-sending logic. HTML, by itself, can’t send emails through API calls or by connecting to the SMTP server. Server-side scripting is absolutely necessary for that process;
- Abuse of resources. HTML doesn’t have rate limiting either, which makes it hard to control how many emails are sent within a short period of time. If abused, this can easily drain the resources provided by the hosting server or email services.
Is there an HTML code to send email from a form submission?
The only option to send an email directly from the HTML form is the mailto: link. And while it sounds like a god-sent treat, this approach is also problematic.
Mailto: links can be set as a form action, but they don’t send emails themselves. Instead, they trigger an email software (such as the default mailer on your computer, like Microsoft Outlook or Apple Mail, for example). This can disrupt the website engagement and user experience.
You see, not all website visitors use a default mailing program. Some of them rely on webmail. By clicking the mailto: link, they may have to download the software they have no intention of using. And forcing the users to switch between the website and mailing apps isn’t the most user-friendly thing you can do. That is, if the browser supports this feature and opens an email client.
Moreover, mailto: is quite limited in functionality. It doesn’t allow you to add attachments or have control over the formatting of the email.
You can add an email subject or the body so that these are pre-filled in the popped-up email client window. However, this can easily make the URL too lengthy. If the browser has limitations on URL lengths, mailto: can be mishandled or displayed incorrectly.
Here’s a simple example of mailto: just in case you still want to give it a try:
<a href="mailto:masteryoda@starwars.com">I love star wars</a>And this is what it would look like with Cc, Bcc, subject, and email body:
<a href="mailto:masteryoda@starwars.com? cc=skywalker@starwars.com& bcc=leia@starwars.com& subject=May%20the%20Force%20be%20with%20you&body=May%20the%20Force%20be'%20with%20us%20all%3A%0D%0A%0D%0ACheers%2C%0D%0AHappy%20Customer">I love star wars</a> Can you send email using HTML form with JavaScript?
No, you can’t. JavaScript is a client-side script – sending emails from it would reveal the same vulnerabilities as HTML.
However, you can use Javascript to validate the form fields, such as the email address. Then, send the form submission through a server-side language. The most common option is PHP. We’ll break down how to use that combination below.
How to create an HTML form
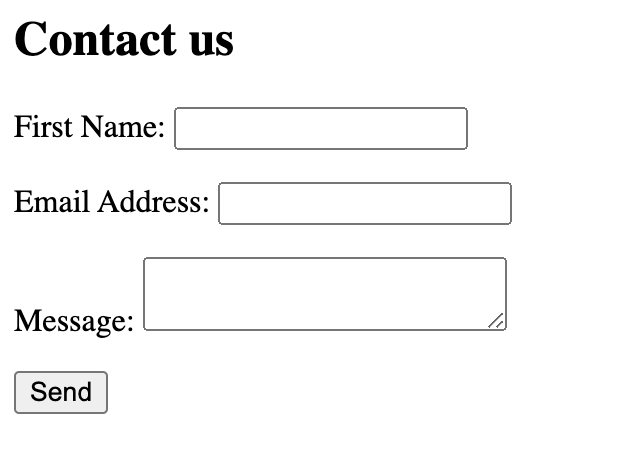
Before building an email-sending script, we should first create a simple HTML contact form. To simplify our examples, we won’t be using any CSS styling. Yes, our form will look like a toddler’s sketch, but we’re not trying to be coding Picassos here.
The code of a simple HTML form will look something like this:
<!DOCTYPE html>
<html lang="en">
<head>
  <meta charset="UTF-8">
  <title>Contact Form</title>
</head>
<body>

<h2>Contact us</h2>

  <label for="name">Name:</label>
  <input type="text" id="name" name="name" required>
  <br>

  <label for="email">Email Address:</label>
  <input type="email" id="email" name="email" required>
  <br>

  <label for="message">Message:</label>
  <textarea id="message" name="message" required></textarea>
  <br>

  <button type="submit">Send</button>
</form>

</body>
</html>
And this is what the users will see:
How to send email using HTML form with PHP
To send emails from HTML form using PHP, we also have to validate the form input. This is necessary to avoid invalid addresses such as masteryoda@starwars or masteryoda.starwars.com.
For validation, you have two options – HTML5’s built-in validation and JavaScript’s validate.js.
Validating and sending emails using HTML5 and PHP
HTML5 is the latest version of HTML. It validates form input using attributes such as required, pattern, type, etc. So, it can be used to run client-side validations.
The following code is an example of an HTML form with HTML5 validation:
<!DOCTYPE html>
<html lang="en">
<head>
  <meta charset="UTF-8">
  <title>Contact Form</title>
</head>
<body>

<form action="send_email.php" method="post">
  <label for="firstName">First Name:</label>
  <input type="text" id="firstName" name="firstName" required>
  <br>

  <label for="email">Email Address:</label>
  <input type="email" id="email" name="email" required>
  <br>

  <label for="message">Message:</label>
  <textarea id="message" name="message" required></textarea>
  <br>

  <input type="submit" value="Send">
</form>

</body>
</html>
In this script, the form method is defined with POST, meaning that it should send a POST request to the server. The required attribute makes the fields, such as name, email address, and email message mandatory. If any of these fields are empty and you click Send, you’ll see a message saying Please fill in this field.
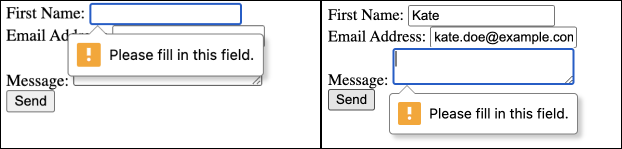
input type="email" checks whether the entered email address is in a valid format, while form action="send_email.php" points to the PHP script that will process the request and send an email.
Now it’s time to add a server-side validation. The code below checks if the name, email, and message fields are empty. If the email field isn’t empty, it checks whether the provided address is valid or not. The $errors array will hold error messages corresponding to any invalid or missing input fields.
<?php

$errors = [];

if (!empty($_POST)) {
  $name = $_POST['name'];
  $email = $_POST['email'];
  $message = $_POST['message'];

  if (empty($name)) {
      $errors[] = 'Name is empty';
  }

  if (empty($email)) {
      $errors[] = 'Email is empty';
  } else if (!filter_var($email, FILTER_VALIDATE_EMAIL)) {
      $errors[] = 'Email is invalid';
  }

  if (empty($message)) {
      $errors[] = 'Message is empty';
  }
}
At this point, we can start writing an email-sending script in PHP.
Note: PHP uses the mail() function to send emails. It uses the local mail server configured on the server on which the PHP is running. We don’t recommend using it as it’s not a secure method of sending emails. PHPMailer is a much safer and more reliable option, and we’ll discuss this further in the following section.
Create a new PHP file with the name specified in the HTML code. In this case, it will be send_email.php. The script will grab the form data such as name, email, and message if the request is POST. Then, it will validate form fields.
If everything is correct, the script will send an email to a specified recipient address. If the request isn’t POST, a 403 forbidden error will be displayed.
<?php
$errors = [];

if ($_SERVER["REQUEST_METHOD"] == "POST") {
    // Get POST data
    $name = isset($_POST['name']) ? strip_tags(trim($_POST['name'])) : '';
    $email = isset($_POST['email']) ? trim($_POST['email']) : '';
    $message = isset($_POST['message']) ? strip_tags(trim($_POST['message'])) : '';

    // Validate form fields
    if (empty($name)) {
        $errors[] = 'Name is empty';
    }

    if (empty($email)) {
        $errors[] = 'Email is empty';
    } else if (!filter_var($email, FILTER_VALIDATE_EMAIL)) {
        $errors[] = 'Email is invalid';
    }

    if (empty($message)) {
        $errors[] = 'Message is empty';
    }

    // If no errors, send email
    if (empty($errors)) {
        // Recipient email address (replace with your own)
        $recipient = "recipient@example.com";

        // Additional headers
        $headers = "From: $name <$email>";

        // Send email
        if (mail($recipient, $message, $headers)) {
            echo "Email sent successfully!";
        } else {
            echo "Failed to send email. Please try again later.";
        }
    } else {
        // Display errors
        echo "The form contains the following errors:<br>";
        foreach ($errors as $error) {
            echo "- $error<br>";
        }
    }
} else {
    // Not a POST request, display a 403 forbidden error
    header("HTTP/1.1 403 Forbidden");
    echo "You are not allowed to access this page.";
}
?>
Check out this blog post or watch this video to learn more about sending emails with PHP.
You can use a PHP contact form to create a contact-us web page in WordPress or Drupal. However, if you’re not willing to do some coding, there are multiple form builder plugins available.
Sending emails from HTML web form using PHPMailer
PHPMailer is a secure alternative to the PHP mail function as it sends emails via an SMTP server and complies with modern security standards. You can install it via composer using the following line of code:
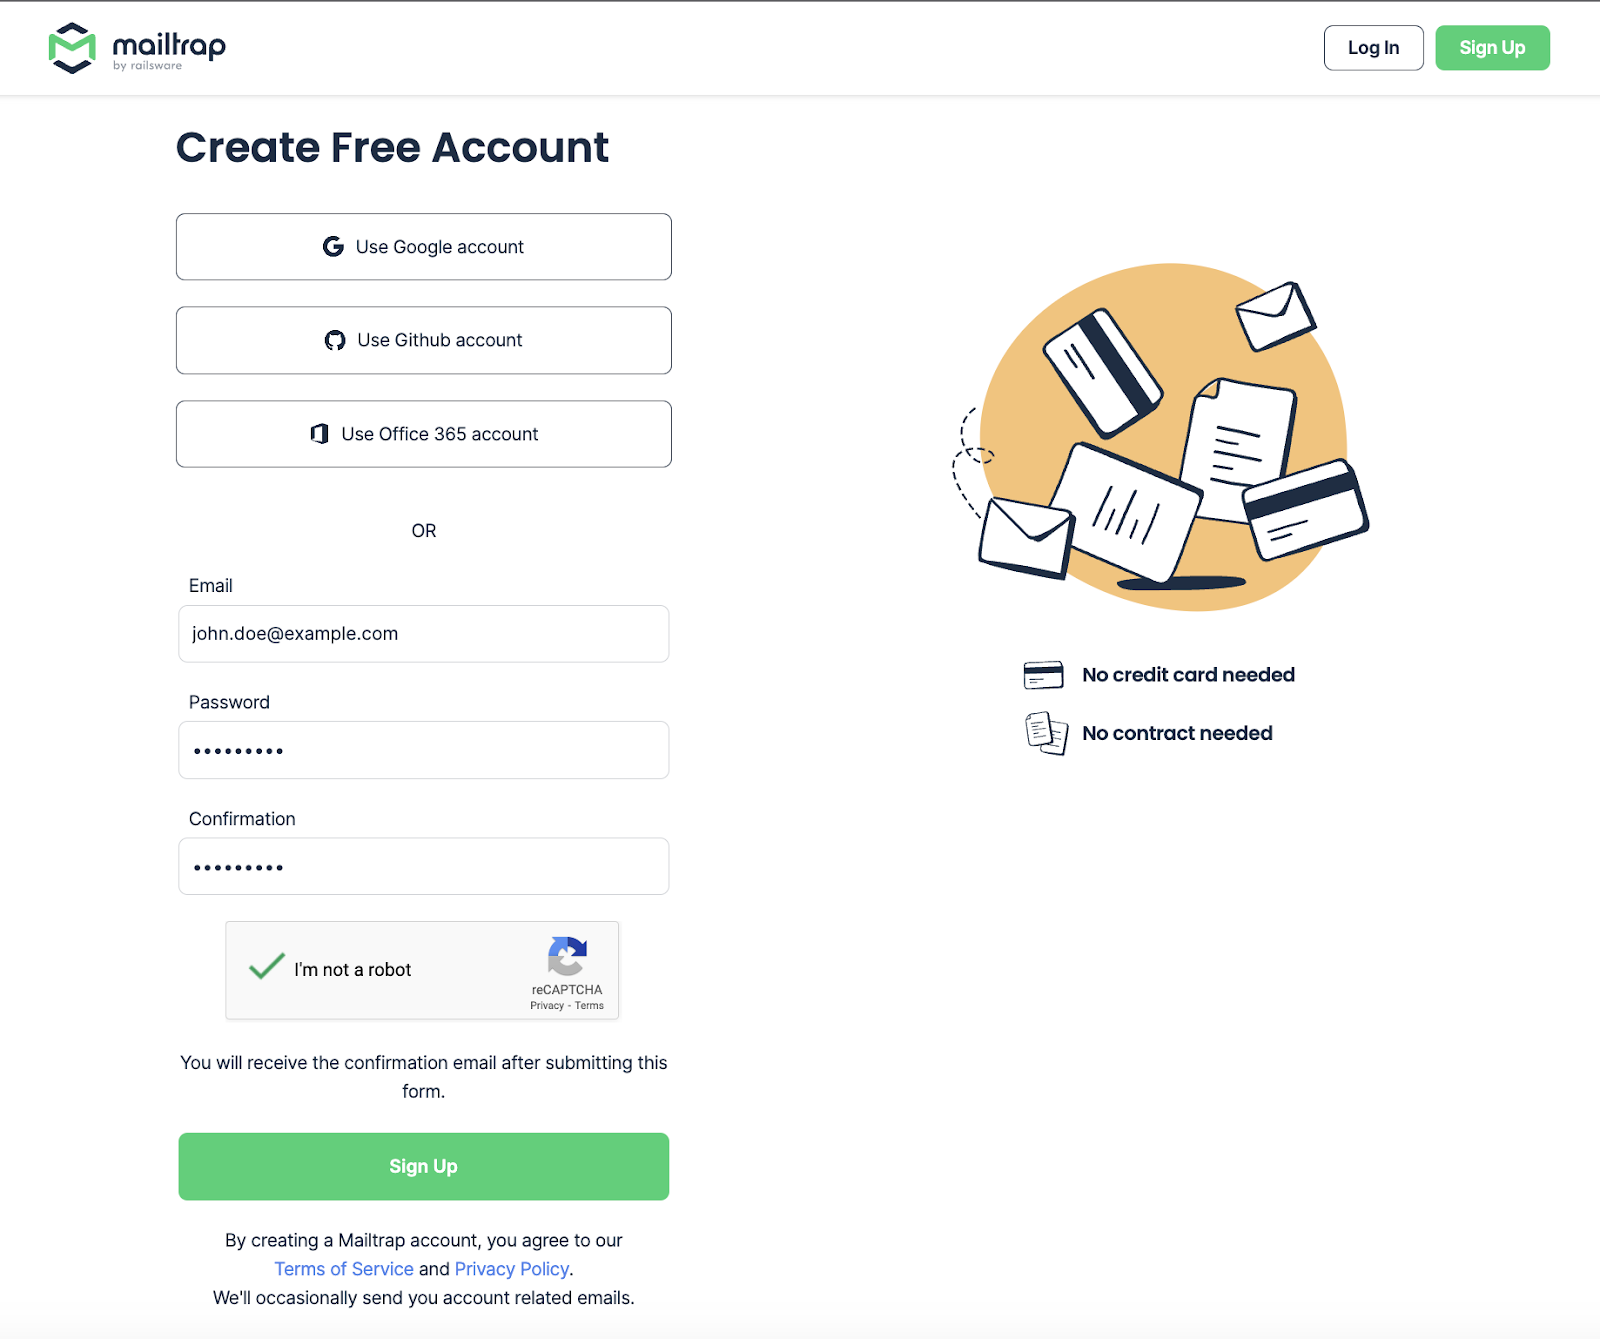
composer require phpmailer/phpmailerWe’ll also need an SMTP server to route our emails. For this example, we’ll be using Mailtrap Email Sending – an email infrastructure with high deliverability rates by design. It has Email API and SMTP services for quick and easy setup.
To access the SMTP credentials, go to https://mailtrap.io/ and create an account.
Navigate to Sending Domains and add your sending domain. Then verify it using the instructions in the video below.
Once you’re all set, go to the API and SMTP tab and choose the sending stream (Transactional or Bulk) you’d like to use, then SMTP or API.

Note down the SMTP credentials and go back to building the PHPMailer code.
Here’s what the PHPMailer script will look like for the HTML page above:
<?php
use PHPMailer\PHPMailer\PHPMailer;
use PHPMailer\PHPMailer\Exception;

require 'vendor/autoload.php';

$errors = [];
$errorMessage = ' ';
$successMessage = ' ';
echo 'sending ...';
if (!empty($_POST))
{
  $name = $_POST['firstName'];
  $email = $_POST['email'];
  $message = $_POST['message'];

  if (empty($name)) {
      $errors[] = 'Name is empty';
  }

  if (empty($email)) {
      $errors[] = 'Email is empty';
  } else if (!filter_var($email, FILTER_VALIDATE_EMAIL)) {
      $errors[] = 'Email is invalid';

  }

  if (empty($message)) {
      $errors[] = 'Message is empty';
  }

  if (!empty($errors)) {
      $allErrors = join ('<br/>', $errors);
      $errorMessage = "<p style='color: red; '>{$allErrors}</p>";
  } else {
      $fromEmail = 'anyname@example.com';
      $emailSubject = 'New email from your contact form';

      // Create a new PHPMailer instance
      $mail = new PHPMailer(exceptions: true);
      try {
            // Configure the PHPMailer instance
            $mail->isSMTP();
            $mail->Host = 'live.smtp.mailtrap.io';
            $mail->SMTPAuth = true;
            $mail->Username = 'api';
            $mail->Password = 'your_smtp_password';
            $mail->SMTPSecure = 'tls';
            $mail->Port = 587;

            // Set the sender, recipient, subject, and body of the message
            $mail->setFrom($email);
            $mail->addAddress($email);
            $mail->setFrom($fromEmail);
            $mail->Subject = $emailSubject;
            $mail->isHTML( isHtml: true);
            $mail->Body = "<p>Name: {$name}</p><p>Email: {$email}</p><p>Message: {$message}</p>";

            // Send the message
            $mail->send () ;
            $successMessage = "<p style='color: green; '>Thank you for contacting us :)</p>";
      } catch (Exception $e) {
            $errorMessage = "<p style='color: red; '>Oops, something went wrong. Please try again later</p>";
echo $errorMessage;
  }
}
}

?>
Don’t forget to substitute placeholders with the actual variables.
If you want to dive deeper into the peculiarities of PHPMailer, read our dedicated blog post.
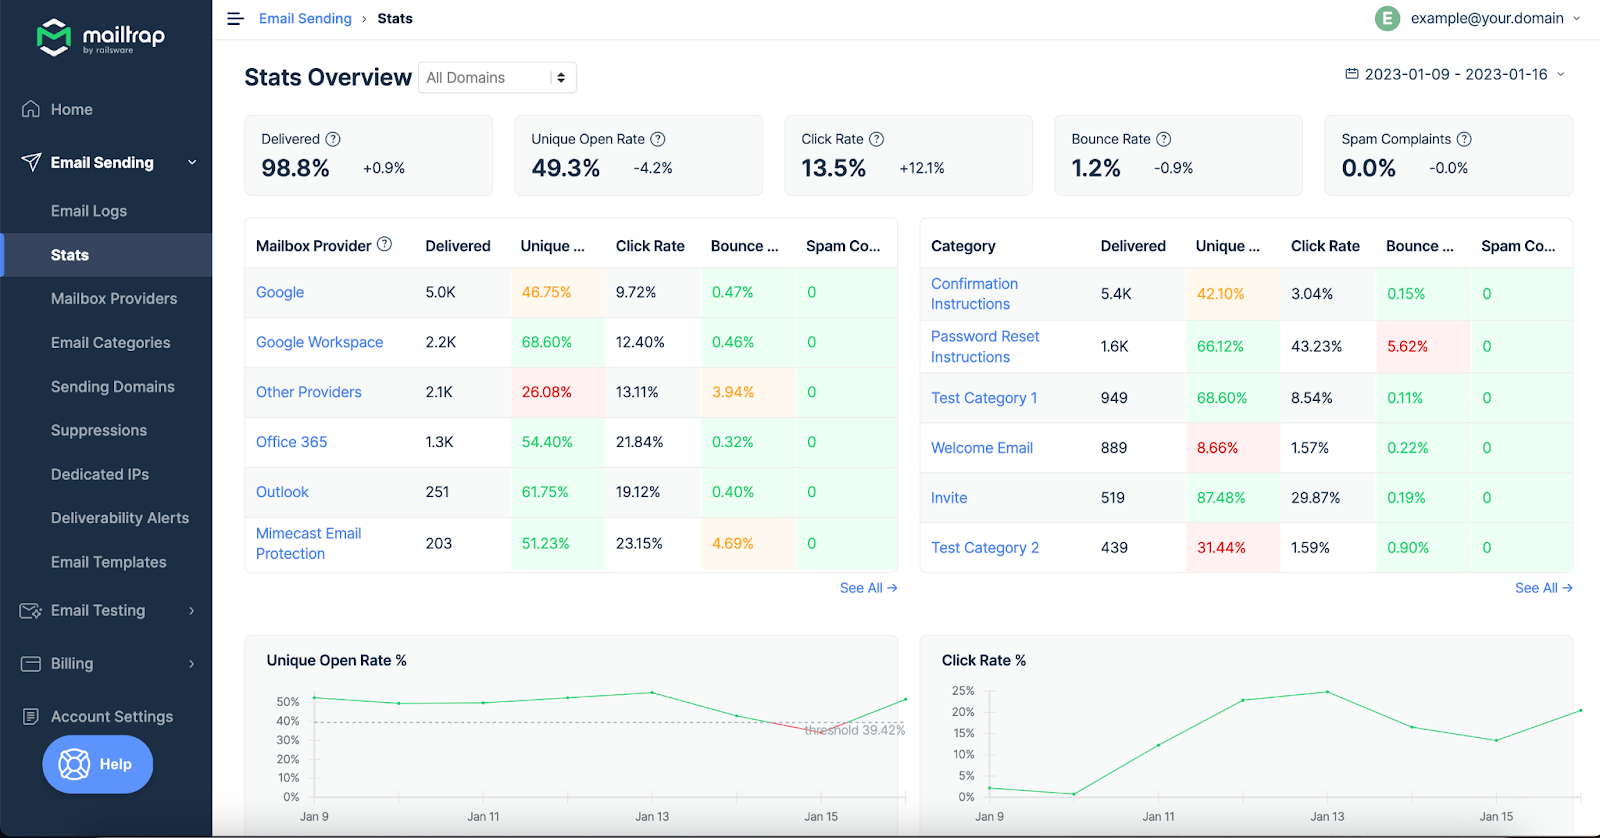
As you send your first emails with Email Sending, track their performance with actionable analytics. Check the stats for open, click, and bounce rates to be in control of your infrastructure.
Validating and sending emails using JavaScript and PHP code
We’ll need to install validate.js to validate HTML email form entries with JavaScript. This can be done by adding the library from CDN.
<script src="//cdnjs.cloudflare.com/ajax/libs/validate.js/0.13.1/validate.min.js"></script> The validation script will look like this:
<script>
  const constraints = {
      name: {
          presence: { allowEmpty: false }
      },
      email: {
          presence: { allowEmpty: false },
          email: true
      },
      message: {
          presence: { allowEmpty: false }
      }
  };

  const form = document.getElementById('contact-form');

  form.addEventListener('submit', function (event) {
    const formValues = {
        name: form.elements.name.value,
        email: form.elements.email.value,
        message: form.elements.message.value
    };

    const errors = validate(formValues, constraints);

    if (errors) {
      event.preventDefault();
      const errorMessage = Object
          .values(errors)
          .map(function (fieldValues) { return fieldValues.join(', ')})
          .join("\n");

      alert(errorMessage);
    }
  }, false);
</script>
The code above defines the constraints object with rules for validating the form fields. The name, email, and message fields can’t be empty, and the email field should be populated with a valid entry.
The form constant is assigned the HTML form element with the ID contact-form using document.getElementById.
A function gets triggered when the form is submitted. It extracts the field data and stores them in the formValues object. Then, it validates formValues using the validate() function. If there are validation errors, it prevents the form from being submitted using event.preventDefault().
Error messages are then combined into a single errorMessage string and displayed using the alert() function.
The backend validation will be the same as in our previous example.
Below, you can see a full code sample containing PHP and JavaScript validation, and the HTML-formatted email form itself.
<!DOCTYPE html>
<html>
<head>
  <meta charset="utf-8">
  <title>Contact form submission</title>
</head>
<body>
  <form method="post" id="contact-form">
    <h2>Contact us</h2>
    <?php
      $errorMessage = ''; // Define $errorMessage
      echo(!empty($errorMessage) ? $errorMessage : '');
    ?>
    <p>
      <label>First Name:</label>
      <input name="name" type="text"/>
    </p>
    <p>
      <label>Email Address:</label>
      <input style="cursor: pointer;" name="email" type="text"/>
    </p>
    <p>
      <label>Message:</label>
      <textarea name="message"></textarea>
    </p>
    <p>
      <input type="submit" value="Send"/>
    </p>
  </form>

  <script src="//cdnjs.cloudflare.com/ajax/libs/validate.js/0.13.1/validate.min.js"></script>
  <script>
    const constraints = {
      name: {
        presence: { allowEmpty: false }
      },
      email: {
        presence: { allowEmpty: false },
        email: true
      },
      message: {
        presence: { allowEmpty: false }
      }
    };

    const form = document.getElementById('contact-form');
    form.addEventListener('submit', function(event) {
      const formValues = {
        name: form.elements.name.value,
        email: form.elements.email.value,
        message: form.elements.message.value
      };

      const errors = validate(formValues, constraints);
      if (errors) {
        event.preventDefault();
        const errorMessage = Object.values(errors)
          .map(function(fieldValues) {
            return fieldValues.join(', ');
          })
          .join("\n");

        alert(errorMessage);
      }
    }, false);
  </script>
</body>
</html>
Sending emails from HTML form with PHPMailer
Let’s substitute PHP with PHPMailer once again, but this time we’ll also add reCAPTCHA.
Go to the Google reCAPTCHA page and choose its version. Unless you want to rewrite the whole code and trigger reCAPTCHA manually from the front end, we’d recommend using the Challenge (v2). You can handle it in the back end and send it with the form.
Google provides two types of reCAPTCHA v2:
- “I’m not a robot” Checkbox that validates requests with the “I’m not a robot” checkbox;
- Invisible reCAPTCHA badge that validates requests in the background.
We’ll opt for the invisible badge. Once you click the Submit button, you’ll see your Site Key and Secret Key. Take a note of them both, as you’ll need to insert their values into the code below:
<?php
use PHPMailer\PHPMailer\PHPMailer;
use PHPMailer\PHPMailer\Exception;

require 'vendor/autoload.php';

$errors = [];
$errorMessage = '';
$successMessage = '';
$siteKey = 'YOUR_RECAPTCHA_SITE_KEY';
$secret = 'YOUR_RECAPTCHA_SECRET_KEY';

if ($_SERVER['REQUEST_METHOD'] === 'POST') {
    $name = sanitizeInput ($_POST['name']);
    $email = sanitizeInput ($_POST['email']);
    $message = sanitizeInput ($_POST ['message']);
    $recaptchaResponse = sanitizeInput ($_POST['g-recaptcha-response']);

    $recaptchaUrl = "https://www.google.com/recaptcha/api/siteverify?secret={$secret]&response={$recaptchaResponse]";
    $verify = json_decode(file_get_contents($recaptchaUrl));

    if (!$verify->success) {
        $errors [ ] = 'Recaptcha failed';
    }
    if (empty ($name)) {
        $errors [ ] = 'Name is empty';
    }
    if (empty ($email)) {
        $errors [ ] = 'Email is empty';
    } else if (!filter_var($email, filter: FILTER_VALIDATE_EMAIL)) {
        $errors [ ] = 'Email is invalid';
    }
    if (empty ($message)) {
        $errors [ ] = 'Message is empty';
}

    if (!empty ($errors)) {
        $allErrors = join ( separator: '<br/>', $errors);
        $errorMessage = "<p style='color: red; '>{$allErrors}</p>";
    } else {
        $toEmail = 'myemail@example.com';
        $emailSubject = 'New email from your contact form';

        // Create a new PHPMailer instance
      $mail = new PHPMailer (exceptions: true);
      try {
            // Configure the PHPMailer instance
            $mail->isSMTP();
            $mail->Host = 'live.smtp.mailtrap.io';
            $mail->SMTPAuth = true;
            $mail->Username = 'api';
            $mail->Password = 'your_smtp_password';
            $mail->SMTPSecure = 'tls';
            $mail->Port = 587;

            // Set the sender, recipient, subject, and body of the message
            $mail->setFrom($email);
            $mail->addAddress($toEmail);
            $mail->Subject = $emailSubject;
            $mail->isHTML( isHtml: true);
            $mail->Body = "<p>Name: {$name]</p><p>Email: {$email]</p><p>Message: {$message]</p>;

            // Send the message
            $mail->send () ;
            $successMessage = "<p style='color: green; '>Thank you for contacting us :)</p>";
      } catch (Exception $e) {
            $errorMessage = "<p style='color: red; '>Oops, something went wrong. Please try again later</p>";
      }
    }
}

function sanitizeInput($input) {
    $input = trim($input);
    $input = stripslashes($input);
    $input = htmlspecialchars($input, ENT_QUOTES, 'UTF-8');
    return $input;
}
?>

<html>
<body>
<script src="https://www.google.com/recaptcha/api.js" async defer></script>
<form action="/" method="post" id="contact-form">
    <h2>Contact us</h2>
    <?php echo (!empty($errorMessage) ? $errorMessage : ''); ?>
    <?php echo (!empty($successMessage) ? $successMessage : ''); ?>
    <p>
        <label>First Name:</label>
        <input name="name" type="text" required />
    </p>
    <p>
        <label>Email Address:</label>
        <input style="..." name="email" type="email" required />
    </p>
    <p>
        <label>Message:</label>
        <textarea name="message" required></textarea>
    </p>
    <p>
        <button class="g-recaptcha" type="submit" data-sitekey="<?php echo $siteKey ?>" data-callback="onRecaptchaSuccess">
            Submit
        </button>
    </p>
</form>

<script>
    function onRecaptchaSuccess() {
        document.getElementById('contact-form').submit();
    }
</script>
</body>
</html>
This script incorporates the reCAPTCHA badge, conducts server-side validations, and sends an email through the SMTP server. Properties such as Host, SMTPAuth, Username, Password, SMTPSecure, and Port should be filled with your Mailtrap credentials.
How to send HTML form emails with attachments
It’s also possible to send HTML form emails with attachments. For that, we recommend using the PHPMailer as it’s a much simpler option.
You’ll just have to use the $mail->AddAttachment() method after the body property.
$mail->AddAttachment($_FILES["attachment"]["tmp_name"], $_FILES["attachment"]["name"]);Wrapping up
Now that you know all the ins and outs of sending emails from HTML form, contact-us forms won’t scare you anymore. Whether they are ugly or have undergone a makeover ✨, you can send emails from them safely with PHPMailer, reCAPTCHA, and JavaScript validation.
If you’re interested in building contact forms in other programming languages, then check out our YouTube channel where we have multiple contact form tutorials published:
- PHP Contact Form
- Vue.js Contact Form
- JavaScript Contact Form
- Ruby on Rails Contact Form
- Django Contact Form
- Flask Contact Form
Meanwhile, read these blog posts to master HTML forms: