


In this article, I share everything I’ve learned about Google Postmaster Tools in the past few years of monitoring my email campaigns with it.
First, I’ll go over the basics and explain what this tool is and why you should use it. However, if you feel like skipping theory, click on some of the following to jump straight into action:
- How to set up Google Postmaster Tools
- How to use Google Postmaster Tools
- How to improve your Gmail email deliverability
What is Google Postmaster Tools?
Google Postmaster Tools is a free tool that provides data about the emails you send to personal Gmail accounts. With it, you gain insight into email performance you can use to monitor and improve your email deliverability.
More specifically, Google Postmaster Tools you get you can monitor:
- Compliance status
- Spam rate
- IP reputation
- Domain reputation
- Feedback loops (FBL)
- Email authentication
- Email encryption
- Delivery errors
Click on the data point to jump to its dedicated dashboard.
Why to use Google Postmaster Tools
First things first, Gmail is the second most popular email client in the world, with 30.70% of users worldwide. Hence, your email list probably consists of a comparable share of Gmail users.
Moving on, even if the majority of your contacts aren’t Gmail users, Postmaster can help you. Why? Well, understanding how your email configuration is viewed by Gmail can help you land in inboxes with other mailbox providers.
Last but not least, in 2013, Google introduced new Gmail protections. Then, a decade later, in 2024, there came new sender guidelines to improve email security and ensure emails are delivered more effectively.
Some of these require you to:
- Comply with DNS-based authentication (SPF, DKIM, DMARC)
- Stay underneath the spam rate threshold of 0.3%
- Make sure your shared IP address isn’t on a blocklist
Trying to meet these requirements without having the insight Google Postmaster Tools gives you is like shooting in the dark. With Postmaster, you get info on all of the above and more, so you can keep sending your emails worry-free.
I’ll cover the requirements a bit later in the article, but if you’d like to read more about them, you can also check out our dedicated article or watch the video our awesome YouTube team has prepared for you on Google and Yahoo sender guidelines.
How to set up Google Postmaster Tools
To set up and use Google Postmaster Tools, you’ll need a regular Google Account or a Google Workspace account and a registered sending domain.
For the purposes of this tutorial, I’ll show you the setup and verification flow using my domain hosted on GoDaddy, but you can use any other domain registry.
Also, feel free to check out the official Google documentation for troubleshooting if you get stuck.
Step 1. Add your sending domain
First, you’ll simply have to add your sending domain:
- Visit the Google Postmaster Tools page and click on ‘Get Started’ postmaster.
- You can also visit postmaster.google.com directly and click on the red button in the bottom right corner of the page.
- Enter your domain name in the following popup and click ‘Next.’

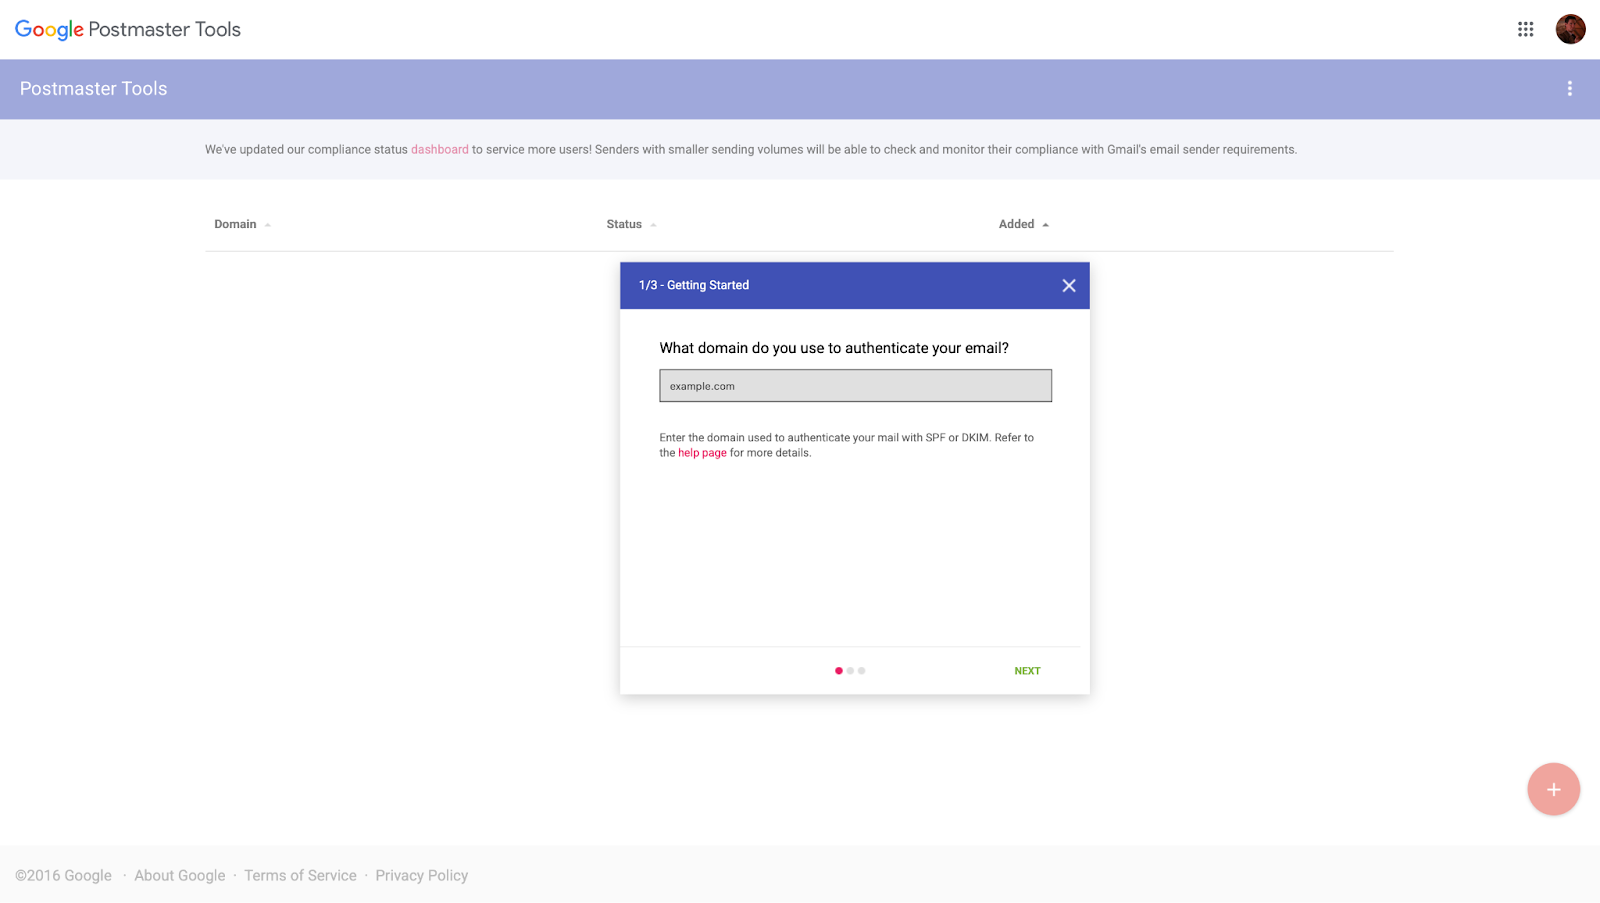
Note: If you have separate different domains for SPF and DKIM, you can use just one of those.
Step 2. Verify your sending domain
Once you’ve added your sending domain, you’ll need to add the DNS records provided by Google to verify the domain is really yours. Think of it like the small verification charge when you link a new credit card to a service. Here’s how to do it:
- Copy the following TXT record Google Postmaster generates for you.

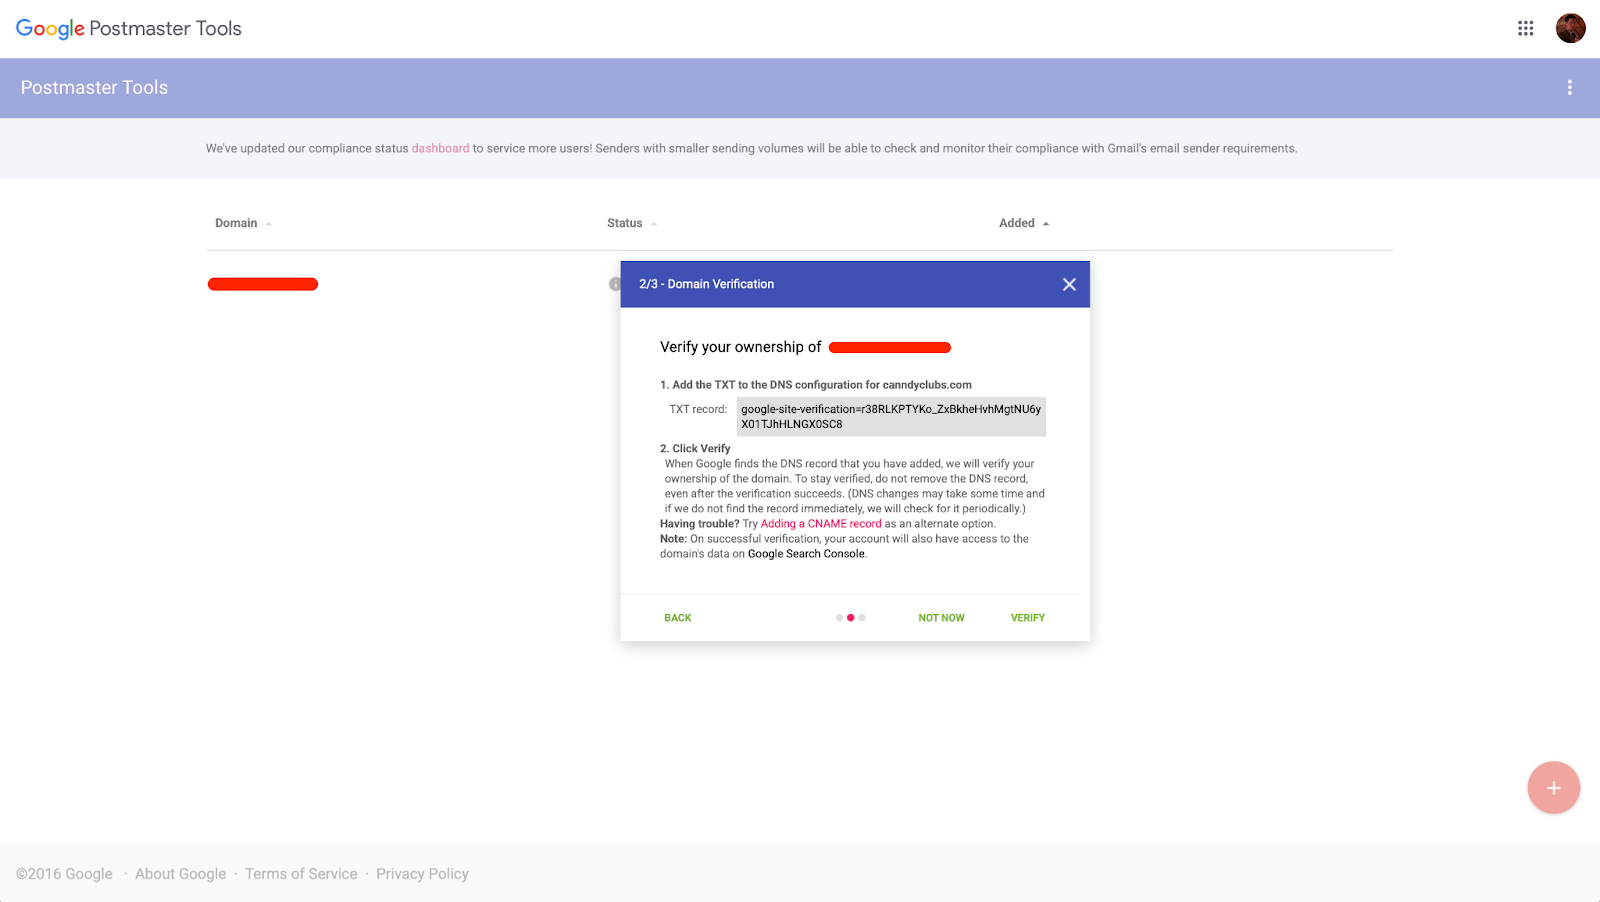
- Paste the TXT record provided by Google in your domain provider’s DNS settings and save the configuration.

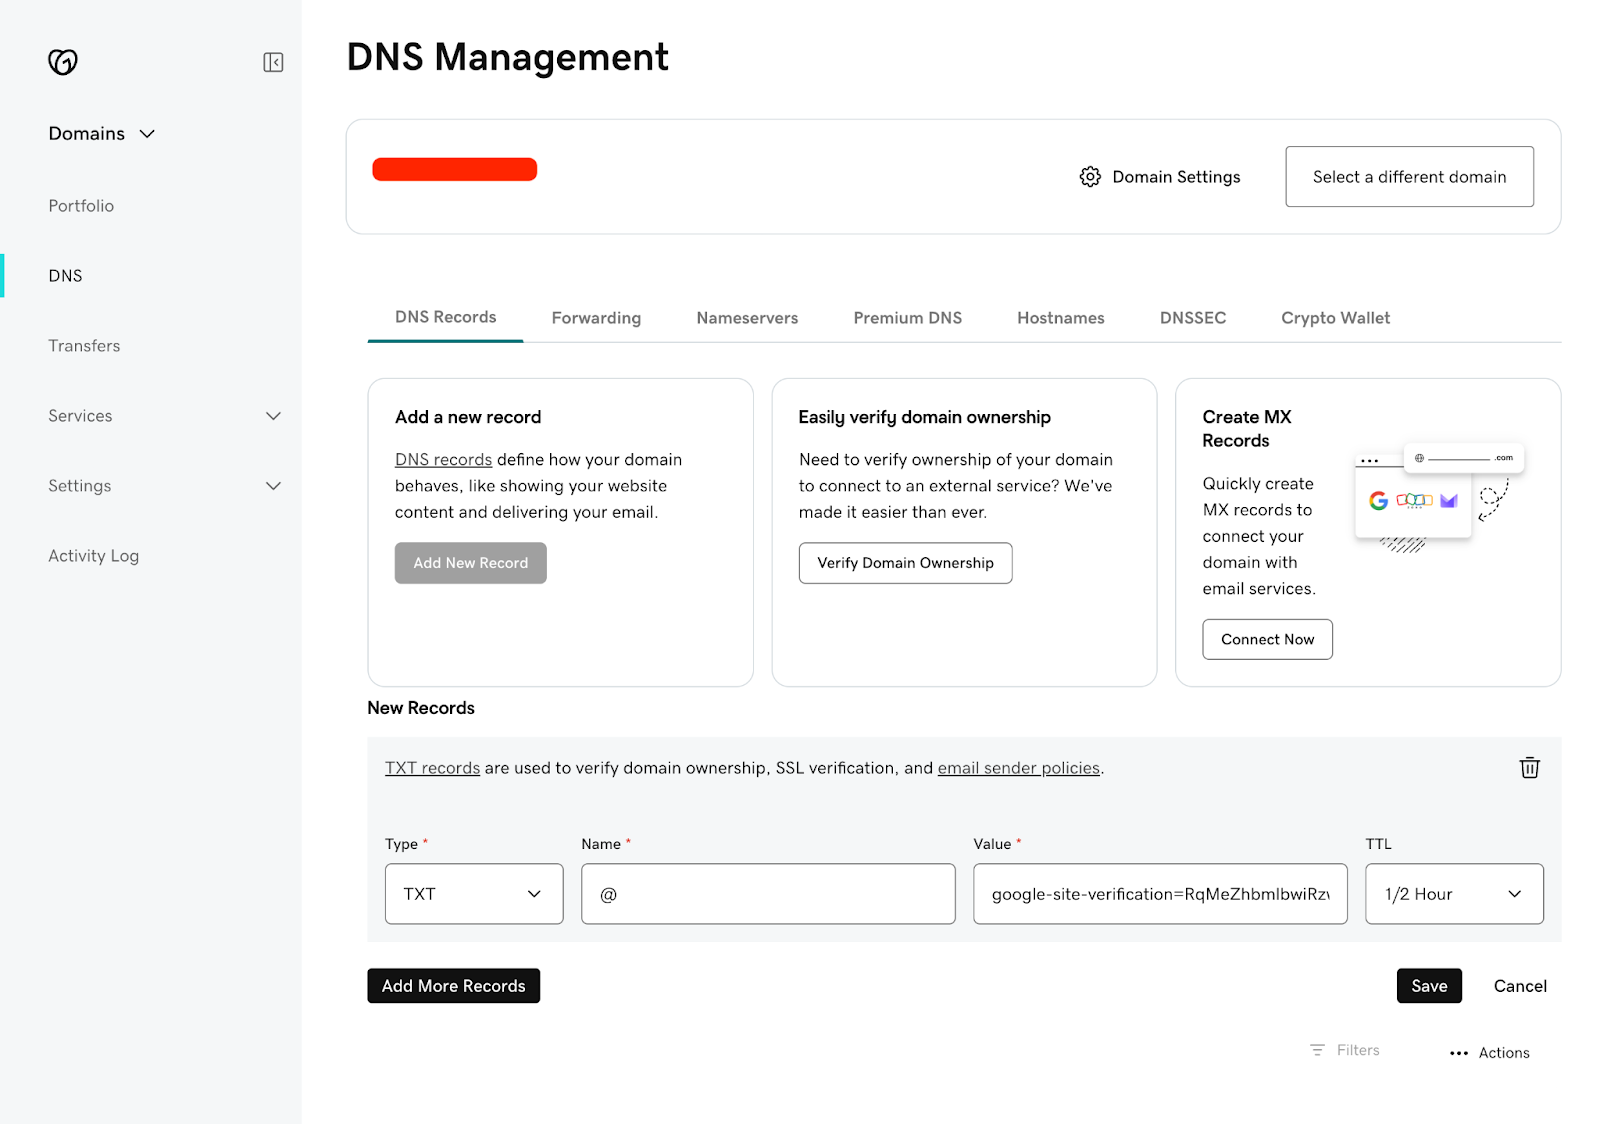
Tip: In case you’re using GoDaddy too, enter ‘@’ under ‘Name’ since it stands for the root domain, e.g., yourdomain.com.
- Go back to this page and click on ‘Verify.’
Note: You can also verify your domain using a CNAME record, which Google offers as an alternative option.
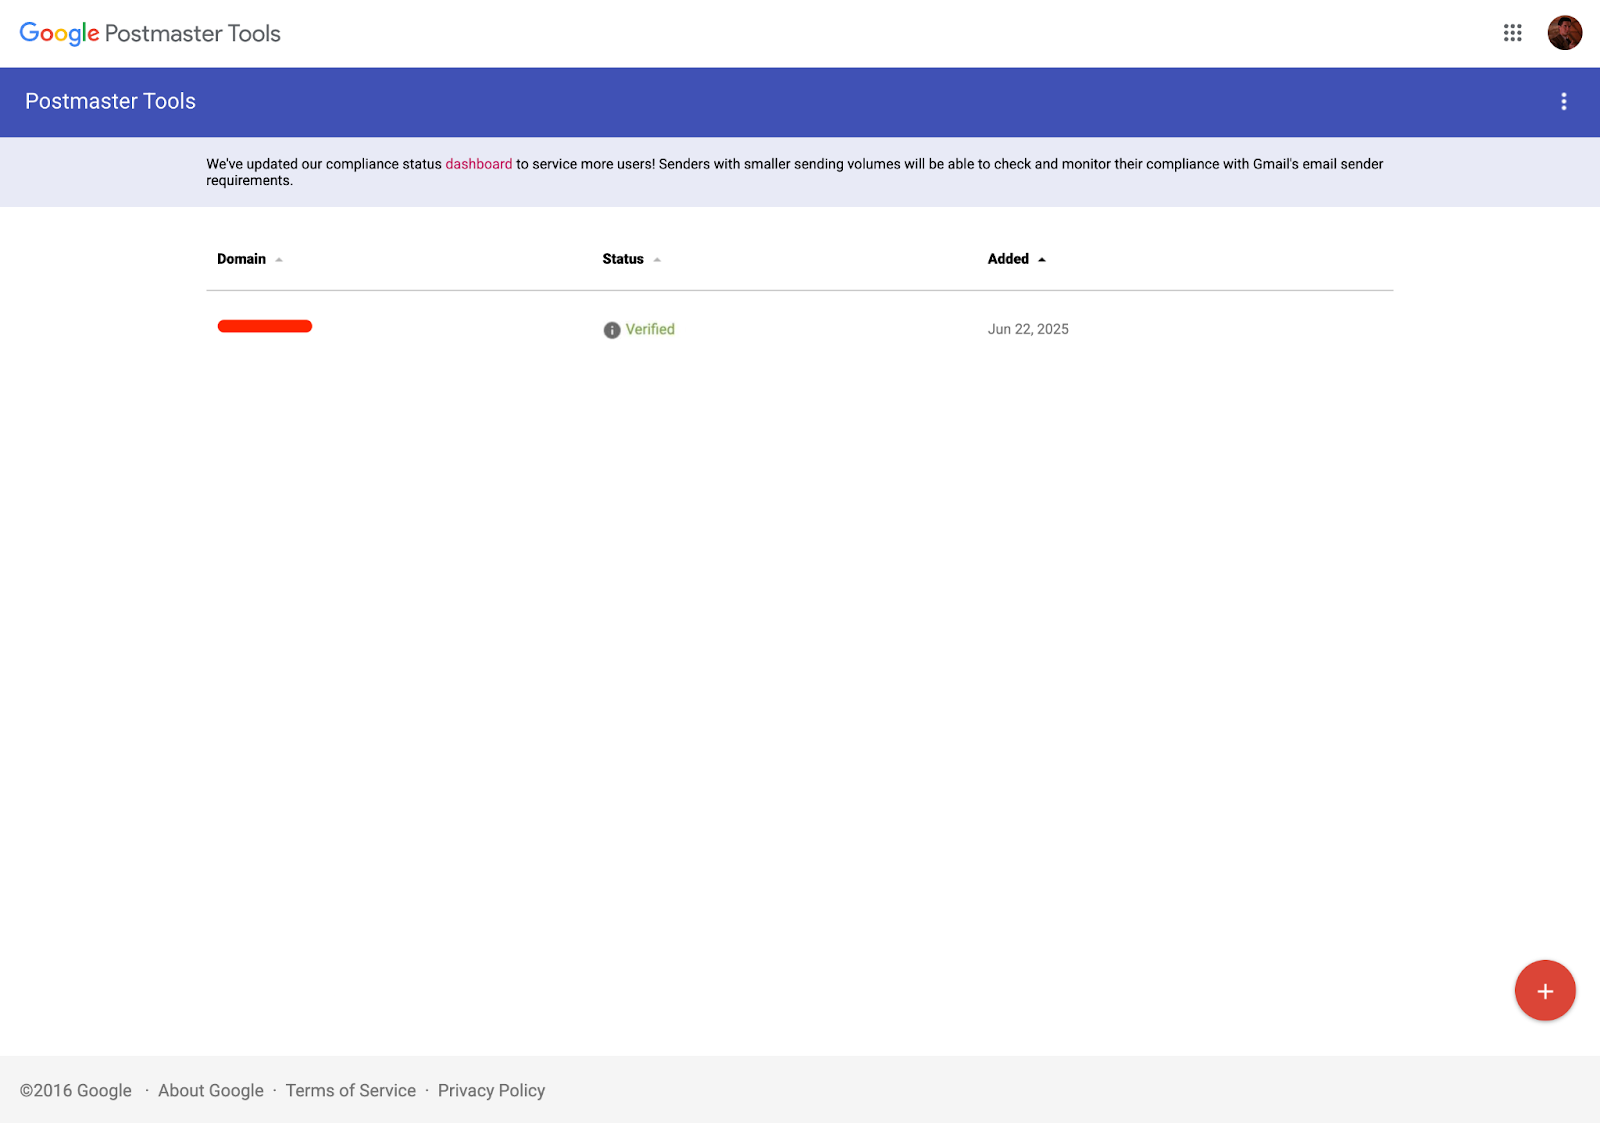
- In case the verification was successful, you should see this window:


- And your verified domain should be on display on the management page:
However, if your domain is still not verified, keep in mind that it can take Google up to 24-48 hours to finish the process. You can also check out the official troubleshooting page.
Step 3. Give others your dashboard access
If you want to give your teammates or coworkers access to your Google Postmaster, here’s what you have to do:
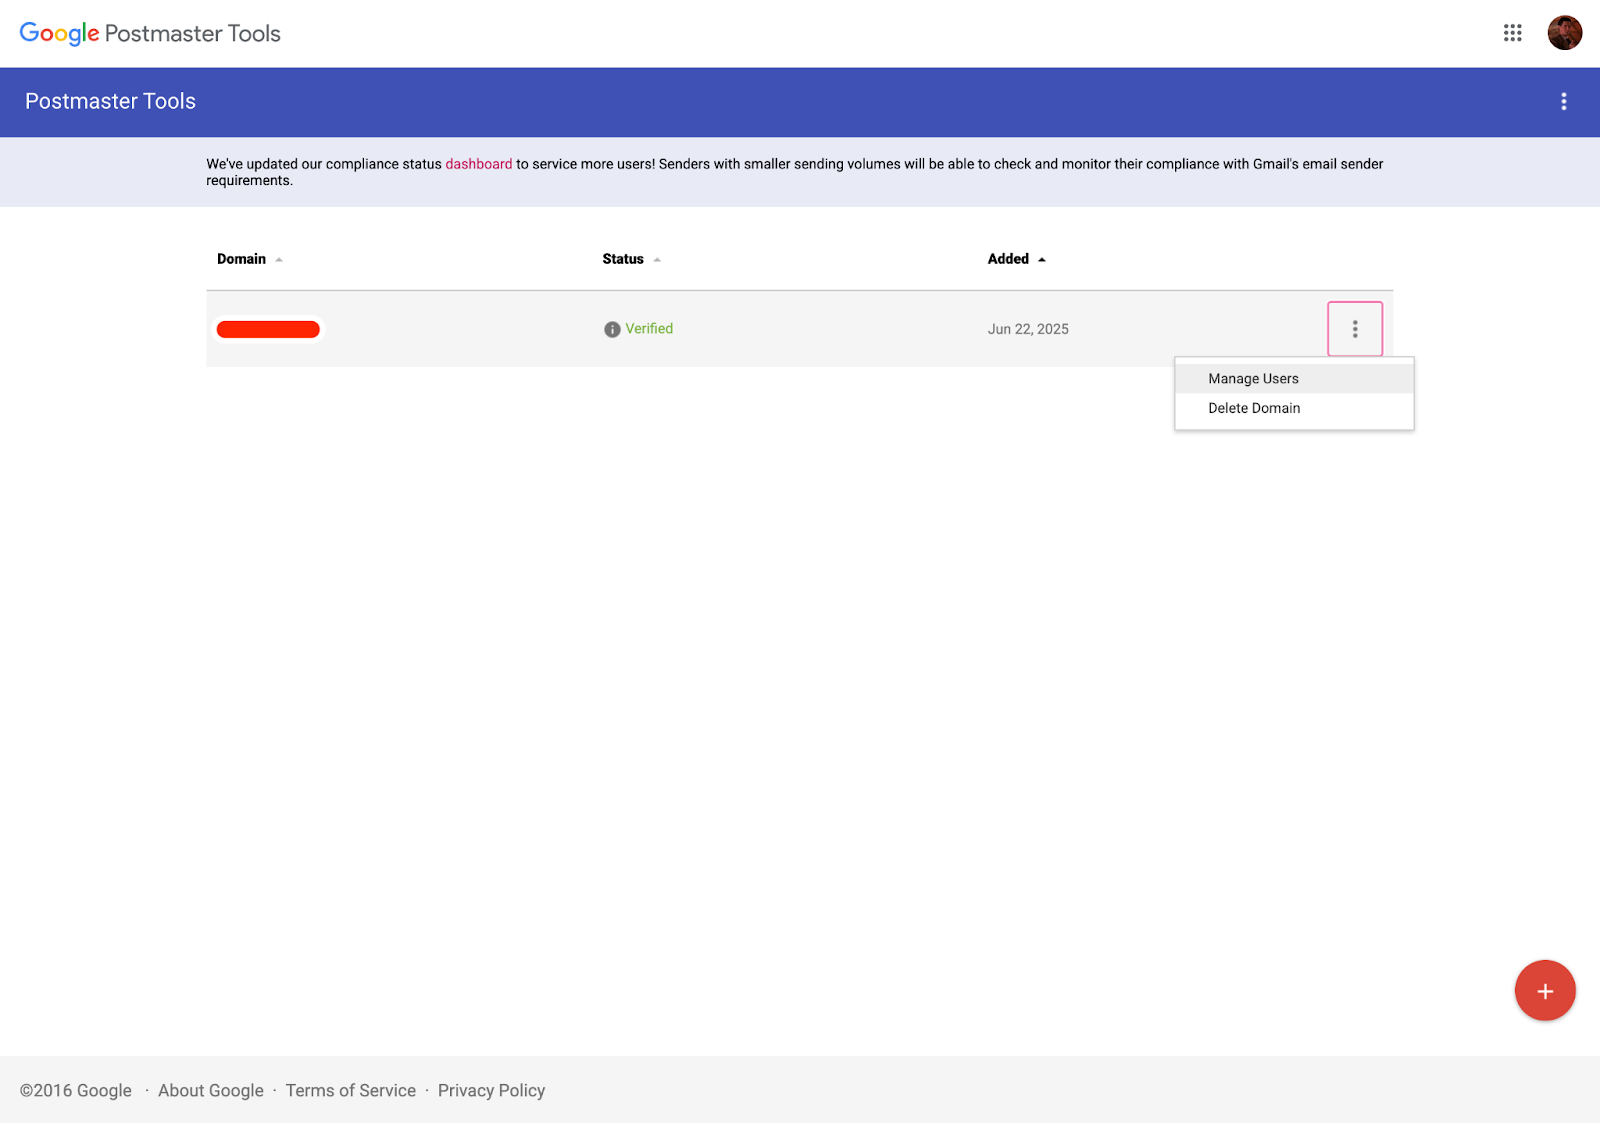
- On the domain management page, click on the three dots and on ‘Manage Users’
- Enter the Gmail address of the person you want to give access to.
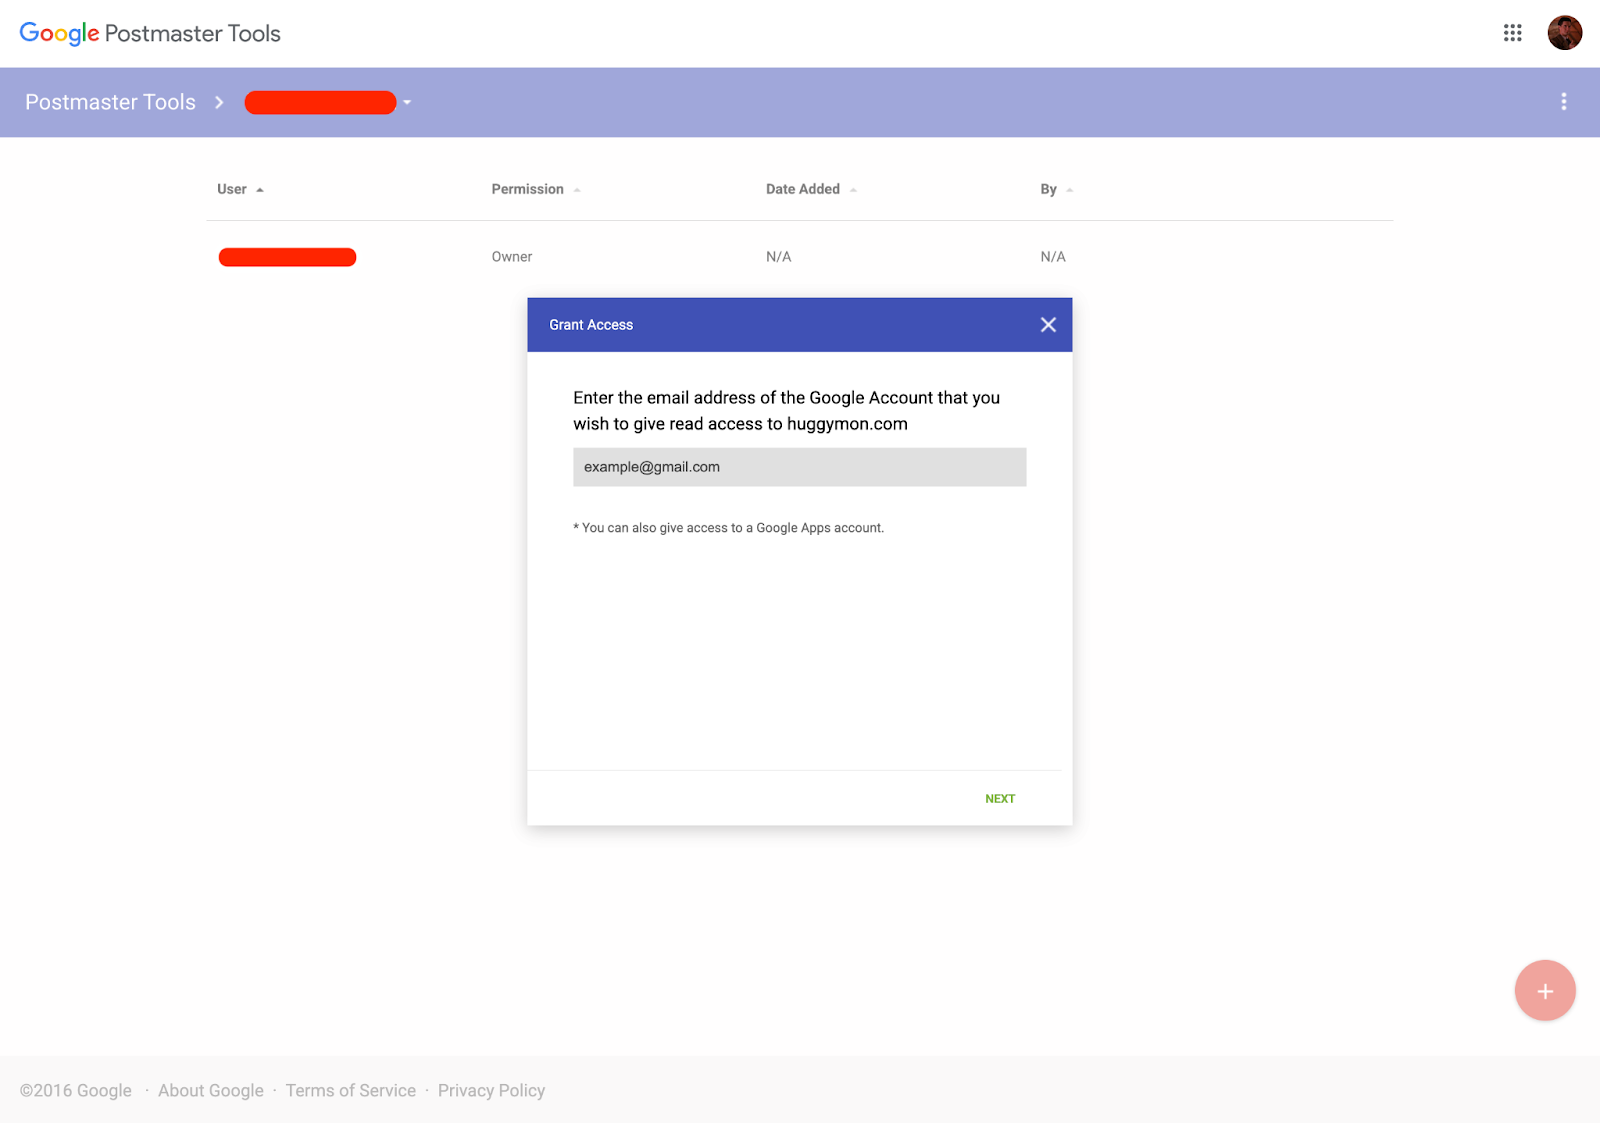
- If everything was successful, you should see the following page:

Note that people you add won’t get a notification that they now have access to your Google Postmaster dashboard, so make sure to let them know you’ve added them.
How to use Google Postmaster Tools
Google Postmaster Tools consists of several dashboards that display the information about the emails you send to personal Gmail accounts.
Note that the data you see on dashboards isn’t updated in real-time. Instead, it’s updated within 24 hours, but it can also take longer. Additionally, to protect the privacy of Gmail users, Google might not include all data on days when your sending volume is low (~100-200 emails).
P.S. If you’re feeling tech-savvy, you can also automate tracking for your app or project with the Google Postmaster API.
Compliance Status Dashboard

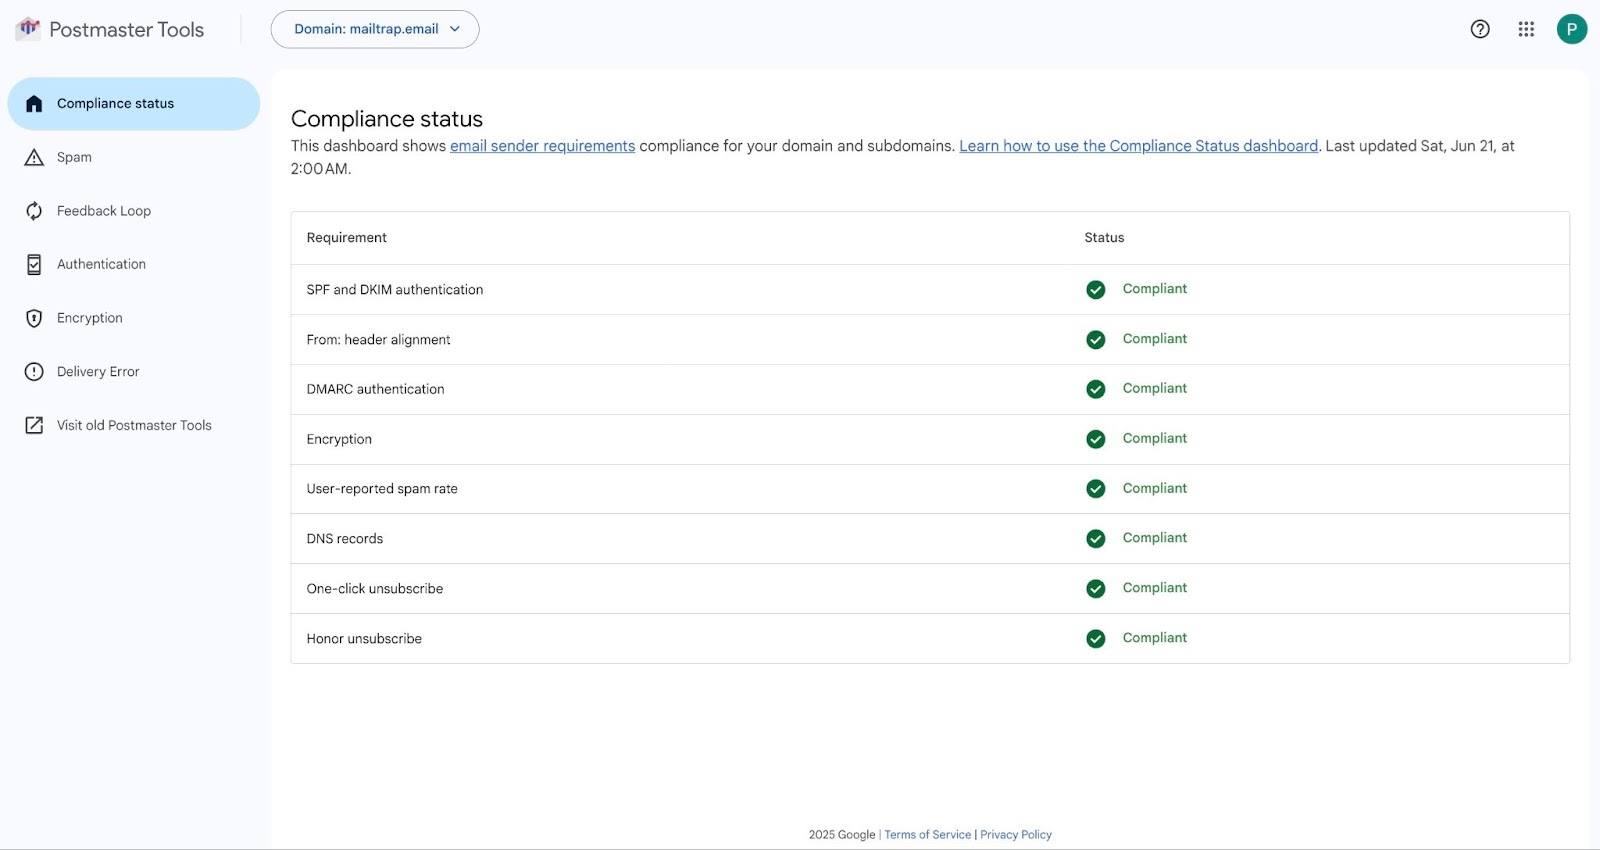
The Compliance status dashboard lets you see whether you’re compliant with the email sender requirements imposed by Google in 2024, which I mentioned previously in the article.
If you are compliant with all requirements, then you can proceed with sending emails. However, if you have a ‘Needs work’ status, you’ll need to update your email configuration to meet the specific requirement. Once you resolve any potential issues, it can take up to 7 days for the dashboard to be updated with changes.
It’s also worth noting that this dashboard takes into account data from subdomains but only to determine compliance. The status regards only the primary domains.
How to be compliant with Google email sender requirements:
- SPF authentication – Add a valid SPF record to your domain’s DNS settings
- For example: v=spf1 include:yourprovider.com ~all
- DKIM authentication – Enable DKIM in your email service provider (ESP) settings, which is usually done by adding CNAME or TXT records to your DNS for domain verification.
- From: header alignment – Make sure that your ‘From’ domain matches the domain used in your SPF and DKIM signatures.
- If your ‘From’ address is example@yourdomain.com, your SPF and DKIM domains need to be yourdomain.com.
- DMARC authentication – Create a DMARC record and set policy (p=) to none, quarantine, or reject, and ensure SPF or DKIM pass and align.
- For example:_dmarc.yourdomain.com TXT “v=DMARC1; p=quarantine; rua=mailto:dmarc-reports@yourdomain.com”
- Encryption – Use TLS encryption when sending emails, which is an industry standard among ESPs. However, if you’re sending from your own server, configure your SMTP to require STARTTLS.
- User-reported spam rate – According to Google’s 2024 sender guidelines (red line), you need to keep the spam rate under 0.3%. If you want to take it a step further and follow industry standards, I would advise not going above 0.1% (blue line).
How to be compliant if you’re a bulk sender:
The requirements concern all email senders, but the last 3 on the dashboard are only for bulk senders that send 5,000 emails or more daily.
- DNS records – Use tools like MxToolbox, Google Admin Toolbox, or even Mailtrap’s very own free checkers to verify your DNS records are configured correctly for SPF, DKIM, and DMARC.
- One-click unsubscribe – Add a list one-click list unsubscribe header option. This can be as basic as a hyperlink, but if you want to comply with Microsoft Outlook’s requirements in one go, then make it a visible button.
- Honor unsubscribe – Make sure anyone who clicks on your unsubscribe header is removed immediately from your list without having to confirm anything or log in somewhere.
Spam Rate Dashboard

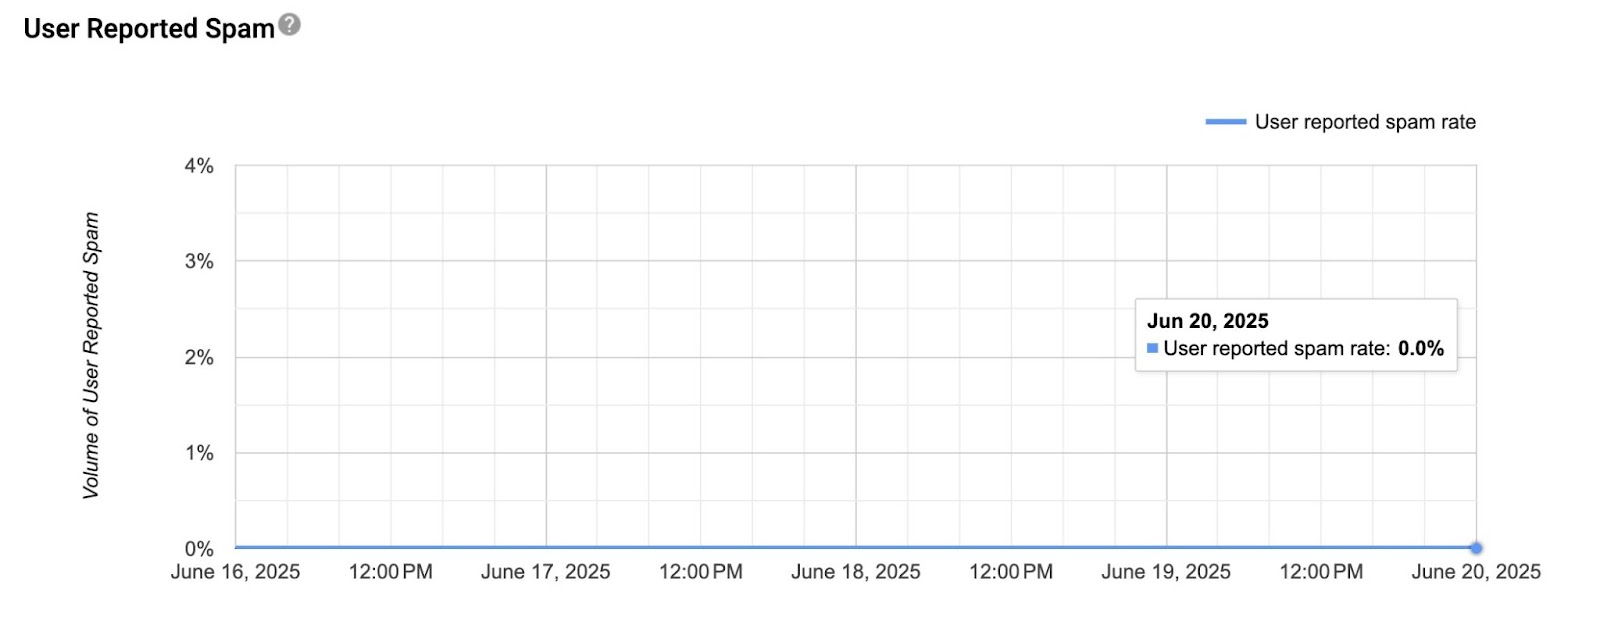
This dashboard will show data only for emails authenticated by DKIM.
This dashboard tells me what percentage of my emails have been reported as spam by users. This is in comparison to the number of emails that have successfully landed in the inbox.
Additionally, any emails that your recipients send to spam folders and later marked as ‘not spam’ will also be included in this calculation. The red line represents Google’s spam rate requirements, whereas the blue line stands for the industry standard.
How to fix a high spam rate:
- Improve your email design
- Avoid spammy words
- Reduce your sending frequency
- Send only to people who have opted-in
IP Reputation Dashboard

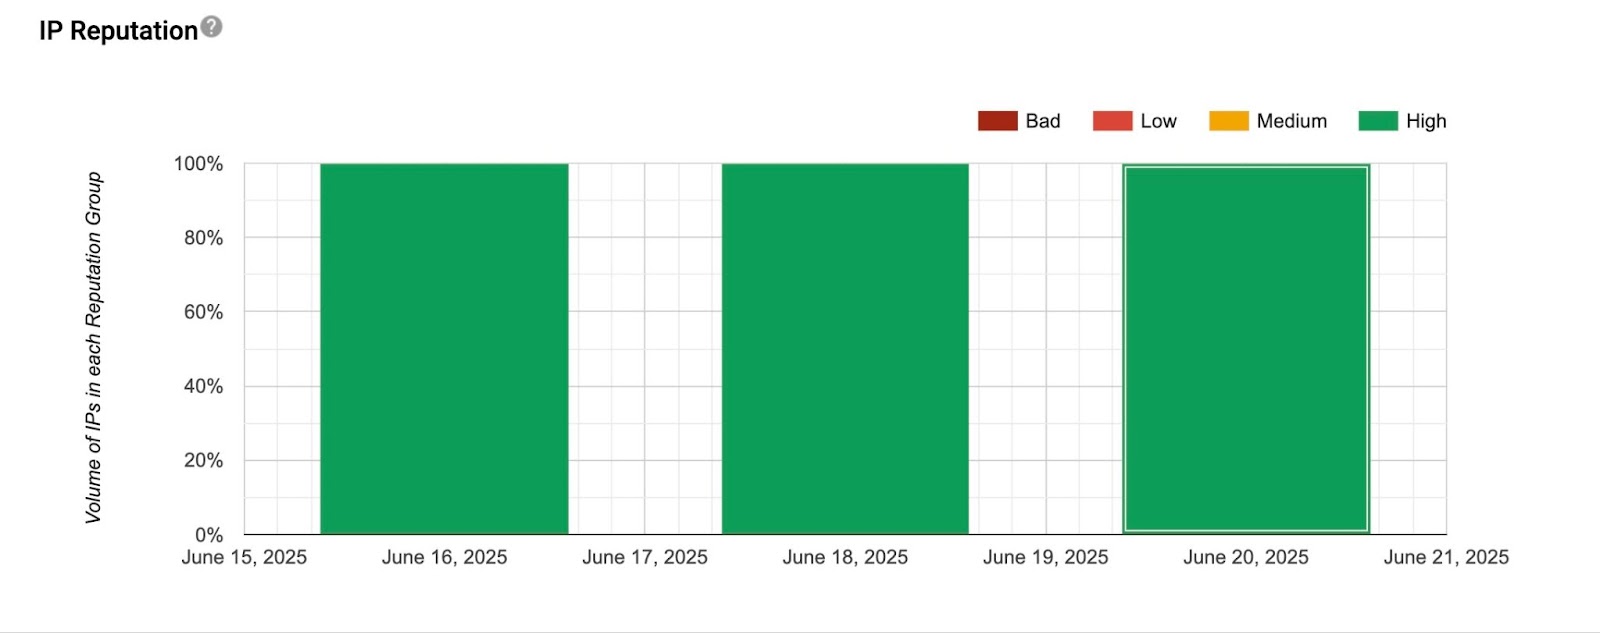
IP reputation is a measure Internet Service Providers (ISPs) use when evaluating whether you’re a legitimate email sender or not. The stacked bars in this graph show the percentage of email traffic per rating group.
Essentially, your goal here with this dashboard is to aim to have as many as (preferably) green and yellow bars as you can. If you start seeing red bars, then it’s time for action because a bad or low IP reputation directly influences your email deliverability rate.
How to fix IP reputation:
Some of the factors that impact IP reputation include:
- Email sending volume
- Bounce rates and complaint rates
- Presence on email blacklists
- Whether the IP is shared or dedicated
- Rate of spam trap hits
- Consistency and warm-up behavior
- TLS/SMTP configuration
According to Google, you should avoid sending spam, malware, unauthenticated messages, and emails that come from suspicious domains.
Personally, I suggest taking care of your email list hygiene if you want to take it up a notch.

Domain Reputation Dashboard

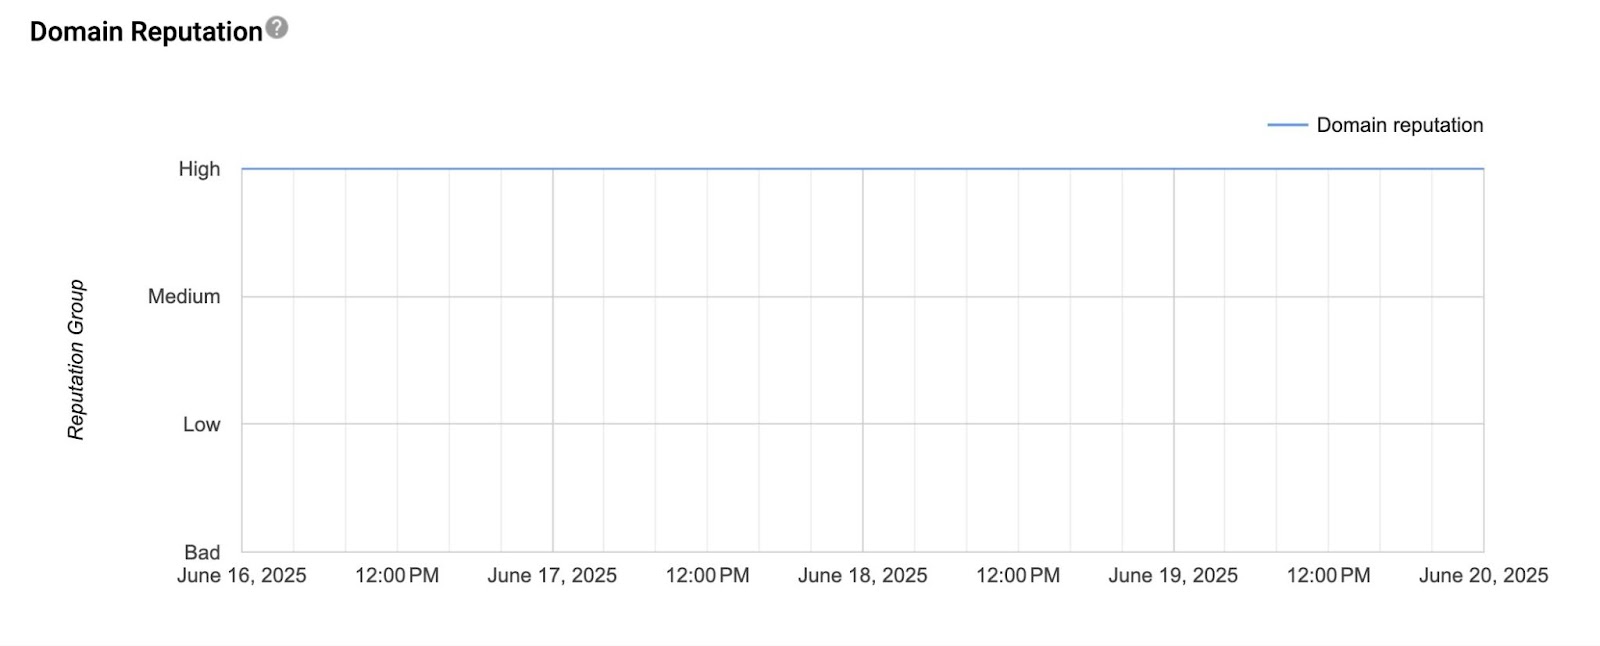
This dashboard will show data only for emails authenticated by DKIM.
Domain reputation is a measure ISPs use to evaluate whether your emails are trustworthy or not. In this graph, you can see how Google’s spam filters view your domain reputation, based on rating per day, ranked from bad to high.
Here’s a table that summarizes the domain reputation ratings (it also works for IP reputation):
| Rating | Explanation | Result |
| Bad | History spam volume | Almost always flagged or blocked |
| Low | Frequent spam | Likely to be marked as spam |
| Medium | Mostly legitimate with occasional spam | Generally delivered, except during spam spikes |
| High | Very low spam, meets Google’s standard | Rarely marked as spam by Gmail |
How to fix domain reputation:
Some factors that impact domain reputation include:
- Bounce rates
- User-reported spam complaints
- Spam trap hits
- Engagement metrics (opens, clicks, replies)
- Sending domain history (age, consistency, email volume)
- DMARC, DKIM, and SPF configuration
- Message content quality (spammy words, links, formatting)
- Unsubscribe mechanism reliability
The fixes, like the ratings, are quite similar to IP reputation, although here I can recommend that you avoid switching domains often and try to send consistently from one domain (at least until you fix your deliverability issues). For example, don’t send marketing emails from one domain and transactional from another.

Feedback Loop (FBL) Dashboard


This dashboard will show data only for emails authenticated by DKIM.
A feedback loop is a mechanism that most mailbox providers have, and it sends you a notification when your emails are marked as spam by your recipients.
The Feedback Loop dashboard provides two graphs for tracking:
- Average Feedback Loop spam rate – The blue graph shows the average spam rate across your campaigns per day. You can also click a data point on the graph if you want to display spam rates for a specific campaign.
- Feedback Loop identifier count – The red graph shows how many unique identifiers (e.g., customer IDs) triggered spam complaints on a given day. This can help you determine which campaigns have an unusual spam rate.
Personally, I find this dashboard most useful for seeing whether a particular campaign or email channel is impacting my overall sender reputation. Now, you’ll want to aim for as low spam rates, so either 0.1% or 0.3%, as we mentioned previously. However, Google states that if your spam rate is too low, something might be interfering with your data accuracy.
However, for the dashboard to show any data, you’ll first need to embed a header called Feedback-ID that follows this format:
| Feedback-ID: a:b:c:SenderId |
a:b:c:– These are optional fields.SenderId– This is a required field (5-15 characters).
So, for example, here’s what a Feedback-ID header would look like in practice:
| Feedback-ID: campaign123:client456:newsletter:abcSender |
P.S. Mailtrap customers don’t have to worry about setting up the Feedback Loop since we do it by default for all of our users.
How to deal with a spike in Feedback Loop:
If you’re seeing an increase in spam rate as reported by Google’s Feedback Loop, I recommend you to:
- Remove inactive subscribers or send them a re-engagement campaign
- Re-evaluate your content and make sure it’s valuable to your audience
- Segment your contacts further and personalize your content

Authentication Dashboard

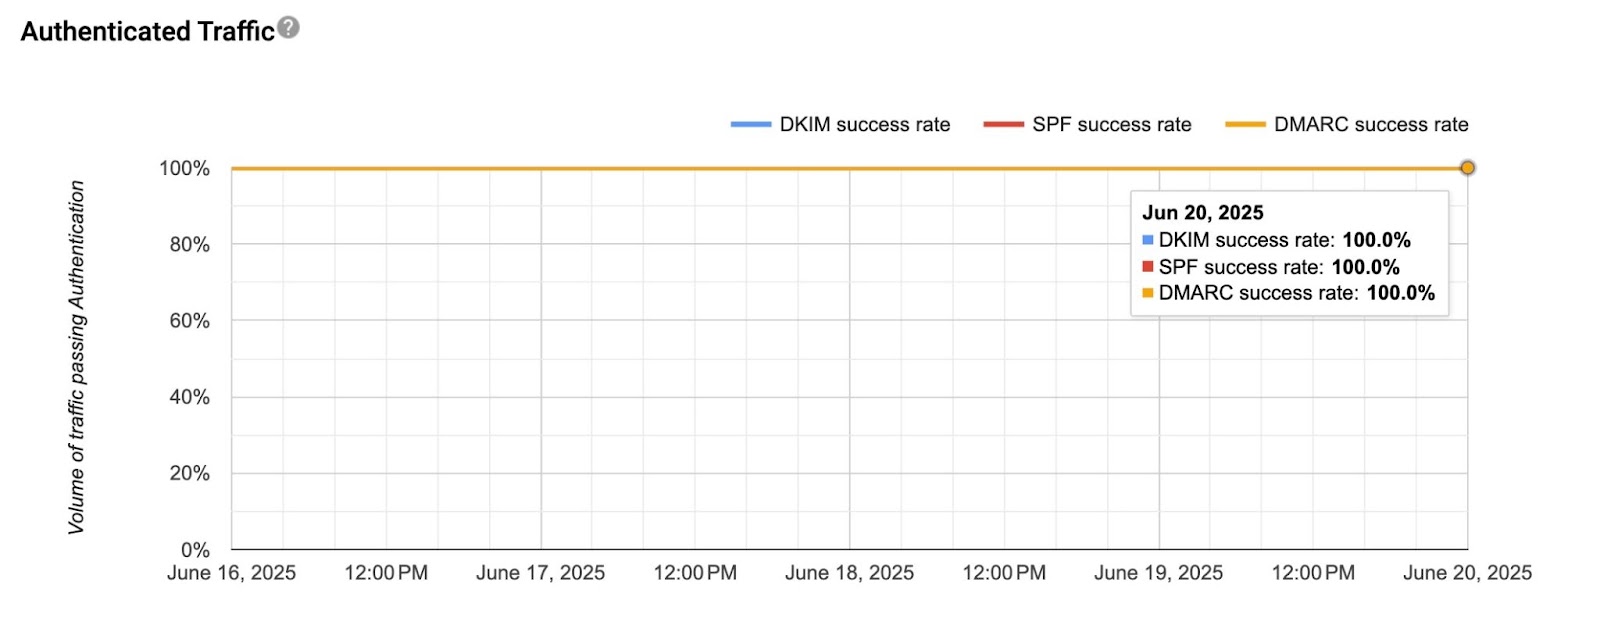
This dashboard shows the percentage of sent emails that passed email authentication checks, including SPF, DKIM, and DMARC.
If you’ve recently set up and verified your domain with Google Postmaster Tools, the chances are that you’ll see 100% here for a while. Graph drops in this dashboard are typically rare, with most issues having to do with missing DNS records, incorrectly configured sending setups, and similar.
How to fix a drop in authentication success rate:
The first thing you’ll want to do is review DMARC reports for days when there was an issue. This way, you can isolate the faulty IP or sending stream and take further action, which includes:
- Verifying whether your SPF and DKIM records are still published correctly in your DNS.
- Checking whether your ‘From’ address and authenticated domains are properly aligned.
- If your domain is example.com, your ‘From’ domain should be ‘example@example.com’.
- Inspecting your email infrastructure to see whether your sending stream is configured correctly.

Encryption Dashboard

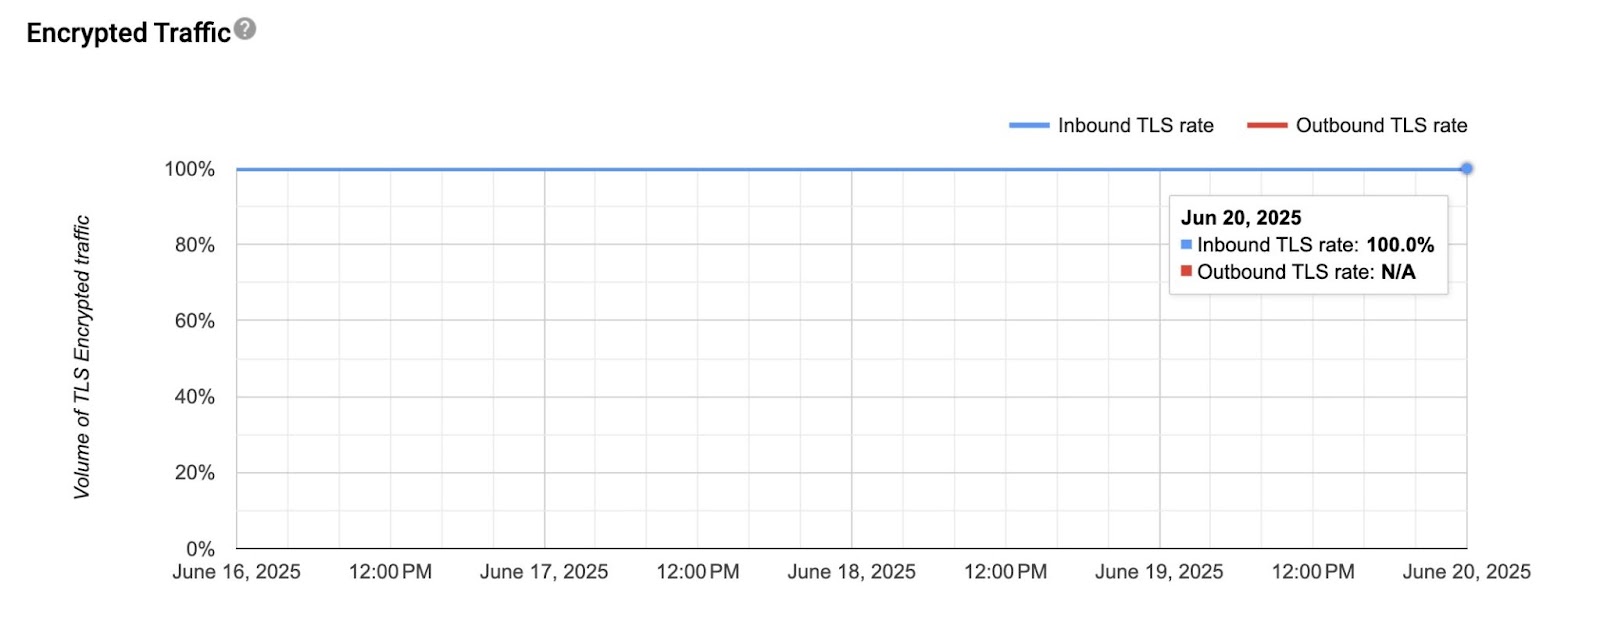
On this dashboard, you can see the percentage of emails you sent that have been sent over SSL or TLS connection. These are industry-standard security protocols used to encrypt data during transit, protecting them from unauthorized access.
Compared to other dashboards, this one isn’t used as much since not many things can go wrong here. However, you should keep an eye on the volume because, even though a drop doesn’t directly impact your deliverability, it can mean a vulnerability and pose a security risk.
How to fix a drop in encrypted traffic:
The solution to this problem is quite simple, as all you can do is check your SMTP configuration for a misalignment in SSL/TLS settings. Or, if you’re using an email service provider, you’ll need to contact their customer support for assistance.
Delivery Errors Dashboard

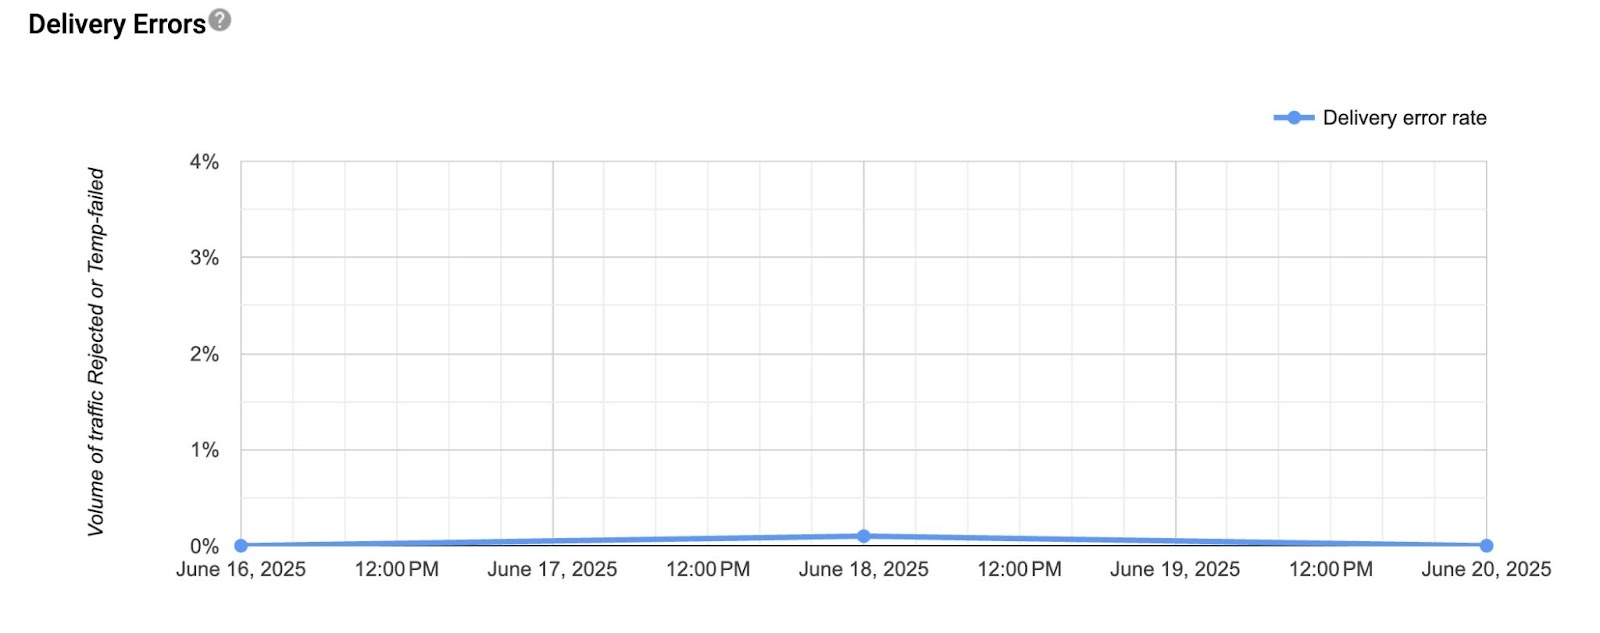
Delivery rate refers to whether an email has been accepted by the recipient’s mail server or not, regardless of the folder (e.g., spam, promotions, etc.). This dashboard lets you see the percentage of all authenticated messages (SPF or DKIM) that were rejected or temporarily failed by Google.
Besides the volume of message rejection or failure, the Delivery Errors dashboard will also provide you with the reason for the error.
How to fix a spike in delivery errors:
Some of the reasons for a spike in errors include:
- Exceeded rate limit
- Spammy content
- Unsupported attachment
- IP or domain have a low reputation or they are on one or more blacklists
On the other hand, if you’re seeing a spike but your email logs are telling a different story, the chances are that your recipients are auto forwarding your messages and the forwarding server is the one getting delivery errors. Or, God forbid, there’s a malicious actor in the play.
How to improve your Gmail email deliverability
Now that you know how to use the Google Postmaster Tools, here are some tips from our deliverability experts for improving your Gmail email deliverability:
- Use Google Postmaster proactively – Many marketers come to us for help with deliverability when it’s too late, and the damage has already been done. So make sure to routinely observe Postmaster Tools dashboards and resolve small issues using AI mode.
- Monitor domain reputation regularly – A drop in domain reputation is a big red flag, often meaning there’s a significant issue under the hood, so make sure to check it regularly.
- Act early if something looks off – If you notice some of the metrics presented by Google Postmaster look off, don’t be afraid to pause your campaigns so you can investigate and run diagnostics.
Over at Mailtrap, all of our customers can share their Google Postmaster Tools with us so we can do all of the above in their stead. We’ll observe your Google Postmaster dashboards internally, notice you when we see when something is off, and suggest the needed fixes.
So, make sure to schedule a free consultation with one of Mailtrap’s very own deliverability experts! ⬇️
Wrapping up
Using Google Postmaster Tools to track the performance of emails you send to Gmail users is detrimental to your overall deliverability. Hopefully, you can now do it with certain ease by following this guide.
However, since the cost of undelivered emails is $0.11 per email, don’t stop at Google Postmaster! Make sure to regularly test your deliverability, track other key performance metrics, and perform regular audits.
For further deliverability inspiration and tips on improving it, make sure to check out our blog, where you can find articles such as:
- 10 Deliverability Tools and Email Marketing Platforms [2025]
- Inbox Placement Explained: How It Works & How to Improve It]
- Email Bounce Explained: Definition, Reasons, Best Practices
- 13 Reasons & Solutions for Why Your Emails Are Going to Spam
