Skip to Navigation


I’ve seen my fair share of perplexing cases, but the Outlook spam filter not working in early 2023 is certainly in the top five.
In this article, I’ll cover the details to help bulk senders understand what to do. And there are also useful tips for everyday Outlook users.
Why does the Outlook spam filter not work?
Here, I wanna give you an experience-based post-mortem to make it easier for you to recognize and troubleshoot the issue.
What happens when the filter stops working?
All hell breaks loose and if you’re responsible for email campaigns, a patch of grey hair pops up on your head. Jokes aside, 3 things typically happen.
- Genuine emails misdirected: Vital emails get mistakenly categorized as junk messages, causing important communications to be overlooked or delayed. Happened to me.
- Spam infiltrates the inbox (Safe Sender list bypass): The annoying, unsolicited spam emails find their way into your main inbox, cluttering your view and increasing the risk of phishing or malware. This didn’t happen to me, but there were a bunch of users voicing their despair on social media.
- Inconsistencies in categorization: The filter seems to lose its way, creating an unpredictable email environment where nothing seems to be sorted correctly. Happened to me, causing panic, as it hinted at a more serious issue with email infrastructure.
Tip: Check the full guide on how to prevent your emails going to spam.
Reasons behind the dysfunction
It’s easy to blame Microsoft. However, it may also happen that users or senders misconfigured email settings, making things even worse.
- Accidental alterations in user settings:
Tweaking the filter settings or unknowingly marking important emails as junk can disrupt the filter’s efficacy.
- Misinterpretations by Outlook’s learning behavior:
Outlook learns from user behavior, and in February 2023 it was a bad student. It could have happened if you, or your recipients, frequently moved emails to and from the junk folder. I can only assume that the Outlook junk filter got confused and junked perfectly deliverable emails, then let the obvious junk creep into the primary inbox.
- Problems from the sender’s side:
If an email comes from a sender with a tarnished domain or IP address reputation or poor email practices, Outlook may flag it as spam, regardless of its actual content. The same thing could happen if you haven’t properly authenticated your sending server. Remember that this applies to any other client (Gmail, Hotmail, etc.). It’s the first thing I checked, and I’ll tell you how to do it yourself in the following sections.
How to make the Outlook spam filter work properly?
Honestly, none of us can fix Outlook and ‘make’ the spam filter work properly, that’s in Microsoft’s hands.
But with a few adjustments and a bit of know-how, you can work on your infrastructure and get the spam filtration back on track.
Tackling email infrastructure (for bulk senders)
When you suddenly see a surge in spam complaints, do the following two things right away. (I’ll also trow in a bonus tip for good measure.)
1# Check domain authentication policies
If you send emails in bulk, make sure to use proper domain authentication methods – DNS records (SPF, DKIM, and DMARC). These help Outlook recognize the sender as legitimate and generally help increase the level of protection against phishing and malware from your domain.
How can you check authentication records?
MXToolbox is a free lightweight tool to do it. Select their DNS lookup tool, paste your domain name to the designated field, and it’ll check whether your domain has the records published.
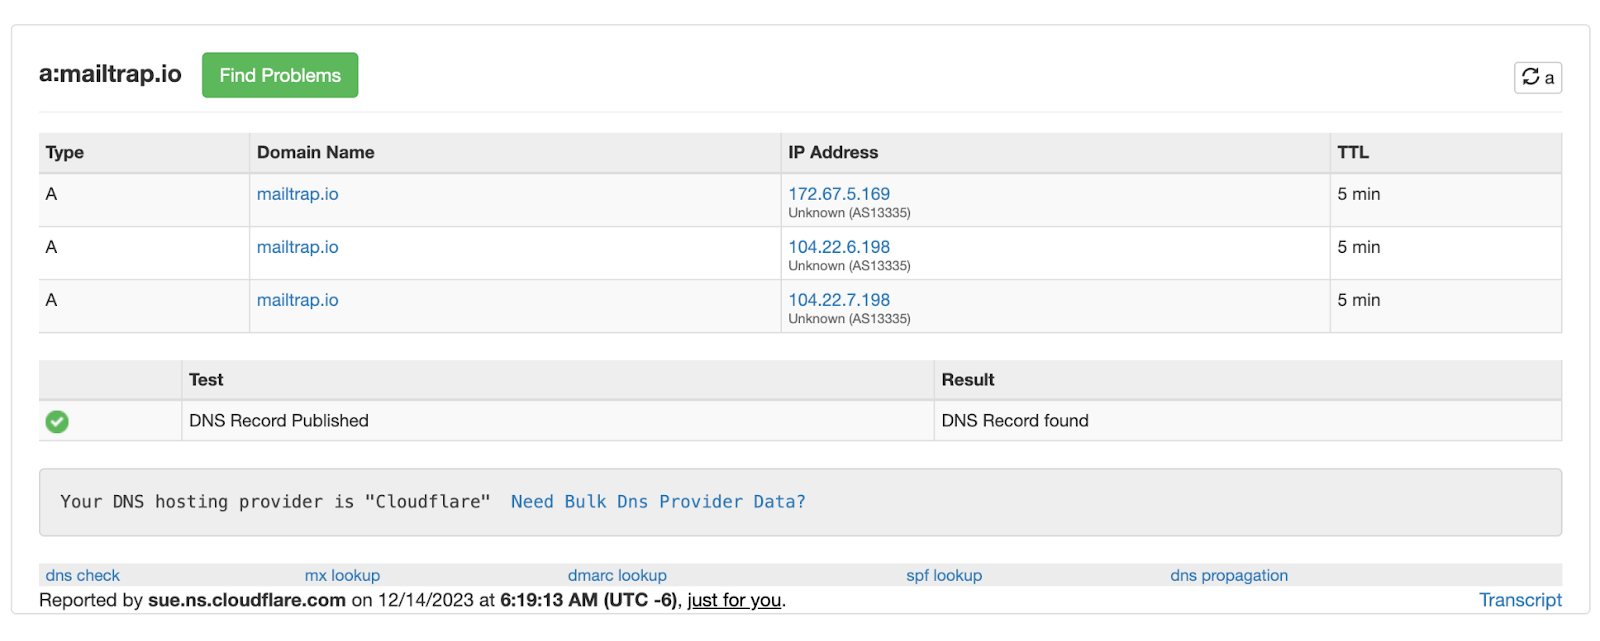
Feel free to click the Find Problems button, and the tool will list all the related warnings and error logs for you. MXToolbox also has a separate lookup tool for each DNS record (SPF, DMARC, DKIM).
I have to stress that the tool above is good for quick troubleshooting. However, you’ll still need to know how to fix things if there are problems with the DNS records, or critical records are missing.
So it’s better to opt for an email-sending service that requires you to add all the DNS and authenticate your domain before sending. Effectively, it helps prevent most authentication and DNS-related deliverability issues.
Mailrap Email Sending takes care of you by requiring DNS authentication.
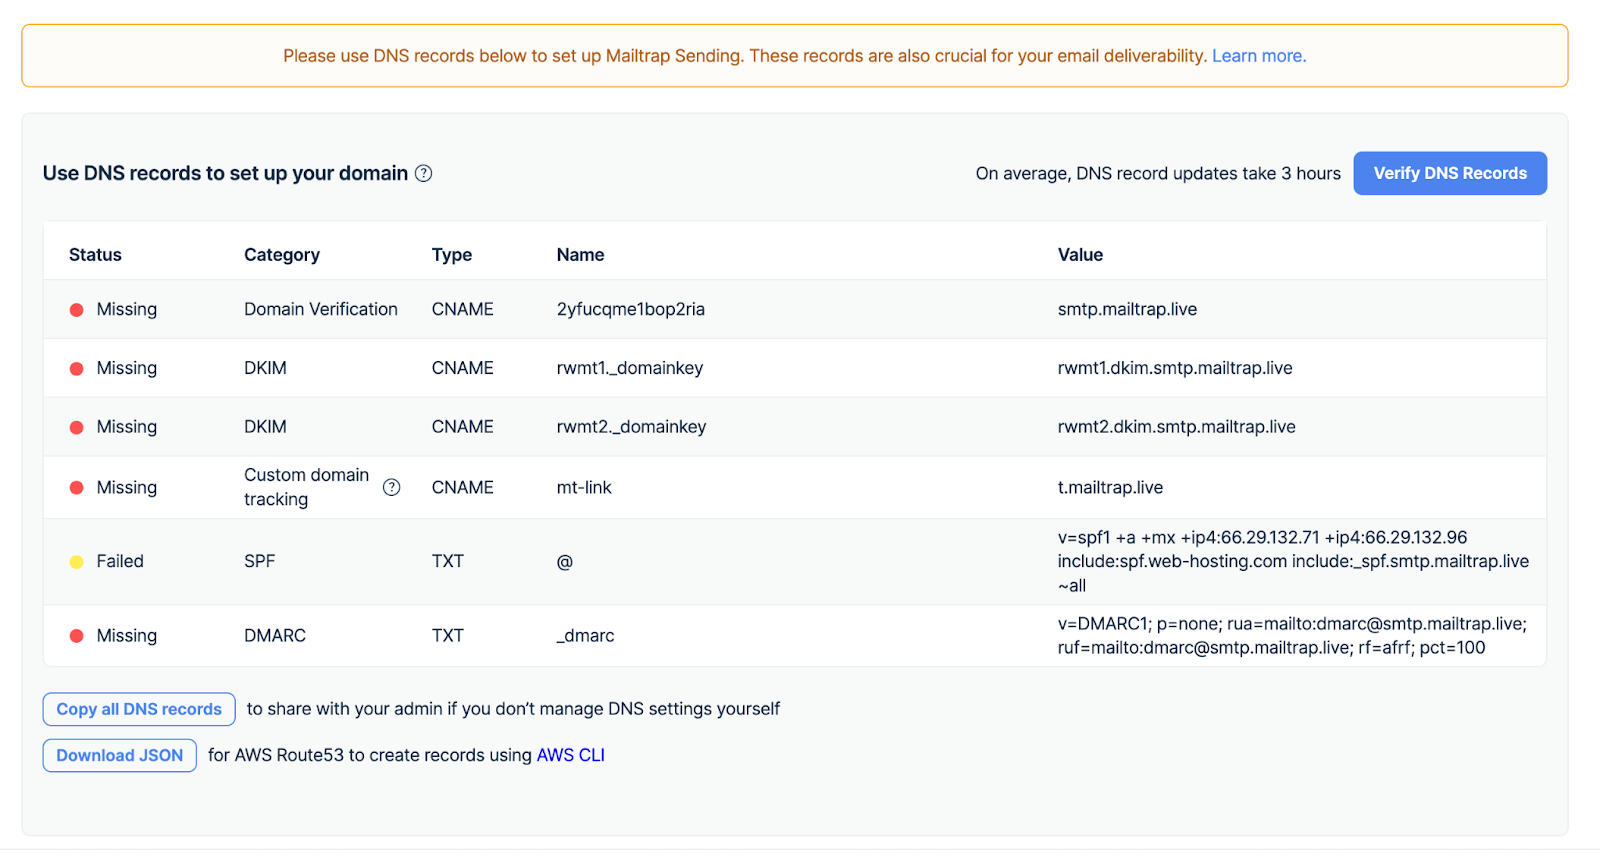
We made sure that the DNS authentication is as easy for you as possible. It’s only a copy-paste job, you can copy all the records and share them with your admin. And yes, we already parse your SPF, so there’s no additional work there.
Plus, you have to take this step for the following reasons.
- Starting from February, Google and Yahoo are making authentication #1 requirement for bulk senders.
- Without DNS your deliverability will suffer = your domain reputation suffers too.
- You increase the chances of landing on a blacklist.
- You risk your sender’s reputation.
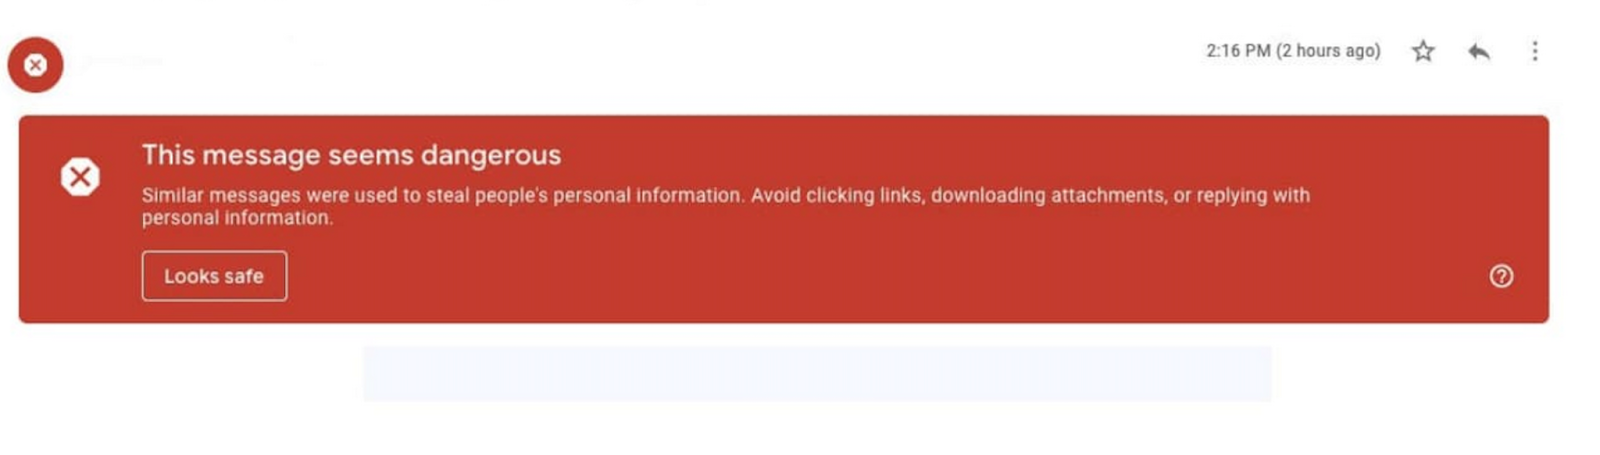
- Mailbox providers are more likely to share the following info ⬇️ with your recipients.
#2 Know your sender’s reputation (score)
Outlook considers the sender’s score when filtering emails. If a sender is consistently marked as spam by many users, their emails are more likely to end up in the junk folder. In turn, the sender’s score goes down.
How can you check the score?
There are more than a few tools, I’ll list two that I find the easiest to use, plus one from Microsoft.
- Sender Score from Validity – Arguably the quickest, and among the most accurate. Add your domain, register, and run the check. In under a minute, you get a detailed score (top score is 100) across all hostnames and IPs on your domain.

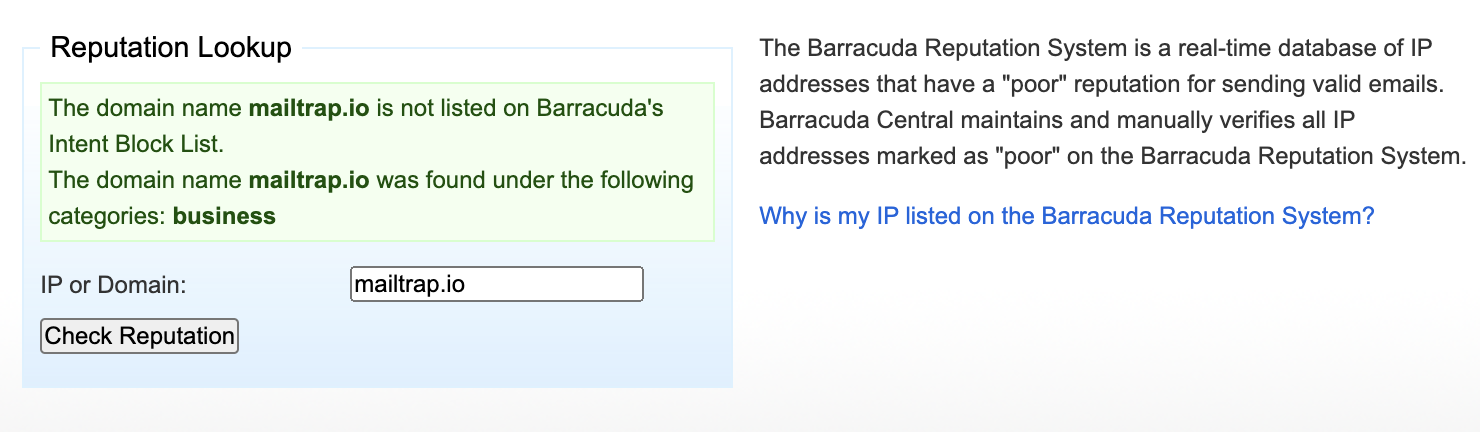
- BarracudaCentral.org – Also super quick and convenient to use, it’s a simple tool to check if you appear in any blacklists and how your domain is categorized. Though, if all’s well, Baracuda gives you little info. But you get a detailed report should your domain be in trouble.
- Microsoft SNDS – Honestly, I haven’t used this one. But based on a quick search, it’s much more comprehensive and offers the data points for the following:
- Spam complaint rate
- IP sending reputation
- Deliveries to spam traps (only with Microsoft)
Note: Check full tutorials on sender and email domain reputation.
Bonus Tip: Test your emails in a sandbox with Mailtrap
To continuously keep your domain reputation intact, it’s necessary to test your emails in a sandbox.
Let me explain.
Mailtrap Email Testing helps you inspect and debug emails in staging, dev, and QA environments before sending them to recipients in production.
You can preview and analyze content for spam (via SpamAssassin) and validate HTML/CSS. Plus, you can see the market support for your email across different devices (be it Windows, Mac, iPhone, or Android) and mailbox providers (including Outlook).
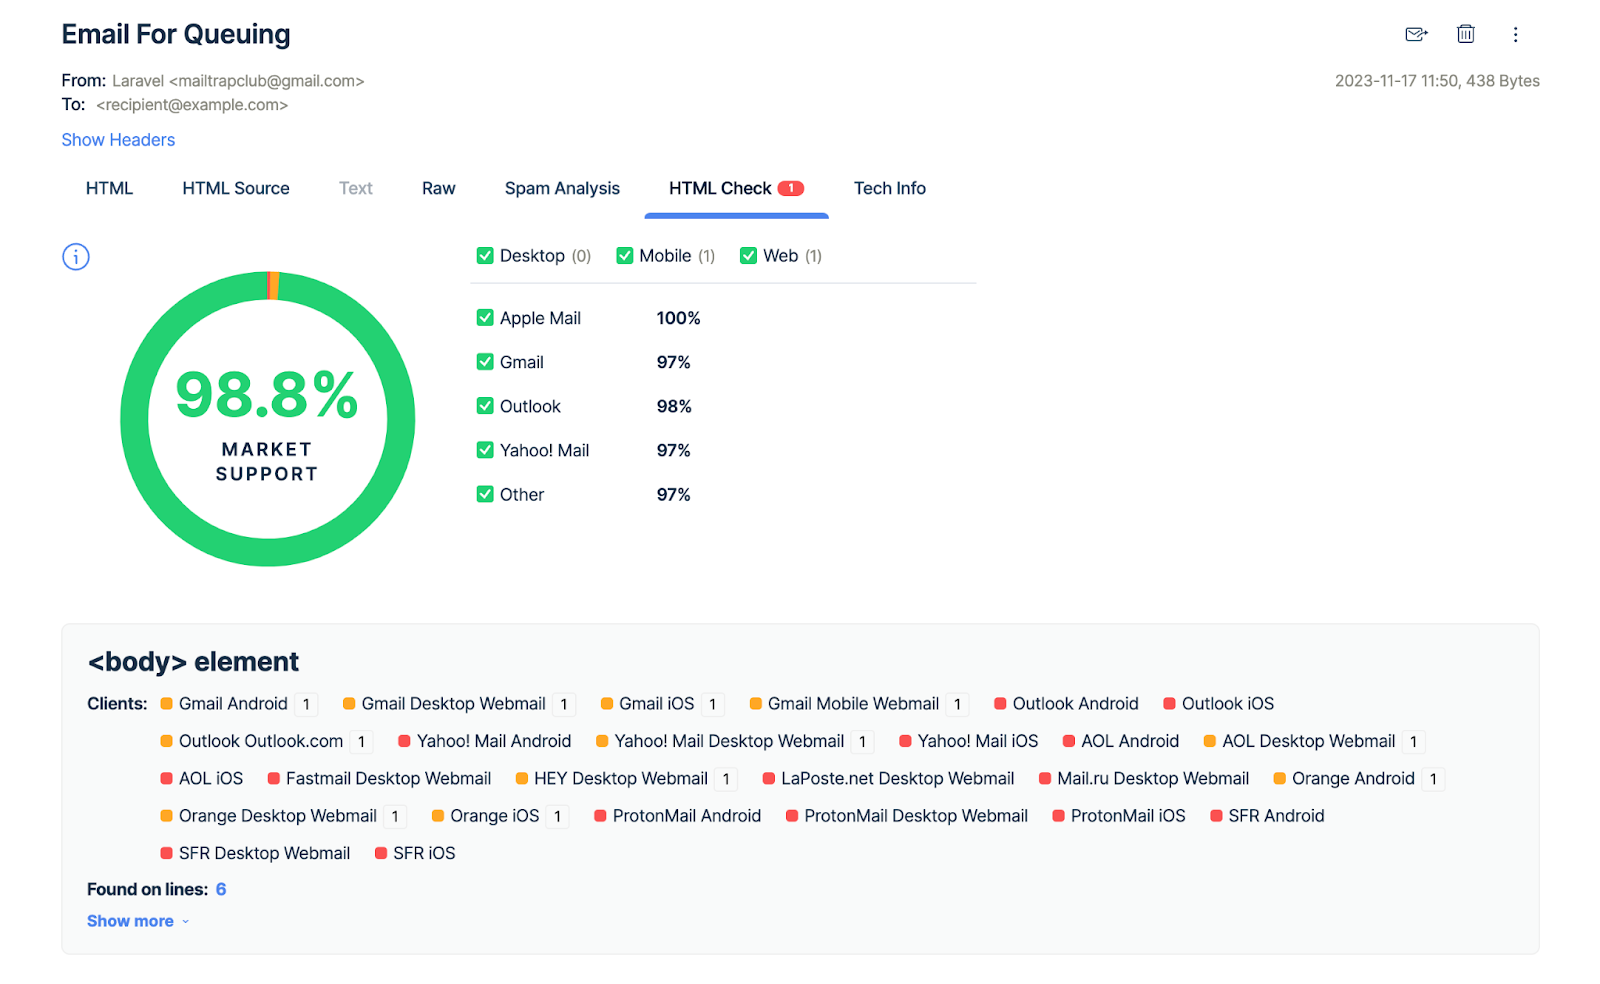
Mailtrap allows you to have an accurate estimation of your email deliverability without actually sending an email. You can select just one client (e.g. Outlook app) and see if the template is likely to trigger a junk mail filter.
Also, you get detailed spam analysis, error logs, and quick explanations on how to fix them. Hit the button below to test it out yourself.
Now, I’m moving to inbox placement as an umbrella parameter that encompasses much of what’s already been discussed.
Inbox placement – quick overview
Inbox placement is a blend of sender reputation, content quality, recipient engagement, and the ever-evolving algorithms of email clients like Outlook. All that helps mailbox providers determine if your emails should land in primary inbox, promotions, or spam.
But how to ensure your emails always hit the mark?
There are a couple of things to do – take preemptive actions or use a tool to roughly estimate the inbox placement.
However, I wouldn’t recommend inbox placement tools 100%, particularly if you send at a volume. The results can be misleading unless you’re strictly using your domain data. Anyway, here are the preventive measures to take.
- Regularly clean your email lists: Remove inactive subscribers to maintain a high engagement rate. You can even go a step further and create like a safe recipients list.
- Personalize and segment your emails: Tailored content increases relevance and engagement.
- Monitor your sender reputation: Use tools (mentioned above) to track your domain and IP reputation.
- Monitor email feedback loops: Depending on the mailbox provider, you can get feedback on recipient complaints. Here’s a full guide.
- Stay updated on email best practices: Email marketing is an ever-evolving field. Keep abreast of the latest trends and practices. For example, you should rotate your DKIM keys quarterly and set your DMARC policies to “quarantine”.
If you want to know more about email deliverability, click the link ⬅️ to our comprehensive guide.
Tackling Outlook settings (for everyday users)
There are two things to do – tweak the email account filter settings and try to manage Outlook’s learning behavior.
#1 Tweak junk email filter settings
- Access Junk Email Options: Open Outlook, go to the Home tab, and click on Junk. From there, select Junk E-mail Options. This is where you can fine-tune your spam filter settings.
- Modify the settings: You’ll find several levels of filtering to choose from – from No Automatic Filtering to Safe Lists Only. Choose the one that best suits your needs. Remember, the stricter the setting, the higher the chance of legitimate emails being marked as junk.
- Use the Not Junk option correctly: If a legitimate email ends up in your Junk Email folder, don’t just move it back to the inbox. Instead, right-click on the email, select Junk, and then Not Junk. The action tells Outlook’s filter that it made a mistake, helping it learn and improve over time.
#2 Guide Outlook’s learning behavior
- Always mark wrongly categorized emails: I already told you how to ‘Not-Junk’ emails properly. Here I’m stressing that you need to do it consistently, or Outlook inbox might struggle to understand your preferences.
- Manage Safe Senders and Blocked Senders lists: Under Junk Email Options, you’ll find the Safe Senders and Blocked Senders lists. Add reliable senders to the Safe Senders list to ensure their emails always make it to your inbox. Conversely, add known spammers to the Blocked Senders list to keep them out.
Critical note: If you’re a bulk sender, you should never proactively instruct your users to change their settings and mark you as a Safe Sender. You can only do that if a recipient explicitly complains that your emails aren’t properly categorized.
To wrap up
At the end of the day, Outlook spam filter not working is a real problem largely tied to client malfunction. Even so, as a sender, you need to hawk over your email functionality and ensure low percentage of spam messages. Just follow the tips in this article and your recipients will never receive unwanted emails from you.