


In this EmailJS React tutorial, I will show you how to send emails from your React contact form or app via EmailJS, as well as some alternatives.
Note that I’ll use a 3rd party email service provider since EmailJS doesn’t have built-in sending functionality. For this, I’ll go with Mailtrap Email Delivery Platform, which offers a reliable SMTP and email API with high deliverability rates by design.
Feel free to skip ahead by using one of the following jump links:
- Install and configure EmailJS [jump ahead]
- Create a contact form [jump ahead]
- Send email using EmailJS [jump ahead]
- EmailJS alternative 1: Nodemailer [jump ahead]
- EmailJS alternative 2: Node.js [jump ahead]
- Test email and email sending on staging [jump ahead]
Disclaimer: Our developers have written and checked every line of code in this article.
EmailJS and React security
Sending emails from a React app using EmailJS makes things simple and convinient, but it introduces some security risks you should be aware of.
Here’s what to check and how to secure your infrastructure from form spam, abuse, and Public Key theft.
- Understand the distinction between Public and Private Keys
The article correctly shows you how to use your Public Key with emailjs.init() via a .env.local file and the VITE_PUBLIC_KEY variable. This is a good practice for public-facing keys.
However, your EmailJS Private Key (Access Token) is a different story. This token should never be exposed in your React code, regardless of whether it’s in a .env file, as the build process embeds it into your client-side JavaScript bundle. Any attacker can find it and use it to send emails from your account without your permission.
- Move your sending logic to serverless functions
The most robust way to protect your credentials and prevent abuse is to move the core email-sending logic to a server-side environment. This is a perfect use case for serverless functions with providers like Vercel, Netlify, or AWS Lambda.
Your React component’s job is then simplified: it simply sends the form data to a secure serverless endpoint.
// Example in your React component
const sendEmailSecurely = async (formData) => {
  await fetch('/api/send-email', {
    method: 'POST',
    body: JSON.stringify(formData),
    headers: { 'Content-Type': 'application/json' },
  });
  // Handle success or error responses
};
On the serverless function, you can securely store your Private Key as an environment variable and use it to execute the emailjs.send() call. This completely removes the risk of exposing your most sensitive credentials.
- Implement Google reCAPTCHA
Even with a serverless setup, your contact form is still a target for bots that can exhaust your sending limits. To protect your endpoint, integrate a bot-prevention service like Google reCAPTCHA. On the front-end, a user completes a quick check, and the generated token is passed to your serverless function. Your function then validates this token before sending the email, ensuring that only genuine requests get through.
- Properly configure the EmailJS dashboard settings
Finally, strengthen your account security directly within the EmailJS dashboard by:
- Restricting origins: In the settings, create a whitelist of authorized domains (e.g.,
https://your-react-app.com). This prevents anyone from using your Public Key on a different website. - Using MFA: Enable multi-factor authentication on your EmailJS account to prevent unauthorized login attempts.
Install and configure EmailJS
EmailJS is a service that allows you to send emails directly from client-side applications without needing a backend.
Here’s what you need to do:
- Sign up for EmailJS
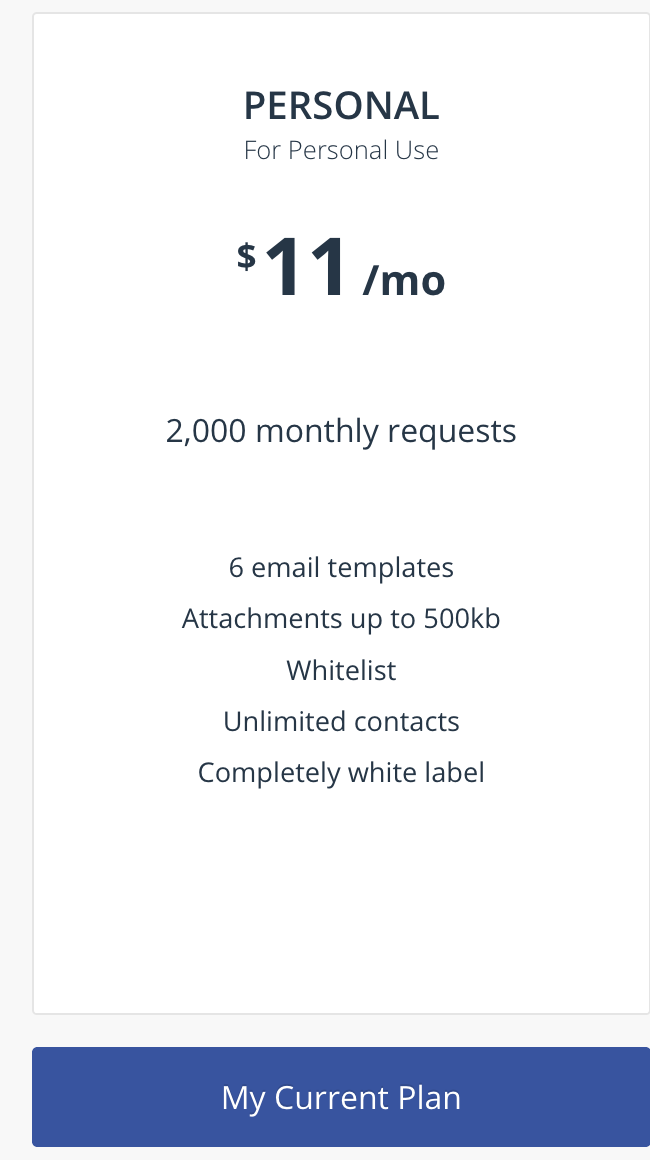
Before integrating EmailJS in your project, you need to create a free account. For demoing purposes, you can use the free tier. However, if you want to send attachments, you need to have at least a Personal Plan subscription.

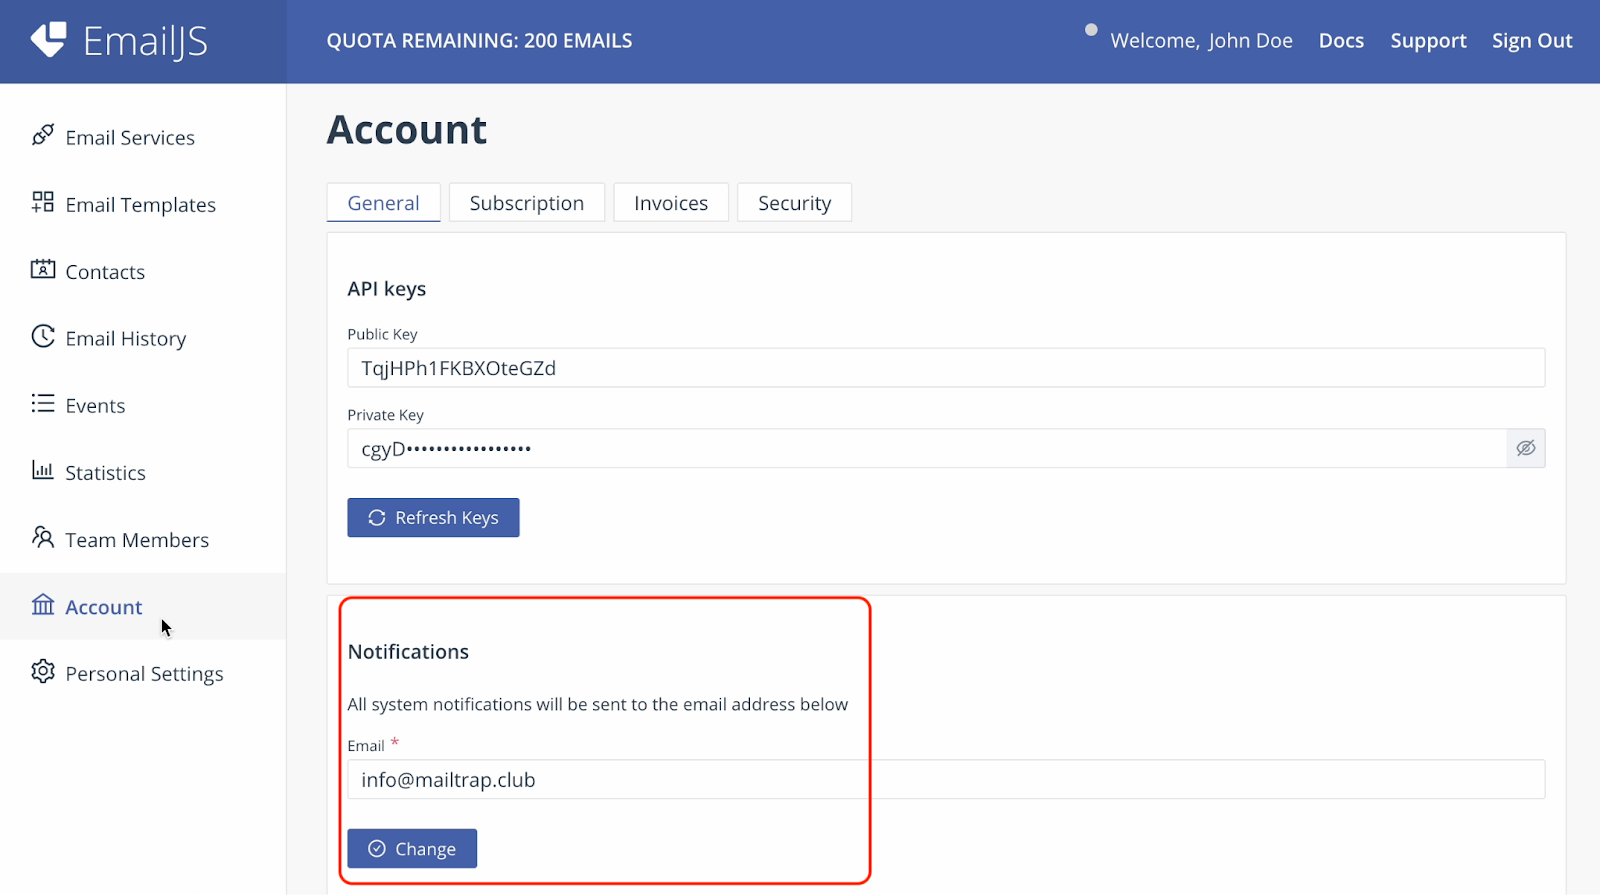
- Set notifications email
As you’ve signed up, navigate to the Notifications section in the account tab and add an email with the same domain as your Mailtrap’s account.

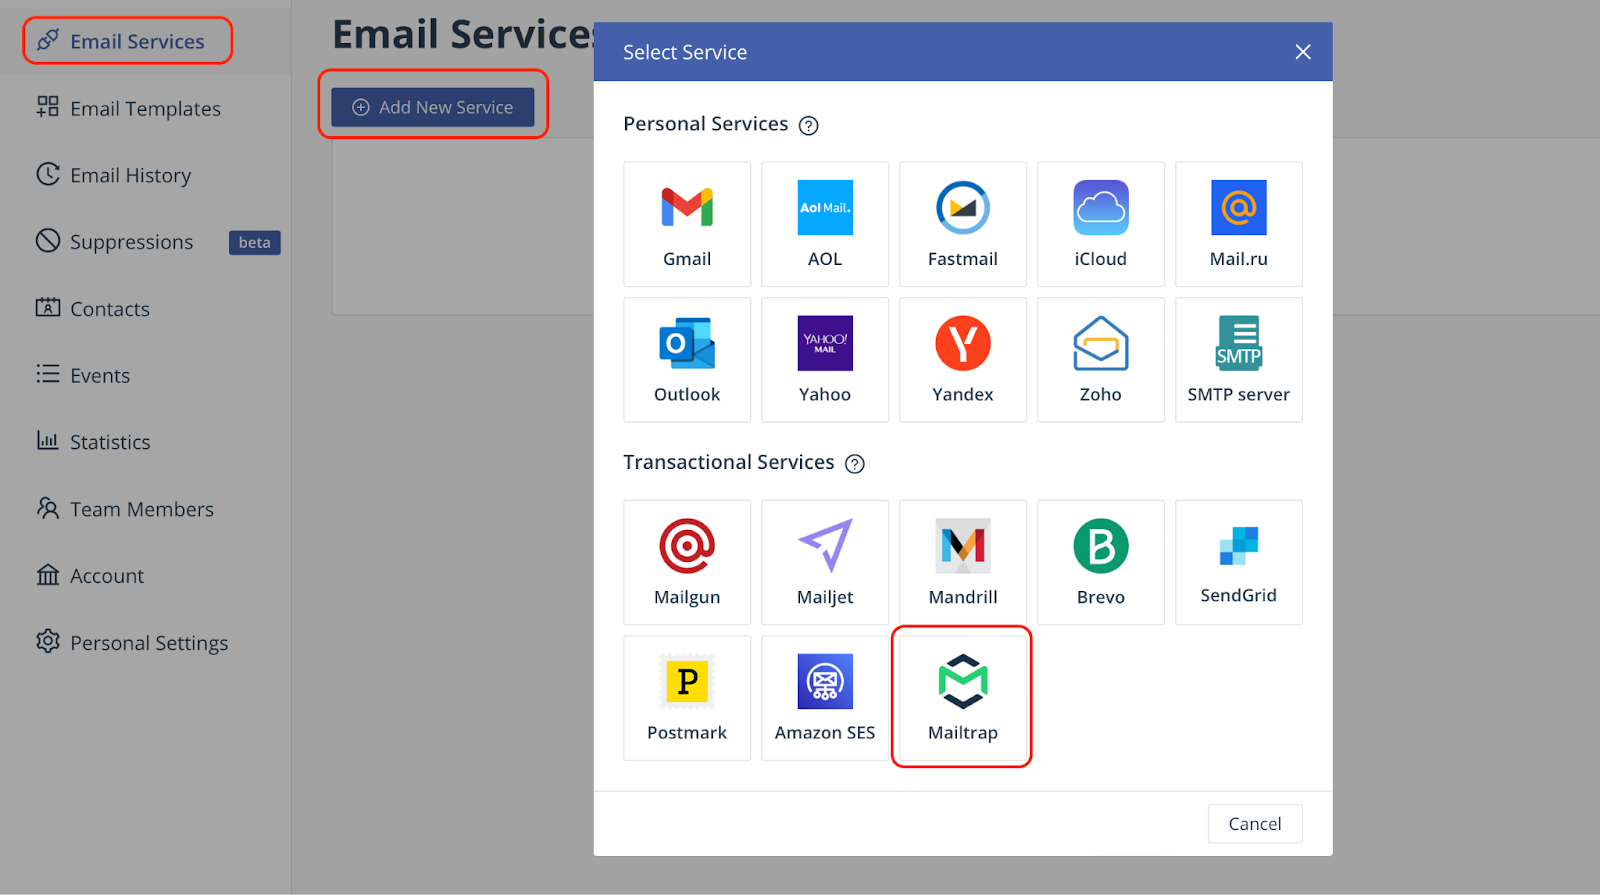
- Connect an Email Service
Next, go to Email Services and select Mailtrap as your email service provider (ESP).
Then, configure the service by providing the following details:
→ Username and Password: Find your credentials by going to your Mailtrap dashboard and then navigating to Sending Domains > Integration > SMTP. (if you can’t find your API key there, go to Settings > API Tokens)
→ Service ID: A unique identifier for this service. You can name it something like “mailtrap_service” or any name you like.
→ Email Feature – Select “Sending” from the dropdown menu.

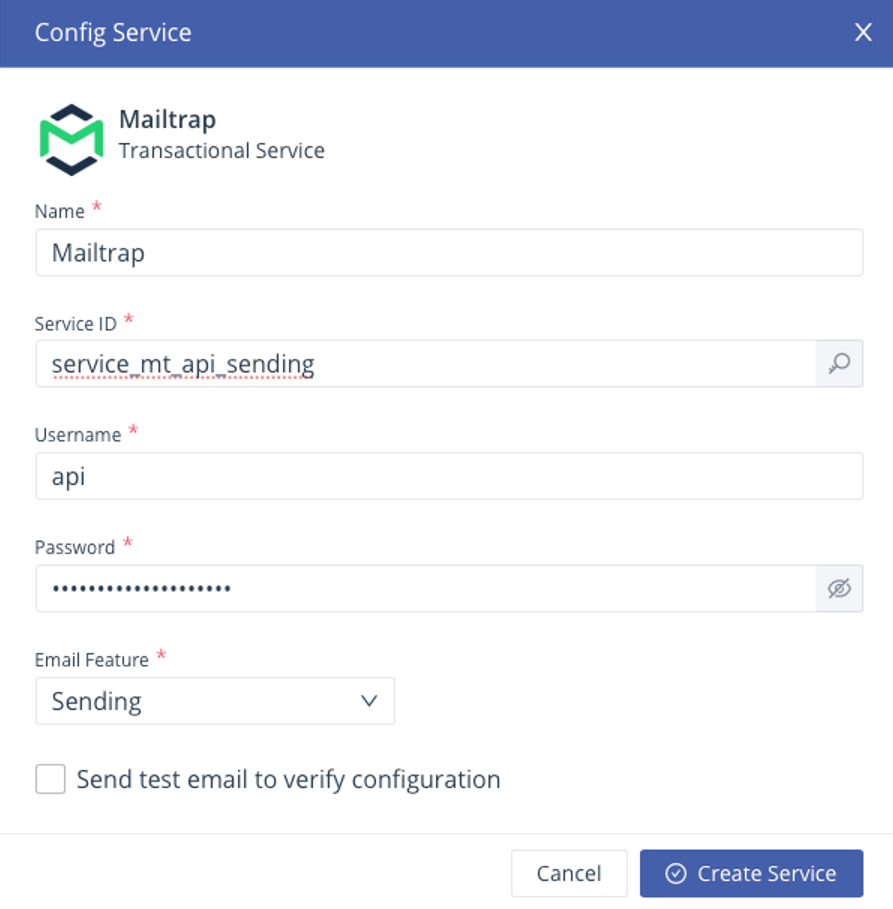
Note: If you experience issues when trying to configure Mailtrap in EmailJS, uncheck “Send test email to verify configuration”.
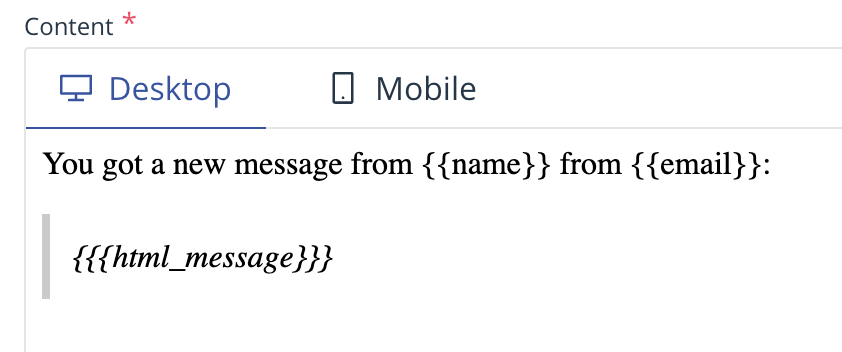
- Create an Email Template
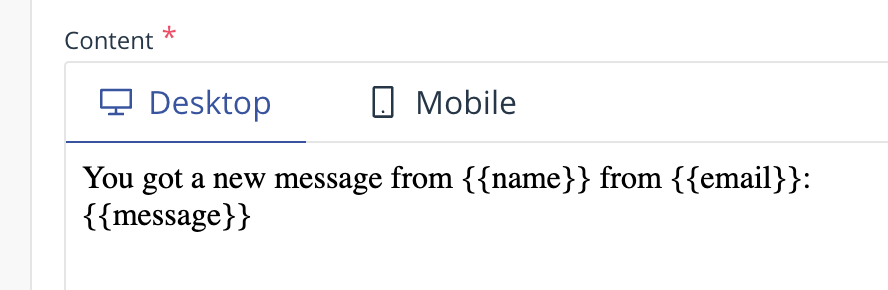
Go to Email Templates and create a new template. Add placeholders like {{name}}, {{email}}, and {{{html_message}}} in the email body where the user input will go. When the emails are sent, these get replaced with the sender’s name, email and message HTML content accordingly.

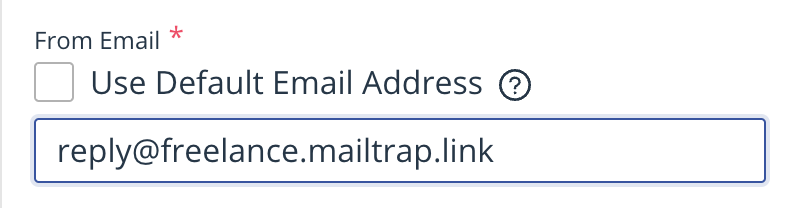
On the right sidebar, set your ‘From Email’ field to use your Mailtrap Account’s email domain, otherwise, Mailtrap will block the SMTP requests if they aren’t sent from the same domain. Also, do not tick the “Use Default Email Address” box.

- Save your IDs and Keys
Finally, navigate to the account section → API Keys, and save your Public Key.
All said and done, you need to have 2 IDs (Service and Template ID) and 1 Public Key.
Create React contact form
First, to create a working directory and set up everything to use React without much fuss, Vite is the optimal solution. It provides a quick and simple way to set up a preconfigured React project using a React template. You can install it via:
npm:
npm create vite@latest emailjs-react --template reactOr yarn:
yarn create vite emailjs-react --template reactIn the directory, create an src folder to store the source code, that is, HTML and JavaScript files:
mkdir srcIn the src folder, delete all the unnecessary files coming with the default React template since we only need App.jsx and main.jsx files:

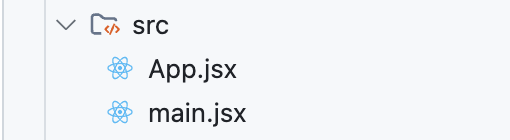
Also, since we won’t use CSS for this example, remove the following line in main.jsx:
import './index.css'Similarly, in the App.jsx remove all imports and all the code in the App function:
function App() {}
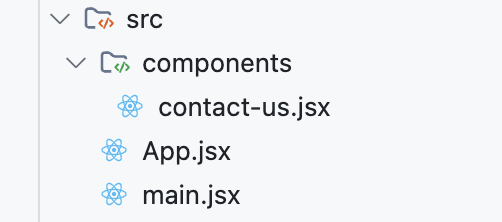
export default App;Now, we have successfully configured everything we need to create a contact form in React, so let’s get to it. First, create a components folder and a contact-us.jsx file inside the form, just like so:

In the contact-us.jsx file, create a React Component for the form, which we will connect to EmailJS later on. We’ll also add some basic styles so that inputs are positioned properly:
const ContactUs = () => {
  return (
    <form
      style={{
        display: "flex",
        flexDirection: "column",
        gap: 12,
        width: 300,
      }}
    >
      <label>Name</label>
      <input type="text" name="name" required />

      <label>Email</label>
      <input type="email" name="email" required />

      <label>Message</label>
      <textarea name="html_message" required></textarea>

      <button type="submit">Send</button>
    </form>
  );
};

export default ContactUs;
Important: Make sure all input names match the names you use in your EmailJS template.
Finally, let’s connect the component so that it’s rendered when we run our React application and center the form on the page:
import ContactUs from "./components/contact-us";

function App() {
  return (
    <div style={{ display: "flex", justifyContent: "center" }}>
      <ContactUs />
    </div>
  );
}

export default App;
To verify that the form is being correctly rendered when we run the application, we can use:
npm:
npm run devOr yarn:
yarn devThis is how your terminal should look like:

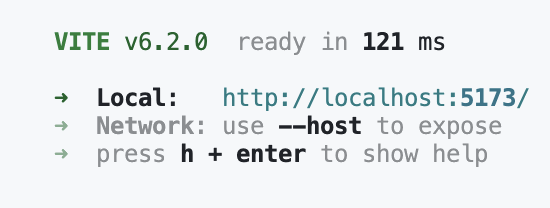
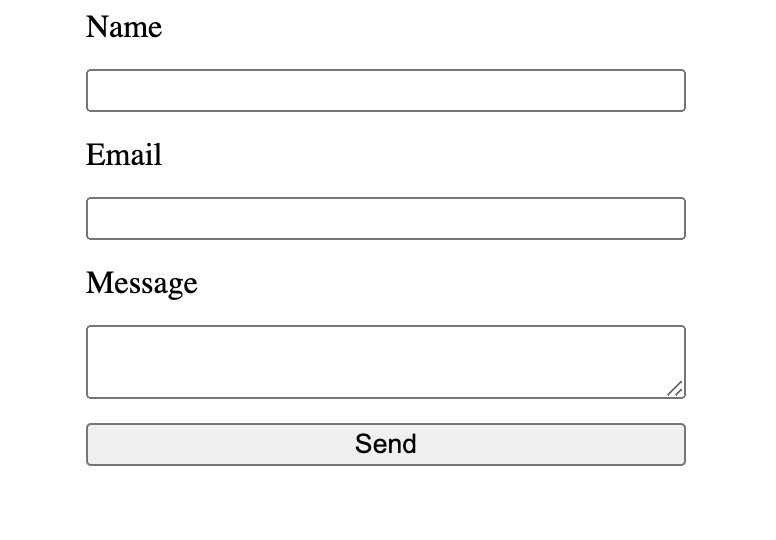
Click on the local host link to open the page, which should show your rendered form:

Want to add an additional layer of security to your React contact form or web app? Consider adding an email validation logic to your sign-up form, which will protect you against spammers and bots.

Send email in React using EmailJS
In this step, we’ll add EmailJS and make the form send emails on click using the data filled in.
First, we need to store Public Key, Service ID and Template ID somewhere. With Vite, we can do it safely using environment variables. The keys would still be exposed to the client, but it’s safer than using keys directly in the code.
So let’s create a .env.local file and add the mentioned keys and IDs there from the EmailJS dashboard:
VITE_PUBLIC_KEY=your_public_key
VITE_TEMPLATE_ID=your_template_id
VITE_SERVICE_ID=your_service_id
Important: Environment variables in Vite must have a VITE_ prefix for them to be imported correctly in the code.
Let’s install the EmailJS SDK so that we can use it in the React code.
npm:
npm install @emailjs/browseryarn:
yarn add @emailjs/browserNow we have to make sure EmailJS is being properly initialized in the React application. To do this, modify the App.js file, add the emailjs.init call, and pass the environment variable that corresponds with the Public Key.
The code below initializes EmailJS as soon as the React application is mounted on the page:
import { useEffect } from "react";
import emailjs from "@emailjs/browser";

import ContactUs from "./components/contact-us";

function App() {
  useEffect(() => {
    emailjs.init(import.meta.env.VITE_PUBLIC_KEY);
  }, []);

  return (
    <div style={{ display: "flex", justifyContent: "center" }}>
      <ContactUs />
    </div>
  );
}

export default App;
Note:
- In Vite, instead of
process.envwe useimport.meta.env. - For more information on
emailjs.init, read the official docs for EmailJS initialization.
If you want your emails to strictly behave as plain-text, you can replace the triple brackets with double brackets like {{message}} in your EmailJS dashboard when editing the template.

Additionally, make sure to replace the html_message name in the message field with message in your index.html file:
<label>Message</label>
<textarea name="message" required></textarea>
Send HTML email
To send HTML email, open contact-us.jsx file and copy/paste the following code inside it:
import { useRef } from "react";
import emailjs from "@emailjs/browser";
const ContactUs = () => {
const form = useRef();
const sendEmail = async (e) => {
e.preventDefault();
try {
const response = await emailjs.sendForm(
import.meta.env.VITE_SERVICE_ID,
import.meta.env.VITE_TEMPLATE_ID,
form.current
);
console.log("Email was successfully sent!", response);
} catch (error) {
console.error("Failed to send an email", error);
}
};
return (
<form
ref={form}
onSubmit={sendEmail}
style={{
display: "flex",
flexDirection: "column",
gap: 12,
width: 300,
}}
>
<label>Name</label>
<input type="text" name="name" required />
<label>Email</label>
<input type="email" name="email" required />
<label>Message</label>
<textarea name="html_message" required></textarea>
<button type="submit">Send</button>
</form>
);
};
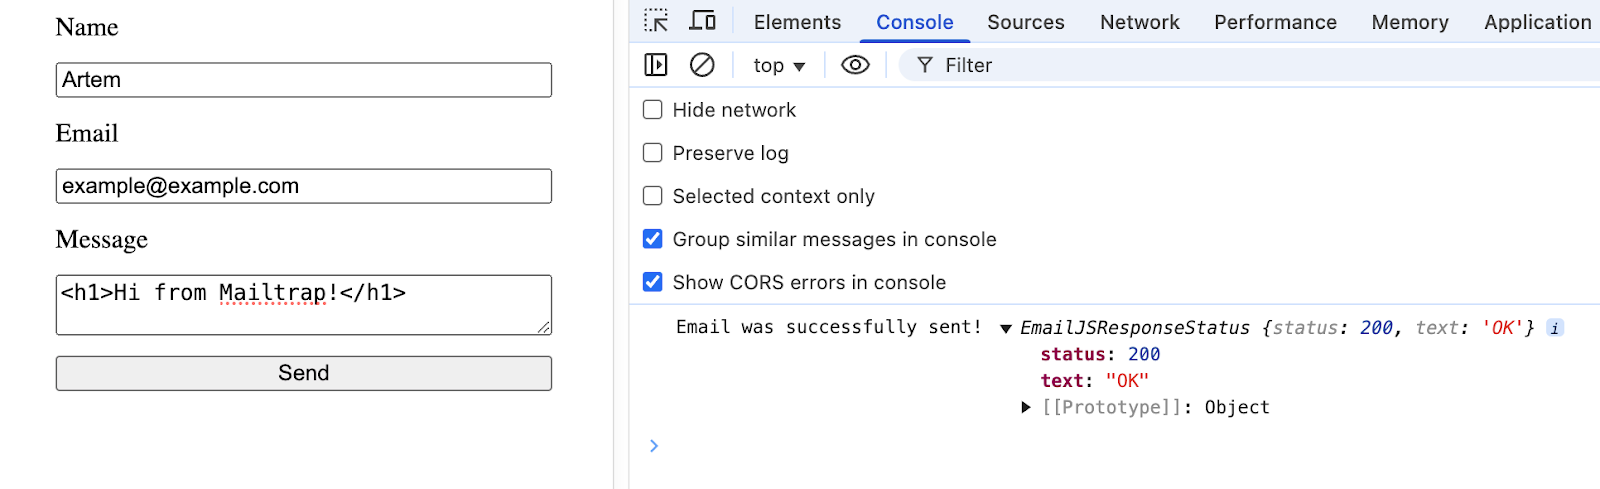
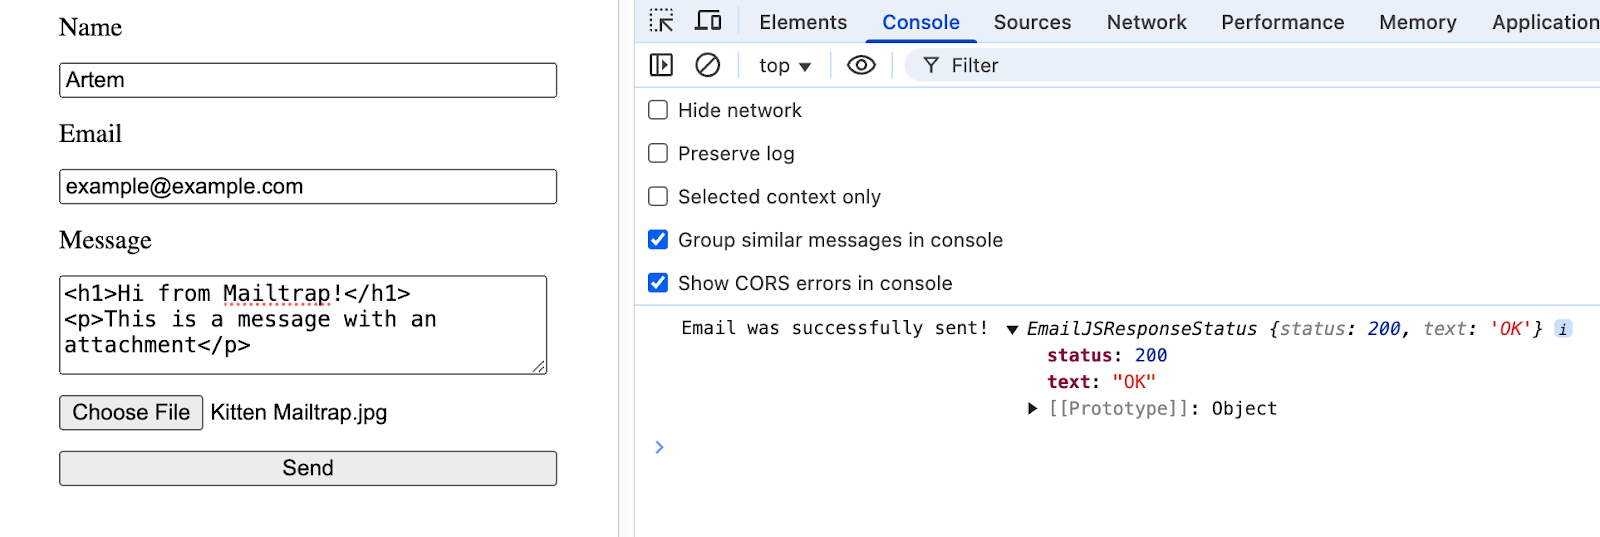
export default ContactUs;Run the app similarly and open the browser. Additionally, you could open the developer console to see the logs. If everything was set up correctly, after submitting the form, you should see something like this.

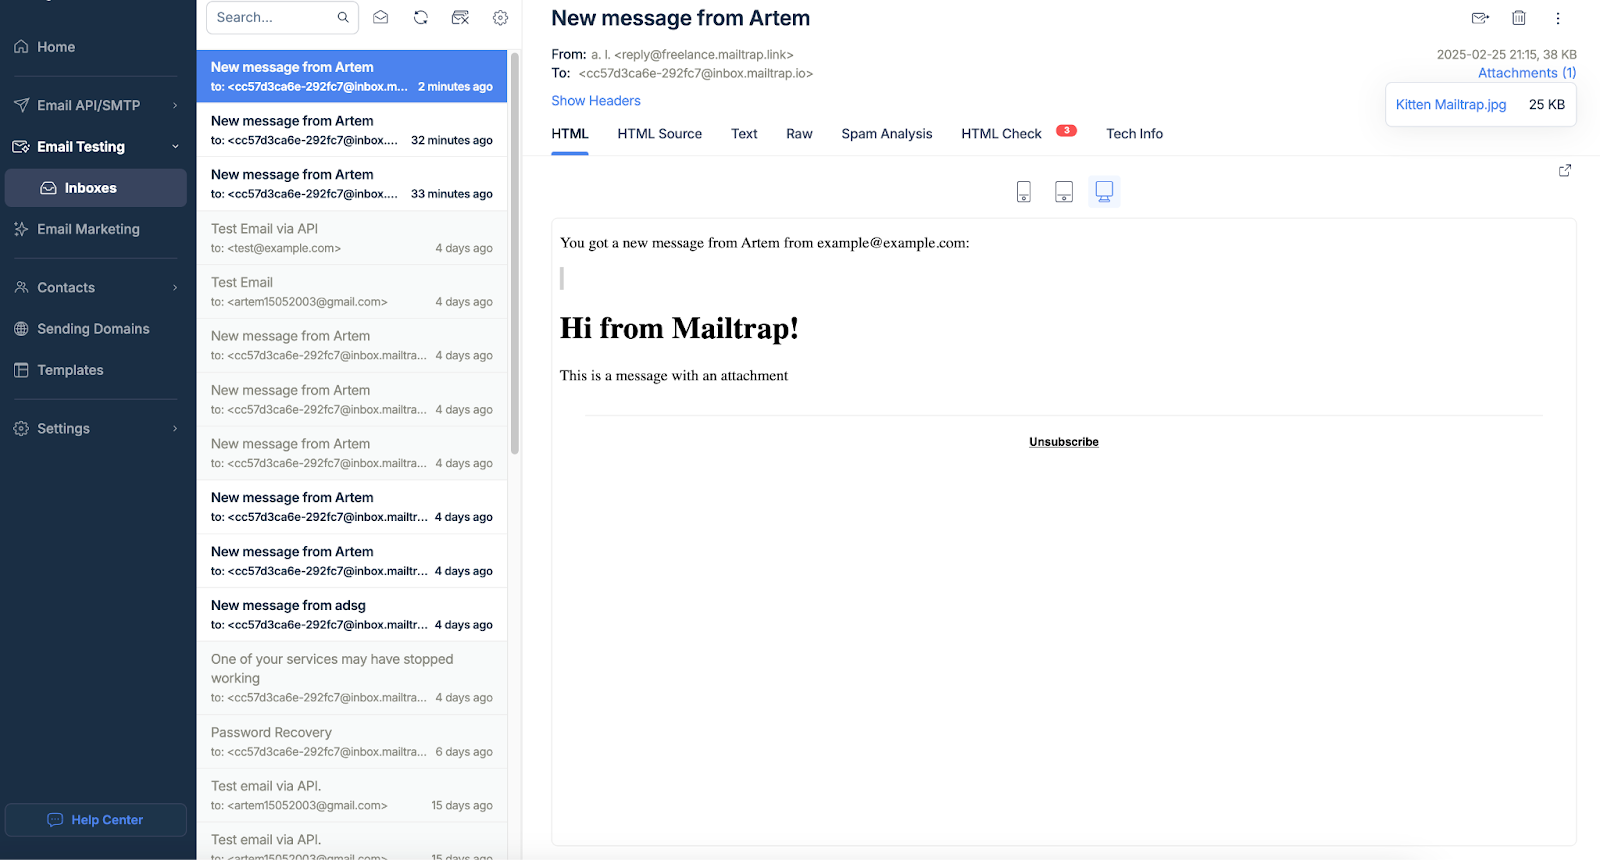
You should also receive an email in your Mailtrap Email Logs accordingly.


Send email with attachment
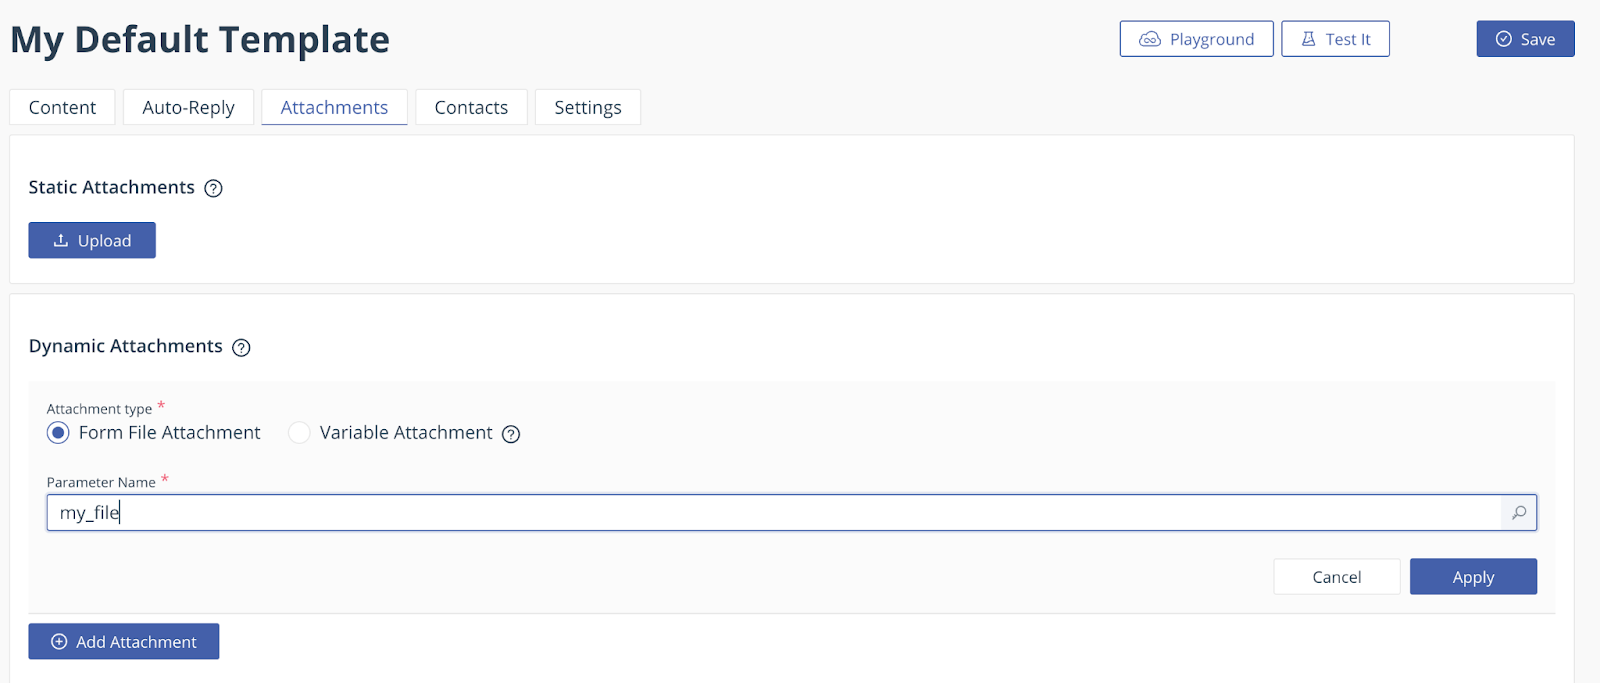
Open the Attachments tab in your selected template, then click Add Attachment, select Form File Attachment, and enter the parameter name that you’re going to use later in your HTML code. Once you’re done, don’t forget to click Apply and Save the template.

Next, let’s add a new input in the React form that will be responsible for file selection. Here’s a code snippet you can insert into the contact-us.jsx file:
import { useRef } from "react";
import emailjs from "@emailjs/browser";

const ContactUs = () => {
  const form = useRef();

  const sendEmail = async (e) => {
    e.preventDefault();

    try {
      const response = await emailjs.sendForm(
        import.meta.env.VITE_SERVICE_ID,
        import.meta.env.VITE_TEMPLATE_ID,
        form.current
      );
      console.log("Email was successfully sent!", response);
    } catch (error) {
      console.error("Failed to send an email", error);
    }
  };

  return (
    <form
      ref={form}
      onSubmit={sendEmail}
      style={{
        display: "flex",
        flexDirection: "column",
        gap: 12,
        width: 300,
      }}
    >
      <label>Name</label>
      <input type="text" name="name" required />

      <label>Email</label>
      <input type="email" name="email" required />

      <label>Message</label>
      <textarea name="html_message" required></textarea>

      <input type="file" name="my_file" />

      <button type="submit">Send</button>
    </form>
  );
};

export default ContactUs;
As you see, the only thing that changed is that we added a new input with my_file name. The attachment is added to the sent email with the same file name as the file we selected in the input.
Important: Make sure the input’s name matches the name you provided in the attachments tab in your template, similarly to how we did it on the previous steps.
When you run your React app and open it in the browser, you should see a form, now with a new file select field, which would send the data that you typed in the inputs on submit, as well as the attachment you selected.

And here it is in the Mailtrap Email Logs:

Send email to multiple recipients
To send emails to multiple recipients, let’s go to the template and add {{carbon_copy}} in the Bcc field. This way the email would be sent to the recipients listed in the Bcc field. You can use static emails for the field, to send to some specific recipients.
For this example, we’ll use a template value so that we can dynamically pass the recipients by mentioning them in the form.


And in contact-us.jsx, add a new receivers field to the React form:
import { useRef } from "react";
import emailjs from "@emailjs/browser";

const ContactUs = () => {
  const form = useRef();

  const sendEmail = async (e) => {
    e.preventDefault();

    try {
      const response = await emailjs.sendForm(
        import.meta.env.VITE_SERVICE_ID,
        import.meta.env.VITE_TEMPLATE_ID,
        form.current
      );
      console.log("Email was successfully sent!", response);
    } catch (error) {
      console.error("Failed to send an email", error);
    }
  };

  return (
    <form
      ref={form}
      onSubmit={sendEmail}
      style={{
        display: "flex",
        flexDirection: "column",
        gap: 12,
        width: 300,
      }}
    >
      <label>Name</label>
      <input type="text" name="name" required />

      <label>Email</label>
      <input type="email" name="email" required />

      <label>Message</label>
      <textarea name="html_message" required></textarea>

      <label>Recipients</label>
      <input type="text" name="carbon_copy" />

      <input type="file" name="my_file" />

      <button type="submit">Send</button>
    </form>
  );
};

export default ContactUs;
Important: Make sure the new input name matches the name you use in your EmailJS template for Bcc.
If you want to learn more about Cc and Bcc, be sure to check out our dedicated article. 👀
Send emails using SMTP
If EmailJS does not meet your security requirements or if you need more fluidity with creating content emails dynamically in code (which EmailJS doesn’t fully allow since it’s template-based), consider such backend-based solutions as Nodemailer (SMTP-based).
Nodemailer is probably one of the most popular solutions for this since it makes sending emails from Node.js applications a breeze.
Here’s what you need to do to use it:
Step 1. Create a directory and a new folder with any name that you want:
mkdir nodemailer-mailtrap
cd nodemailer-mailtrap
In the directory, let’s create an src folder where we’ll store our source code:
mkdir srcStep 2. Install the dependencies using npm or yarn:
npm:
npm init -y
npm install nodemailer dotenv
yarn:
yarn init -y
yarn add nodemailer dotenv
Step 3. Create a .env file and fill it with the Mailtrap credentials:
MAILTRAP_USER=your_smtp_user
MAILTRAP_PASS=your_smtp_pass
Step 4. Add email-sending functionality
When the dependencies are installed, create an index.js file in the src folder and copy/paste the following code inside it:
require("dotenv").config();

const nodemailer = require("nodemailer");

const transporter = nodemailer.createTransport({
  host: "live.smtp.mailtrap.io",
  port: 587,
  auth: {
    user: process.env.MAILTRAP_USER,
    pass: process.env.MAILTRAP_PASS,
  },
});

const mailOptions = {
  from: "your-email@your-domain.com",
  to: "recipient@example.com",
  subject: "Test Email",
  text: "Hi from Mailtrap!",
};

transporter.sendMail(mailOptions, (error, info) => {
  if (error) {
    console.log("Error:", error);
  } else {
    console.log("Email sent:", info.response);
  }
});
Run the code using the command below:
node src/index.jsSend HTML email
To send an HTML email, simply use the html property instead of text property, just like so:
require("dotenv").config();

const nodemailer = require("nodemailer");

const transporter = nodemailer.createTransport({
  host: "live.smtp.mailtrap.io",
  port: 587,
  auth: {
    user: process.env.MAILTRAP_USER,
    pass: process.env.MAILTRAP_PASS,
  },
});

const mailOptions = {
  from: "your-email@your-domain.com",
  to: "recipient@example.com",
  subject: "Test Email",
  html: `
    <h1>Hi from Mailtrap!</h1>
    <p>This is a test email sent from Node.js (Nodemailer) using Mailtrap.</p>
  `,
};

transporter.sendMail(mailOptions, (error, info) => {
  if (error) {
    console.log("Error:", error);
  } else {
    console.log("Email sent:", info.response);
  }
});
Send emails using API
For the email API approach, we’ll use the official Mailtrap SDK. The library is regularly maintained and updated by a team of developers and lets you automate your email-sending process.
First, create a new folder and the directory:
mkdir mailtrap-sdk
cd mailtrap-sdk
In the directory, create an src folder where we’ll store our source code:
mkdir srcNext, let’s install the dependencies using:
npm:
npm init -y
npm install mailtrap dotenv
Or yarn:
yarn init -y
yarn add mailtrap dotenv
Now, to store the credentials safely in the application, create a .env file and fill it with the Mailtrap API Token:
MAILTRAP_TOKEN=your_tokenOnce you install the dependencies, create an index.js file in the src folder and paste the following code inside:
require("dotenv").config();

const { MailtrapClient } = require("mailtrap");

const TOKEN = process.env.MAILTRAP_TOKEN;
const SENDER_EMAIL = "sender@freelance.mailtrap.link";
const RECIPIENT_EMAIL = "artem15052003@gmail.com";

const client = new MailtrapClient({ token: TOKEN });

const sender = { name: "Mailtrap Test", email: SENDER_EMAIL };
const recipient = { email: RECIPIENT_EMAIL };

const sendEmail = async () => {
  try {
    const response = await client.send({
      from: sender,
      to: [recipient],
      subject: "Hi from Maitrap!",
      text: "Hi from Mailtrap! This is a test message",
    });
    console.log(response);
  } catch (error) {
    console.error(error);
  }
};

sendEmail();
Run the code using:
node src/index.jsSend HTML email
For sending HTML emails we use html property instead of text property:
require("dotenv").config();

const { MailtrapClient } = require("mailtrap");

const TOKEN = process.env.MAILTRAP_TOKEN;
const SENDER_EMAIL = "sender@freelance.mailtrap.link";
const RECIPIENT_EMAIL = "artem15052003@gmail.com";

const client = new MailtrapClient({ token: TOKEN });

const sender = { name: "Mailtrap Test", email: SENDER_EMAIL };
const recipient = { email: RECIPIENT_EMAIL };

const sendEmail = async () => {
  try {
    const response = await client.send({
      from: sender,
      to: [recipient],
      subject: "Hi from Maitrap!",
      html: `<h1>Hi from Mailtrap! This is a test message</h1>`,
    });
    console.log(response);
  } catch (error) {
    console.error(error);
  }
};

sendEmail();