


In this guide, I’ll walk through the process of sending emails from a React application created in Bolt. We’ll use EmailJS, a popular client-side email solution module, to handle the email-sending functionality.
Prerequisites:
- You need a Bolt account. Register for one on the main page by pressing the Sign In Button. The process is straightforward; you can use your Google/Github Account or email with a password.
- An email provider for SMTP configuration. In this tutorial, we’ll use the Mailtrap Email Delivery Platform. For AI-enhanced email workflows, consider using the Mailtrap MCP email server, compatible with Claude, Visual Studio, and Cursor.
- An EmailJS account configured to work with Mailtrap (this includes connected and configured Mailtrap Service and Email Template). In the sections below, we’ll explain how to configure an EmailJS account to work with Mailtrap. But first, I’ll do a quick overview of the tools.
Bolt.new and EmailJS – Quick overview and basic setup guide
Bolt
Bolt.new is an AI-driven web development agent that lets you prompt, build, modify, and deploy full-stack applications entirely from your browser, so no local environment is needed.


Note that the services is available for use as soon as you sign into Bolt; there aren’t any additional verifications or validations. Now, let’s follow the guide below to set up an EmailJS account.
EmailJS
EmailJS is a service that allows you to send emails directly from client-side applications without needing a backend. This quick guide walks you through setting up EmailJS in your frontend using JavaScript.
Before integrating EmailJS into your project, you need to create a free account account and an email template.


As you’ve signed up, ensure the Notifications section in the account tab has an email with the same domain as your Mailtrap account.

Then, navigate to Email Services and select a Mailtrap email provider. Follow the steps to connect your email account. Service ID will be pre-generated for you, you can edit it as you like.


Fill Username and Password fields using your Mailtrap credentials from the Integrations page.

Select ‘Sending’ for the Email Feature field. If you experience issues with verifying configuration when trying to create a Mailtrap service in EmailJS, uncheck “Send test email to verify configuration”.
Once you’re finished with the previous step, go to Email Templates and create a new template.

Add placeholders like {{name}}, {{email}}, and {{{html_message}}} in the email body.
Tip: To format the HTML code within the placeholders, use triple curved brackets instead of double. When emails are sent, these get replaced with the sender’s name, email, and message HTML content accordingly.
Save the template and note its Template ID. If you followed the steps correctly, your template should look similar to the one in the screenshot below. If not, go ahead, click Edit Content, choose Code Editor, and modify the template as you want.


Important Note: In the right sidebar, set your From Email to the address associated with the Mailtrap Account’s email domain. Otherwise, Mailtrap will block SMTP requests if they aren’t sent from the same domain.


Lastly, within EmailJS, go to Account > API Keys and take note of your Public Key. As a result, you should now have 2 IDs and one key: Public Key, Service ID, and Template ID
Create a React contact form
The prompt is important when using any language-model-based AI tool. The more specific your input for the AI, the more accurate the output.
In the following steps, I’ll focus on creating and executing prompts in Bolt to generate a React form and connect EmailJS later. You can find more information on improving your prompt engineering skills here.
But first, let’s manually create a simple prompt for the Bolt.
Create a react form containing the following fields: "name", "email", "html_message".

"name" input is a string input
"email" input is an html input
"html_message" input is textarea, supporting any string including html code
Let’s input the prompt in Bolt’s prompt field on the main page


Bolt includes a helpful Enhance Prompt feature. This feature analyzes and restructures your prompt, adding new details and providing you with new ideas. Then, you can edit the enhanced prompt to meet your expectations.


Pro Tip: You can upload files (pictures, etc), allowing Bolt to use it as a context for the prompt to produce more desirable, expected, or stable results.
I’ll use the Enhance Prompt feature to get a more detailed promo, and potentially get some new ideas for the React form.
Bolt provided a more detailed prompt featuring more details. After small edits from my side, you can see the enhanced prompt below. Again, this is an example prompt, so feel free to edit it in any way you like to fit your requirements.
Create a React form component with the following specifications:

1. Create a form with three input fields:
  - Name field: Regular text input
  - Email field: Email type input with validation
  - HTML Message field: Textarea that accepts HTML content

Requirements:
- Inputs and form are uncontrolled
- Implement basic form validation
- Include appropriate labels and placeholder text
- Add basic error handling for invalid inputs (use default input type error handling when possible)
- Add simple styling for the form using CSS for a professional appearance
- Include a submit button
- Handle form submission with a function that logs the form data

Please provide the complete React component code with event handlers, and basic styling. The form should be responsive and follow accessibility best practices.
Finally, as we just engineered our first prompt, let’s execute it in Bolt by clicking the blue button at the top right corner of the prompt field


In a matter of seconds, Bolt will create a basic React app containing the desired styled form.
On the left side, you’ll see a sidebar where Bolt’s AI Agent describes all the steps it took in the process of working on your prompt and implementing the solution for it.
As evident in the screenshot below, the secret to Bolt’s popularity is that it provides a nice-looking/functioning form almost instantly. Of course, this is also why a lot of non-tech people use the service.


Anyway, I’ll switch the tab and select Code. Since we didn’t provide any tool-specific requirements, Bolt decided to use popular tools, such as TypeScript and Tailwind, to simplify things.
I’ll follow this default example further in the guide, but if you have any specific tool requirements, include them in your prompt. In the sidebar prompt field, you can ask Bolt to regenerate the solution or create a new project by going back to the main page.


And here’s the code snippet from the image above in the format you can copy-paste directly.
import React, { FormEvent } from 'react';
import { Send } from 'lucide-react';

function App() {
  const handleSubmit = (e: FormEvent<HTMLFormElement>) => {
    e.preventDefault();

    const formData = new FormData(e.currentTarget);
    const data = {
      name: formData.get('name'),
      email: formData.get('email'),
      message: formData.get('message'),
    };

    console.log('Form data:', data);
  };

  return (
    <div className="min-h-screen bg-gray-100 flex items-center justify-center p-4">
      <div className="w-full max-w-md bg-white rounded-lg shadow-md p-8">
        <h1 className="text-2xl font-bold text-gray-800 mb-6">Contact Form</h1>

        <form onSubmit={handleSubmit} className="space-y-6">
          <div>
            <label
              htmlFor="name"
              className="block text-sm font-medium text-gray-700 mb-1"
            >
              Name
            </label>
            <input
              type="text"
              id="name"
              name="name"
              required
              placeholder="Enter your name"
              className="w-full px-4 py-2 border border-gray-300 rounded-md focus:ring-2 focus:ring-blue-500 focus:border-blue-500 outline-none transition-colors"
            />
          </div>

          <div>
            <label
              htmlFor="email"
              className="block text-sm font-medium text-gray-700 mb-1"
            >
              Email
            </label>
            <input
              type="email"
              id="email"
              name="email"
              required
              placeholder="your@email.com"
              className="w-full px-4 py-2 border border-gray-300 rounded-md focus:ring-2 focus:ring-blue-500 focus:border-blue-500 outline-none transition-colors"
            />
          </div>

          <div>
            <label
              htmlFor="message"
              className="block text-sm font-medium text-gray-700 mb-1"
            >
              HTML Message
            </label>
            <textarea
              id="message"
              name="message"
              required
              placeholder="Enter your message (HTML allowed)"
              rows={5}
              className="w-full px-4 py-2 border border-gray-300 rounded-md focus:ring-2 focus:ring-blue-500 focus:border-blue-500 outline-none transition-colors resize-y"
            />
          </div>

          <button
            type="submit"
            className="w-full flex items-center justify-center gap-2 bg-blue-600 text-white px-6 py-3 rounded-md hover:bg-blue-700 focus:outline-none focus:ring-2 focus:ring-blue-500 focus:ring-offset-2 transition-colors"
          >
            <Send size={18} />
            Send Message
          </button>
        </form>
      </div>
    </div>
  );
}

export default App;
Quick breakdown:
lucide-reactis used to add basic icons to the form.TypeScriptis used to add static typing to the code.Tailwindis used to add basic styling for the form.handleSubmitfunction is used as a listener for the form’s submit browser action. It callse.preventDefaultto cancel page reload on form submission. Then, we have some basic logic where we create and gather all form properties in theFormDataobject and log it in the console.- The form is composed of react elements such as
form,input,textarea,label, andbutton.
Send email in React using EmailJS
In this step, I’ll modify the form to connect EmailJS email-sending logic on form submission. Again, while you can manually connect and configure EmailJS, using a new prompt would simplify things.
Start by creating a simple prompt in the sidebar prompt field.
Add EmailJS integration to the current form

Use the Prompt Enhance feature to make it more comprehensive. Feel free to manually edit some parts of the enhanced prompt to better meet your requirements. Here’s the enhanced prompt after some minor edits.
Create a secure contact form submission system using EmailJS integration by following these steps:

1. Install the EmailJS library via npm
2. Initialize EmailJS with your example user ID
3. Implement the EmailJS send function using:
  - Example template ID
  - Example Service ID
  - Example Public key

Ensure the implementation follows security best practices and maintains a good user experience throughout the submission process.
After executing the prompt, Bolt updates the code to include the EmailJS email-sending logic. Check the script below.
import React, { FormEvent, useState } from 'react';
import { Send } from 'lucide-react';
import emailjs from '@emailjs/browser';

const EMAILJS_PUBLIC_KEY = 'YOUR_PUBLIC_KEY';
const EMAILJS_SERVICE_ID = 'YOUR_SERVICE_ID';
const EMAILJS_TEMPLATE_ID = 'YOUR_TEMPLATE_ID';

emailjs.init(EMAILJS_PUBLIC_KEY);

function App() {
  const [isSubmitting, setIsSubmitting] = useState(false);
  const [submitStatus, setSubmitStatus] = useState<{
    type: 'success' | 'error' | null;
    message: string;
  }>({ type: null, message: '' });

  const handleSubmit = async (e: FormEvent<HTMLFormElement>) => {
    e.preventDefault();
    setIsSubmitting(true);
    setSubmitStatus({ type: null, message: '' });

    try {
      const form = e.currentTarget;

      await emailjs.sendForm(
        EMAILJS_SERVICE_ID,
        EMAILJS_TEMPLATE_ID,
        form,
        EMAILJS_PUBLIC_KEY
      );

      setSubmitStatus({
        type: 'success',
        message: 'Message sent successfully!'
      });
      form.reset();
    } catch (error) {
      setSubmitStatus({
        type: 'error',
        message: 'Failed to send a message. Please try again.'
      });
      console.error('EmailJS error:', error);
    } finally {
      setIsSubmitting(false);
    }
  };

  return (
    <div className="min-h-screen bg-gray-100 flex items-center justify-center p-4">
      <div className="w-full max-w-md bg-white rounded-lg shadow-md p-8">
        <h1 className="text-2xl font-bold text-gray-800 mb-6">Contact Form</h1>

        {submitStatus.type && (
          <div
            className={`mb-6 p-4 rounded-md ${
              submitStatus.type === 'success'
                ? 'bg-green-50 text-green-800'
                : 'bg-red-50 text-red-800'
            }`}
          >
            {submitStatus.message}
          </div>
        )}

        <form onSubmit={handleSubmit} className="space-y-6">
          <div>
            <label
              htmlFor="name"
              className="block text-sm font-medium text-gray-700 mb-1"
            >
              Name
            </label>
            <input
              type="text"
              id="name"
              name="name"
              required
              placeholder="Enter your name"
              className="w-full px-4 py-2 border border-gray-300 rounded-md focus:ring-2 focus:ring-blue-500 focus:border-blue-500 outline-none transition-colors"
            />
          </div>

          <div>
            <label
              htmlFor="email"
              className="block text-sm font-medium text-gray-700 mb-1"
            >
              Email
            </label>
            <input
              type="email"
              id="email"
              name="email"
              required
              placeholder="your@email.com"
              className="w-full px-4 py-2 border border-gray-300 rounded-md focus:ring-2 focus:ring-blue-500 focus:border-blue-500 outline-none transition-colors"
            />
          </div>

          <div>
            <label
              htmlFor="message"
              className="block text-sm font-medium text-gray-700 mb-1"
            >
              HTML Message
            </label>
            <textarea
              id="message"
              name="message"
              required
              placeholder="Enter your message (HTML allowed)"
              rows={5}
              className="w-full px-4 py-2 border border-gray-300 rounded-md focus:ring-2 focus:ring-blue-500 focus:border-blue-500 outline-none transition-colors resize-y"
            />
          </div>

          <button
            type="submit"
            disabled={isSubmitting}
            className={`w-full flex items-center justify-center gap-2 bg-blue-600 text-white px-6 py-3 rounded-md hover:bg-blue-700 focus:outline-none focus:ring-2 focus:ring-blue-500 focus:ring-offset-2 transition-colors ${
              isSubmitting ? 'opacity-75 cursor-not-allowed' : ''
            }`}
          >
            <Send size={18} />
            {isSubmitting ? 'Sending...' : 'Send Message'}
          </button>
        </form>
      </div>
    </div>
  );
}

export default App;
Key changes:
- Bolt installed EmailJS using Bolt.
- EmailJS is initialized in the project using
emailjs.init(EMAILJS_PUBLIC_KEY) command. - Bolt added
isSubmittingandsubmitStatusstatuses to show theSending…status message during the process and a status message when the action gets done. - Bolt added
form.reset()on successful form submission to reset the form’s fields. - Bolt added try/catch condition to ensure basing error handling, combining it with
submitStatusandisSubmittingstate updates. - Bolt updated the submit button to display when the email is being sent and a basic
divblock to display the result.
Notes on sending plain-text messages
Since we use {{{message}}}, the messages we enter are automatically formatted as HTML when we send them, and the variable can accept both HTML and simple messages.
If you want your emails to behave strictly as a plain-text, you can replace the triple brackets with double brackets {{message}} in the EmailJS dashboard.


This applies to all of the examples below, so if you want to send plain-text emails, just update your placeholder value format to use double brackets in your EmailJS template.
Send HTML email
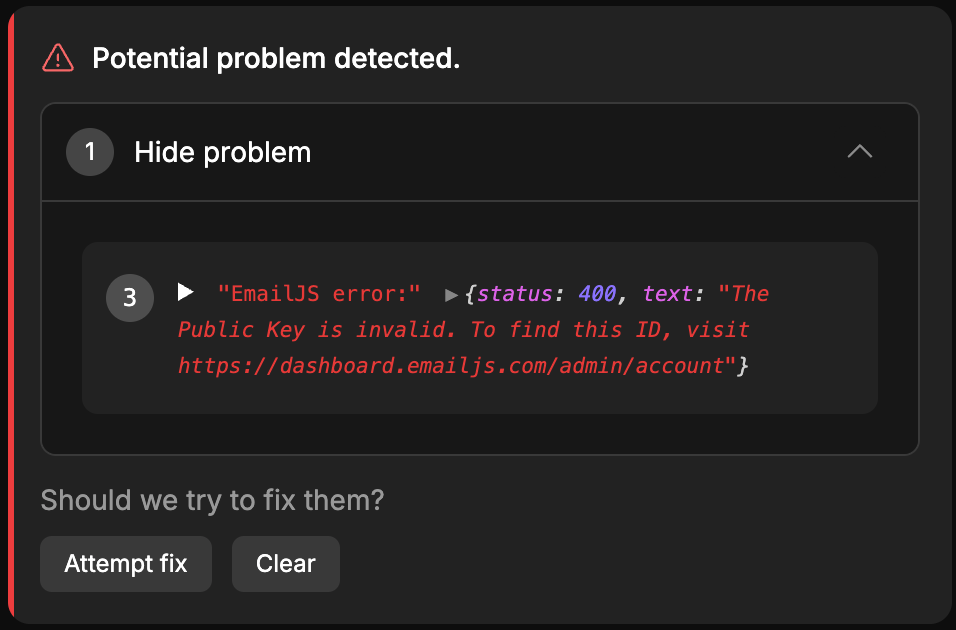
If you try to run the current solution, you’ll see an error. This happens because Bolt doesn’t know anything about our credentials, and you need to manually replace the example keys with the keys from the EmailJS account.


Also, in the sidebar, you’ll see a message from Bolt highlighting this issue.

To fix it, we’ll need to do two things:
- Add the keys from the EmailJS account.
- Update the fields to correspond with your template.
So, manually update the code to include the keys. It’s simple and requires very few changes; there’s no need for a separate prompt. In the Code tab, replace your EmailJS placeholder values with actual keys from the EmailJS dashboard.
const EMAILJS_PUBLIC_KEY = 'your-real-emailjs-public-key';
const EMAILJS_SERVICE_ID = 'your-real-emailjs-service-id';
const EMAILJS_TEMPLATE_ID = 'your-real-emailjs-template-id';
Now, before trying it out, let’s update all the field properties in the form to match our EmailJS template.
To do this, use a simple prompt and the email template you created earlier. Go to your EmailJS dashboard and copy your template in the prompt field. Here’s the example.
Update form inputs to match my EmailJS template placeholder names

Subject:
New message from {{name}}

Content:
You got a new message from {{name}} from {{email}}:

{{{html_message}}}
As always, I’ll use Enhance Prompt to get a more specific prompt.
Update form input fields that match the following EmailJS template structure:

- Input field for sender's name (must use "name" as the field identifier)
- Input field for sender's email address (must use "email" as the field identifier)
- Text area for the message content (must use "html_message" as the field identifier)

Ensure all form fields are properly labeled and the identifiers exactly match the template placeholders {{name}}, {{email}}, and {{{html_message}}} to enable correct data mapping when sending emails.
Upon execution, Bolt updates the example to match your prompt. Still, I recommend manually verifying your code before testing the form so that you’re sure all the fields correspond with your EmailJS template
import React, { FormEvent, useState } from 'react';
import { Send } from 'lucide-react';
import emailjs from '@emailjs/browser';

const EMAILJS_PUBLIC_KEY = 'your-real-public-key';
const EMAILJS_SERVICE_ID = 'your-real-service-id';
const EMAILJS_TEMPLATE_ID = 'your-real-template-id';

emailjs.init(EMAILJS_PUBLIC_KEY);

function App() {
  const [isSubmitting, setIsSubmitting] = useState(false);
  const [submitStatus, setSubmitStatus] = useState<{
    type: 'success' | 'error' | null;
    message: string;
  }>({ type: null, message: '' });

  const handleSubmit = async (e: FormEvent<HTMLFormElement>) => {
    e.preventDefault();
    setIsSubmitting(true);
    setSubmitStatus({ type: null, message: '' });

    try {
      const form = e.currentTarget;

      await emailjs.sendForm(
        EMAILJS_SERVICE_ID,
        EMAILJS_TEMPLATE_ID,
        form,
        EMAILJS_PUBLIC_KEY
      );

      setSubmitStatus({
        type: 'success',
        message: 'Message sent successfully!'
      });
      form.reset();
    } catch (error) {
      setSubmitStatus({
        type: 'error',
        message: 'Failed to send a message. Please try again.'
      });
      console.error('EmailJS error:', error);
    } finally {
      setIsSubmitting(false);
    }
  };

  return (
    <div className="min-h-screen bg-gray-100 flex items-center justify-center p-4">
      <div className="w-full max-w-md bg-white rounded-lg shadow-md p-8">
        <h1 className="text-2xl font-bold text-gray-800 mb-6">Contact Form</h1>

        {submitStatus.type && (
          <div
            className={`mb-6 p-4 rounded-md ${
              submitStatus.type === 'success'
                ? 'bg-green-50 text-green-800'
                : 'bg-red-50 text-red-800'
            }`}
          >
            {submitStatus.message}
          </div>
        )}

        <form onSubmit={handleSubmit} className="space-y-6">
          <div>
            <label
              htmlFor="name"
              className="block text-sm font-medium text-gray-700 mb-1"
            >
              Your Name
            </label>
            <input
              type="text"
              id="name"
              name="name"
              required
              placeholder="John Doe"
              className="w-full px-4 py-2 border border-gray-300 rounded-md focus:ring-2 focus:ring-blue-500 focus:border-blue-500 outline-none transition-colors"
            />
          </div>

          <div>
            <label
              htmlFor="email"
              className="block text-sm font-medium text-gray-700 mb-1"
            >
              Your Email
            </label>
            <input
              type="email"
              id="email"
              name="email"
              required
              placeholder="john@example.com"
              className="w-full px-4 py-2 border border-gray-300 rounded-md focus:ring-2 focus:ring-blue-500 focus:border-blue-500 outline-none transition-colors"
            />
          </div>

          <div>
            <label
              htmlFor="html_message"
              className="block text-sm font-medium text-gray-700 mb-1"
            >
              Message
            </label>
            <textarea
              id="html_message"
              name="html_message"
              required
              placeholder="Enter your message (HTML formatting allowed)"
              rows={5}
              className="w-full px-4 py-2 border border-gray-300 rounded-md focus:ring-2 focus:ring-blue-500 focus:border-blue-500 outline-none transition-colors resize-y"
            />
          </div>

          <button
            type="submit"
            disabled={isSubmitting}
            className={`w-full flex items-center justify-center gap-2 bg-blue-600 text-white px-6 py-3 rounded-md hover:bg-blue-700 focus:outline-none focus:ring-2 focus:ring-blue-500 focus:ring-offset-2 transition-colors ${
              isSubmitting ? 'opacity-75 cursor-not-allowed' : ''
            }`}
          >
            <Send size={18} />
            {isSubmitting ? 'Sending...' : 'Send Message'}
          </button>
        </form>
      </div>
    </div>
  );
}

export default App;
Key Changes:
inputandtextarea, and other React elements are updated to follow the EmailJS template placeholder names.
Finally, let’s try to send an HTML message.


If everything was set correctly, you should see a block with a success message, and the email should be visible in your Mailtrap Email Logs tab, which confirms that the HTML email has been sent successfully from the Bolt React App using EmailJS.


Send an email with an attachment
Here, I need to stress that using attachments is only available with a paid EmailJS plans, a Personal Plan at least. On a free plan, you won’t be able to proceed with the configuration.
With that out of the way, the first step is to open the Attachments tab in your selected template. Then click Add Attachment, select Form File Attachment, and enter the parameter name that you’re going to use later in your HTML code.
Once done, click Apply and Save the template.


Now is the time for a new prompt since we need to add a new input in the React form for file selection.
Important Note: Make sure the element name ithe n prompt matches the attachment’s name in the EmailJS dashboard.
Add an ability to attach a file. The element should have "my_file" nameAs you might guess, I enhanced the prompt; check the output below.
Create a file upload input element with the name "my_file" that allows users to select and upload a single file.
The element should be properly configured for form submission and follow HTML best practices.
Include appropriate attributes for accessibility and user experience.
<input type="file" name="my_file" id="my_file" accept="*/*">
Bolt updated the form to include the attachments field; here’s the updated script.
import React, { FormEvent, useState } from 'react';
import { Send, FileInput } from 'lucide-react';
import emailjs from '@emailjs/browser';

const EMAILJS_PUBLIC_KEY = 'your-real-public-key';
const EMAILJS_SERVICE_ID = 'your-real-service-id';
const EMAILJS_TEMPLATE_ID = 'your-real-template-id';

emailjs.init(EMAILJS_PUBLIC_KEY);

function App() {
  const [isSubmitting, setIsSubmitting] = useState(false);
  const [submitStatus, setSubmitStatus] = useState<{
    type: 'success' | 'error' | null;
    message: string;
  }>({ type: null, message: '' });
  const [fileName, setFileName] = useState<string>('');

  const handleSubmit = async (e: FormEvent<HTMLFormElement>) => {
    e.preventDefault();
    setIsSubmitting(true);
    setSubmitStatus({ type: null, message: '' });

    try {
      const form = e.currentTarget;

      await emailjs.sendForm(
        EMAILJS_SERVICE_ID,
        EMAILJS_TEMPLATE_ID,
        form,
        EMAILJS_PUBLIC_KEY
      );

      setSubmitStatus({
        type: 'success',
        message: 'Message sent successfully!'
      });
      form.reset();
      setFileName('');
    } catch (error) {
      setSubmitStatus({
        type: 'error',
        message: 'Failed to send a message. Please try again.'
      });
      console.error('EmailJS error:', error);
    } finally {
      setIsSubmitting(false);
    }
  };

  const handleFileChange = (e: React.ChangeEvent<HTMLInputElement>) => {
    const file = e.target.files?.[0];
    setFileName(file ? file.name : '');
  };

  return (
    <div className="min-h-screen bg-gray-100 flex items-center justify-center p-4">
      <div className="w-full max-w-md bg-white rounded-lg shadow-md p-8">
        <h1 className="text-2xl font-bold text-gray-800 mb-6">Contact Form</h1>

        {submitStatus.type && (
          <div
            className={`mb-6 p-4 rounded-md ${
              submitStatus.type === 'success'
                ? 'bg-green-50 text-green-800'
                : 'bg-red-50 text-red-800'
            }`}
          >
            {submitStatus.message}
          </div>
        )}

        <form onSubmit={handleSubmit} className="space-y-6">
          <div>
            <label
              htmlFor="name"
              className="block text-sm font-medium text-gray-700 mb-1"
            >
              Your Name
            </label>
            <input
              type="text"
              id="name"
              name="name"
              required
              placeholder="John Doe"
              className="w-full px-4 py-2 border border-gray-300 rounded-md focus:ring-2 focus:ring-blue-500 focus:border-blue-500 outline-none transition-colors"
            />
          </div>

          <div>
            <label
              htmlFor="email"
              className="block text-sm font-medium text-gray-700 mb-1"
            >
              Your Email
            </label>
            <input
              type="email"
              id="email"
              name="email"
              required
              placeholder="john@example.com"
              className="w-full px-4 py-2 border border-gray-300 rounded-md focus:ring-2 focus:ring-blue-500 focus:border-blue-500 outline-none transition-colors"
            />
          </div>

          <div>
            <label
              htmlFor="html_message"
              className="block text-sm font-medium text-gray-700 mb-1"
            >
              Message
            </label>
            <textarea
              id="html_message"
              name="html_message"
              required
              placeholder="Enter your message (HTML formatting allowed)"
              rows={5}
              className="w-full px-4 py-2 border border-gray-300 rounded-md focus:ring-2 focus:ring-blue-500 focus:border-blue-500 outline-none transition-colors resize-y"
            />
          </div>

          <div>
            <label
              htmlFor="my_file"
              className="block text-sm font-medium text-gray-700 mb-1"
            >
              Upload File
            </label>
            <div className="relative">
              <input
                type="file"
                id="my_file"
                name="my_file"
                onChange={handleFileChange}
                className="hidden"
                aria-label="File upload"
              />
              <label
                htmlFor="my_file"
                className="w-full flex items-center justify-between px-4 py-2 border border-gray-300 rounded-md hover:border-blue-500 cursor-pointer transition-colors"
              >
                <div className="flex items-center gap-2">
                  <FileInput size={18} className="text-gray-500" />
                  <span className="text-gray-500">
                    {fileName || 'Choose a file...'}
                  </span>
                </div>
              </label>
            </div>
            {fileName && (
              <p className="mt-1 text-sm text-gray-500">
                Selected: {fileName}
              </p>
            )}
          </div>

          <button
            type="submit"
            disabled={isSubmitting}
            className={`w-full flex items-center justify-center gap-2 bg-blue-600 text-white px-6 py-3 rounded-md hover:bg-blue-700 focus:outline-none focus:ring-2 focus:ring-blue-500 focus:ring-offset-2 transition-colors ${
              isSubmitting ? 'opacity-75 cursor-not-allowed' : ''
            }`}
          >
            <Send size={18} />
            {isSubmitting ? 'Sending...' : 'Send Message'}
          </button>
        </form>
      </div>
    </div>
  );
}

export default App;
Key changes:
- Added the
fileNamestate to display the selected file. handleFileChangeupdates the statefileNamewhenever we change a file.- Added the ‘
my_file input’ to give the ability to select a file for attachment.
Now, I’ll fill out the form, add an attachment, and send the email.


And, after a moment or two, it will appear in the Mailtrap Email Logs!


Send email to multiple recipients
To send emails to multiple recipients, go to your template and add {{carbon_copy}} in the Bcc field.


This way the email gets sent to the recipients listed in the Bcc field.
For the exemplary form, we’ll use a template value so that we can dynamically pass the recipients by mentioning them in the form. But you can also use static emails for the field, to send to some specific recipients.
Again, we’re starting with a new prompt.
Add an ability to mention multiple recipients using commas.
The element should have "carbon_copy" name and be a simple input
Important Note: Make sure the element name in the prompt matches the name of Bcc placeholder in the EmailJS dashboard.
I’m enhancing the promt.
Create an input element with the name "carbon_copy" that allows users to enter multiple email addresses separated by commas.
The input should accept and validate email addresses in a comma-delimited format, with proper spacing handling.
After executing the prompt, you’ll notice a new CC Recipients field being generated by Bolt.


And here’s the full code snippet including carbon copy.
import React, { FormEvent, useState } from 'react';
import { Send, FileInput } from 'lucide-react';
import emailjs from '@emailjs/browser';

const EMAILJS_PUBLIC_KEY = 'your-public-key';
const EMAILJS_SERVICE_ID = 'your-service-id';
const EMAILJS_TEMPLATE_ID = 'your-template-id';

emailjs.init(EMAILJS_PUBLIC_KEY);

function App() {
  const [isSubmitting, setIsSubmitting] = useState(false);
  const [submitStatus, setSubmitStatus] = useState<{
    type: 'success' | 'error' | null;
    message: string;
  }>({ type: null, message: '' });
  const [fileName, setFileName] = useState<string>('');

  const handleSubmit = async (e: FormEvent<HTMLFormElement>) => {
    e.preventDefault();
    setIsSubmitting(true);
    setSubmitStatus({ type: null, message: '' });

    try {
      const form = e.currentTarget;

      await emailjs.sendForm(
        EMAILJS_SERVICE_ID,
        EMAILJS_TEMPLATE_ID,
        form,
        EMAILJS_PUBLIC_KEY
      );

      setSubmitStatus({
        type: 'success',
        message: 'Message sent successfully!'
      });
      form.reset();
      setFileName('');
    } catch (error) {
      setSubmitStatus({
        type: 'error',
        message: 'Failed to send a message. Please try again.'
      });
      console.error('EmailJS error:', error);
    } finally {
      setIsSubmitting(false);
    }
  };

  const handleFileChange = (e: React.ChangeEvent<HTMLInputElement>) => {
    const file = e.target.files?.[0];
    setFileName(file ? file.name : '');
  };

  return (
    <div className="min-h-screen bg-gray-100 flex items-center justify-center p-4">
      <div className="w-full max-w-md bg-white rounded-lg shadow-md p-8">
        <h1 className="text-2xl font-bold text-gray-800 mb-6">Contact Form</h1>

        {submitStatus.type && (
          <div
            className={`mb-6 p-4 rounded-md ${
              submitStatus.type === 'success'
                ? 'bg-green-50 text-green-800'
                : 'bg-red-50 text-red-800'
            }`}
          >
            {submitStatus.message}
          </div>
        )}

        <form onSubmit={handleSubmit} className="space-y-6">
          <div>
            <label
              htmlFor="name"
              className="block text-sm font-medium text-gray-700 mb-1"
            >
              Your Name
            </label>
            <input
              type="text"
              id="name"
              name="name"
              required
              placeholder="John Doe"
              className="w-full px-4 py-2 border border-gray-300 rounded-md focus:ring-2 focus:ring-blue-500 focus:border-blue-500 outline-none transition-colors"
            />
          </div>

          <div>
            <label
              htmlFor="email"
              className="block text-sm font-medium text-gray-700 mb-1"
            >
              Your Email
            </label>
            <input
              type="email"
              id="email"
              name="email"
              required
              placeholder="john@example.com"
              className="w-full px-4 py-2 border border-gray-300 rounded-md focus:ring-2 focus:ring-blue-500 focus:border-blue-500 outline-none transition-colors"
            />
          </div>

          <div>
            <label
              htmlFor="carbon_copy"
              className="block text-sm font-medium text-gray-700 mb-1"
            >
              CC Recipients
            </label>
            <input
              type="text"
              id="carbon_copy"
              name="carbon_copy"
              placeholder="email1@example.com, email2@example.com"
              title="Enter valid email addresses separated by commas"
              className="w-full px-4 py-2 border border-gray-300 rounded-md focus:ring-2 focus:ring-blue-500 focus:border-blue-500 outline-none transition-colors"
            />
            <p className="mt-1 text-sm text-gray-500">
              Add multiple email addresses separated by commas
            </p>
          </div>

          <div>
            <label
              htmlFor="html_message"
              className="block text-sm font-medium text-gray-700 mb-1"
            >
              Message
            </label>
            <textarea
              id="html_message"
              name="html_message"
              required
              placeholder="Enter your message (HTML formatting allowed)"
              rows={5}
              className="w-full px-4 py-2 border border-gray-300 rounded-md focus:ring-2 focus:ring-blue-500 focus:border-blue-500 outline-none transition-colors resize-y"
            />
          </div>

          <div>
            <label
              htmlFor="my_file"
              className="block text-sm font-medium text-gray-700 mb-1"
            >
              Upload File
            </label>
            <div className="relative">
              <input
                type="file"
                id="my_file"
                name="my_file"
                onChange={handleFileChange}
                className="hidden"
                aria-label="File upload"
              />
              <label
                htmlFor="my_file"
                className="w-full flex items-center justify-between px-4 py-2 border border-gray-300 rounded-md hover:border-blue-500 cursor-pointer transition-colors"
              >
                <div className="flex items-center gap-2">
                  <FileInput size={18} className="text-gray-500" />
                  <span className="text-gray-500">
                    {fileName || 'Choose a file...'}
                  </span>
                </div>
              </label>
            </div>
            {fileName && (
              <p className="mt-1 text-sm text-gray-500">
                Selected: {fileName}
              </p>
            )}
          </div>

          <button
            type="submit"
            disabled={isSubmitting}
            className={`w-full flex items-center justify-center gap-2 bg-blue-600 text-white px-6 py-3 rounded-md hover:bg-blue-700 focus:outline-none focus:ring-2 focus:ring-blue-500 focus:ring-offset-2 transition-colors ${
              isSubmitting ? 'opacity-75 cursor-not-allowed' : ''
            }`}
          >
            <Send size={18} />
            {isSubmitting ? 'Sending...' : 'Send Message'}
          </button>
        </form>
      </div>
    </div>
  );
}

export default App;
Key Changes:
- Added the
carbon_copyfield, where multiple email recipients can be specified.
Reminder: Please verify that the carbon_copy field name from the EmailJS dashboard matches the field name in your code.
Lastly, run the code and fill the form. You should see the email delivered to multiple recipients.
Send email in React using EmailJS: security considerations
As a rule, make sure to avoid exposing sensitive API keys in frontend code. Client code is always accessible to users, meaning API keys can be extracted.
In EmailJS, however, the key is always exposed, and there’s pretty much no way around it. Since React is a client-side library, any use of keys in the code exposes them, like the Public Key, for example.
This raises the question of whether it’s safe to implement the method in your application. Technically, malicious users can script automated requests using your public key, leading to spam or excessive email usage.
So what’s the solution to all of this? Is it really not safe to use?
React is all client-side (partially except SSR which we don’t use here), so the keys are exposed. Luckily, EmailJS took care of the mentioned issues related to key exposure.
To be honest, they don’t solve the problems fully, but prevent the issues to a satisfactory degree while maintaining the simplicity of using EmailJS. Here are the highlights.
- Someone could copy your Public Key, but they’d only be able to send your predefined templates with your content. They wouldn’t be able to send custom emails with their own spam content, making it unappealing to spammers.
- EmailJS has multiple tools to prevent abuse, including IP-based rate limiting to block bot spam, an origin whitelist for added security, and optional reCAPTCHA tests to verify human interaction when sending emails.
Methods like origin whitelist and reCAPTCHA are powerful enough to mitigate the mentioned issue of excessive email usage and monthly limit filling by other users who take note of your Public Key.
The given methods make EmailJS safe enough to use in React for template-based email sending. However, you should still take note of the issues since your usage of EmailJS in React may vary and require additional security methods.
Here are additional official resources to help enhance your security:
Conclusion
In this guide, I’ve instructed you on how to use Bolt to connect EmailJS in React Form to send emails from the client side. And we covered everything from setting up Bolt and EmailJS accounts to creating React contact forms using a prompt.
Even though EmailJS provides a convenient way to handle simple email-sending tasks directly from the frontend, it’s important to be mindful of limitations.
I recommend leveraging server-side implementations if you need a more robust and secure solution. However, EmailJS is still a solid option for specific use cases, such as the one presented in this article.